
Reading a Knitting Pattern
Knitting patterns are very useful, especially if you’re not creative enough to write your own (which I am not). In order to make anything more complicated than a scarf or blanket, you’ll have to know how to read one. Today, using snippets from a free pattern I have on hand, I’ll walk you through the basics.
Before I begin, make sure to download your own copy of the pattern to follow along (since I won’t be showing the whole thing, only what I need to in order to explain things).
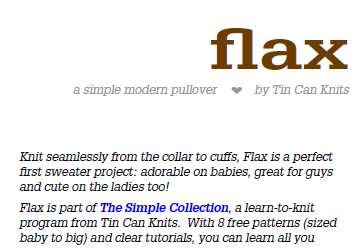
On the first page of many patterns, you’ll see the name of the pattern and photograph(s) of what the completed pattern will look like. Obviously yours will look a little different based on your knitting skill (evenness of stitches) and the yarn you choose (fiber and color).
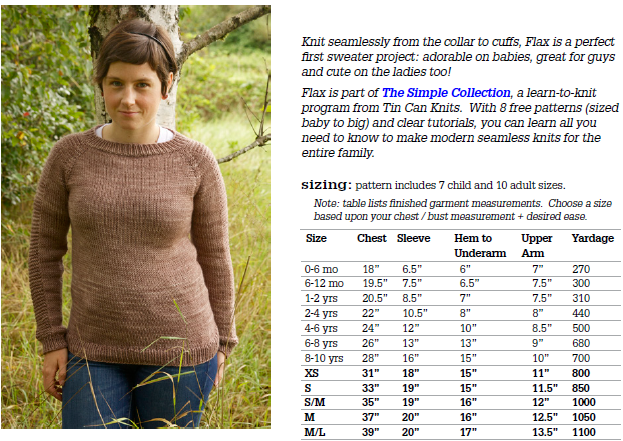
Some patterns will also have a chart on this page, showing how much yarn is required for the different sizes available to knit. This is often listed in yards.
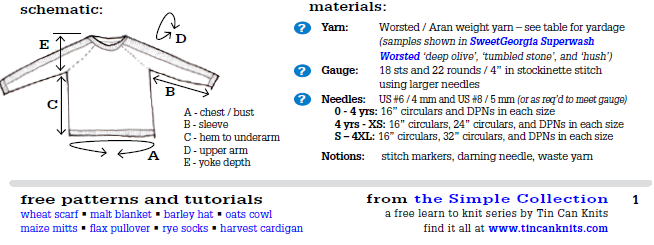
The final thing you’ll likely see on the cover page is the gauge for the pattern. I’ll be writing specifically about gauge in an upcoming post, but basically what it means is “stitches per inch.” You need to make sure your gauge is the same as what the pattern calls for, otherwise your finished garment will not be the size you intend it to be.
Then we get to the actual “here’s what to knit” portion of the pattern. Many patterns have a range of sizes all in one pattern. You need to decide what size to knit. In this sample, there are over a dozen different sizes; I didn’t show them all in this screenshot because… well, copyright. (You can see the chart for this pattern up above, in the same image as the photograph of the finished sweater). Finding the one you want is rather simple. Just refer back to the first page where it listed out all the sizes, and count how many that is from left to right. So, if you want to make the 6-12 month size, that’s the 1st one inside the parentheses.
The first thing you’ll see on any pattern is how many stitches you need to cast on. Refer back to this post if you’ve forgotten how to do that.
Then it will tell you what to do. In sweaters, you’ll usually begin with ribbing of some kind. This just means you go back and forth between knits and purls to create a zigzag fabric. This will prevent the hem and collar from rolling, as stockinette fabric tends to do if left unbordered.
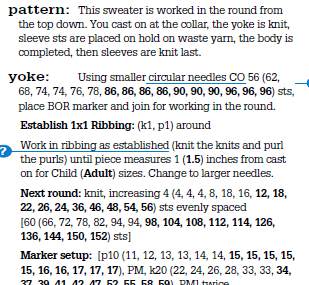
Depending on whether your sweater pattern is knit from the neck to the waist or the waist to the neck will determine what happens next. In this sample, it starts at the neck and goes down to the waist, so we have to start increasing (adding stitches). Your shoulders are much wider than your neck, after all! The pattern tells you exactly how many stitches to increase. In this particular pattern, it doesn’t give you specific instructions on how to space the added stitches in, so I use this knitting increase/decrease calculator to help me.
Because this pattern is knit in the round, you just knit every stitch to get that beautiful stockinette fabric. There is a garter stitch panel on the sleeves, but the pattern is very clear on where to knit vs purl to make that happen. To make the gradual increases for the shoulders, it tells you to “KFB.” This means “Knit into the Front and Back of the same stitch.” Here’s a great video explaining that in detail.
From here, you just keep going, reading the pattern carefully and keeping track of your rows to make sure everything ends up exactly right. There are several ways to keep track of your rows. I usually use an app on my phone. You can also use tally marks on a sheet of paper or a designated row counter, available at yarn stores. When you get to the specified rows for new instructions, just follow what it says for the next bit. The trickiest part of this particular pattern is separating the sleeves and body, but even that’s not too hard. Just watch this video for extra help.
So, following a knitting pattern is really just reading what it says and doing that. It might seem complicated and overwhelming at first, but it’s not. Just take it slow and steady, and you’ll be fine.
Blessings,
