Leather Armor

4E5E6385-1E45-47C6-9DB8-16D7ACB499C4
As I mentioned last week, Ballet Boy took up the hobby of swords and related things when ballet classes were put on indefinite hold due to COVID-19.

BCC566C4-ECDB-47C8-A55C-C0F06A904FD8

He started by purchasing a pair of fencing foils from an antique store last fall, and things have been “all swords all the time” ever since. For the holidays, he made a couple of swords (yes, MADE) for gifts. I got a new sewing machine earlier this year, and after a couple of very basic lessons, my oldest child just took on on his own, and his biggest accomplishment (besides making his own swords) has been the “leather” (really vinyl fabric) armor he made for himself.

C53B3F55-5D0E-4309-AFE5-4892348D136B

He didn’t use a pattern, but instead just estimated the size and shape of fabric he would need and cut it straight out. Brave boy!! But it worked out for him. We bought a separating zipper, and he YouTubed his way into installing it correctly. On the areas where he was working with many layers of fabric, he knew that he needed to use rivets instead of stitches, and he did that. Overall, he’s done an amazing job, and I am ridiculously impressed with the work he did on this.
E74BD1AE-64C0-437A-9FFF-DC44EEB3E304

Blessings,

ladybug-signature-3 copy

History of the US Life Saving Service (review)

Disclaimer: I received a FREE copy of this product through the HOMESCHOOL REVIEW CREW in exchange for my honest review. I was not required to write a positive review, nor was I compensated in any other way.

Today’s review is a guest post from Ballet Boy (my 16-year-old son), so I’m going to let him take it away.

2011CB65-E845-4467-85A1-2EED388A0CC7

The last few weeks, my friends and I have been talking over the idea of getting a boat and going on a grand adventure to the ends of the Earth. About a week after we started joking about this, the opportunity came up to review Exploring the U.S. Life-Saving Service 1878-1915: 17 Student Workshops with 120 Activities by Rebecca Locklear. Me being the boat lover that I am, I thought it sounded intriguing to say the least.

USLSS coverExploring the U.S. Life-Saving Service is a 117-page ebook and has a variety of different sections/topics (called workshops in the book) which cover different aspects of what the Life Saving Service did. The workshops are categorized by the amount of critical thinking required to succeed in the section. The ones that require more problem-solving are geared for higher age groups, but there are tasks for everybody (grades 4-12). Topics include things like

  • Hunting, fishing, and eating
  • Beach patrol
  • Rescues with boats
  • And even solving scenarios for yourself

IMG_20200616_232848_639My favorite of the topics given is Rescue Scenarios: Live or Die. The concept behind this assignment is you are given a card (which is a printable within the book) and on it is a limited amount of information about a given situation (the amount you would likely have if you were a real USLSS agent in that situation). You might be given the position of the boat to the shore, the weather conditions, whether your boat is on fire or not, or how many crewman you have. Your objective as the student is to use the information you’re given to solve the situation as best you can and try to save the lives of as many crewmen as possible using random items (around the house) to set up a sort of game board and reenact it and see if your boat would roll, how the waves would effect, how difficult it is to get to the boat in the first place, etc. And then, once you have developed a strategy that you’re comfortable with (through trial and error) you present to your teacher/parent and he/she will decide if your solution is acceptable, and then give you the historical situation and if you got the “answer” right.

Sounds like a piece of cake, right? I can tell you from personal experience that it is not as easy as it seems. My first inclination was “Well, if I was in a situation with a flaming ship, I’d want to use divers and cables and hoses.” But in the 1880s, where a lot of these situations came from, those technologies were not yet at their disposal. So solving with today’s technology may not be so hard (but it still is). But with their technology, it becomes near impossible, and for anyone with an analytical mind, this sort of problem solving simulation is fascinating – especially if you love boats too.

3862A415-7BDC-4F76-8C87-CB1E06F717A6For the lesson I chose in this section, I found one where the scenario was what to do when your boat is on fire. To simulate this, I made a few origami boats and then filled our kitchen sink with water. Once the boats were in the water, I lit them on fire. I figured, and Mom agreed, that I was old enough to use real fire instead of orange crayon. Doing this experiment really gave me a respect for the captains of the boats back then. It was more stressful than I thought it would be dealing with the fire.

IMG_20200616_232814_768Besides all the activities, there is also a lot of reading about the true history behind the shipwrecks (and other catastrophes) that are on the cards. Many of them take place in the Atlantic Ocean near Cape Cod, which I believe is where the USLSS was based. The reading can be done easily by an older student on their own, or in a group setting as a read-aloud. It is broken into sections by the different jobs of people on the ship. In a group setting, it would be easy to assign students to read aloud, and no one student would have to read a lot aloud. Each section is just one or two paragraphs. The reading is really interesting, especially considering my love of boats. But as much as I love boats, I would not want one of their boats! They are so primitive looking based on the photos in the book to look unsafe – definitely not the kind of thing I would want to sail right into a flaming shipwreck with.

My opinion of Exploring the U.S. Life-Saving Service 1878-1915: 17 Student Workshops with 120 Activities is that it is absolutely amazing. I would definitely recommend this to any study group that has even an inkling of interest in boats or the ocean. It’s generally enjoyable to read and every piece of information is refreshing and it’s topic that you see many books on. Who would have thought there was something before the coast guard?! I would also encourage you to check out Ms. Locklear’s email newsletter (click the link and the signup box is in the right hand sidebar). She sends out seasonal messages with blog posts and book news.

I am so excited to own this book and continue reading and learning from it. I will definitely be doing more of the activities in the future.

Make sure to check out more reviews from our fellow Homeschool Review Crew members over the next couple of days too!

Blessings,

Ballet Boy

Animation

Because the boys’ ballet classes were cancelled for so long due to COVID-19, they had to find new hobbies. Ballet Boy (16) took up swords, sword-making, and armor-making, which I’ll talk about next week. Scorpion (13) took up animation, and he is the topic of today’s post.

Each semester, we require the older boys to choose a topic of interest to them and do a full study on said topic. Then they have to present a project showing us (Will and I) what they learned. The idea is that they get to have some autonomy over their schooling, but also that they will learn to manage their time effectively (all they’re given is a due date).

Sometimes they choose to present their findings in a video, sometimes it’s a poster or a report. Once, Scorpion did a project on locks and keys and made a working safe out of a cardboard box. This term, he chose animation.

illusion bookTo help him with his studies, we bought him a book that Will always wished he’d had as a teenager called The Illusion of Life: Disney Animation (not an affiliate link) by Frank Thomas and Ollie Johnston, and Scorpion has been reading it practically nonstop. In addition to reading the book, he’s been working with various iPad apps to develop his own animated stories, and he has 8 of them so far. Each one is a little different in length and story, but they’re all pretty fun, and they definitely show a full understanding of the topic – which is the whole point of the “project” class. He’s even started a YouTube channel with all of his animations, using the name “Box on a Belt” that he created for his “company.” He tries to add a new one every other week or so.

Here is the first big one he did. (I know the title sequence looks a lot like Finding Nemo, but the rest of the story isn’t like it at all.)

Blessings,

ladybug-signature-3 copy

Critical Comparisons

Disclaimer: I received a FREE copy of this product through the HOMESCHOOL REVIEW CREW in exchange for my honest review. I was not required to write a positive review, nor was I compensated in any other way.

The Critical Thinking Co.™ is one of my favorite companies for supplemental homeschool curriculum. They offer such fun books that teach kids to think in ways that they might not normally. Over the years, we’ve had the pleasure of reviewing a few of their books with the older kids, and this year, Grasshopper had the opportunity to give their stuff a try with Dare to Compare Math: Beginning.

AF7BD1A2-DB68-4CAA-8C37-8D9076620732Dare to Compare Math: Beginning is a consumable workbook, available in physical or digital formats ($12.99 each). The physical book, which I received, is for a single student’s use; the digital copy can be used for multiple students in the same household. It is designed for kids in second or third grade. Since Grasshopper is finishing up his second grade year, it was perfect for him. The softcover book has 92 pages and is the first in the Dare to Compare Math series (there is also “Level 1” and “Level 2”). It has 150 problems all together; after the problems are sections for hints, answers, and samples of other math books from The Critical Thinking Co.™.

19B973B1-B581-4D7C-AAF8-48388519E0DDEach page (for the first 50 pages) has three problems on it, and Grasshopper and I dived right in at the beginning. And I immediately had reservations. He struggled with understanding what was going on with these problems. But we continued on, and before long he was off and running. By the time he got to problems 125-26, he was saying how “fun and easy” they were.

There are a wide variety of types of problems in the book, but they are all based around the idea of comparisons. For many of the problems, the information given seems unusual, but when you stop and think it through, they’re not difficult to solve. (Of course, that’s coming from me, and I’m a little above the suggested grade level!) For example, you can see the word problem in the middle of the photographed page. It gives you the number of teachers and students for a given field trip, and your job (well, your student’s job) is to separate the information out and determine which school sent more teachers on the field trip. When I had Grasshopper write down how many students (S) and teachers (T) were on the trip from each school, it was easy to see and compare to find the right answer.

Some of the problems are more traditional math problems (Fill in the blank: ___+23=54). Some have multiple parts all using the same basic set of information. Some use charts or graphs for students to read and decipher. Some are supplemented with illustrations, which may or may not be necessary to study in order to solve the problem. And so on.

Overall, once we got over that initial “Oh no, what I have I gotten us into with this review” moment, Grasshopper and I have had a good time working through this book together.

The Critical Thinking Co.™ has a lot of options for students from PreK all the way through high school and beyond. As their name implies, they put a focus on teaching kids how to think rather than how to simply solve problems. I really appreciate this, which is why they’ve been one of my favorite companies over the years. This week, members of the Homeschool Review Crew are talking about a wide variety of their books (though not nearly all of them!), in a wide age range of student levels. I invite you to click through to learn more about this great company!

And if you’re interested in reading my past reviews, you can find those links below.

Blessings,

ladybug-signature-3 copy


My past reviews of The Critical Thinking Co.:

Sentence Diagramming: Beginning

Pattern Explorer

Understanding Pre-Algebra

Spelling and Math Practice to supplement any curriculum

Disclaimer: I received a FREE copy of this product through the HOMESCHOOL REVIEW CREW in exchange for my honest review. I was not required to write a positive review, nor was I compensated in any other way.

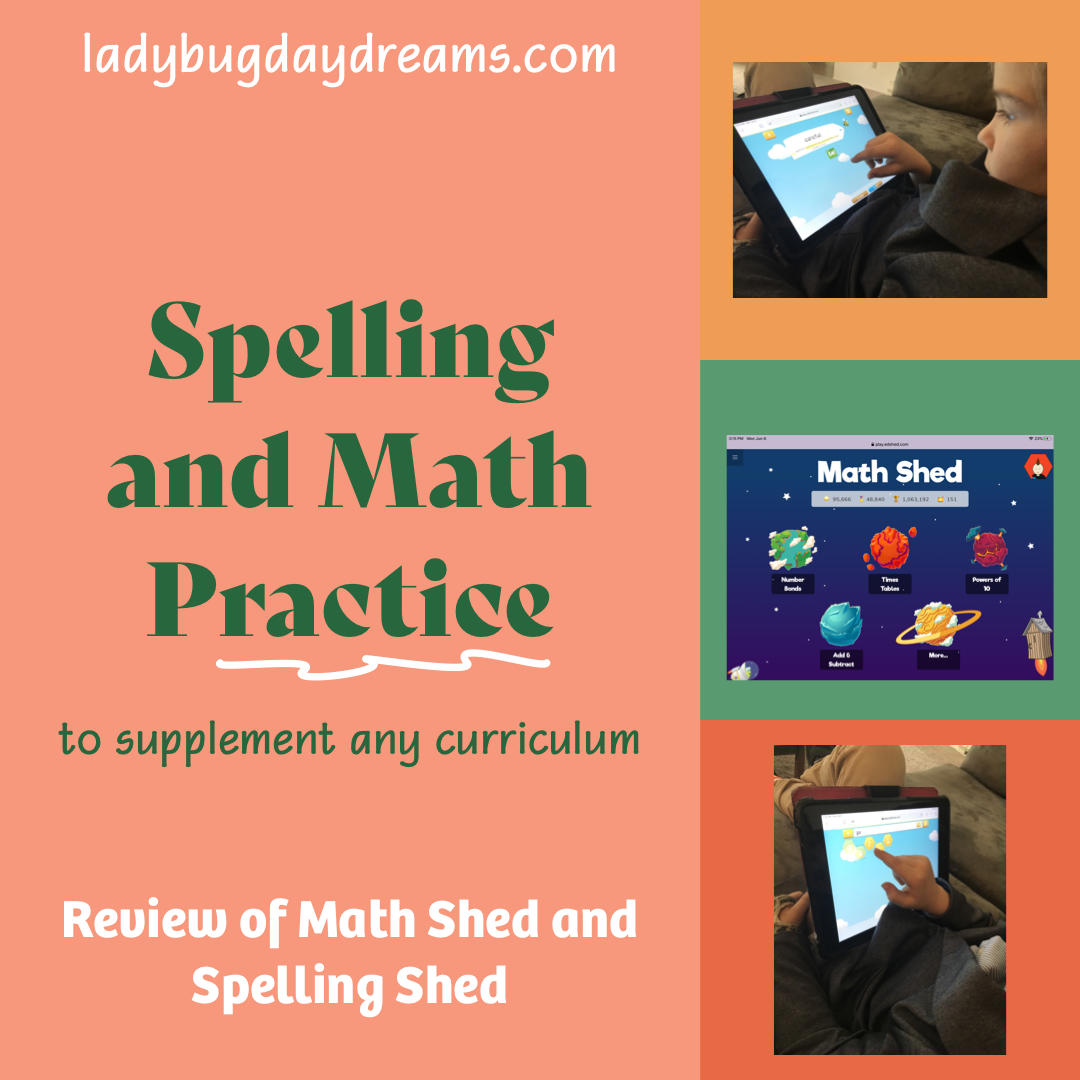
There are lots of curriculum supplements out there, especially for things like math facts and spelling words, and they have varying degrees of “fun.” For the past few weeks, Grasshopper has been working with Math Shed and Spelling Shed, and having a good time with both. Today, I’m going to talk briefly about both programs and what we thought of them.

655EC904-502F-4B5F-9373-46B07BBCA026

The first thing to know about these programs is that they work in sync. What I mean by this is that it’s the same website for both; when you log in to one, you’re logged in to the other as well. When I got the information to sign us up, I logged into the teacher portal and signed my son up for the program. (Initially, I signed up Dragonfly, too, but it turned out to be way too advanced for him.) I was given the option to sign him up using his real name or a nickname, and then they emailed me a username and password for his account. From then on, we just signed into his account.

Math Shed

39923E4E-D07B-44F4-A437-B9C740078A6F
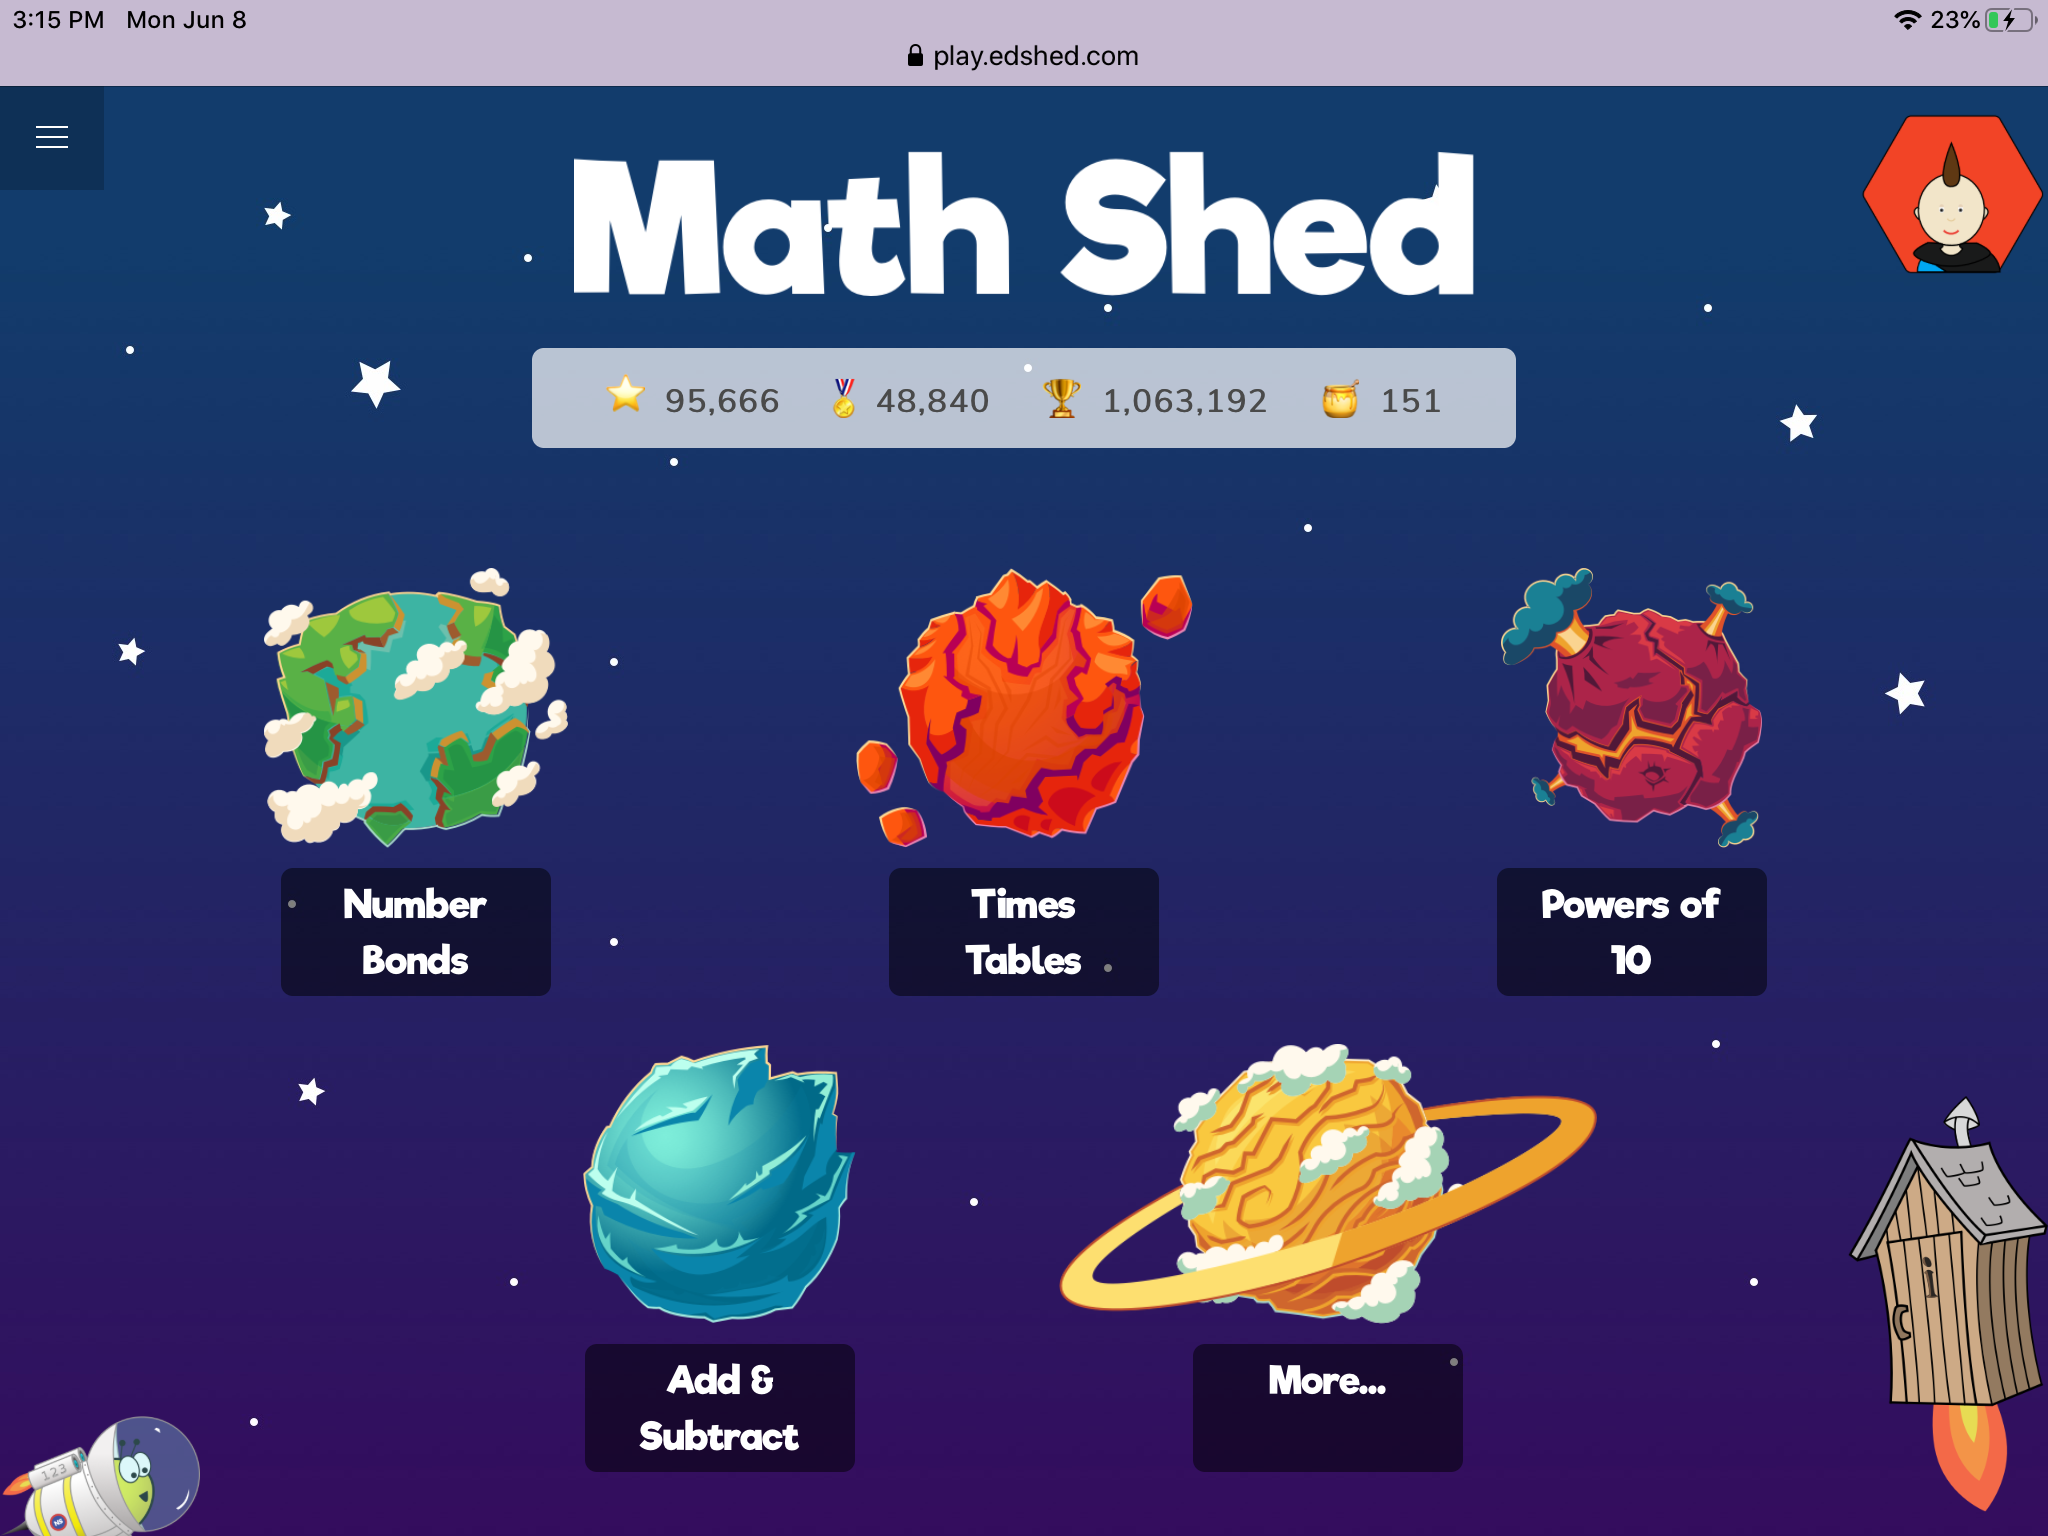
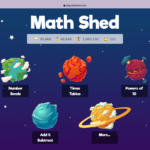
Math Shed has five options on the main screen to choose from, and it’s presented in a fun, space theme. In each The choices are: Number Bonds (these were called “fact families” when I was a kid); Times Tables; Powers of 10; Add & Subtract; and More…

Each selection is represented by a planet, and to work in the program, you simply choose the one you want your child to practice. In each category, a random smattering of problems are displayed, and the child has to answer them. In all the games, it’s “answer as many as you can in one minute.” For each correct answer, children are awarded a “honeypot,” which is the currency of the game. They can use those honeypots to “buy” upgrades for their avatar. Grasshopper loved earning the honeypots and changing his character out often!

C357FCA7-85E8-4F53-99EA-C10AD634F7A7
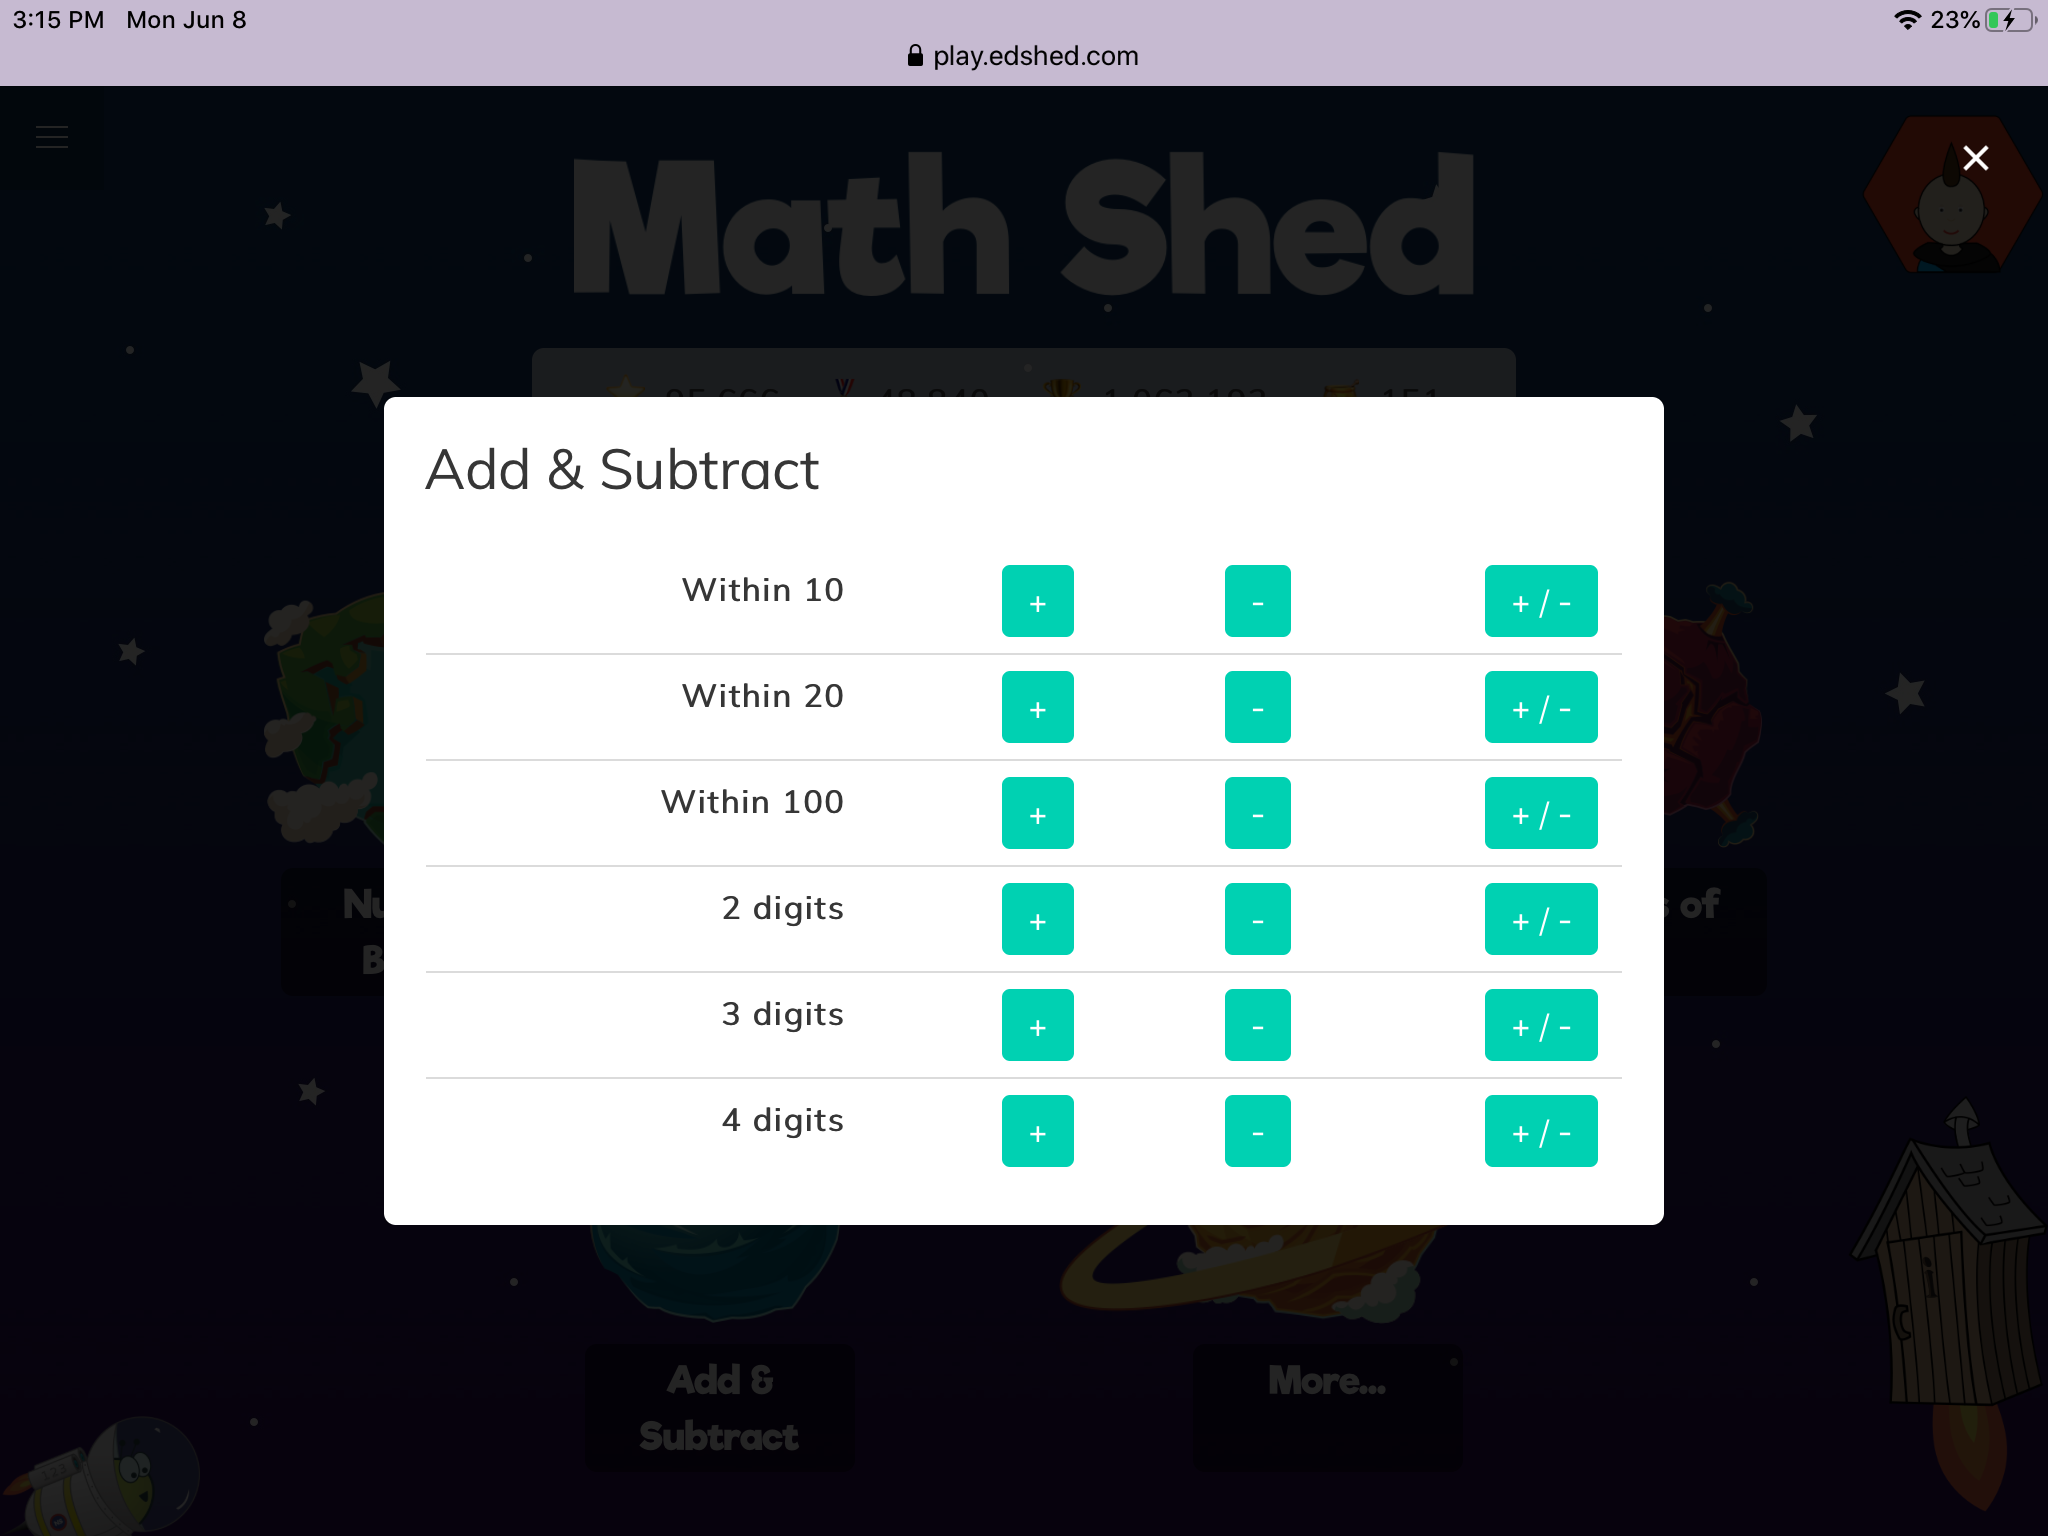
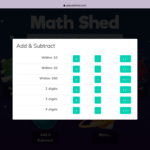
We spent most of our time in the Addition and Subtraction section. (When he has learned his times tables and just needs more practice, we will switch to that section.) After you choose which area you want your child to practice, there’s a pop up that has you choose which area of addition or subtraction you want them to practice. As you can see from the screenshot to the right, the options are “10s,” “20s,” “100s,” “2 digits,” “3 digits,” or “4 digits.” Next to each category, you can see a +, a -, and a +/- button. This allows you to choose what types of problems show up – all adding, all subtracting, or a mix. Once you make that selection, the pop up changes, and you see options for “easy,” “medium,” or “hard.” When you choose “easy,” the child is given three choices for each problem. On “medium,” there are six choices, and on “hard,” there’s a calculator-type image in which the child must type the answer.

Spelling Shed

Spelling Shed is a beehive theme, and when you first log in there are options for “Stage 1 & 2,” “Stage 3,” “Stage 4 & 5,” and “More Lists.” Because Grasshopper is a bit slow in reading and words, we kept to Stage 1 & 2, which was plenty difficult for him.

2BE82082-1D50-4B82-B49B-BF7511211F32
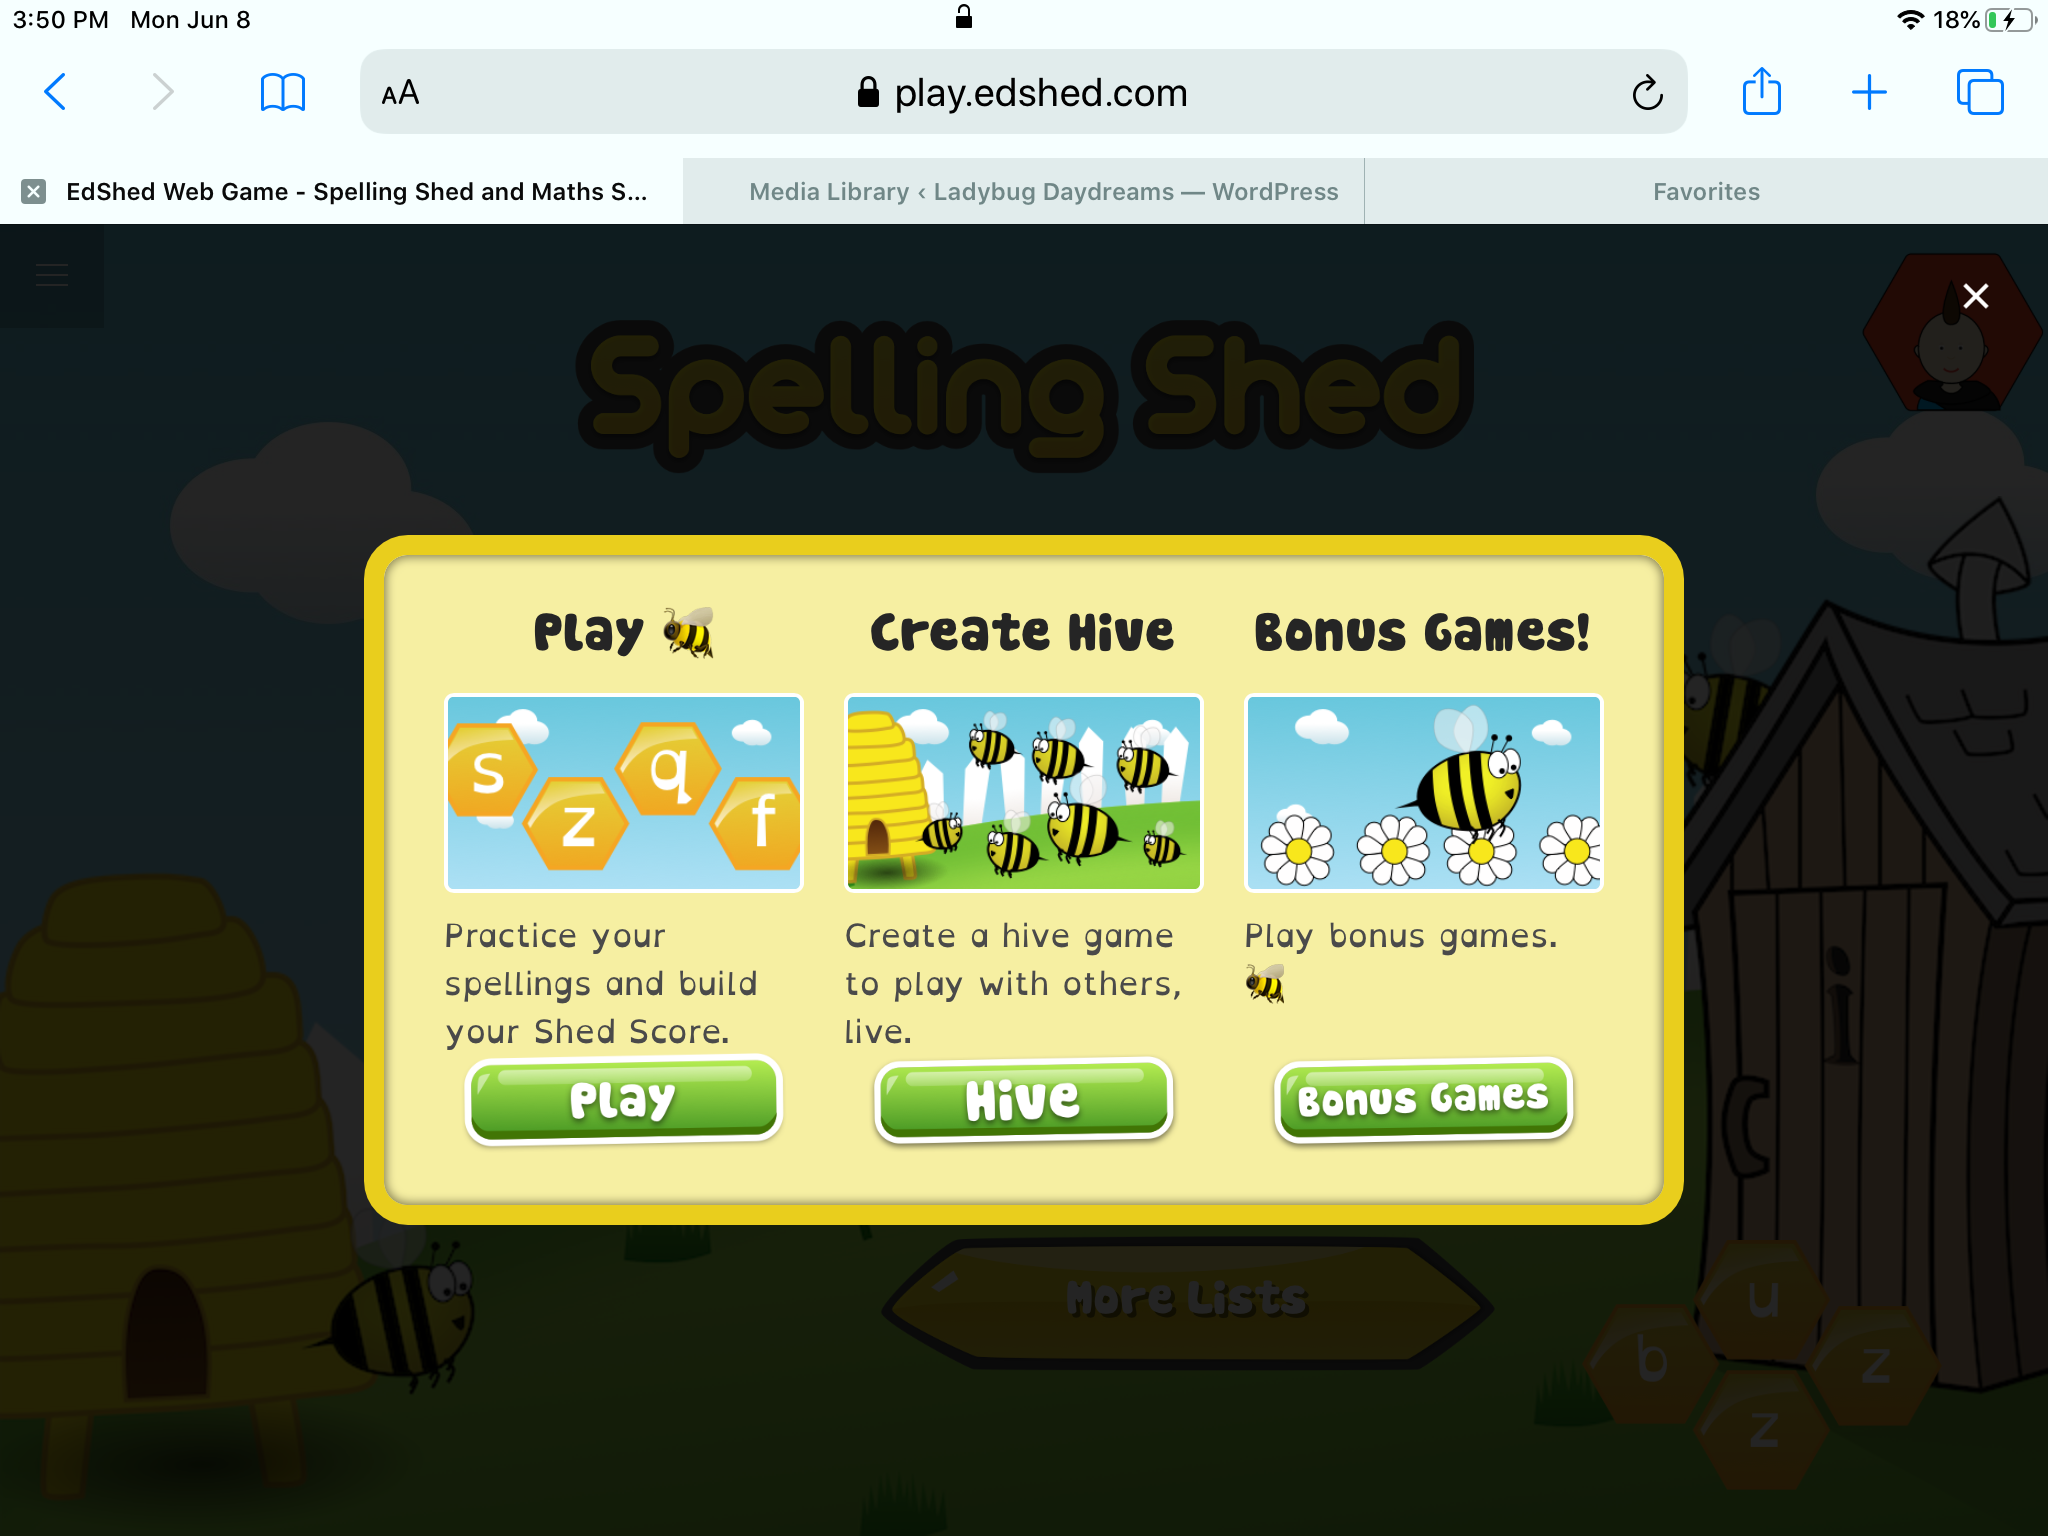
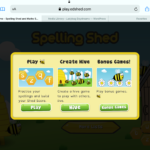
When you select a stage, there’s a pop up very similar to the one you get in Math Shed. In Spelling Shed, the options are “Play,” “Create Hive,” and “Bonus Games.” When you choose the option you want, there are then four choices of difficulty: easy, medium, hard, and extreme. We stuck with easy for my son. The “Create Hive” option isn’t one that we found very useful. I think it would pretty cool if you had friends who were also using the program, because it’s a way to make a kind of study group in which kids can play the game together and challenge one another.

71427A8E-E70D-48A9-B427-96CC4762A8AB
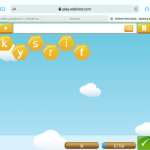
In the game (the “play” option), students are given a word, which can be seen on the screen and is also read aloud by a narrator (a woman with a very pleasant voice) in the program. They can study the word, and then click “go,” at which point they must spell the word using the letters given. It’s a lot like a word scramble, to be honest. Points are awarded based on the speed with which the word is spelled correctly, and later words are worth more points than earlier ones (though they’re not necessarily harder). At the end of the round, which is ten words, students are awarded one honeypot for each correctly spelled word. When you choose an alternate difficulty, there are more letters to choose from; at the “Extreme” level, words are simply spoken (not shown on the screen) and students type them out on a qwerty keyboard.

There are two Bonus Games in Spelling Shed. Bee Keeper is essentially Hangman, and Missing Word is “choose the correct spelling.” We didn’t spend too much time in those because on the few occasions that we did, Grasshopper got frustrated at his lack of success.

Final Thoughts

Math Shed and Spelling Shed are pretty good programs for supplementing what your child is learning. They wouldn’t be good for teaching, but they’re not designed for that. If you have a child who is super into technology (rather than books or worksheets), this would be a really good program. It gives you the “flashcard” method in a really fun way.

Other members of the Homeschool Review Crew are discussing their experiences with Math Shed and Spelling Shed this week, so make sure to click through and read about their experiences too.

Blessings,

ladybug-signature-3 copy

Dollar Tree home decor sign


I decided recently that I wanted to redo our bathroom. Even though it’s fairly cliche, I decided on a beach theme. We live fairly near the coast (about 30 minutes away), and spend a reasonable amount of time looking at the ocean. (We haven’t been able to go actually down on the beach lately because of COVID restrictions.) I love to see the Pacific Ocean, and so I was okay doing a fairly unimaginative theme in there based on my likes.

The first thing I did was to cover the ugly yellow countertop with a blue shower curtain, which I taped down. Because we rent, I couldn’t do anything super permanent about the counter. I cut out a hole for the sink, which was a lot harder than I thought it would be. I also bought a blue toothbrush holder (we’d been using a kitchen glass before that) and a blue votive holder with “coastal breeze” scented candles. For the finishing touch, I bought a package of seashells from the Dollar Tree and spread them out on the counter.

And the piece de resistance (lol). I took a summertime sign from the Dollar Tree:

0BB82E94-4945-4F31-BB14-88DD616C670F and turned it into this:

9B06711C-EA36-42CC-8ED2-7864AC4C72BE

How I did it:

I bought two pieces of scrapbooking paper from JoAnn. I really love the seashell one! I googled “beach theme home decor phrases” and found one that I liked – I’d rather have seashells than snowflakes. I really love that it’s not just something basic like “Life’s a Beach” or something. And it went with my paper perfectly!

 I first dismantled the sign. I knew I wasn’t going to want to keep the bright pink ribbon holding it together, so I wasn’t concerned with keeping it nice. Then I took the arrow boards and traced them onto the back of the paper and cut it out. Using school glue (I was out of Mod Podge and forgot to buy more), I glued the paper onto the sign pieces, and then had trim the edges a little bit.

When the glue dried, I did the stenciled words on the blue tiles. This wasn’t as perfect as I’d hoped, but it turned out okay enough. I freehanded the word “than,” and decided that I liked that a lot better than what I’d stenciled, so I decided to just paint the “seashells” freehand on the center board instead of using my stencil. When all the words were painted and dry, I used my school glue to seal everything down. It worked really well! I love the firm, glossy feel it gave my sign.

After the glue dried, I had Ballet Boy drill new holes in the sign so that I could reattach them to one another. I threaded some twine into a yarn needle and then used it to tie the signs together in the right order. For the final flourish, I took one of my seashells and hot glued it to the seashell part of the sign. Ballet Boy had a small artificial pearl on hand, so he glued it into the shell.

Overall, I’m pretty happy with how the room turned out – especially the sign. 

Blessings,

ladybug-signature-3 copy

Pursuing Art

Disclaimer: I received a FREE copy of this product through the HOMESCHOOL REVIEW CREW in exchange for my honest review. I was not required to write a positive review, nor was I compensated in any other way.

I live in a family of artists, literally. My husband does graphic art and comics for a living, and our older boys are following closely in his footsteps by doing illustrations for some new stories we’re working on. The younger set also want to begin learning all about art, so this review from Artistic Pursuits Inc. was well received. Because I’m not much of a “traditional” artist (I knit and crochet, of course, but that’s not so helpful in something like this), I delegated the teaching of Art for Children, Building a Visual Vocabulary to Ballet Boy (16). He and Grasshopper (7) spent several days working on art class together.

F7DAEFF2-71F3-4C6E-9933-B8D353A45F9E

Art for Children, Building a Visual Vocabulary is part of an 8-book set, and each book has 18 lessons. The entire course is designed to take four years, giving your student a complete elementary-level art history education. Each book comes with a DVD and a Blu-Ray with video lessons to go along with the text lessons of the book. We don’t have a player for either of those, so my kids used the book alone and didn’t have any trouble with it (but again – artists).

6DF68DCF-2B33-48B5-9F66-AF30B1C3EDC1The book has a focus of building an understanding of the elements of art, rather than just looking at pictures. Students are given lessons in landscapes, still life, animals, figures, and portraits. Rather than going through in order, we ended up selecting lessons based on the supplies we had on hand. (Yes, they’re artists, but we work mostly with pencil and/or pen and ink in our family.) This meant that the kids dove in to the still life lessons.

From Ballet Boy:

2009465F-4A4C-4D5A-837F-6DB4154FB0E7To start off the still life lesson, they provide examples of images that capture the essence of what still life is supposed to do, which is to capture your imagination and fascinate you with everyday items. It casts normal household things in a new light that draws you in, holding your interest. For example, they show a van Gogh painting of a table covered with various sized, colored, and shaped dishes. They explain to you something that you don’t even notice that you’re noticing. That is the focal point, the thing the artist wants you to see. In this case, he wanted you to notice a chipped dish, and so all of the dishes on the table are arranged in such a way as to draw you into the painting. All of them are angled the exact way to catch the light just right to make it so that you focus on exactly what he wants you to, like a magician. The art of still life is not, therefore, in drawing what you see, but it is in capturing the attention of the viewer and making them see it through your eyes and feel it the exact way you want them to.

12121422-6B69-4DEB-8E5A-5E4812297032The way I taught this to my little brother was, as I was going over the information, he was really confused. I had to make him learn to take what he was looking at tell his own story through the items. I had to demonstrate to him how to make the art “make itself” – how he could feel something when he was drawing and let the drawing show him where he should draw the next line. You can never fully understand still life until you know how to put feeling into your lines. To do this, I had him draw a triangle. Then I made him draw another one. Then I had him throw in a square for good measure. As he saw what was happening, I could see his eyes light up. What was happening was a mosaic of shapes, all with that feeling in them – the feeling of confidence in what you were doing. Knowing where the next line needed to be. He filled a page, every square inch, with shapes and shadings. Then I made him look at what he’d drawn very carefully, for at least five minutes. When he was able to see the outline of a horse hidden away in those lines, I drew a line right down the middle of his page and on one side (his choice) I drew a tiny circle and colored it yellow. I said, “Everything on the yellow side is in the light. The other side is in the dark. Color it black.” He did, and he ended up with a very stylized, elegant horse drawn in a cubist style.

Since then, he’s been doing cubist drawings of everything, so I figured we’d take a stab at putting that feeling into another style of art. He and I worked together to create this still life of a NERF gun. He truly has begun pursuing the artist in himself!

C928175C-2CFE-4561-9626-9551DE0C8311

Other members of the Homeschool Review Crew have been working with a variety of books from Artistic Pursuits Inc. and reviewing them this week. Click through to learn more!

Learning Math, one page per day

Disclaimer: I received a FREE copy of this product through the HOMESCHOOL REVIEW CREW in exchange for my honest review. I was not required to write a positive review, nor was I compensated in any other way.

DCF33324-6AE0-445E-8BB2-9704B0B2A9CD

Basic math skills are so important for kids. Starting strong when they are young really makes a difference, especially if they’re excited to start learning. That’s why I was super interested in the idea of the PreK Math Starter Kit from Page a Day Math for Dragonfly (4 years old). We had (and are having) such great success with him reading that I wanted to take advantage of his eagerness to start learning more, and this kit was the perfect thing. Page a Day Math was so generous to us reviewers, however, and didn’t limit us to just one product for one child. In addition to the PreK Math Starter Kit (physical books), I was able to get downloadable copies of their other Math Starter Kits for Grasshopper (7 years old), and some of the handwriting books for him as well.

What is Page a Day Math?

Well, just like it sounds, these books are designed to help your kids with their math facts – with just one worksheet per day. Dragonfly, as mentioned before, has been using the PreK kit, and Grasshopper has been using the Multiplication Starter Kit (he’s pretty strong with his addition and subtraction facts already) and I Can Write in Cursive! My first cursive writing book.

How We Used It

B05E8DDE-CC2E-4A30-ADE7-509CA57F9AB1Page a Day Math Kits are designed to be a math fact supplementation system. It works with any math curriculum you’re already using, because its goal is simply to drill the math facts into kids so they internalize them over the long run. We received a physical set of the PreK kit and digital versions of the others. The first thing I did was to go over their website and look for the kits I wanted. Once they were purchased, I downloaded them to my computer (zip files) and then was able to extract them and print out the books I needed. I printed the pages on both sides so that it would feel more like a book, and then put the sheets into a folder for Grasshopper. Of course, none of this was necessary for the physical books that came in the mail.

Each day, I would have my kids do one page of math. It’s mostly tracing numbers and solving problems. In the PreK level (for ages 3-5), you start the day by teaching your child one math fact (0+1=1, for example). Go over it with them a couple of times, then they start tracing the numbers. You can see an example of what I mean in the photograph at the top of this post. There are three sets of numbers to trace (on the first day, it’s 0, 1, and 2; on the second day, 1, 2, and 3; third day, 2, 3, and 4; and so on). Then they trace math facts. As you continue through the books, more math facts are introduced. It’s very slow and methodical, so it’s never overwhelming for the child. At such a young age, it’s important to keep things very simple, and Page a Day Math does a great job with that – just one new problem each day. And then lots and lots of tracing. I love that there’s so much tracing involved here because it really helps kids to learn what each number looks like and how to write it. Such vital skills!

DFC761C1-E642-4409-A5BD-C08061167615The PreK Starter Kit consists of 10 books, and each one has 2 weeks (14 lessons) of instruction. It starts very simply, as I described above. As more problems are introduced, they are added into the “review” section of each lesson (the back side of the page), but the front side is primarily dedicated to the new addition fact. By the end of the tenth book, students are adding up to 10+10=20.

The Multiplication Starter Kit is very basic as well, starting at the very beginning of the concept (0 x 1 = 0). It mixes in addition and subtraction, too, so there’s no loss of skill while learning a new one. It is mostly tracing, just like the PreK kit, but the main difference is that students are expected to write in the answer themselves. (In the PreK kit, it’s traced all the way through.) The Multiplication Kit has 12 books with 14 lessons each, and by the end of the kit students are doing all standard times tables through the 12s.

The handwriting books are basically the same as the math books, but with letters instead of numbers. Grasshopper is pretty good at writing in print at this point, so he was excited to begin learning cursive. I started him with the basic book, which teaches the uppercase and lowercase cursive alphabet, one letter (two sides of the page) per day. While he’s enjoying this, I think he’ll be even more excited to work on it when two things happen: first, when he gets his cast off (next week!); and second, when the letters start connecting into words.

What We Think of it

Each day when I ask Dragonfly if he wants to do his “number tracing,” I get a very enthusiastic “Yes!!” He calls the main dog mascot, Mo, his “best friend.” It’s really cute. We keep a pencil in the box with all of the workbooks so it’s always ready to go. He insists that his pencil must be “needle sharp,” so sometimes we have to sharpen it for him before he begins, but it’s always in the box so we can find it. I have never once had even an iota of hesitation from him over it. And he is learning. I love watching him make the connection between just counting and reading/recognizing numbers. He gets excited when he realizes what he’s seeing, and it’s magical to watch. I know it sounds like he’s my first kid when I gush like this, but the fact is that it doesn’t matter that he’s the fourth – watching your child learn (every child), is the most gratifying thing in the world.

Grasshopper, on the other hand, is much like his oldest brother. He likes to learn, but he doesn’t like formal lessons. That said, he liked tracing the letters in the cursive lessons. I am convinced that if it wasn’t for his broken arm, he’d be more engaged in the lessons. Even though the cast is on his non-dominant arm, he still has to hold it at an awkward angle in order to hold the page in place.

Page a Day Math is a fantastic product, and I’m so glad we’ve had the opportunity to review it. It will definitely keep a prominent place in our lessons through the summer. Both boys will be using these workbooks for many, many more weeks.

Blessings,

ladybug-signature-3 copy


Over 50 members of the Homeschool Review Crew are reviewing Page a Day Math this week. Make sure to click through to read their thoughts, too.