Easy No Bake Cheesecake recipe

I have grown to really enjoy cheesecake as an adult. I didn’t like it as a child, but it’s definitely one of my favorite desserts as an adult. I love the tanginess of cream cheese, whether it be in a cheesecake or a cream cheese frosting on top of a cupcake or even just as a bagel spread for breakfast or snack.

Baked cheesecake, while a lovely thing to eat, can be very difficult to get just right at home, though. I have a recipe from my mom that I’ve made before, but it’s so finicky that I wanted to find a no-bake version (plus, I don’t have any spring-form pans, and they’re a must for cheesecake baking). This is now my go-to cheesecake recipe. It’s always a hit, no matter who I serve it to.

No-Bake Cheesecake

A 9- or 10-inch graham cracker crust (store bought or homemade)
1 cup whipping cream
2 8-ounce blocks of cream cheese, softened
2 tbsp sugar, divided
1 tbsp lemon juice (orange juice works well too)

Pour the whipping cream into the bowl of an electric mixer and whip on high speed until soft peaks form. Add 1 tablespoon sugar and mix until the cream is lightly sweetened and the sugar is no longer grainy. Gently scoop the whipped cream into a small bowl and set aside.

In the same mixing bowl (you don’t have to wash it yet), whip the cream cheese, lemon juice, and remaining tablespoon sugar until well combined and smooth.

Gently fold (not mix) the whipped cream into the cream cheese mixture. You want to be careful here so you don’t knock the air out of your whipped cream. When the two mixtures are fully combined, gently pour the new mixture into the graham cracker crust. Cover and refrigerate for at least one hour. Keep refrigerated for up to 4-5 days.

Optional: serve with a fruit topping. Strawberry is always a hit in our house.

See? Much easier than a baked cheesecake!

Blessings,

History Comes Alive with Figures in Motion (review)

Disclosure: I received this complimentary product through the Homeschool Review Crew.

My third grader and I are learning about early American history this year, using a variety of living books for his curriculum. Since it’s mostly just a lot of reading, I was excited to see Figures in Motion come up as a review option through the Crew – it was the perfect opportunity to add something “fun” to the reading. (He likes to listen to me read; we snuggle up and read and he never, ever complains – and I rather like the 8-year-old snuggles too. But even so.) The Famous Figures of the American Revolution book was the perfect supplement for our reading!

Figures in Motion is kind of like paper dolls, but instead of dressing static images of people, students create movable “puppets.” Each page of the book has the famous figure divided up into multiple parts (body, arms, and legs – the limbs are usually 2 pieces each). For each figure, there is a page that is pre-colored and one that is just line art for students to color themselves. You cut out each piece and then attach them together using brads. The result is an historical figure that is a moveable plaything! It really is a fun product that adds a lot to a history lesson.

The paper in the books is very high quality – more card stock than paper, really. There aren’t “instructions” per se, but it was super easy to understand what needed to happen. On the back of each piece, there is a letter and the word “front” or “back.” Simply line up the letters, determine whether a specific piece needs to go in front of or behind the matching letter, and join with a brad. The result of such a simple product is amazing!

Our current history book is a biography of Benjamin Franklin, so I had both of the younger boys (excluding the baby) create a puppet of him. Grasshopper (8, and the official recipient of the history lessons) opted for the colored version, which left the white version for Dragonfly (5). I will say that I think 5 is a little too young for this product. He had a pretty difficult time coloring the page to his (admittedly high) standards. There were a lot of tears, and I didn’t even have him cut out the pieces himself!

In addition to the book itself, you need some mini brads to create the puppets (regular sized ones would work, but your puppets wouldn’t look quite as polished). A hole punch is also useful, but not strictly necessary – the brads can push through the card stock reasonably easily. Both of these tools are available from Figures in Motion, in addition to a wide variety of puppet books.

Included at the beginning of the book is also a short (1-2 paragraph) biography of each figure, so if you wanted to use this as a quick project rather than a supplement to another curriculum, you can still get some learning in there.

We had a really fun time working with Figures in Motion, and I will definitely be pulling this book out again and again as we learn more about the main players in the American Revolution over the rest of the school year!

Be sure to check out the other reviews from the Homeschool Review Crew; many of the Figures in Motion books are represented there, not just the American Revolution one.

Blessings,

Teaching Textbooks 4.0 (review)

Disclosure: I received this complimentary product through the Homeschool Review Crew.

For the past several months, my teenagers have been using the Teaching Textbooks Math 4.0 apps on the iPad for their math. The Teaching Textbooks apps are easy to download and sign in to, and each grade level gets its own app. If you’re short on space on your device this could be problematic, but otherwise I think it’s a benefit. There’s no trouble having students working on different levels having to sign each other in and out in order to do their lessons. Simply download the app, sign in using the parent account, add your student, then assign them a username and password. Each day, they have to enter their own password, but they shouldn’t need to sign in to the main account each time. (Ballet Boy had some issues and had to get my log in many times, but I don’t think that’s normal. Scorpion didn’t have the same issue at all.) Here are my boys’ thoughts on the program.

From Scorpion (Math 7):

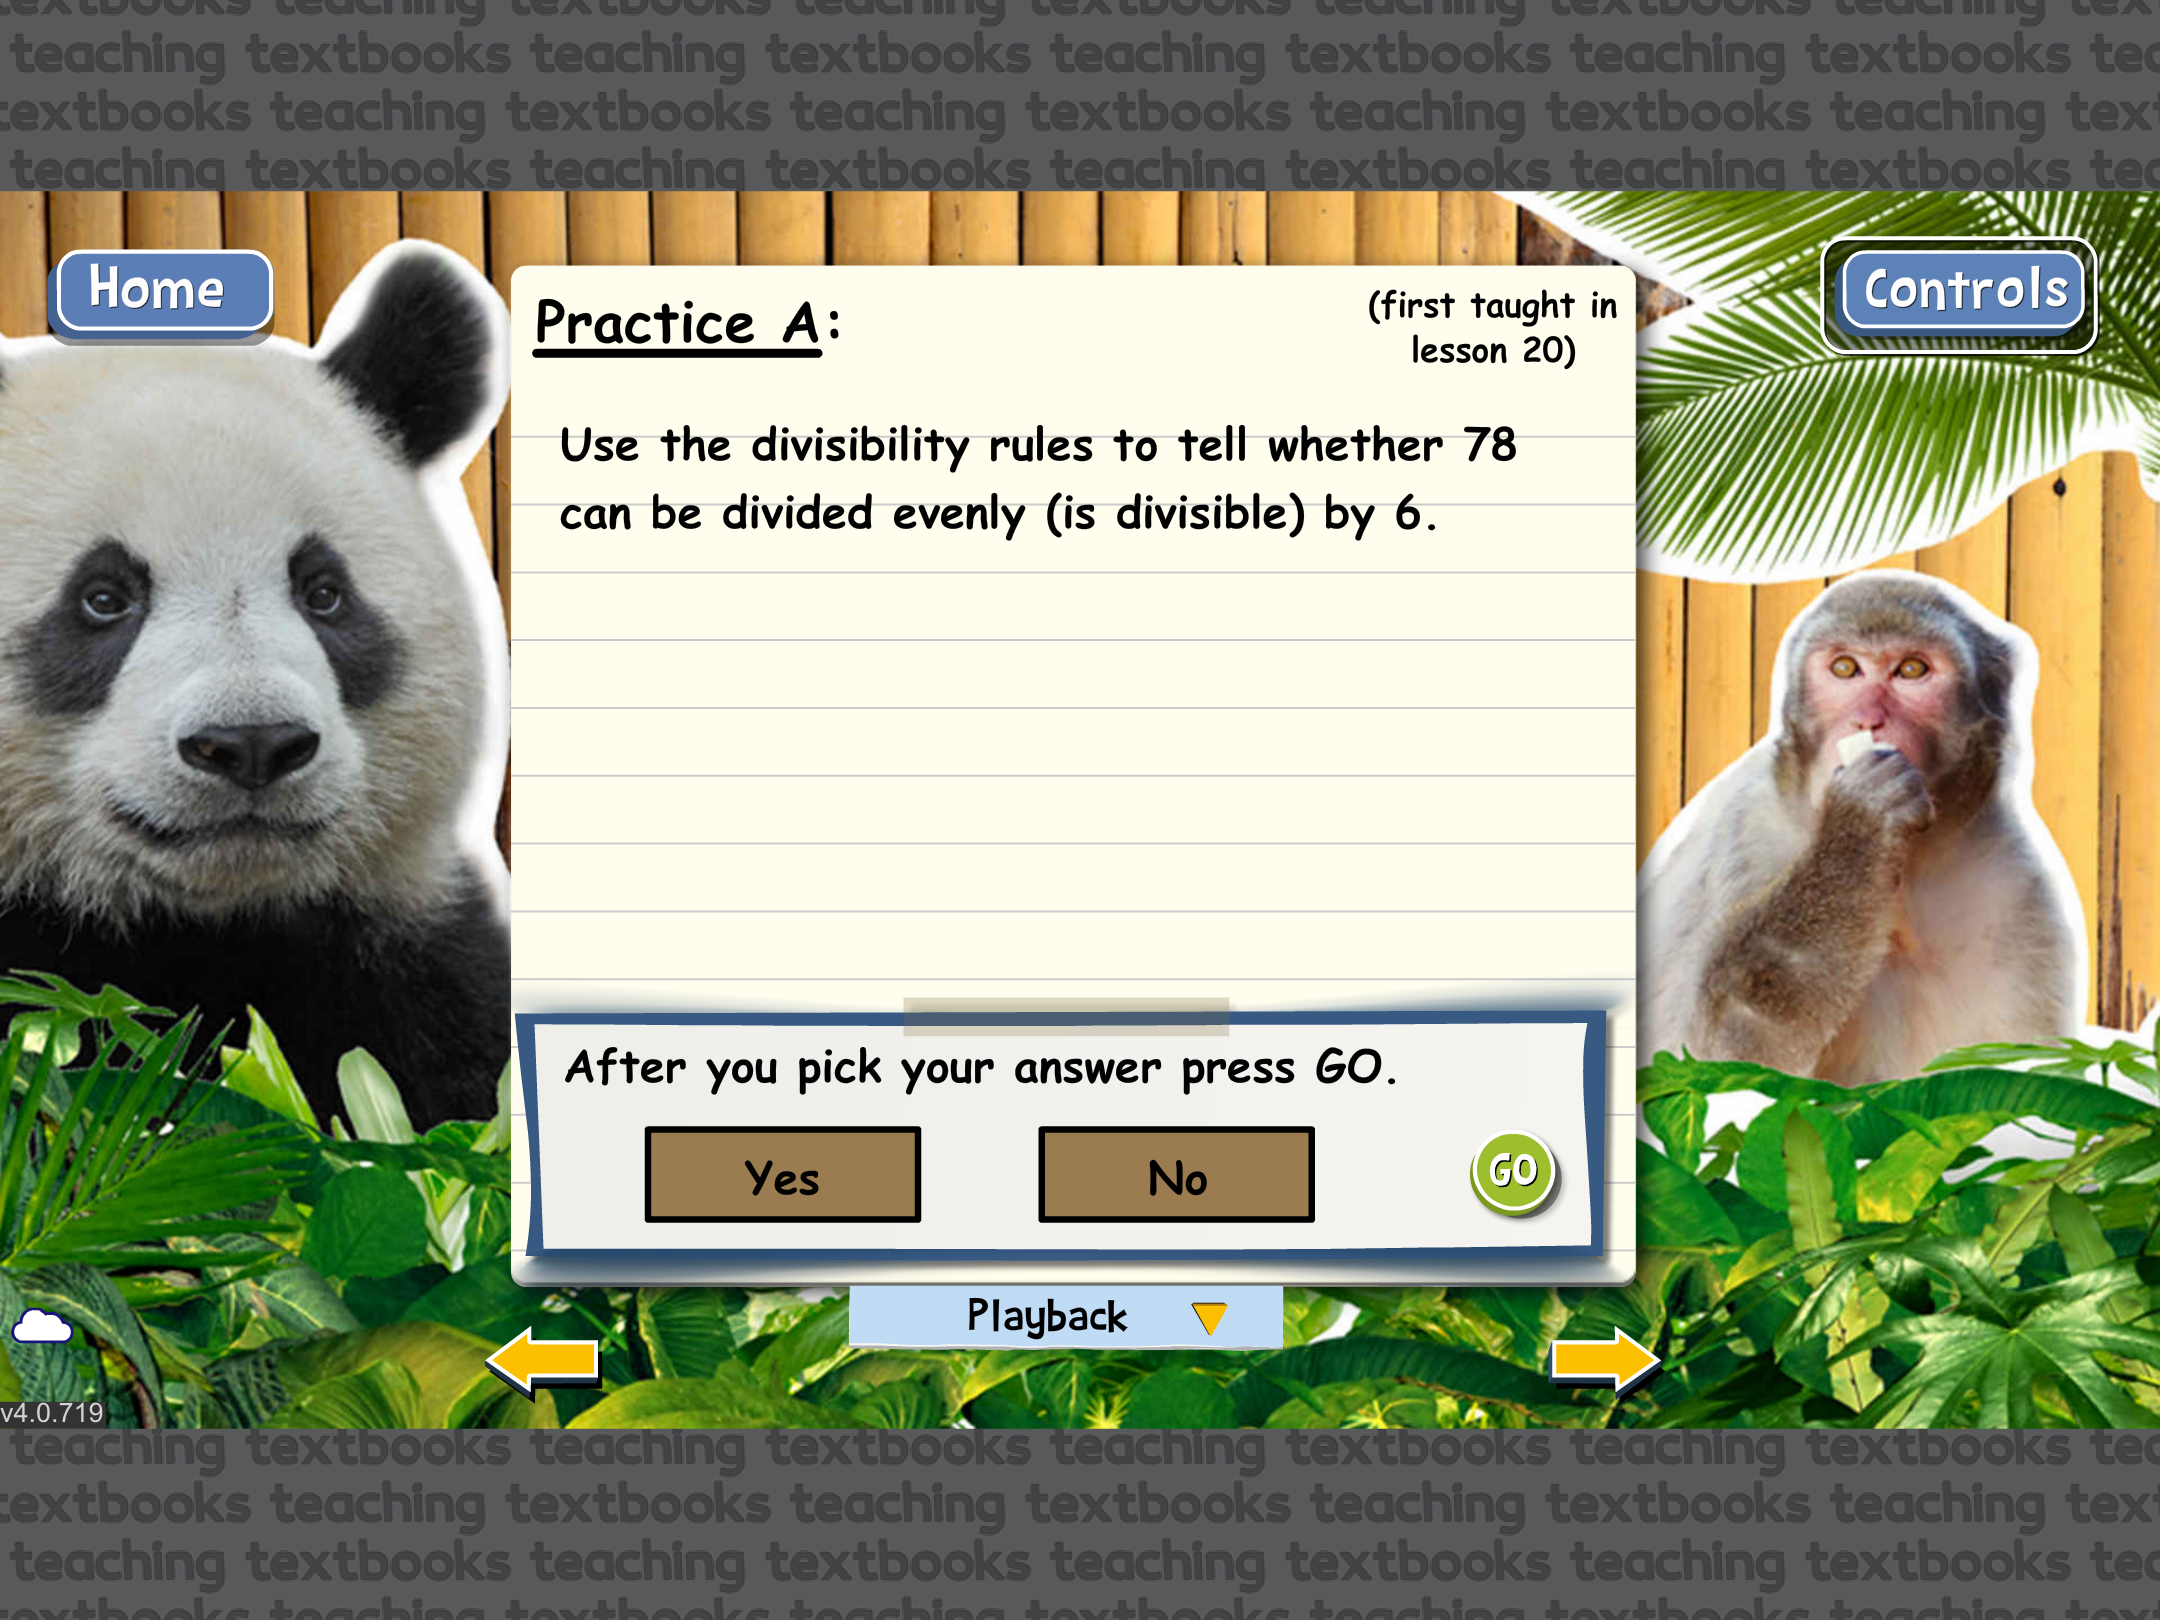
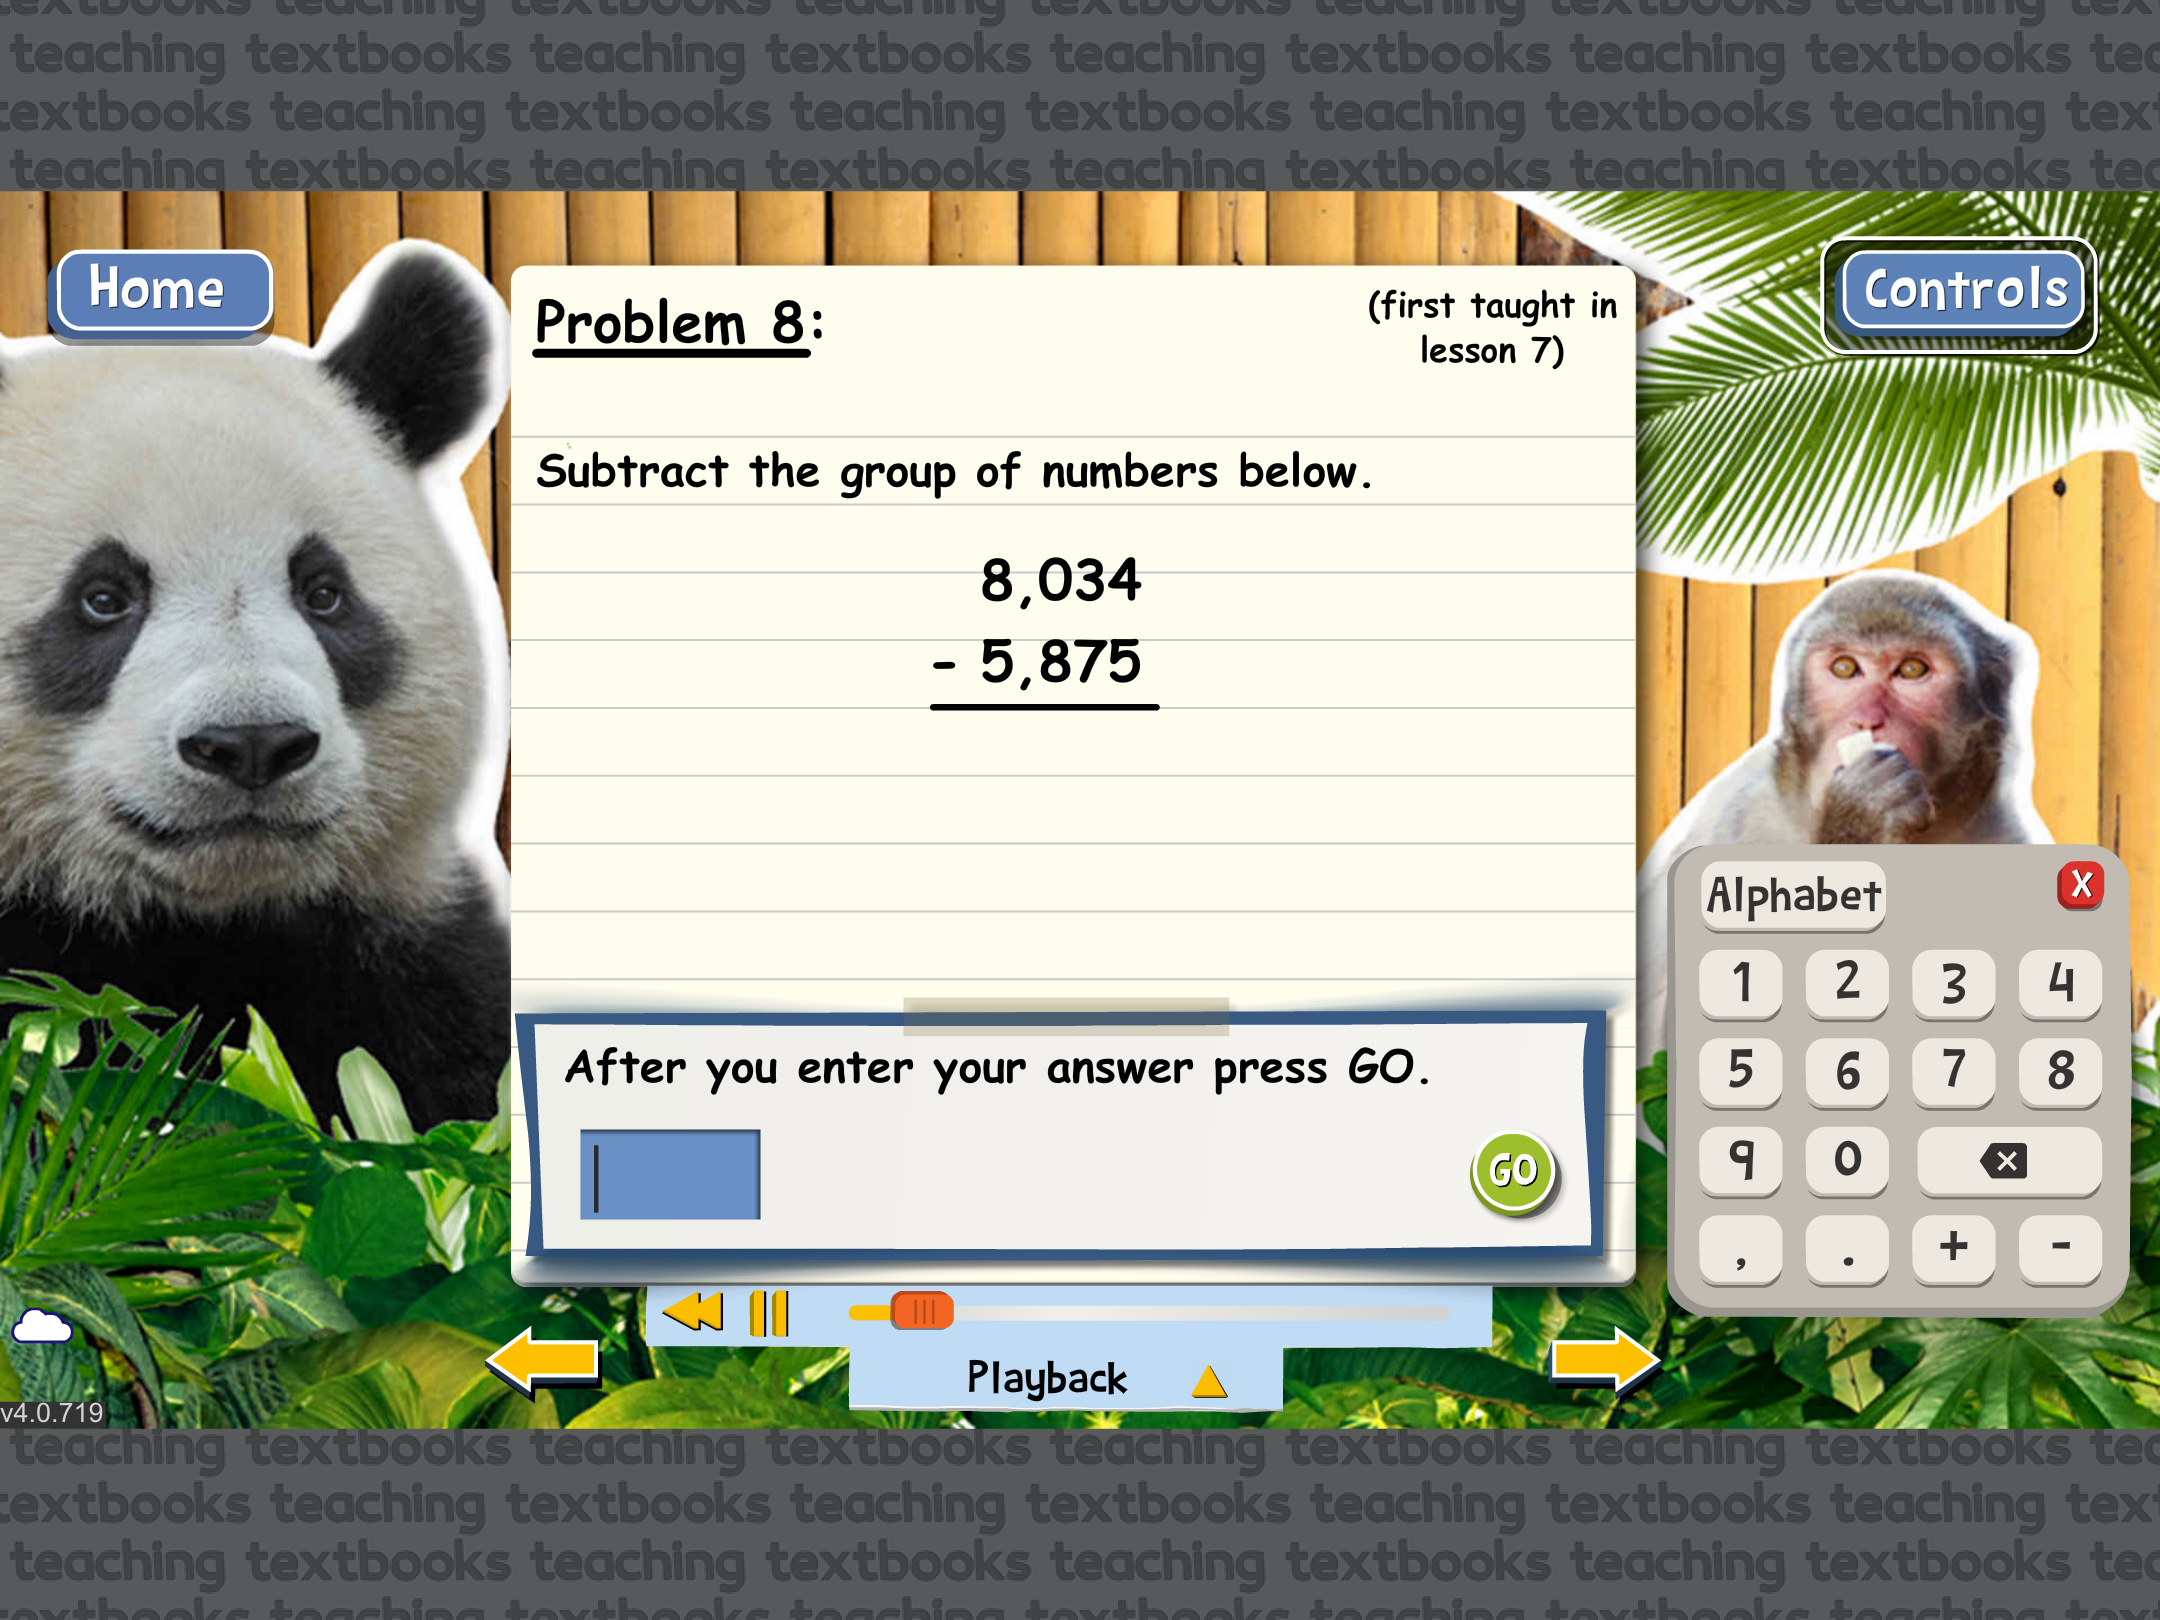
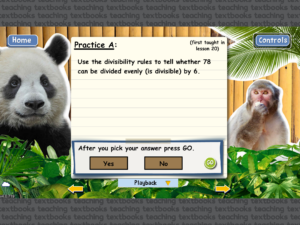
Teaching Textbooks 4.0 Grade 7 is a program that starts with a video that explains the lesson. The videos are very clear, and last about 5 minutes. After that, there are the lesson portion, which is just a series of questions and problems to solve. If you get a question wrong, there is an option that says “watch solution,” which allows you to see exactly how and why you got the problem wrong. This helps you to remember in the future and get similar problems correct next time.

Topics that I’ve covered so far have been mostly the normal addition, subtraction, multiplication, and division. But I’ve also moved forward into some more advanced division as well. Later lessons have shown me ways to break up some of the harder division problems in order to solve problems quicker.

Math 7 is an excellent math program for any middle schooler (or a high schooler who is behind and/or needs a refresher course). I have tried a lot of different math programs, and Teaching Textbooks has worked really well for me personally. I like the “app” format because I spend a lot of time on my iPad anyway. It’s really easy to find what I need and move forward in the next lesson. It keeps my spot, so I never have to try to remember where to pick up. Signing in is super easy, too. The app keeps our family login all the time, so I just have to type in my student password each day. This makes it really quick to get going. I’m glad to have this math for my main curriculum.

From Ballet Boy (Algebra I):

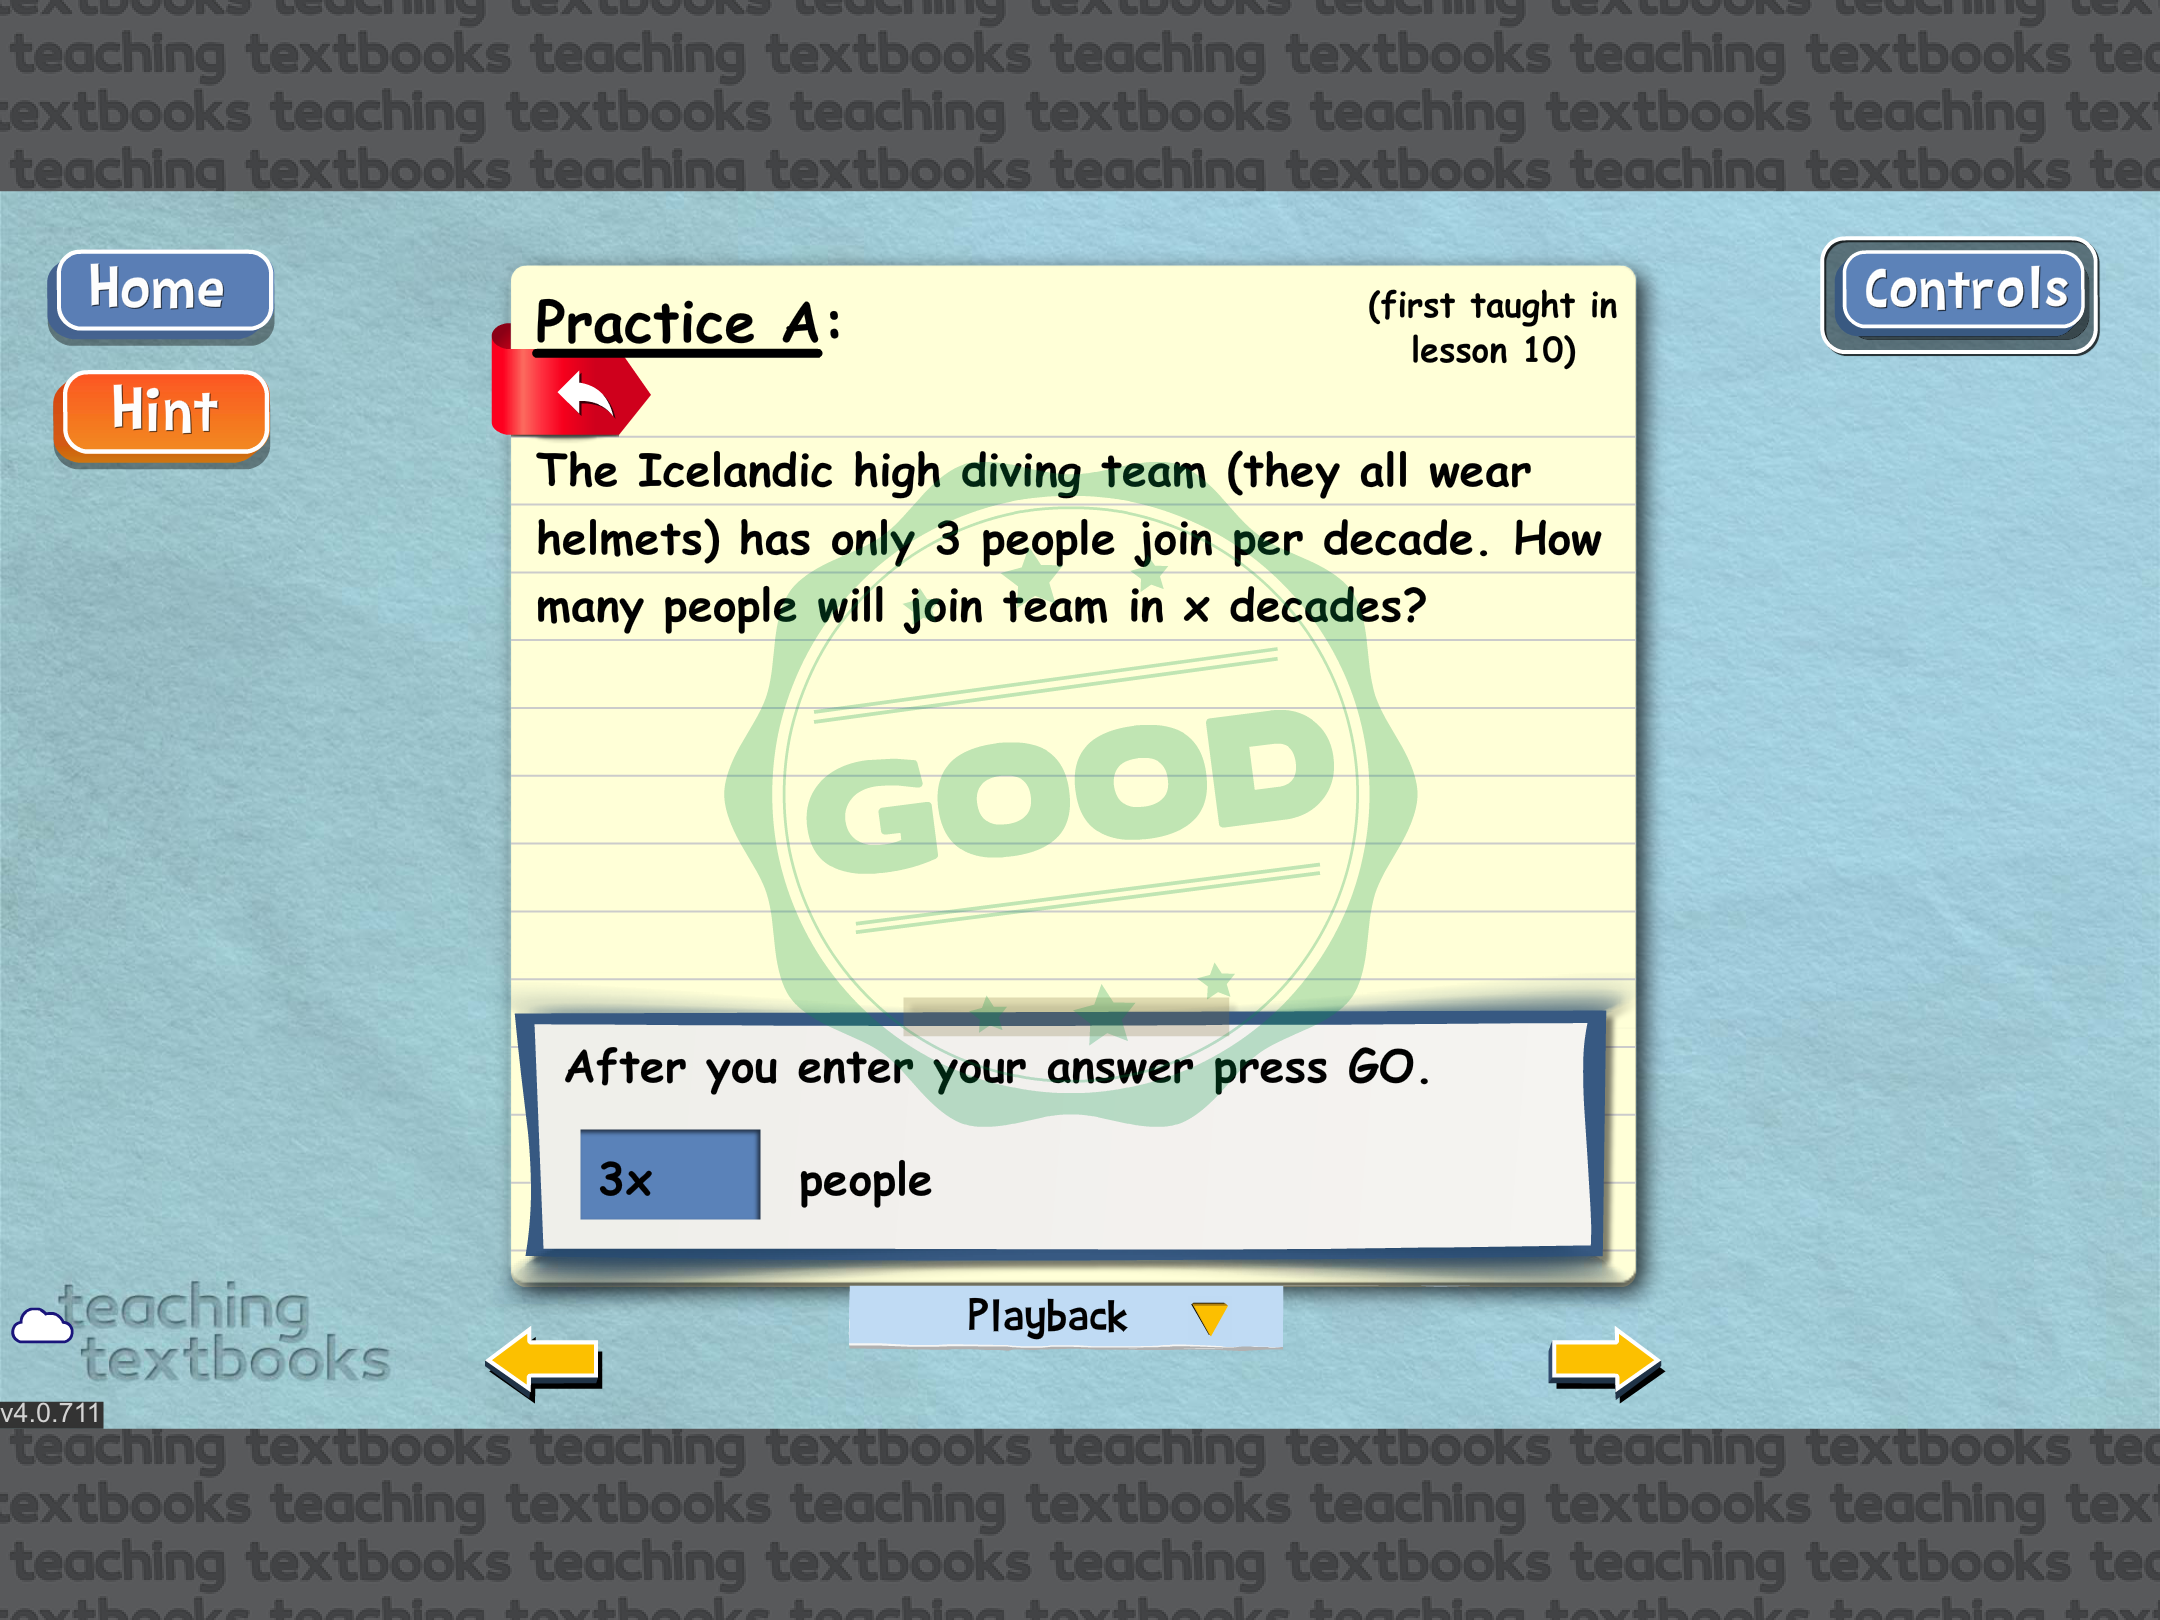
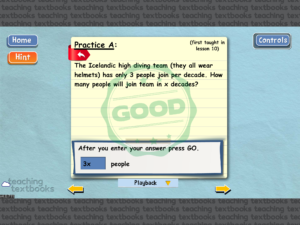
Teaching Textbooks 4.0 Algebra I is a great program for people who learn like me. I’m normally terrible at watching a video and then doing questions. The thing I love about this program is it’s a lot more interactive than others I’ve done in the past. Each video walks you through the problems step by step but you have to type in the answers; it’s not just the teacher solving them for you. It then gives you about 20 questions and they run them the exact same as the ones you solved in the lesson so it’s more of the same instead of watching someone be good at math and then being given a page of homework and told to do it in an hour. All in all a great program. Five stars.

Back to Mom:

You can see that both boys have really enjoyed working on this program, and that’s really saying something because they each have different strengths. Ballet Boy is definitely a math kid. His main struggle has been finding a program that works for him, not the math itself. We’ve found that with Teaching Textbooks. Scorpion, on the other hand, has always been more of a literature kid – he’s struggled with math for as long as I can remember (which is why he’s 14 and doing 7th Grade math). But it looks like we may have found a good fit for him as well (famous last words, right?). I never have to harp on the kids to work on their math now, though. In fact, they like it so well that they wake up and dive right in. They’re always done with it by the time I see them for the first time in the morning.

We only ever had access to Teaching Textbooks 4.0, but other members of the Homeschool Review Crew are comparing the 3.0 version to the new 4.0 version, so if you’ve used Teaching Textbooks 3.0 and are wondering how the new version is different, I urge you to check out more reviews.

Blessings,

Perpetual Birthday Calendar

I really enjoy watching Dollar Tree DIY videos on YouTube, and Kelly Barlow Creations is one of my favorite channels. I was watching one of her videos recently, and the idea of a sign displaying all of the birthdays in the family seemed really cute. I knew it wasn’t something we would display, but I wanted to make it anyway. So I decided to make it to give to my grandmother-in-law. I went to the Dollar Tree to get the supplies, and my local store was out of some of the supplies Kelly had used, so I found alternatives. Also, she used a Cricut for her sign, and since I don’t have one of those I had to improvise on some of the other pieces too. Here is how I made my sign.

I started with two of the Dollar Tree signs that have the shape that looks kind of like offset boards. The way those signs are built, they don’t line up to perfectly when you try to put two of them together (I wanted to keep the up-down pattern intact), so I had Ballet Boy help me saw one of the planks off one sign. Then, with a little bit of puzzle solving, the signs lines up the way I wanted them to. I used the piece we cut off, as well as some popsicle sticks, to hold the two signs together (I hot glued the pieces onto the signs, going across the seam). With my sign built, I was ready to decorate!

I started by painting the sign white using Apple Barrel gloss acrylic paint. When the paint dried, I used a Sharpie to draw lines where the “planks” shifted because I wanted a fence-look. With the lines drawn, I used the dry brush technique to add another coat of white paint in order to soften the black lines. 

I added the words Family Birthdays next. “Family” is a metal word cutout from the Dollar Tree, which I painted with Apple Barrel Cool Blue. I used hot glue to attach it to the sign. I mixed my own purple using blue, red, and white paint to add the word Birthdays to the sign. Using a Sharpie I wrote the names of the months across the bottom of the sign, one month per plank. Then I painted the entire sign (including the metal word) with Mod Podge to seal the paint. Finally, I added a bit of ribbon to the two short sides to hide the rough edges.

I drafted Ballet Boy to  help me again at this point. He drilled one hole into the bottom of each of the planks with a month, and a larger one up near the top so I could install the pinwheel. 

I gathered up all the birthdays from the extended family, and took some decorative cardstock (from the scrapbook paper open stock at JoAnn). Using the planks on my sign as a template of sorts, I cut small rectangles from the paper and added each person’s name and day of birth (not the month) to one rectangle. I laminated all the rectangles using DT packing tape, and then organized them by month. I used a small hole punch to add holes to the top and bottom of each rectangle, then using embroidery thread I attached the papers to the bottom of the sign under the correct month (in order within the month). I added a bit of hot glue to the back of each rectangle to help keep the thread in place, and added a tassel to the last rectangle of each month. 

The last thing I did was to take some brown Kraft paper and cover up the ugly back. It used to be the fronts of the two signs, but now it was terrible looking because of those popsicle sticks holding the two boards together. I used a bit of hot glue to hold the paper on. Then I used cotton yarn (ch 13, slip stitch in 2nd ch from hook and in each ch across) to create two hangers for the back. Using copious amounts of hot glue for stability, I attached the hangers to the back of the sign. 

If you’re still here after all this, thank you for reading!

Blessings,

Crochet Wallet

Grasshopper (8) recently came into some money, and he didn’t have a good place to keep it. He asked his brothers to make him a duct tape wallet, but all we had was Dollar Tree box tape (which is really thin) so they told him no. He was pretty upset, so I got to thinking about how I could help him. My main skills are in yarn, so I realized it would be pretty easy to crochet a wallet. 

I started out with a double crochet stitch using a small hook so the fabric would be tightly woven, but I didn’t love the way that was turning out so I ripped it out and tried again. For my second attempt, I used fewer stitches (the first one was way too wide) and the half double crochet. I utilized a variation of the “third loop” method of the stitch (though not in a way I’ve ever seen done before), giving the wallet an interesting texture – and that extra solidity I was looking for in the beginning. This wallet would be great for any kid, and maybe even a woman who keeps it in a purse. If you’re a “wallet in the pocket” person, it’s probably a bit too thick (although, you could perhaps make it with thinner yarn to combat that ?).

Crochet Wallet

Yarn: any worsted weight yarn (I used JoAnn Big Twist in Varsity Green and Bubblegum ) in one or two colors

Hook: H

Panel (make 2):

Chain 36.

Row 1: HDC in 3rd ch from hook and every ch across (35)

Rows 2-12: ch 2 (counts as HDC). Sk 1st st; HDC in the “front V” of each remaining st across. (See photos for clarification.) HDC in top of ch 2 from previous row.

I’ve highlighted the parts of the HDC in blue. The V at the top is where you normally would insert your hook to create the next stitch. For this pattern, you want to use the bottom loop (the line below) and the “traditional front loop” of the V to make your stitch into. Treat those two loops together as if they were the normal V.


See here the position of the hook at the beginning of the HDC.

Fasten off; weave in ends.

When both panels are made,  you can add an appliqué (Jayda in Stitches on YouTube has lots of tutorials) or surface stitch a design to one or both, but this is completely optional. I added my son’s first initial. 

Stack the two panels together. Push your hook through one corner of both panels. Attach contrasting yarn (or the same color, for a calmer look) with a slip stitch. Single crochet through both panels together on 3 sides (one long and two short). As you turn the last corner, now start single crocheting on just one of the panels. When you get back to the starting point, SC into the seam between the panels, and then continue around on the other top. When you finish the second top (SC into the other seam too), join to the top of the first SC in the opposite side. Fasten off and weave in ends. 

If you make this wallet, tag me on Instagram (@ladybugdaydreams) or Twitter (@ladybugdaydream) – I’d love to see!

Blessings,

The Humble Calculator (Triad Math review)

Disclosure: I received this complimentary product through the Homeschool Review Crew.

I grew up using a Texas Instruments scientific calculator, and I’d be willing to bet many of you did as well. What I bet most of us don’t know, however, is the sheer amount of power that humble machine has. Enter Mastering the TI-30Xa Scientific Calculator: Augmented Intelligence for all 21st Century Students from Triad Math, Inc. In this course, which is a combination of video lessons, a work text with problems to solve, and the calculator itself, students learn all about the nuances and extraordinary power this calculator has.

The main dashboard

When we first got access to the course, I gave the book to Ballet Boy (17) and emailed him the login credentials for the video lessons. Then, he worked on the course independently each day. From my perspective, the course was very easy to navigate. When we logged in, it was easy to find the right course, and then to scroll down through the lessons. The interface kept track of where you left off, so it was a breeze to move to the next lesson correctly. I did the first few lessons with my son, and I found the teaching to be very clear and easy to follow. The questions in the textbook went well with the lessons.

A screenshot from the video for lesson 1

Each lesson consists of a pretest, the video lesson, practice questions (available as PDFs within the course or as a separate book, as we received), and a post-test. The post-test is identical to the pretest, except it’s taken after the lesson to make sure the student has learned the material. Each lesson also has a forum, but we didn’t utilize those. 

Here are Ballet Boy’s thoughts. 

I’ve been using the Texas Instruments calculator for a few weeks now and let me just say: this calculator is AMAZING! It’s the only calculator I’ve used that was actually useful for math. All calculators do math, of course, but I’m not in third grade so one that does more that multiply and divide is a welcome sight. I have yet to come across an equation or geometry problem that isn’t made easy with this tool. The calculator even does trigonometry with a few clicks of a button. It also has three memory banks for doing complex word problems. I have done entire math lessons without even scratch paper.

Additionally, the course has many video lessons and a work book that go with it to help you understand every button one step at a time. The videos are super easy to understand and follow along with. What I will say is when you’re watching them, “Dr. Del” is a lesson behind when he tells you what lesson number you’re on so that’s confusing at first, but only a small bug.

All in all I have no problems with the class, only praise. Highly recommended!! 

Make sure to head over to the Homeschool Review Crew for more information!

Blessings,


DIY Dollar Tree Photo Trivet

I have a super easy project for you today! I had seen trivets and plates like this on YouTube and wanted to try making one, and now I’m sharing it here. 

Supplies:

Glass trivet (I got mine at the Dollar Tree)

Printer and access to a favorite photograph (or a printed one from the store)

Dishwasher safe Mod Podge (available at Walmart and other craft stores – I got mine for about $8 at Michael’s)

1. Measure your trivet and open some sort of photo editing program on your computer. Size your picture up so that it takes up as close to the full trivet size as possible. OPTIONAL: Add some sort of background to the photograph. I found a background design on Pixabay and put my photo over the top of it using Photoshop, and then printed. 

2. Cut the image out to just a bit smaller than the trivet. 

3. Paint Mod Podge over the back of the trivet. Lay your image out on top of the glue (face down) and carefully smooth it out. Paint another coat of Mod Podge over it. 

4. Wait an hour, then paint another coat of glue over your image. 

5. Repeat step 4.

6. Wait 28 days (yes, you read that right) for the glue to cure and become dishwasher safe. 

I hope you make one of these and enjoy using yours as much as I have loved mine. 

Blessings,