Book Club: Troublemaker

During my drives to and from the gym, I like to listen to audio books. (I hate listening to music in the car. I find it oppressive.) I recently finished Troublemaker: Surviving Hollywood and Scientology by Leah Remini. I’d heard of the book years ago, and was a low-key fan of Remini’s (I remember her from her Saved by the Bell days, and my husband and I used to watch The King of Queens regularly). I remember her explosive separation from the Scientology religion in 2013. And last year (earlier this year? I don’t remember exactly) I watched the A&E show on Netflix that she and Mike Rinder (another former high-end, though not celebrity, Scientologist) did together. So I was interested in reading/listening to the book. I wasn’t able to find any “book club questions” for this book, so I’m just going to ramble about it for a little while.
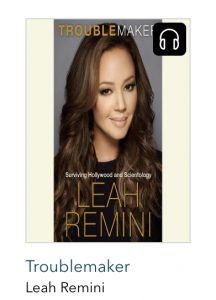
The audiobook is read by Remini herself, and as I mentioned before I’m already familiar with her and some of her work, so I wasn’t distracted or surprised by her thick New York accent. I enjoyed hearing her tell her own account of her life, especially some of the more “explosive” Hollywood stories. But let’s not get too far ahead of ourselves here.

Leah Remini was born and raised in New York. Her parents divorced when she was young, and she spent time with each of her parents separately. When her mother got remarried (to a Scientologist), she swept Leah and her sister into the church with her. They quickly moved through the lower ranks, eventually landing themselves in the “Sea Org.” Even after watching three seasons of the show and listening to this book, I don’t have a super clear understanding of the Sea Org, but I’ll do my best here. The Sea Org is one of the highest levels of “clergy” (though that’s not quite the right word) that civilian members of Scientology can reach. Members are recruited, and when they’re brought in to be offered a spot they are expected to sign a billion-year contract. You read that right; it’s not urban legend. Adults and children (Scientology views children as “adults in young bodies”) are required to sign a contract promising a billion years of servitude to become members of the Sea Org. Remini became a member at (if I remember correctly) age 13. Her sister was one year older, and her mother also signed at the same time.

The following chapters, covering her time in the Sea Org, are full of horrors. There were two stories that stood out to me the most. Both took place long before she was a legal adult.

In the first story, she tells of how she was put in charge of a battalion (not the right word, but it conveys the right idea) of other Sea Org members. She was a young teenager at this time in charge of a group of other teens and adults (remember, children are considered small adults) and given a job. She figured that the main goal of the job was to get the job done, so she motivated her team and they finished early. Because they had time to spare, Leah – in her teenage wisdom – gave her team permission to lounge by the pool. (She and her family were living in Clearwater, Florida, the home of Scientology, by this time.) They were caught by a higher ranking Sea Org member, and he took her and her entire team out to sea on a raft. This man insisted that she apologize to him and call him “sir.” She struggled with this; even though it was a fairly simple and painless way for her to get out of trouble, she just couldn’t bring herself to call him Sir. She’d been trained by her religion that all members were equal – she was just as important as he was, so why should she be forced to call him Sir? When she refused time and time again, he eventually threw her overboard. She almost drowned in the water that day.

The second story from that time that struck me was the time Leah was checking in on the nursery. As a teenager, like most teen girls, she had a heart for the babies. The fact that she had a new sister in that nursery (her mother and stepfather had a baby after the family moved to FL) didn’t hurt. She went in to check on her baby sister and found the conditions horrendous. Babies were left in cribs for hours on end with no care. There was a teenager in the room, but that person didn’t do anything to care for the children – no feeding, no diaper changes, no playing. Nothing. Hearing that story made my heart so sad.

After her time in the Sea Org, we get into some of the more interesting (to me) parts of Remini’s life: her time in Hollywood. I enjoyed hearing about her acting auditions, her (many) shows that had varying levels of success (but mostly failure). The jobs she took after the Sea Org but before she “hit it big” were also interesting – waitressing, becoming a secretary and then personal assistant for someone she knew, and others. I enjoyed hearing her tell her own stories with her very unique sense of humor. She can definitely make fun of herself! I found it interesting to learn that she took the Saved by the Bell job because she literally needed to pay the rent on her family’s apartment. Before long, she landed The King of Queens, though. (I say “before long,” but that’s really just in terms of the book. I’m sure it was many years, and a whole lot of frustration on her end.) I wish she’d spent more time talking about her time on that show, but I was glad to hear the parts she was willing to share. It was lovely to hear that her co-star, Kevin James, was as nice as he seems to be.

Near the end of her time on The King of Queens, we entered 2006. If you follow Hollywood really at all, you might remember that as the year Tom Cruise and Katie Holmes got married. Their wedding in Italy was the beginning of the end for Remini and Scientology. I’m already getting pretty high on my word count, so I’m not going to go into very many details here. But let’s quickly summarize a few of the main events from that trip.

  • Tom and Katie’s infant daughter was left to cry on the kitchen floor. She needed a bottle, but no one was willing to give her one. Instead, they all chastised her as though she were an adult. (She was 7 months old at the time.)
  • Leah and her husband seemed to be “reluctant” invitees. They were invited, but mostly because some of their friends were “more important” than they were and Tom Cruise and the church of Scientology needed them there (Jennifer Lopez and Marc Antony).
  • On the way back to the airport to fly home after the event, Leah and her husband rode with Tom Cruise and Nicole Kidman’s children. A tense conversation in that shuttle van confirmed suspicions that Nicole had been labeled an “SP” (suppressive person) in the church. Now that Katie Holmes is no longer married to Tom Cruise, she has that label as well. And since her falling out and subsequent years of “tattling,” Remini is also a suppressive person.

There is so much to this book, and I couldn’t possibly talk about it all here. If you’re interested in Hollywood, or Scientology, or how one goes about escaping from a cult, I recommend this book. I found it very engaging.

Next month in Book Club, I’ll be talking about The Guardians by John Grisham.

Blessings,

Last Minute Back-to-Homeschool

This post contains affiliate links.

It’s back to school time for most of the country! What an exciting time of year! Are you ready? Because I’m not. As much as I love the fall and get excited for back to school with my kids, I enjoy the freedom of summer and just letting the kids run around outside most of the day (except for Bumblebee, who’s not quite 3 – his birthday is next weekend).

an hourglass with red sand sitting on top of an open newspaper

We live in a state that doesn’t start school until September (the day after Labor Day, specifically). As a former public school student, I’ve always followed that same basic schedule with my kids. Over the years, we’ve slowly grown less attached to the public schools’ guidelines, but there’s a small part of me that just can’t keep the boys working hard all summer long. I don’t think I’d make a good year-round homeschooler! So every year around this time, it’s time to start thinking about back to school things.

I posted earlier this summer about our plans for high school. Read what Scorpion is doing, and how Ballet Boy is studying for his GED. They will also work on review products as they come up, but their basics are covered already.

Let’s talk about curriculum choices for the younger set. Maybe our choices will help inspire you. And keep reading to the end of this post for a special offer from the Homeschool Review Crew, too.

Grasshopper (4th Grade)

Literature: He will be reading a few books aloud to me this year. First up, Wayside School Beneath the Cloud of Doom. He owns an autographed copy of this book and has been desperate to read it for a long time. It’s finally time! It takes him quite a while to get through a novel, so I’m holding future selections loosely for the time being. As of right now, I plan to write a post each month with our new reading choices, but that might change as the school year progresses.

Math: CTCMath, with random other things to supplement.

Grammar: Fix It! Grammar from IEW. He got about halfway through book 1 (The Nose Tree) last school year, so he will finish that up and then move straight into book 2 (Robin Hood). He loves this program! The biggest issue I have is slowing him down; he prefers to do an entire week’s worth of work every day! But I need to make sure he understands the concepts, not just gets through the book.

Science: Every other day, alternated with history. We will be utilizing our SchoolhouseTeachers.com membership for science. There’s lots of fun science classes for 4th grade on there, so we will work through them over the course of the school year. “Discovering Disgusting Things” sounds like a good place to start for a 9-year-old boy!

History: My plan is to work on a variety of things from SchoolhouseTeachers.com. We’re going to start with their Lapbooking Through the Ages course because he did so well with the Home School in the Woods lapbook course we reviewed over the summer.

Writing: Even though he’s a little old for them, we are using My First Reports from Hewitt Homeschooling (they don’t have a landing page for all of the different options, but here’s one on mammals so you can see what they’re all about and then poke around on their site for more options). He was such a late reader that these reports work well for him, even though he’s 9 years old. They provide such a strong writing (and learning to research) foundation that they’re a fantastic resource.

Dragonfly (K)

Dragonfly is young enough that we’re still taking things reasonably slowly with him. He works on Reading Eggs every day, and does a combination of Math Seeds and CTCMath for mathematics. I also plan to start him on Khan Academy Kids this year. Bumblebee has been playing with that app and loves it, so I know Dragonfly will too. We will also continue to have him read simple books, with the goal of graduating to more mainstream books (maybe even his first novel or biography) in the spring. I will also add in a few things from SchoolhouseTeachers.com for him, and maybe a few lapbooks from Homeschool Share. I want his first official year of school to be both well-rounded and fun, and I think using this combination of resources, without focusing on specific subjects, will accomplish that.

I also plan to read the New Testament aloud to these two kiddos. It was about this age when the older set and I did that together, so it’s time for the younger set to get that experience too.

Now for that special offer from the Homeschool Review Crew! They’re giving away a subscription to SchoolhouseTeachers.com this week. The giveaway starts on Saturday, so make sure to head over to the Review Crew website this weekend for more information!

What grades are you teaching this year? What are your curriculum choices?

Blessings,


This post is part of the Homeschool Review Crew Not-Back-To-School Blog Hop. Make sure to check out other posts in this series in the linky below!


Making Vegetable Broth is Easy!

a cutting board with a variety of vegetables as well as three bowls of broth laid out on it.

Something I always wanted to do but never really got the hang of until recently, was to make my own broth. It’s not that buying store-bought broth is so expensive, but it’s more about getting all I can out of what I do buy. Take asparagus for example. It’s often one of the more expensive vegetables, and then you have to cut off half of it and throw it straight in the trash. That has always been a frustration of mine. Smaller things like carrot peels and onion castoffs didn’t bother me too much, but now even those get second life. Let me tell you how I make my broth, and then at the end I’ll give you a recipe you can make to utilize your freshly made vegetable broth.

The first thing to do is get a gallon-size zip top bag. Every time you cut up or peel vegetables – no matter what they are – put everything you would normally throw away into this bag instead. This includes, but is not limited to:

  • zucchini tops and bottoms
  • carrot peels and tops
  • onion peels and roots
  • lettuce butts
  • cauliflower greens
  • broccoli stems
  • bell pepper ribs and tops
  • cucumber peels and ends
  • mushroom stems
  • even leftover cooked vegetables!

Seriously, anything you can think of that you’ve used the “good” part of should go into the bag. It might take a few days or longer to fill up your bag, but just keep it in the fridge. It will eventually fill up, and then you’ll be ready to make your broth!

When your bag is totally full (it should weigh about 2 pounds, give or take, depending on what kinds of veggies you’ve filled it with), empty its contents into the biggest soup pot you’ve got. Fill the pot with water. Tap water is fine because you’re going to be boiling it. Use more water than you think you’ll need. I usually aim for 16-20 cups (that’s at least a gallon). Place it on your stovetop and bring to a gentle simmer over medium-high heat. Set the pot’s lid askew on top, and then just let it simmer and reduce. You want to let it go for at least 2-3 hours. Check it starting at about 2 hours; you’ll know it’s ready when you can see some good color in it (remember, it started out as just water). At that point, it should have reduced down quite a bit. I usually end up with 1-2 quarts of broth after having started with 4-5 quarts of water. Place a strainer over a bowl and empty your broth and veggie scraps into it. Lift the strainer out and discard the scraps (guilt free now that they’ve been used to their full potential!). The broth will be left in the bowl.

At this point, I like to refrigerate it overnight (my broth making usually happens after dinner) before transferring it to freezer bags for long-term storage. When the broth has cooled, I measure out 4-cup servings and gently pour it into a zip-loc baggie. This way my homemade broth is divided up into the same portions as a store-bought box of broth. If I have a reasonable amount left that isn’t a full quart, I write that amount on the baggie along with the date and contents. This way I know it’s not a full batch when I thaw it for use later. If you have mason jars, definitely use those! You’ll be much more environmentally friendly than I am. (I’ll get to the point where I use jars instead of bags soon, but I just don’t have the storage space in my current home for them.)

That’s all there is to it! I told you it was easy!

And now here’s that bonus recipe I promised you.

Vegetable Risotto (serves 6-8)

In a large soup pot, melt 2 tablespoons butter and add your choice of veggies. I like to use onions, carrots, and zucchini (make sure to save your scraps for more broth!). Cook the veggies until they just begin to soften, 2-3 minutes. Add 2 cups arborio rice and stir to coat.

Meanwhile, in a separate pot, add 7 cups of your homemade broth and bring to a low simmer. Add the broth to the rice mixture, 1-2 ladlefuls at a time, stirring often and allowing the broth to fully absorb into the rice before adding more.

When you have used all of the broth, turn off both burners. Stir in about 1 cup (more or less to taste) Parmesan cheese. It’s really good with the “canned” variety of Parmesan, but even better if you have the time and budget to get a block of fresh cheese and shred it instead.

What’s your favorite way to use homemade broth?

Blessings,

How to Recognize Bad Reasoning (review)

Disclosure: I received this complimentary product through the Homeschool Review Crew.

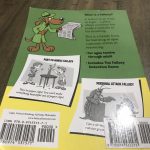
Critical thinking is a really important skill to have, and part of that is being able to recognize bad reasoning, or “straw man” arguments. The Fallacy Detective by Nathaniel Bluedorn and Hans Bluedorn aims to help students do just that. Over the past few weeks, my teenagers have been having good conversations together using the lessons in this book as a jumping off point.

I remember being in high school, and my World History teacher was huge on making sure we understood fallacies. What is a fallacy? “A fallacy is an error in logic, specifically a place where someone has made a mistake in his thinking” (from the back of the book). The main one I remember from my former teacher is the ad hominem or “personal attack” fallacy.

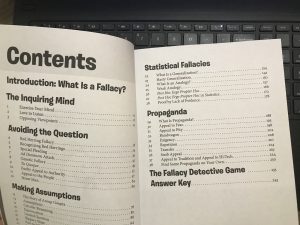
The book is divided up into five different parts, and each part has between three and ten lessons, for a total of 38 lessons. The first three lessons, in the “The Inquiring Mind” section, are designed to help your students understand why critical thinking is so important. (Hint: It’s so they can spot others’ faulty thinking more easily and be equipped to make their own informed decisions later on.) The rest of the sections each tackle a “big picture” issue, with the lessons showcasing the different fallacies that fall under that specific heading. Take my ad hominem from before, for example: that falls under the “avoiding the question” section because the whole point of that fallacy is attacking your opponent instead of focusing on the issues at hand. It’s easy to point fingers, but a whole lot harder to come up with a sound argument.

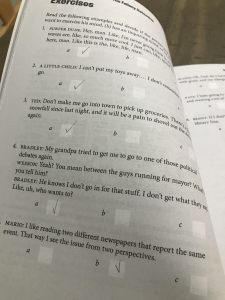
Each lesson has just a few pages of text (no more than 3-4), followed by some questions designed to help your student further understand the topic being taught. It’s sold as a workbook, so students are encouraged to write directly in the book. In the beginning, the questions are simple, multiple choice – just check the correct box. As you work through the book, they get a bit trickier, and kids need to pull specific examples of the fallacy being discussed from the sample. It definitely requires some fairly intense critical thinking skills! But through all that, there are also fun comics – both familiar (Peanuts, Dilbert, Calvin and Hobbes) and unfamiliar – to help illustrate (pardon the pun) the points being made. The comics not only serve to clarify the points in the lesson, but also break up the text a little bit, which is good for kids who get overwhelmed with too much reading.

So what did my kids think of it?

Ballet Boy: I really liked this book. I enjoy studying logic in general, and this book was no exception. It was nice to have something specific to discuss with my brother, too. I liked having something to do with him in the evenings while my parents were getting work done and the little kids were in bed. I would definitely recommend this book to anyone – teen or adult – who is interested in learning more about different types of fallacies and how to combat them.

Scorpion: This book was pretty easy to read, but I found the fallacies a little tricky to identify. The comics were fun to read, and even though the lessons were kind of hard (I haven’t had the same amount of logic training as my brother) I liked trying to figure them out.

Members of the Homeschool Review Crew are discussing both The Fallacy Detective and Archer and Zowie (also by Hans Bluedorn), so make sure to head over there to learn more.

Blessings,

Homeschool Encouragement, Incentives, and Rewards

If you’re a parent, you know that children respond well to rewards. Just think about it. What’s one of the biggest tips to potty-training your toddler? Give them praise and rewards when they “do their business” in the toilet. Never punish them for getting it wrong. Why would older children, school-age children, be any different? They’re not.

Homeschool Encouragement, incentives, and rewards

We likely spend all day encouraging our children, even if we don’t realize we’re doing it. “Good job, buddy.” “Nice work!” “I’m so proud of you.” Those are just a few of the things that parents tell their children on a regular basis. Sometimes you need a bit more though, and that’s where incentives and rewards can come in.

Incentives and rewards are similar in concept, but not exactly the same. An incentive can become a reward, but it starts out as its own thing; it’s the promise and the reward is the follow through. In the world of homeschooling, we might use incentives to urge our children on in doing a particularly difficult assignment, or more broadly, to learn a difficult concept (like times tables or learning to read). When they succeed, they get the reward.

The incentive and reward “required” will vary from child to child. I’ve talked before about how when our children read their first chapter book (whether a novel or a nonfiction book like a biography), we get them a trophy of some sort. Our oldest child was all about Ancient Egypt when he was learning to read, so his trophy is a replica of a mummy’s sarcophagus (head only). Our second child, who read his first chapter book at about the same time as his older brother, really liked learning about medieval times. His trophy is a bookend of a knight in shining armor. Our third child was a late reader, just like our first child. He loves literature – he just prefers to listen to it rather than reading it. So even though he didn’t really read, he had plenty of exposure to good books, and therefore had a favorite author. So his trophy was an autographed book from that author. The incentive was always “when you read a chapter book, you’ll get a trophy.” The reward was the trophy itself.

Incentives and rewards aren’t just for kids, though. As adults, we also relish in the encouragement of our spouses and friends. Just think about how good it feels when you’ve spent a long time cleaning your home, and your husband returns from work or a day out and notices. He tells you, “The house looks good today. Thank you.” That’s a fantastic feeling! Without even necessarily doing it on purpose, he has given you encouragement and reward all in one little statement.

What about in homeschooling? I know that some of the best rewards I get as a homeschooling mom is when my children are really learning well. And enjoying their time with me. I love to see their eyes light up when they learn a new concept, or when something finally clicks. Reading is the biggest one for me. When my children finally understand that all those funny little squiggles they’ve seen everywhere (letters) work together to make words, and they are able to decipher those squiggles and understand the words for the first time… those are my favorite homeschool moments, by far.

So today, let me finish up by offering you just a tiny bit of encouragement.

You are a good mom, even on the days you don’t feel like one. Even when the days feel impossible to navigate, you can do it. Your children are grateful to be home with you rather than in a public school, even if they tell you they aren’t.

You are enough.

Blessings,


This post is part of the 2021 Homeschool Review Crew Not-Back-To-Homeschool blog hop. Click any of the links below to read more posts on this topic.


Homeschooling High School: You Can Do This! (review)

Disclosure: I received this complimentary product through the Homeschool Review Crew.

A lot of people get really concerned when their kids grow up and it’s time to homeschool high school. Elementary school is easy: read a lot of books, make sure they can do basic math and read, and you’re all set. Middle school isn’t much harder. Keep encouraging them to read; some of their reading time will shift from “fun” books to text books. More intense book reports. But middle school doesn’t seem to scare too many homeschool parents. But high school… that’s a whole other beast, and many parents get really concerned when their kids become teenagers and high school looms. But The HomeScholar LLC is here to help you through this critical planning time with High School Solution.

A lot of the things I have the privilege of reviewing are for my kids (students). But this time, while the product is directly related to homeschooling, it was a course for me. I’ve already gotten Ballet Boy most of the way through high school, and now it’s Scorpion’s turn. I was interested in seeing all of the different tips and tricks this course would give me as we start a fresh journey with my second son. (He will be attempting a more “traditional” homeschool high school experience than his older brother had, complete with a diploma at the end instead of a GED test.) There is a lot involved in this course, and I doubt I’ll even scratch the surface, but let’s go over what I learned from taking Lee Binz’s High School Solution.

The course is available as a streaming video, but you can also download all of the slides and read them instead if you want. Of course, if you do that, you miss out on Mrs. Binz’s lovely presentation. She has an intense passion for older teens, and it shows in this course (not to mention everything else she provides on The HomeScholar, which I’ll touch on at the end of this article). I watched the course while working on non-distracting crafty things to keep my hands busy. The course is quite long; I didn’t personally time it (I watched it over the course of several days), but the initial email said it’s about 4 hours long. The PDF with the slides is 123 pages, so that tells you that it’s a very full courseload. You can also download the audio file and save it to some sort of mp3 device (or your phone, I imagine) and listen on the go.

The main theme of the High School Solution seems to be “don’t be afraid; you can do this.” That concept runs through nearly every slide of the presentation. Mrs. Binz offers many reasons why parents are afraid of the high school years, and solutions for every argument. The main thing she drives home, though, is that you will be successful because you love your child. Think about it like this: you taught your child to read and add because it mattered to you that they learned those things. You taught them because you love them, and you wanted them to be successful in life. The same principle applies to homeschooling high school. You teach them advanced math, economics, music, government, home ec, etc… because those are the things you feel are important for them to know to become functioning members of society. And you want your high schooler to become a functioning member of society because you love him (or her). Keep that love for your child in the forefront of everything you do while you make your high school preparations, and you’ll be fine!

The High School Solution is built around an assumption that your student will go on to college. But what if that’s not in the cards for one reason or another? Well, you should homeschool high school with that assumption anyway, because Mrs. Binz argues that college prep is life prep. What harm comes if your child is ready for college and decides to go straight into the workforce or to a trade school instead? Absolutely none. This was a different way of thinking for me, and I can appreciate the ideas presented with this ideology.

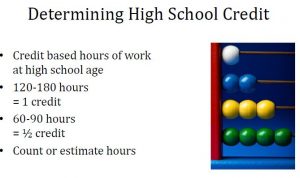
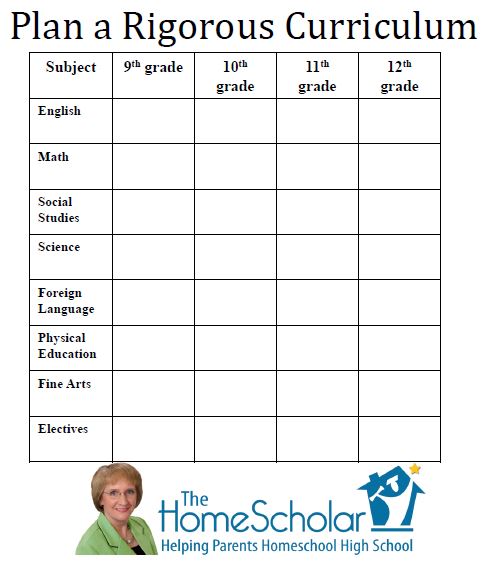
Other things covered in the course are getting your child ready for the “high school tests” (SAT, ACT, CLEP, etc); a breakdown of what you should make priorities in each year of high school (starting with a vague middle school plan); catering your high school plan to your student’s interests (delight directed learning); determining a grading system for your student; awarding credits; writing a transcript; and more.

There’s also a printable workbook that goes along with the course. It lists the main point of each section and gives you space to take notes.

In addition to the prerecorded presentation, there are regular live webinars available with the subscription. (As a reviewer, I received 6 months of access, but if you purchase the program, it’s lifetime access. Even though it’s called a “subscription,” it’s not – one purchase price gets you that lifetime access.) And as I touched on before, The HomeScholar offers more than just The High School Solution.

Do you feel comfortable with teaching high school, and you’re just unsure how to create a transcript that colleges will accept? Get the Total Transcript Solution. Is your student definitely college bound, but you have a strong plan for high school? Try the Comprehensive Record Solution. Need a strong push getting through those final 2-3 years of high school, with an emphasis on college applications and scholarships? Then the College Launch Solution is probably the right answer for you. Members of the Homeschool Review Crew have had access to all of those different options, so make sure to click through to find out more about the Solution you need the most.

Blessings,

Dollar Tree Tiered Tray

I love seeing the tiered trays that Dollar Tree crafters on YouTube make. I really want to have one in my kitchen, but as I mentioned last month, it’s really just too small in there for much of anything. So I did the next best thing: I made one and gave it away! Here’s what I did to make “my” tiered tray.

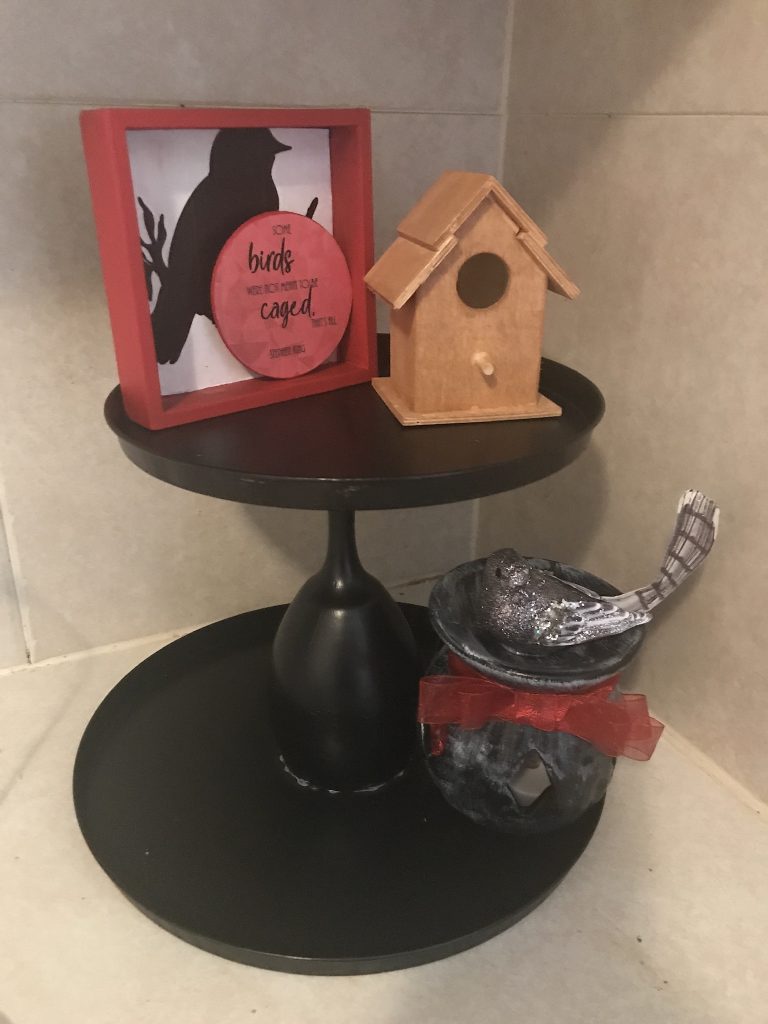
I started with a set of the burner covers from the Dollar Tree. I went this route instead of getting two cake pans, or a cake pan and pie pan, because I wanted to keep it cheap for my first time out. I painted both pieces black. It was technically chalkboard paint because that was the only black paint they had at Dollar Tree (and I didn’t have any at home). For the piece that connects the two tiers, the YouTubers usually use one of the standard Dollar Tree candlesticks. My store didn’t have any of those when I was there shopping, so I wandered the store for a while to try to find something that would work. I eventually chose a stemmed wine glass. When I got home, I painted that black as well. Then, following the tips from the people on YouTube, I used a combination of super glue and hot glue to connect everything together. The super glue gives you a permanent hold, while the hot glue gives you a semi-instant hold so you don’t have to worry about your piece falling apart while you wait the hours for the super glue to cure.

With the tray done, now I had to fill it up. I decided that I would give this to my mom for Mother’s Day, so I chose items that would fit her personality. I went with a “birds” theme because she loves birds. Some of the items I used almost as-is, and some I DIY’ed a lot.

First up was this candle holder. It was gray when I started, but I wanted it to be black so I painted it with my chalkboard paint. I distressed it a bit with some white dry-brushing, and then glued a Dollar Tree bird decoration on top of it and tied a red ribbon around the top. I filled the candle holder with an LED candle from DT because my mom doesn’t use real candles in her home for animal safety reasons. That went onto the tiered tray.

Next, I chose one of the birdhouses from Dollar Tree. I wanted a stained wood look for that, so I took some brown acrylic paint and watered it down. I brushed this all over the bird house, and it gave me exactly the look I wanted. I kept the bird house pretty plain.

I found a packet of wooden dragonflies at the Dollar Tree too, and I painted one of them with the chalkboard paint. I primed the new mini-chalkboard and wrote “Love U” on it, mostly to show that it was a working chalkboard.

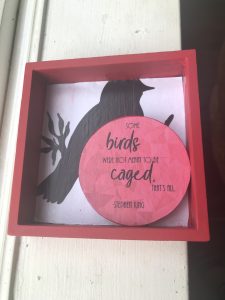
The last piece I added to the tiered tray was the best one I made. I found a cheesy shelf frame at the Dollar Tree. It was sort of like a shadow box frame, but with no glass in the front. It had a wood circle, which I popped off and painted. (It turns out I didn’t need to have painted it because I ended up gluing a piece of paper to the circle later. But I didn’t know that at the time.) I also painted the bright blue frame with red. Next, I went to the computer and found two things. The first was a picture of a bird. The second was a quote about birds. I found a perfect one for my mom – it was about birds, and spoken (or written, I’m not sure) by Stephen King, her favorite author. In Photoshop, I drew a circle the same size as the cutout I’d removed from the frame. I then added a red textured background and then typed the quote over the top of that. I printed out both pieces – the bird and the quote. Then I used Mod Podge to glue the bird into the back of the frame and the quote onto the painted circle. With a bit of hot glue, I attached the circle on top of the bird – in a different place than it had been originally though. I absolutely loved how this piece turned out.

And that was it. Usually a tiered tray is jammed full of cute themed items, but I was having trouble getting inspired, and I left it at just the four items. I will likely make things for my mom to add to it here and there though.

Have you ever made a tiered tray? Or bought one and decorated it?

Blessings,

Speed Drills for Math Practice (review)

Disclosure: I received this complimentary product through the Homeschool Review Crew.

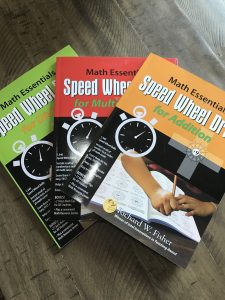
One of the biggest setbacks to a “regular” school schedule is the possibility of losing ground over summer break. This is especially true with math and reading, though reading is easy enough to keep practicing. But math can be a lot harder to stay motivated to work on when it’s “off time.” This is especially true if your student has only recently mastered a new concept – like multiplication or division facts. Math Essentials has an answer for that, though: Math Essentials Speed Wheel Drills! We received all three of the titles in this series: Addition, Multiplication, and Division.

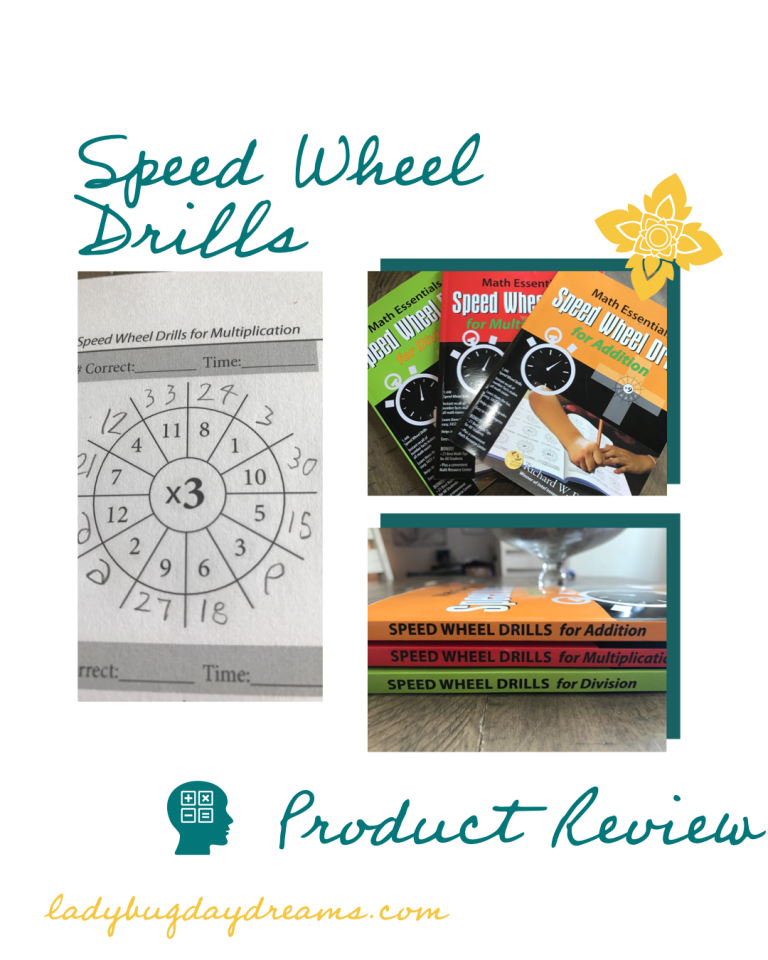
A collage showing the three book covers, the three book spines, and a completed wheel drill

What is a Speed Wheel Drill?

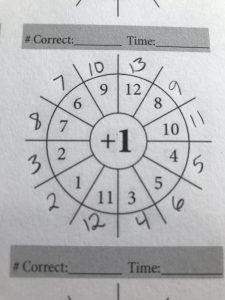
A completed +1 Wheel DrillWhile you may not have heard of a Speed Wheel Drill, once I describe it, you’ll understand where the name came from because it really is exactly what it sounds like. On each page of the consumable workbooks, there are a series of circles. Each circle (wheel) has two smaller circles within it, and a series of spokes coming out. In the very center is a large number (3, for example). In the center section are a series of other numbers, a bit smaller than the center number (7, 5, 2, etc). Your student simply uses the center number as the “base” for each math problem, and then does the specified operation (depending on which book you have), writing the answer in the outer circle. So, with 3 as the center number and 7 as one of the middle numbers, in the multiplication book the child would write 21. Next to the 5, he would write 15. The 2 would get a 6. And so on.

There are a couple of different ways you can use the “speed” portion of the Speed Wheel Drills.

  • Don’t use a timer at all, and just do them as Wheel Drills
  • Time your child as he completed a wheel. Then see if he can best himself on the next one, and the next one.
  • Set a stopwatch and see how far your child gets in the set amount of time. Next time, see if he can complete more of the wheel in the same amount of time.

How We Used the Workbooks

The three workbooks stacked on top of one another, fanned out.My older boys are well versed in their math facts, so I didn’t bother giving these to them. Because we received all three books, which are ideal for different ages, I set up Grasshopper (9, heading into 4th grade) with the Multiplication book and Dragonfly (5, K) with the Addition book. We set the Division book aside for later.

Grasshopper has gone through all of the multiplication lessons in his math curriculum, and has done quite well with them. But that curriculum only has a single lesson for each set of the times tables, and that’s just not enough practice to really master such an important concept. Adding in Speed Wheel Drills has been perfect. We started without the “speed” aspect, just to see how he’d do, and he did pretty well. As I could tell that he was getting quicker with each successive wheel, I introduced a timer. I opted to use the second method that I described before with him. It was great to watch him continue to get faster and faster throughout the summer. And Grasshopper is a kid who loves to best himself, so this type of workbook is perfect for him.

Dragonfly, being just 5, is reasonably new to addition. He’s done a little bit here and there, but his math up to this point has been primarily number recognition, patterns, colors, shapes… you know, Kindergarten stuff. He’s very good at that now, though, which means it’s time to begin some of the more difficult things. We used the Speed Wheel Drills Addition book as a gentle introduction to adding for him. He was a bit confused about how the wheels worked until I explained it to him, and then he thought it was such a great idea. He warmed to the concept very quickly, although he got frustrated with trying to write the numbers himself. We found that they worked better almost as oral drills, and I wrote his answers down for him. We haven’t timed him at all yet.

Opinion and Final Thoughts

Math Essentials Speed Wheel Drills are fantastic resources for students. You can use them during the summertime like we did, or as a supplement to any math curriculum. My kids thrived with them, and I can’t recommend them enough.

Make sure to click through to see what other members of the Homeschool Review Crew think of the books!

Blessings,

Beginning of the School Year Memories

a chalk board with fall leaves around the edge. the title of the post is written in a chalkboard font in the middle.

The beginning of the school year is a special time for students, regardless of what “kind” of school they go to. If you go on Instagram anytime this month, you’ll begin seeing loads and loads of back to school posts. In my feed, a couple of these traditions come to mind; these moms post the same thing every year and it really sticks in my mind. The first is a mom that has a huge frame that she has each of her children hold around their face each fall and spring. It must a dry erase or something, because she writes each child’s grade on it, and it’s different for each of her kids (she also has 5, like me). The second one is a mom who is also a public school teacher. She takes a photograph of her son in the fall and again in the spring standing in front of the school’s sign where he attends. It’s pretty neat to get the same picture nine months apart and see how much taller her son has gotten!

We’ve never really done anything like that, but that doesn’t mean I don’t think it’s a good idea. There are some things from my own elementary school days that I remember having done (mostly from 3rd grade – I must have had a great teacher that year!). Here’s an idea to do with your children/students. At the beginning of the school year, get a manila envelope and have your student write on it: (Name)’s Time Capsule. Do not open until 2046. (Of course, you can choose a different year; I chose that one because it’s 25 years from now.) All throughout the school year, save samples of their work and tuck it into the envelope. Not everything, but a reasonable sample. This will show how much they learn and develop their skills over the course of the school year.

Maybe take some white paper and tempera or acrylic paint and have students create a hand and/or footprint page. This would be a good basic anatomy lesson – I remember being in third grade and not understanding why I had a huge “indent” in my footprint (and trying everything I could think of to fill it in to no avail). Now I know that’s the arch. It would have been nice to have had some sort of explanation for that as a child. Do this again at the end of the school year to show physical growth. When your student opens that envelope as an adult, they will cherish at least some of the papers you’ve tucked inside. I know when my mom gave me my third grade time capsule a few years back, I was excited to see everything in there – the only thing I remembered having done was the footprint. Everything else in there was a surprise.

Last month, I wrote about learning styles. Have you ever considered your students’ learning styles? There’s a personality quiz online that you can have your child take. Garnering information about their specific learning style would be a fantastic way to get the school year off to an amazing start, because you could tailor their work to their specific learning style.

If you’ve chosen your homeschool curriculum already, then you have an idea of what you’ll be teaching this year. How about doubling down on that “before and after” concept this way: Choose something related to one of your year long studies and have your children create something at the beginning of the school year (a world map if you’re doing a heavy geography study, for example) and then recreate that same assignment at the end of the year. Make sure to save the one from now so you can show them how much they learned!

What are some of your favorite “beginning of the school year” memory makers?

Blessings,


This post is part of the Homeschool Review Crew Not-Back-To-School Blog Hop. Click on any of the links below to read more posts on this topic!


Dyslexia Gold (review)

Disclosure: I received this complimentary product through the Homeschool Review Crew.

Grasshopper was slow to read. He fought me tooth and nail for a long time. But finally, I told him it was “time.” He was able to read well enough that he had to read a novel out loud to me. It was slow going at first. For a really long time. But as he read every day, he got better and better. Now, he reads everything in sight. I don’t have to force him anymore. And he even (claims to) like reading!

To further his quick studying in reading comprehension, we signed up to review Dyslexia Gold. This is an online program that’s designed for students who struggle with reading, whether it’s due to dyslexia or for another reason. Grasshopper’s reading took off sometime between when we signed up for the review and when we actually started using the program, so the timing was a bit unfortunate for us. That said, he did learn quite a few things from the program, and I’ll tell you all about them!

The program has four main parts, but after a placement test Grasshopper was only assigned three of them. (The one he didn’t get was Reading Unlocked, which I reviewed last year with Dragonfly. We had amazing success with that program! Read that review for a more in-depth look at that program.) Let’s discuss each of the parts of Dyslexia Gold that we used in more detail.

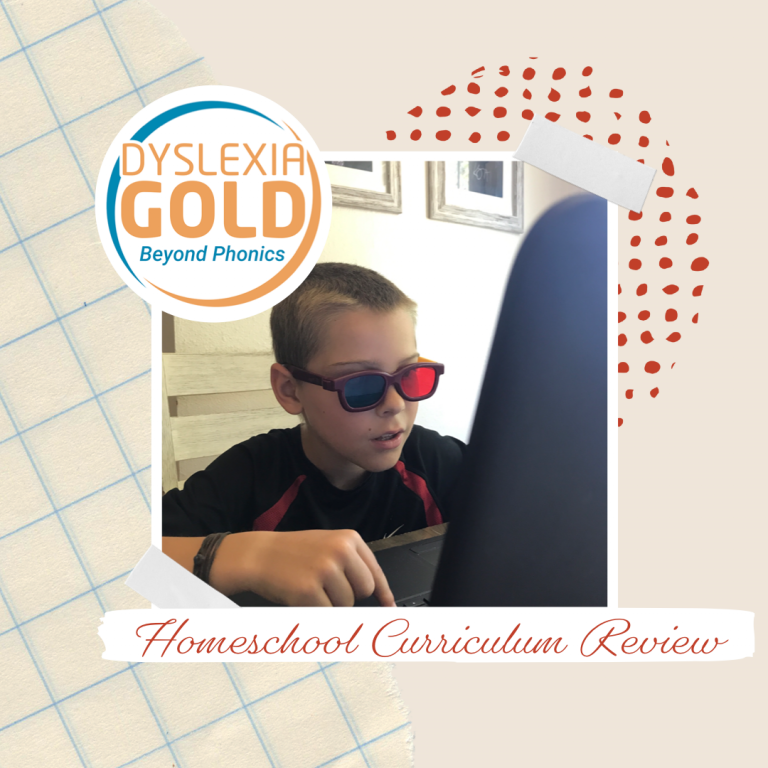
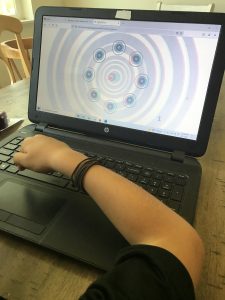
Engaging Eyes is designed to help your child learn to focus. People with dyslexia often have trouble with their eyes, and that inability to focus easily leads to the words “swimming” in front of them. The Engaging Eyes vision training in Dyslexia Gold is done with a pair of 3D glasses. Students wear the glasses and then shoot the targets using the arrows and spacebar on the keyboard. They have to not only aim the shooter, but also make sure it’s on the same plane in order to hit their target. This game was the most fun for Grasshopper. In fact, he had so much fun with it that everyone else in the family gave it a try at one point or another!

Fluency Builder teaches a child who already knows how to read, how to read well. It has a total of 50 lessons, and each one focuses on a specific phonemic sound. It also teaches children to differentiate sounds that might be similar to an early reader (|f| and |v| for example). Each lesson is broken up into a variety of activities that really drive home the phonics aspect of reading. There is also a passage for children to read and answer comprehension questions.

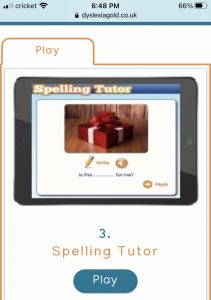
Spelling Tutor is where I saw the biggest improvement in my son. This part of the program has the child read a passage. Then they are to write the passage down, one sentence at a time. When they’re done, they click “mark” and are able to self-grade their work. If they get everything right, great! If they get anything wrong, that word goes on their “practice” list. The program remembers which words the student needs to practice more, and it gives those words to them many times over the course of the program. At the point the child gets a problem word correct, it moves down on the list and is shown less frequently.

Dyslexia Gold also includes a Times Tables tutor, but we’re swimming in math practice right now, so we didn’t use that.

As mentioned, we didn’t end up “needing” the program as much as I thought we would when I agreed to review it. But Grasshopper had amazing success with the spelling portion, and I’m glad we had access to that to help him understand how to get better at spelling.

Make sure to read more reviews on the Homeschool Review Crew website!

Blessings,