Around the World: Italian Chicken Cacciatore (Recipe)
chicken cacciatore collageBuongiorno! Benvenuti in Italia! (Good morning! Welcome to Italy!)

This is the final recipe I have for you this week. I hope you’ve enjoyed the series and that you’ll try out some of these delicious recipes! They’re way cheaper than a plane ticket to all these exotic locations :).

One day a few weeks ago, Will wanted Italian food, but “not pasta.” So I went in search of something that fit the bill, and Chicken Cacciatore was what I came up with. All of the recipes seemed complex and/or took hours and hours to cook, so I adapted this one from Giada De Laurentiis to fit our needs. Enjoy your trip!

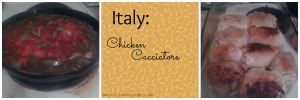
(Oh, also, I forgot to take a picture of the final dish, that’s why I’ve made a collage to showcase the sauce and chicken separately today.)

Ingredients

Chicken thighs – enough for your family

Salt and Pepper

Flour, for dredging

Oil, for frying

1 bell pepper, any color, chopped

1 onion, chopped

3 cloves garlic, chopped

1 (28 oz) or 2 (14 oz) can(s) diced tomatoes

1 1/2 cups chicken broth

2-3 tablespoons balsamic vinegar

Italian seasonings of your choice (oregano, basil, thyme, etc)

Directions:

Preheat your oven to 400 F.

Season the chicken with salt and pepper, then dredge in flour. While you’re doing this, heat the oil in a large skillet. Sear the chicken, skin side down first, until brown and crispy. Move to a baking dish. Do this in two stages if you have to.

In the same skillet, saute the onion, garlic, and bell pepper until they start to soften. Add in the tomatoes, broth, vinegar, and spices. Simmer for just a few minutes to combine the flavors. Pour the sauce over the chicken.

Place the baking dish in the oven and cook for 45-55 minutes to finish cooking the chicken through. Serve over egg noodles and/or with a nice loaf of crusty bread for sopping up the sauce.

Yum!

Thank you for joining me on my trip around the world this week! It’s been fabulous. And please, if you try any (or all) of these recipes, let me know. I’d love to hear how they turned out for you.

Blessings,

Wendy

Make sure to visit my friends and their five day series, too! And for even more five-day fun, click the banner at the end of the post.

Ellen @ Grace Tells Another Story ~ Making Homeschooling Fun!
Marcy @ Ben and Me ~ Helping Children in Uganda
Melanie @ FinchNWren ~ Finchnwren’s Fabulous Family Movies
Sarah  @ Delivering Grace ~  learning about England
Victoria @ Homemaking with Heart ~  Connecting with the Creator through Nature Study
Joanie @ Simple Living Mama ~ 5 Days of Charlotte Mason Preschool
Gwen @ Tolivers to Texas ~ A Happy, Peaceful Home
Chareen @ Every Bed of Roses ~ Homeschooling 4 FREE resources

April Blog Hop

Around the World: U.S. Chicken Fried Steak (Recipe)

Happy Thursday, friends! We’re over halfway through the week :). I hope you’ve enjoyed these recipes as much as I’ve enjoyed sharing them with you.

Today, we’re in my home country, the United States, and making one of my all-time favorite meals (who am I kidding? All of the meals this week are high on my list!): Chicken Fried Steak!

This one’s quite a bit more complex than the others have been up to now, but totally worth the effort.

Here we go!

cfs final
For the steak, you’ll need:

Steak (any kind will do, even a cheap cut)

2 eggs, beaten

1-2 packets of Shake-n-Bake for chicken

Oil for frying

Cut the steak into smallish pieces. You don’t want nuggets, but you want each piece to have plenty of breading, so you don’t want them as big as if you’d be grilling the steak.

Crack the eggs into a dish and beat. Pour the shake-n-bake into another dish.

While you’re dipping the steak, heat the oil over medium to medium-high heat.

Dip the steak first into the egg, then into the shake-n-bake. Fry in the hot oil until cooked to your preferences. It doesn’t take more than 5 minutes a side or so for medium-well.

Once you’ve cooked all the steak, pour off all but a couple of tablespoons of the oil. Add in enough flour to make a roux, then stir in milk and/or chicken broth to make a gravy. For 2 tablespoons of milk/flour, you’ll want about a cup and a half of liquid.

Serve with mashed potatoes and the gravy and some corn for a truly American meal!

Blessings,

Wendy

Don’t forget to hit these other great blogs for fabulous five-day series!

Ellen @ Grace Tells Another Story ~ Making Homeschooling Fun!
Marcy @ Ben and Me ~ Helping Children in Uganda
Melanie @ FinchNWren ~ Finchnwren’s Fabulous Family Movies
Sarah  @ Delivering Grace ~  learning about England
Victoria @ Homemaking with Heart ~  Connecting with the Creator through Nature Study
Joanie @ Simple Living Mama ~ 5 Days of Charlotte Mason Preschool
Gwen @ Tolivers to Texas ~ A Happy, Peaceful Home
Chareen @ Every Bed of Roses ~ Homeschooling 4 FREE resources

April Blog Hop

Around the World: Moroccan Rice Pilaf (Recipe)

Good morning, everyone! I have a super simple recipe for you today – even easier than the Bulgogi from Monday, if that’s even possible.

I don’t know for absolutely certain that this is an authentic Moroccan dish, but I recall years and years ago reading a recipe somewhere that was something very similar to this that claimed to be Moroccan, so it’s close enough! And good golly, this is amazingly delicious! Even Munchkin, who is my pickiest eater BY FAR, had seconds of this dish, so you know it’s good!

Morroccan rice pilafIngredients:

1 box Rice-a-Roni Rice Pilaf flavor (or your favorite from-scratch rice pilaf) – for our family, I need one of the double size boxes or two regular size ones

1 pound ground beef

2 cans garbanzo beans (also known as chickpeas)

a sprinkle of cumin

Directions:

Brown the ground beef and drain the fat off (use a colander). Leave the beef in the colander while you cook the rice according to the package directions in the same skillet. When it’s time to add the seasoning packet and water, add the beef back in, as well as the beans and cumin. Cover and cook on low for 15-20 minutes. The exact amount of time you need will depend on how much rice you’ve cooked.

I love this meal because it practically cooks itself once the beef and rice are browned. 7-10 minutes of hands on time, 20 minutes of hands off. Perfect for busy moms!

Blessings,

Wendy

P.S. As always, make sure to visit these other great blog series this week!

Ellen @ Grace Tells Another Story ~ Making Homeschooling Fun!
Marcy @ Ben and Me ~ Helping Children in Uganda
Melanie @ FinchNWren ~ Finchnwren’s Fabulous Family Movies
Sarah  @ Delivering Grace ~  learning about England
Victoria @ Homemaking with Heart ~  Connecting with the Creator through Nature Study
Joanie @ Simple Living Mama ~ 5 Days of Charlotte Mason Preschool
Gwen @ Tolivers to Texas ~ A Happy, Peaceful Home
Chareen @ Every Bed of Roses ~ Homeschooling 4 FREE resources

April Blog Hop

Around the World: Jamaican Jerk Chicken (Recipe)

Hello again! I hope you enjoyed the recipe for Bulgogi yesterday. Before I dive into today’s recipe, allow me to explain what’s going on this week here on the blog. I should’ve done that yesterday, but I forgot.

This is a five-day series, called a “blog hop,” and the full title of my series is Around the World in Five Evenings: A Week of International Meals. That’s just too long to include in the title of every post. I’ll be exploring cuisines from Asia, Africa, North America, and the Caribbean. I only wish there were more than five days! Maybe I’ll have to make this a recurring feature; I do love international meals. Because cooking is its own kind of simplicity, I won’t be doing an official Simplicity post this week.

Now that that’s out of the way, I bring you Jamaican Jerk Chicken. Enjoy.

I have another one of my very favorite dishes for you today: Jamaican Jerk chicken with Caribbean Rice and Peas.

This recipe was shared with me by a dear friend, and a friend of hers actually invented this particular version. He was kind enough to grant me permission to share it here with you today.

jamaicaJerk Chicken:

2 large boneless, skinless chicken breasts (or however many you need to feed your family – just adjust the amount of sauce you make accordingly)

2 teaspoons, up to 2 tablespoons, Jamaican Jerk seasoning, depending on how hot you like it. 2 teaspoons is a nice flavor without scorching your mouth, and it just gets hotter from there.

1 tablespoon each soy sauce, honey, and vegetable oil

3 tablespoons tomato ketchup

Mix everything except the chicken in a small bowl. Start with a small amount of Jerk seasoning and add more until you get a flavor you like. If you accidentally add too much, you can cut the spice with extra honey and/or ketchup.

Cut slits in the chicken breasts. Spoon half of the sauce over the chicken, making sure to get it into the slits you cut.

Bake at 400 degrees Fahrenheit for 10 minutes. Spoon the rest of the sauce over the chicken and bake for an additional 10-15 minutes, or until the chicken is cooked through.

Don’t try to cut corners by putting all the sauce on in the beginning. I did that once, and the flavor was definitely not as good as if you double sauce on your meat all at once.

Caribbean Rice and Peas:

1 cup rice (just regular old, long grain white rice will do, but brown is yummy in this as well – adjust the cooking time if you use brown rice)

1 (14-15 oz) can kidney beans, drained and rinsed

1 small onion, chopped

1 clove garlic, chopped

1/4 teaspoon chili powder

1 teaspoon dried thyme (or 2 teaspoons fresh)

1 cup each chicken broth and coconut milk

In a bit of oil, saute the onion and garlic until soft and translucent. Add in the rice, thyme, and chili powder and stir to combine and coat in oil. Add coconut milk and chicken broth; bring to a boil. Reduce heat to low and cover. Let simmer, covered, for 15 minutes (do NOT remove the lid during this time). After 15 minutes, remove the lid, stir in the kidney beans, and re-cover. Cook for five more minutes until the beans are heated through, the liquid is absorbed, and the rice is thoroughly cooked.

There are lots of ways you can vary this dish. First off, you can use a fresh pepper instead of chili powder. If you do that, you want to chop it finely and cook it with the onion and garlic. Use whatever spiciness of a pepper you like.

Second, you can use whatever beans you have on hand. Any of them will work beautifully in this dish.

Third, you can add in half a cup of UNsweetened grated coconut or creamed coconut. If you do this, use two full cups of chicken broth and no coconut milk.

Enjoy!

Wendy

P.S. Don’t forget to check out all these other great blogs this week!

Ellen @ Grace Tells Another Story ~ Making Homeschooling Fun!
Marcy @ Ben and Me ~ Helping Children in Uganda
Melanie @ FinchNWren ~ Finchnwren’s Fabulous Family Movies
Sarah  @ Delivering Grace ~  learning about England
Victoria @ Homemaking with Heart ~  Connecting with the Creator through Nature Study
Joanie @ Simple Living Mama ~ 5 Days of Charlotte Mason Preschool
Gwen @ Tolivers to Texas ~ A Happy, Peaceful Home
Chareen @ Every Bed of Roses ~ Homeschooling 4 FREE resources


April Blog Hop

Around the World: Korean Bulgogi Beef (Recipe)

Good morning everyone! I have a super yummy recipe to share with you today. It comes from Korea and is called Bulgogi Beef.

First I want to share a little bit about the origin of the meal with you. Literally translated, it means “fire meat,” and this dish was named #23 on CNN’s “World’s Most Delicious Dishes” list in 2011. It was first described to Will and me as “Korean BBQ” by a local restaurant owner in our hometown who happens to be … wait for it … Korean! We’ve been eating this meal in his restaurant for years, and I only recently learned how to make it at home. I’m excited to share my version of this delicious meal with you today.

bulgogi finalLoosely based on the recipe found on One Good Thing by Jillee.

What you’ll need: 

Beef. Whatever you normally use for stir fry is perfect.

Vegetables. Again, your favorite stir fry veggies.

1/4 cup soy sauce

1/4 cup brown sugar

Optional: Corn starch mixed with water

Cooked rice – enough for your family

What to do:

Cook your beef using your favorite stir fry method. Add your vegetables and cook until tender. Stir in the brown sugar and soy sauce until it all melts together and starts to coat your foods. If you find the sauce is too runny (mine almost always is), mix in some cornstarch that you’ve dissolved in water. Heat to boiling, stir until the sauce is thickened – PAY ATTENTION TO IT! – and promptly remove from the heat.

Serve over rice.

Alternately, serve in toasted hoagie rolls with a side of fries. That’s one of the lunch options at the Korean restaurant, and it’s equally delicious.

That’s it. It really couldn’t get any easier … Perfect for a Monday night, wouldn’t you say? 😉

Blessings,

Wendy

P.S. This series is part of The Schoolhouse Review Crew’s Spring Blog Hop. Lots of other bloggers are sharing a five-day series on topics near and dear to their hearts. Here are just a few that I hope you’ll take a few minutes to check out:

Ellen @ Grace Tells Another Story ~ Making Homeschooling Fun!
Marcy @ Ben and Me ~ Helping Children in Uganda
Melanie @ FinchNWren ~ Finchnwren’s Fabulous Family Movies
Sarah  @ Delivering Grace ~  learning about England
Victoria @ Homemaking with Heart ~  Connecting with the Creator through Nature Study
Joanie @ Simple Living Mama ~ 5 Days of Charlotte Mason Preschool
Gwen @ Tolivers to Texas ~ A Happy, Peaceful Home
Chareen @ Every Bed of Roses ~ Homeschooling 4 FREE resources

In addition to these eight, there are nearly a hundred others doing various series. If you’re interested in those, the following banner will take you to the master list 🙂

April Blog Hop

Simplicity: Meal Planning

simplicity


Wanna know a secret? I suck at meal planning. I’ve never been awesome at it, but I used to be better than I am now. About two years ago, we (Will and I) devised a system in which I would grocery shop each day for that day’s food – kind of like the European model. (What I know of the European model, anyway. I’ve never been to Europe, so my knowledge is limited to what I learned in high school French class.) We decided to take this “route” because at the time, we lived in a small town. Really small. As in no street lights and the only “grocery store” (and I use that term very loosely) carried almost nothing fresh (a few bananas and moldy peaches/strawberries/bell peppers was the extent of the produce department) and charged double what a regular store would for the packaged stuff. The other option in town was a mini-mart whose owners bought their stock from Wal-Mart and marked them up from the already-retail price. So we decided, that as a way for me to make sure to get out of the apartment each day, I should take the car to the bigger town seven miles away and get groceries from a real store.

Since we moved to a bigger town half an hour away in December 2012 (the one I grew up in, actually), we’ve kept up with the daily shopping, just because it was we’d grown accustomed to. But now, I’m starting to feel like it’s becoming cumbersome. I want to spend my time hanging out with my boys, teaching them, playing with them. Not grocery shopping.

Which is going to require a fundamental change in the way I think about our food.

But change is good, right? 🙂

So here’s my plan. I’m going to make a weekly meal plan (inspired by this one from Confessions of a Homeschooler) and buy everything we need for the whole week (possibly excluding highly perishable produce – some things really are better to buy more frequently… although I might just buy that stuff too, and chop it all up and freeze it until it’s needed… we’ll see). The meal plan will include Breakfast, Lunch, Snack, and Dinner. For every single day. (My kids will be happy about the “snack” part – we never have snacks on hand.) I will then turn that meal plan into a grocery list, and on Tuesdays, I will go to the grocery store, just me (and probably Small Fry most weeks). Why Tuesdays? I thought about this a lot, and that’s the day that’s going to work best. Will typically works out of the house on Wednesday, Thursday, Friday, and Saturday each week (it can vary week to week, but that’s the schedule I can count on). Sundays are a Sabbath, so no shopping then. Mondays … well, I could shop on Mondays, but this week, Wednesday worked best (he’s working from home all this week), and I didn’t want my shopping trips to be only five days apart this time.

So there you go.

How do you keep mealtime/grocery shopping simple? Help a girl out and share your tips!

Blessings,

Wendy