Picture of the Week: Green Eggs and Ham

KIMG0068[1]

Small Fry has been really into Dr. Seuss lately. We own a couple of the books, and recently got a big stack of them from the library, one of which is Green Eggs and Ham. We’ve read it several times, and he’s to the point where he can finish a few of the lines now. So the next step, naturally, was to make this dish for him for breakfast. So that’s just what we did one day earlier this week. (I don’t know of a way to make just the yolks green, like in the book, so every time one of our children gets to this stage, I just make green scrambled eggs.)

Blessings,

ladybug-signature-3 copy

The Zoo of the English Language (The Phonetic Zoo Review)

It’s no secret that I love the products put out by the Institute for Excellence in Writing (IEW). It’s also no secret that my oldest, Seahawk (who turns 12 tomorrow and is in 6th grade) needs a lot of help with his spelling. Despite the fact that he reads a lot, he just hasn’t been able to put seeing all the words into practical terms in relation to spelling. When I learned that the newest Crew offering from IEW was going to be a spelling program, therefore, of course I was thrilled. We’ve had only good luck using IEW’s products, so I had incredibly high hopes that The Phonetic Zoo Level A [Starter Set] would finally be the program to help Seahawk gain some success in his spelling. On the other hand, though, I was a little concerned that since we’ve tried so many different programs that this one might not make the grade.

Learning to Spell with The Phonetic Zoo

So what’s the verdict? Has it worked better than other programs for my struggling speller? Keep reading to find out!

The Phonetic Zoo has three levels: A, B, and C. Despite the fact that he was technically outside of the age range for level A, I chose this level for Seahawk anyway. I made the decision after having him take the spelling placement test on the IEW website and seeing that he definitely needed to start at the beginning – his spelling was that poor.

The program is broken down into three portions: the printed materials, the audio CDs, and the downloadable components. The printed materials cover all three levels, so  you only need to purchase those once for the entire time your child or children are using the program. The audio CDs vary from level to level, so those need to be purchased new each time your child ascends to a new level. The printed materials include teacher cards and student motivation cards (more explanation on each component later). The audio CDs are just that: a set of 5 CDs that include the audio portion of the program. These are also available as MP3 downloads, which are automatically included with the CD purchase. And finally, the downloadable components include the teacher manual and an audio version of Andrew Pudewa’s talk “Spelling and the Brain.” (If you’re a more visual person, this speech is also available in its entirety on IEW’s YouTube channel.)

The teacher cards are large (8×5 or so) flashcards. The side you show to the student has pictures of the animal(s) whose name demonstrates the rule being studied and a small selection from each list (levels A, B, and C), while the other has the rule and its jingle along with the complete list for each level. These cards have a single hole punched in them so you can attach them to a large ring for easy storage. The student cards are much smaller (about business card sized, but not exactly) and have the animal on one side and the rule/jingle on the other. When a student successfully completes a lesson (details on that in a minute), they keep the card and add it to their “zoo.”

The first thing I did when I found out we would be on this review was to hop over to YouTube and listen to the Spelling and the Brain speech, even before I had my download access. This was a fascinating talk explaining how the brain works and why that’s important for learning to spell. Then there was the matter of waiting on the mail so we could dive into the program. It arrived on the first or second day of school, so that was perfect timing. We started the program the day after it arrived (I’d already received the downloadables by then, so I’d spent some time with the teacher manual and felt ready to explain it to Seahawk). One thing to keep in mind is the things you’ll need that aren’t included in the purchase: a notebook or binder with blank paper and a CD or MP3 player with headphones. (I ripped our CDs to Windows Media Player on the computer, then moved the files from there to Seahawk’s MP3 player since we don’t have a CD player except in the car.) The curriculum authors emphasize the importance of headphones rather than a regular speaker because the sound gets right into the student’s ears – and brain – better that way. Plus there are fewer options for distraction.

So, the way the program works is pretty simple, and it’s something the student can do autonomously (mostly). The first day, the teacher goes over the new rule with the child. (The rules are very much the same as those that my generation learned in school – “I before E except after C,” “When two vowels go walking, the first one does the talking,” and so forth.) The difference between just learning the rules and The Phonetic Zoo’s way of teaching them is that IEW puts an emphasis on making sure students understand that there are exceptions to every rule. This is important for students to comprehend in order for them to really excel. Once the rule has been explained to the student, they’re on their own. They put their headphones on or earbuds in and play the track with the list of words for that lesson. The CD explains the rule to the student again, and then the list is started. There’s a pause between each word, but students are also encouraged to pause their CD if they need more time. This isn’t supposed to be a rush job. They write down the words on their blank paper, one at a time. Then they listen to the next track, which is the correction track for the lesson. In this track, each word is named and then spelled. This is a very important piece of the puzzle for two reasons. First, it allows the students to self-correct. Second, by hearing the letters in the proper order, students can begin to make sense of the words and rules, specifically the exceptions. While they listen to the correction track, students are encouraged to write down the proper spelling of each word, even if they spelled it correctly the first time. Children work the same lesson each day until they get 100% correct for two consecutive days. Why two? Because one could be a fluke, but two in a row demonstrates true understanding.

We used this program exactly as it’s designed to be used, and how I described it in this post. Seahawk did one lesson each school day (four times per week) until he got 100% for two consecutive days – even if that meant his “correct” days were split over the weekend. Sometimes this took only 3 or 4 days, other times it took upwards of 10-12 days.

So, after all of this… what do we think of the program? We like it a lot. It’s easy to follow, and Seahawk likes the autonomy of not needing to wait until I’m available to get the work done. He can just get on his MP3 player and start working. Each day’s work only takes about 10-15 minutes, so that’s a good thing too. Will it work for him long-term? I’m still not sure. So far, he’s only made it through 3 lessons despite the fact that we’ve been working on it for six weeks. But he doesn’t get fatigued, even when doing the same lesson for days and days in a row. To the contrary, he’s very motivated because he knows that he’s building skills, and that he’ll get a new set of words as soon as he masters the current one. My only concern is that while the program emphasizes learning the rules – and exceptions – of English spelling, it does so using lists of words. I worry that he’s learning the words rather than the rules, but I haven’t tested that theory yet. If I remind him of a rule he’s already learned while he’s writing for another subject, he can usually come up with the correct spelling, even if the word giving him trouble wasn’t on the initial list. But he’s not yet at a point where he’s remembering those rules outside of spelling lessons. I hope to see that change over the course of using the curriculum.

All that said, I will say that Seahawk has now passed spelling tests six times (three lessons, two 100% scores each). This is huge, because before this program he’d passed zero. He’s feeling pretty motivated that he’s actually having some success, and I plan to capitalize on that momentum as much as possible. What this means is that we will definitely continue to use the program. It’s showing more promise than any spelling curriculum we’ve tried to date, and that’s enough for me at this point.

Blessings,

ladybug-signature-3 copy


All three levels of The Phonetic Zoo are being reviewed this weekend at the Schoolhouse Review Crew blog. In addition to the spelling program, some members also had the opportunity to review a series of teacher resources including the Timeline of Classics (putting classical literature in chronological order), A Word Write Now (a thematic thesaurus), and Teaching with Games (a video course that teaches teachers to create games for their students). Make sure to click the banner below for more information on all of those products!


Click here to read more reviews


ladybug review crew disclaimer copy

Combining Art and Geography (Brookdale House Review)

My boys love to draw. I suppose you could say it’s just a part of them, considering Will is a comic strip artist for a living. Me, on the other hand, not so much. Because I use other mediums for my art (fabric and yarn, mostly), I’m a bit at a loss for how to include art in their school day considering neither of them is particularly interested in sewing. This isn’t so bad because they spend a good portion of their free time drawing – especially Munchkin – but I still want to encourage them to use their skills to work on things besides superheroes. (Not that there’s anything wrong with superheroes, but I’d like them to expand their horizons, so to speak.)

Enter Drawing Around the World: Europe from Brookdale House. This neat geography curriculum offers students the chance to combine two subjects (art and geography) into one tidy package. The idea is that students work on one (sometimes more, particularly if they’re closely related like Norway, Sweden, and Finland) country or countries per week. They learn to draw the shape of each country as well as where it’s located within the European continent. By the end of the course, they should be able to draw and label their own map of Europe from memory. Each week, the series is the same – and it’s built around a 4-day week, which as regular readers will know is perfect for us!

On day one, the new country or countries are introduced. Students find them on a map (we have a world map hanging in the school room) and then are given printouts from the e-book on which they practice tracing the country. Then they’re given a blank map where they draw the new country from memory. In addition to the drawing on this first day, there’s a table to fill in with data about the country. These facts they learn are area, population, capital city, people/culture, major religion(s), climate, and resources. On the website for the purchase of the curriculum, they provide links to family-friendly websites to help you find all of this information, as well as specific things to pray for in regards to the people of the countries.

Days two and three are similar to day one, just without the fact table. Students practice tracing and drawing the countries (working with all of the countries studied thus far, not just the new ones).

The fourth day of the week, students are expected to name (write down) all of the countries studied to date as well as draw – on a blank sheet of paper rather than the pre-printed map provided – a map of Europe. Obviously, this isn’t done all at once. Like everything else in this curriculum, it’s done on an “add as you go” method, and they should draw only the countries studied so far.

Because I received the e-book version of this product (available for $22.95; a printed version is also available for $25.95), there was some printing involved. I looked through the curriculum and figured out a method that I thought would work for us, without requiring tons of printing all at once or regular printing each week. Here’s what I did.

I had four copies of the traceable map and four copies of the blank map printed for each child. This would get us through the week of each country studied. The boys had one version of each map for each day of the week. Instead of printing the fact table pages, I wrote the categories of facts into their geography notebooks, and they filled them out in there. The maps went into a separate folder that they pulled out each day. I taped a large sheet of blank paper (folded in half) into the front cover of their notebooks for the day four map, and they used that to draw and label their own map of Europe. This map was expanded upon each week with the new countries learned. By the time we finish the curriculum, they’ll each have a complete map of Europe that they drew themselves. While not perfectly aligned with the way the curriculum is set up, it worked for us.

The kids and I all learned a lot during the review period for this product. The fact table included in the book is a great way to turn what might otherwise be a flat, boring, too-easy geography curriculum into something more. It would be a great jumping off point to have students write a report on a specific country. This could be done on each country each week to flesh it out a bit more, or you could have students pick their favorite country when you get to the end of the book. Either way would be a benefit for students, I think. Because of all the different things included in the data collection portion of the week, it would also be pretty easy to turn this into a full on unit study. Make a chart showing the sizes and populations for math. Or explore what population density means. Use the major religions box to learn more about said religions and to pray for people of those religions who need Jesus. The people and culture box would be a great jumping off point for social studies or history – how did they get to be the way they are? Learning and comparing the climates of different countries would be an interesting science study. And so on.

So as you can see, I was very impressed with this curriculum, and we will definitely be continuing to use it even though we don’t “have to” anymore.

In addition to Drawing Around the World: Europe, Brookdale House also has Drawing Around the World: United States in which students follow the same basic outline, just for the different states in the US instead of the countries of Europe. And lest you think they’re all about geography, they also offer a huge variety of curricula in different subjects including, but not limited to, Spanish, Grammar, Writing, and History. Members of the Schoolhouse Review Crew had the opportunity to review something from each of these categories, so make sure to click the banner below to find out more about those products.

Blessings,

ladybug-signature-3 copy


Click here to read more reviews


ladybug review crew disclaimer copy

Why I’m Choosing a C-Section

KIMG0053

I touched on this before, but today I want to express my specific reasons for why I’m choosing to have Dragonfly via repeat c-section (RCS) as opposed to attempting a TOLAC (trial of labor after cesarean) and VBAC (vaginal birth after cesarean). There are pros and cons to both an RCS and a VBAC, and I thought at length over which option was best for me. This does not, under any circumstances, mean that my choice is the best for everyone. It also does not mean that anyone else’s choice is the right one for me. I just wanted to get some of my thoughts out on why I made what I know to be the right choice for myself.

For the full story of my choice, I think I need to take you back to 2006, when Munchkin was born. I’m not going to go into the whole story of his birth, but I’ll go over the highlights. Due to a failed NST (non-stress test) at my 38-week appointment, I was induced 11 days early with him. Eight hours into the induction, his heart rate dropped to about 30 beats per minute (normal adult resting heart rate is about 80 bpm; newborns are around 130 bpm, just to give you a point of reference). My family practice doctor, who delivered Seahawk and would’ve delivered Munchkin in a vaginal birth, made a call to the obstetrician for an emergency c-section. I don’t know how far away the surgeon was, but from the time Munchkin’s heart monitor beeped until delivery was only about 15 minutes. This included the time spent waiting for the surgeon to arrive, upping my anesthesia (I was already on an epidural), and wheeling me to the operating room. Once in the OR, I think it was closer to 5 minutes before he was born. I was disappointed in the outcome (I never in a million years thought I’d have a c-section, even when the doctor prepped me for the possibility about four hours before it became necessary), but obviously was glad to have my baby in the safest way possible for him.

In 2012, I was pregnant with Small Fry. At my first prenatal appointment, my doctor (the same one that I’d had for the other two boys) talked to me about the possibilities of a VBAC vs an RCS. She told me that the local hospital didn’t offer VBACs because they just didn’t have the staff that the ACOG (American College of Gynecologists) recommends. Because we live in a small-to-medium sized town (about 25,000 residents), they don’t keep an anesthesiologist, obstetrician, or pediatrician within the walls of the hospital 24/7, which is the main requirement of VBAC patients – just in case something happens and they need an emergency c-section. So my options were to deliver at another hospital or have another c-section. At that point, I hadn’t done a lick of research on the differences or pros/cons of each type of delivery. I just remembered that my recovery with Munchkin wasn’t so bad, so I readily agreed to a repeat c-section. I went through all of my prenatal appointments, had an appointment with the obstetrician who would be performing the surgery (the same doctor who had delivered Munchkin almost six years earlier), and was assigned a birthday for our newest family member. The biggest complication with the actual delivery was getting my dehydrated veins (thanks to the “no food or drink 8 hours prior to surgery” rule) to open up enough to insert the IV Hep Lock. (They ended up using a child-size needle.) The actual surgery went very well, and Small Fry was born exactly 15 minutes after my scheduled appointment time.

Recovery, on the other hand, was a bear this time around. I was coughing a lot, and my head felt like a train was passing through it for several hours after each dose of pain medication (2 percocet tablets). I talked to my nurses about the head discomfort, and they told me that it was a side effect of the pain meds; after dropping me back to one tablet instead of two, I felt much better. But there was still that incessant cough. My doctor (again, the same one as had delivered – helped in Munchkin’s case – the first two boys) came to visit me each day, and when I mentioned the cough to her, she listened to my chest and diagnosed bronchitis. I was started on antibiotics before leaving the hospital, and within just a few days was feeling better. Unfortunately, that diagnosis took until the third or fourth day in the hospital (I was there from Thursday through Sunday), which meant that I was recovering from major abdominal surgery with bronchitis for about 9-10 days (the four days before plus the five days of antibiotics). Not fun, and I told myself that if we had another baby I did not want another c-section.

Ah, the things we tell ourselves.

Now it’s 2015, and Dragonfly is expected to make his appearance in about 4 weeks (30 days, to be exact). I tried to keep my promise to myself: No more c-sections. I tried so hard. I spent the first half of my pregnancy on the phone with my insurance company and a variety of doctors/clinics/hospitals trying to find someone who would take a patient with two prior c-sections and was covered by my insurance. I didn’t expect it to be as difficult as it was. My doctor (this time, I’m seeing my regular doctor’s business partner because my other doctor was on leave until I was 22 weeks along; it seemed weird to me to change for “no good reason” at that point) found me the name of a clinic that would likely take me – at the very least, they’d give me a consultation to see if I was a good candidate. She said the only thing I had to do was to call them to make the switch to seeing them as my prenatal doctors by the 28-week mark. I called them around 21 weeks, just to get the ball rolling (my doctor said that changing before 28 was fine, but not after). Within about two minutes, I was told that they didn’t accept my insurance. I felt utterly defeated.

A week later, not ready to be deterred yet, I called my insurance company to get a list of doctors they were contracted with. The lady on the other end of the phone wasn’t sure if any of them did VBACs, but at least it was a place to start. I found one that I was sure I’d be comfortable with (based on internet research of each doctor on the list). Their website said the first thing to do, before calling them, was to make sure that the hospital they worked with/out of was covered by your insurance. So I put in a call to the hospital. The lady I was supposed to talk to wasn’t in at the time I made my call, so I left a message.

I waited several days before moving on, hoping she’d call me back, but she never did.

This was all happening around the same time as my anatomy scan at the beginning of July. (For those who don’t know, the anatomy scan is an ultrasound done between 18 and 22 weeks gestation. The point is to get a good look at baby’s body, inside and out, and making sure that all major organs are developing on schedule. Oftentimes, this is also when expectant parents find out the gender of their little one.) At my anatomy scan, besides telling me that baby was developing perfectly – and that we were expecting our fourth son – my doctor diagnosed a low-lying placenta. This can be a problem, because if the placenta is too close to the cervix (the opening of the birth canal, where baby moves through during birth), then a vaginal birth is impossible regardless of your previous childbearing history.

So in spite of the fact that my doctor thought I was a good candidate for VBAC (having had one previous vaginal birth and the “right kind” of incision and stitching for both of my previous c-sections), I was beginning to think that maybe this wasn’t going to work out so well after all. I spent half a week thinking over everything I knew, doing lots of research about exactly what a “low lying placenta” meant, and going over my previous surgical records again and again (I’d requested them from the hospital several weeks earlier when I thought a VBAC was in my future). After that half week of meditation – and still never hearing back from the VBAC friendly hospital – I made the decision that another c-section was the right answer for me.

After all that backstory, here are the specifics as to why I made that decision.

  • Insurance. There’s no way that we could pay out of pocket for prenatal care and a hospital stay without it. We make a comfortable living, but having to pay $5,000+ for a birth just isn’t practical. And since I was never able to find out whether the Portland hospital would accept my insurance, we couldn’t rely on that.
  • My low-lying placenta. Hours of internet research told me that a “low lying placenta” was one form of placenta previa (complete coverage of the cervix by the placenta). I also learned that previous c-sections are one of the main causes of this condition. Everything I read suggested that, while a low-lying placenta often will move out of the way as the uterus grows to accommodate the baby, sometimes it doesn’t. And in that case, you end up with a c-section, no questions asked. I didn’t want to change doctors only to find out at 34 weeks that the placenta hadn’t moved enough and I’d need a c-section anyway.
  • Risk of uterine rupture. While tiny (about 1%), the risk is still very real. It can happen to women who have had previous c-sections or not, but the risk is higher with c-section moms. Especially those with multiple c-sections. If that happens, it’s an emergency situation that requires an immediate c-section, and sometimes even hysterectomy.
  • Chances of a repeat c-section in an unfamiliar hospital. I’m not going to lie: that 1% risk frightens me. I know it’s almost nothing, but it is something. The thing I wanted even less than a known quantity (a repeat c-section with the doctor I’ve been seeing my entire pregnancy in a hospital I’ve had babies in twice before already) was an emergency c-section in a hospital 30 miles away. Being close to home (a 15-minute walk or 4-minute drive) is a huge plus for me. My family (Will and the boys as well as extended family) will get to come visit more often, and extended family and friends will have an easier time finding Dragonfly and me so they can come visit.

As I stated before, I know this decision isn’t the right one for everyone, but it definitely is for me. I will never judge a woman for their choices in childbirth method, especially after the heavy heart I went through making my decision this time. It’s the most I’ve ever thought about my choice before, and I now know from experience how personal (and maybe painful) the choice can be.

Blessings,

ladybug-signature-3 copy

34 Weeks (pregnancy update)

KIMG0044[1]

34 weeks, 2 days

I didn’t realize that it’d been so long since I posted an update, but it has been. So here’s what’s going on baby-wise the past month…

First off, I’m now seeing the doctor every other week instead of every month. I’m measuring right on track as of my last appointment (last Monday, so I’ve got another one the day after tomorrow), so that’s a good thing, especially since I was measuring ahead for a few weeks ahead for a while. I’d rather have a baby measuring “on track” than “big.”

I’ve also had my first appointment with my c-section surgeon (who I’ll call Dr. S for convenience sake). The doctor who did my c-sections with Munchkin and Small Fry has since retired, so he’s not available this time. I had to rely on my doctor’s recommendation for a surgeon, and while she didn’t have a rec for a specific doctor, she did give me a referral to a local clinic that works with my hospital and takes my insurance, both of which are good things. The clinic is right in the hospital, just like my regular doctor’s office, so that makes it really convenient to go there for appointments even if they’re on a different day from my normal appointments (the hospital is a five-minute drive or 15-minute walk from my house). When Dr. S first walked into the room at my first appointment, I was quite surprised. She’s really young. It was hard for me to gauge just how old, but it was apparent that she’s young. In fact, there was a part of me that thought for a second that she might wonder why I was choosing a c-section instead of a VBAC this time (more on that in another post – it’s all written, just needs a picture). I know this is was an unfair assessment, since the only thing I had to base that on was her age, but that doesn’t change the thoughts that ran through my mind. Anyway, she wasn’t like that at all. I was very pleased with her attitude and demeanor upon talking with her, and I’ll be glad to have her taking the lead in the operating room. The rest of the staff at the clinic was superb as well. Within two days of meeting with Dr. S, I was on the phone with the scheduling supervisor getting Dragonfly’s birthday all arranged. (For anyone who’s curious, he’ll be arriving on Friday, November 13, 2015, shortly after noon Pacific time.)

As a side note, I talked with Dr. R (my regular doctor) after my appointment with the surgeon. It turns out that Dr. S is fresh out of medical school, so she’s likely younger than me. Dr. R said that’s a good thing because she’ll have all the newest guidelines and methods to follow during my surgery. Between the appointment with her and the followup with my PCP, I have all the confidence in the world that things will go well.

This weekend (later today, actually), Will and I have scheduled a tour of the Maternity Ward (called the Birth Center in our hospital). It’s probably completely unnecessary since this will be my third time delivering there and I’m having a c-section, but I know based on last time I’ll probably be spending 4 days there, and I want the refresher of what all goes on and where everything is located. It’s just one of those things that I’m looking forward to doing.

I think that’s it for now. I’ll update again in a few weeks. Only five weeks to go!

Blessings,

ladybug-signature-3 copy

Reading with a Purpose (Progeny Press Review)

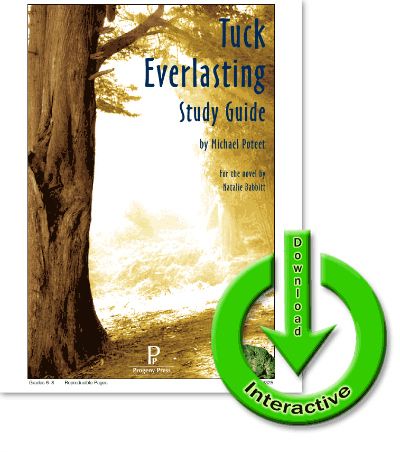
Progeny Press is one of my very favorite companies for teaching literature to my children. We were blessed to be able to review their Little House in the Big Woods study last year, and I was thrilled when I saw that they were on the “upcoming vendors” list with the Schoolhouse Review Crew again. This year, we had the privilege of reviewing their Tuck Everlasting study guide, and I was just as pleased with this one as I was with last year’s.

The Tuck Everlasting guide is written with middle schoolers in mind, even though the book itself is a lower level. This means there were some differences between it and the Little House guide we used last year (namely that there weren’t any “fun” activities), but the general setup is the same.

The Basics

I received an electronic version of this study guide. This means that I was emailed a link from which I was able to download the guide to my computer. There are also options for a CD version of the guide (digital and CD versions are both $18.99) or you can request a printed workbook for an additional $3 over the price of the guide itself. For a total of $25.98 ($28.98 for the printed version), you can also buy a copy of the novel to go with the study guide. I just picked up a copy from the library.

The e-guide is pretty nice for several reasons. First of all, you receive your product right away. There’s no waiting for the mail. Second, if you’re doing the study with only one student, you can download the student version right to your child’s computer (if he has his own) and he can do the work right in the PDF. There’s no writing required. Alternatively, you can print the guide. This is good if you want to use it with more than one child or if you don’t want your child relying on the computer for every little thing. I fall into both of the latter categories, so I chose to use a printed version of the study guide (sort of – more on that in a minute).

The Tuck Everlasting guide is divided into five-chapter “chunks.” For each 5 chapters, there is a series of “paperwork” for your student to move through. These include activities such as vocabulary, comprehension questions, exploring what the author’s intentions might have been for specific words/phrases used, and comparing things the characters say to Biblical principles. And that’s just barely scratching the surface of what’s included. Additionally, concepts such as foreshadowing and similes/metaphors are discussed and there are activities for students to practice their understanding of those notions.

How We Used It

It’s no secret to regular readers that we don’t really print anything out for our homeschool. It’s not that I have a problem with doing so, but more that it’s just not convenient for me since we don’t currently have a printer at home and going to the print shop for every little thing is a pain. So I spent time before we were ready to dive into each of those 5-chapter chunks I mentioned before writing down all of the activities and questions in each of the boys’ Literature composition books. I did this one chunk at a time to save my sanity (and hand!).

KIMG0035Once the “workbook” was ready, I went through it and divided it into manageable sections, one per school day. For example, our schedule for the first chunk went something like this:

Day 1: The boys did the prereading activity, which was to do some basic research on Juan Ponce de León (we got a book from the library for this) and write a report on his life, paying particular attention to his obsession with the Fountain of Youth, which he thought was in present-day Florida.

Day 2: I read the prologue and first five chapters to the boys. The chapters in Tuck Everlasting are pretty short, so it was pretty easy to get through that much in a sitting. (Five chapters in Tuck Everlasting was a much shorter section than just one chapter of our August read-aloud book.)

Day 3: We worked together (with me guiding rather than helping) to get through the vocabulary section.

Day 4: We learned about setting and made an educated guess as to the time period that the book takes place. We also explored the author’s descriptive writing, discovering how she used several verbs rather than adjectives to describe a road.

Day 5 (Week 2, day 1): With my guidance, the boys answered the comprehension questions, including some that required them to think beyond the words on the page to answer (for example, “How does the man in the yellow suit react to the sound coming from the wood? What might this indicate?”).

Day 6: We learned all about foreshadowing, and the boys reread the prologue, this time pulling out specific pieces that they thought were bits of foreshadowing. We also explored what a symbol is in literature.

Days 7 and 8: We worked through the “Dig Deeper” questions. These are a series of questions for each chunk that are far beyond simple comprehension and require students to both think more carefully about the story and put the novel into the context of their own lives (for example, do you have any boundaries?) and the Scriptures (what do these passages say about obedience?).

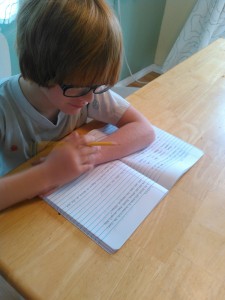
KIMG0036Because the Tuck Everlasting study guide is written for a higher level than the Little House in the Big Woods one was (middle school versus upper elementary), it’s taking us quite a bit longer to get through. To date, we’ve read through chapter 15 and are going to get into the “Dig Deeper” portion for that chunk (chapters 11-15) early next week. The novel has a total of 25 chapters plus an epilogue, so I expect we’ll finish up the study guide around the end of this month.

My Opinion

As I stated in my opening paragraph, Progeny Press is one of my very favorite companies. I love their study guides; it’s so nice to have a deep, rich experience studying novels rather than just reading them. That’s not to say there’s anything wrong with “just” reading, but that for a “literature class,” it’s good to have something more extensive. I love how they incorporate Christian principles into their study guides and encourage students (and teachers!) to explore the Scriptures in relation to the novels they write the guides for.

Finally

Progeny Press has study guides for students of all ages, so make sure to head over to their site to find one that’s the right fit for your child(ren). I promise you won’t regret it!

Blessings,

ladybug-signature-3 copy


If you have students in other grade levels (from early elementary all the way up through high school) make sure to click the banner below for a selection of Schoolhouse Review Crew members and their reviews for a huge variety of Progeny Press study guides. This year’s Crew is talking about study guides for the following novels/categories: Sam the Minuteman and Miss Rumphius (early elementary); Sarah, Plain and Tall and Stone Fox (upper elementary); Tuck Everlasting and Carry On, Mr. Bowditch (middle school); and To Kill a Mockingbird and Intro to Poetry (high school). You’re sure to find something interesting!

Click here to read more reviews


ladybug review crew disclaimer copy

How to Help Kids Build Reading Skills (Reading Kingdom Review)

RK 7

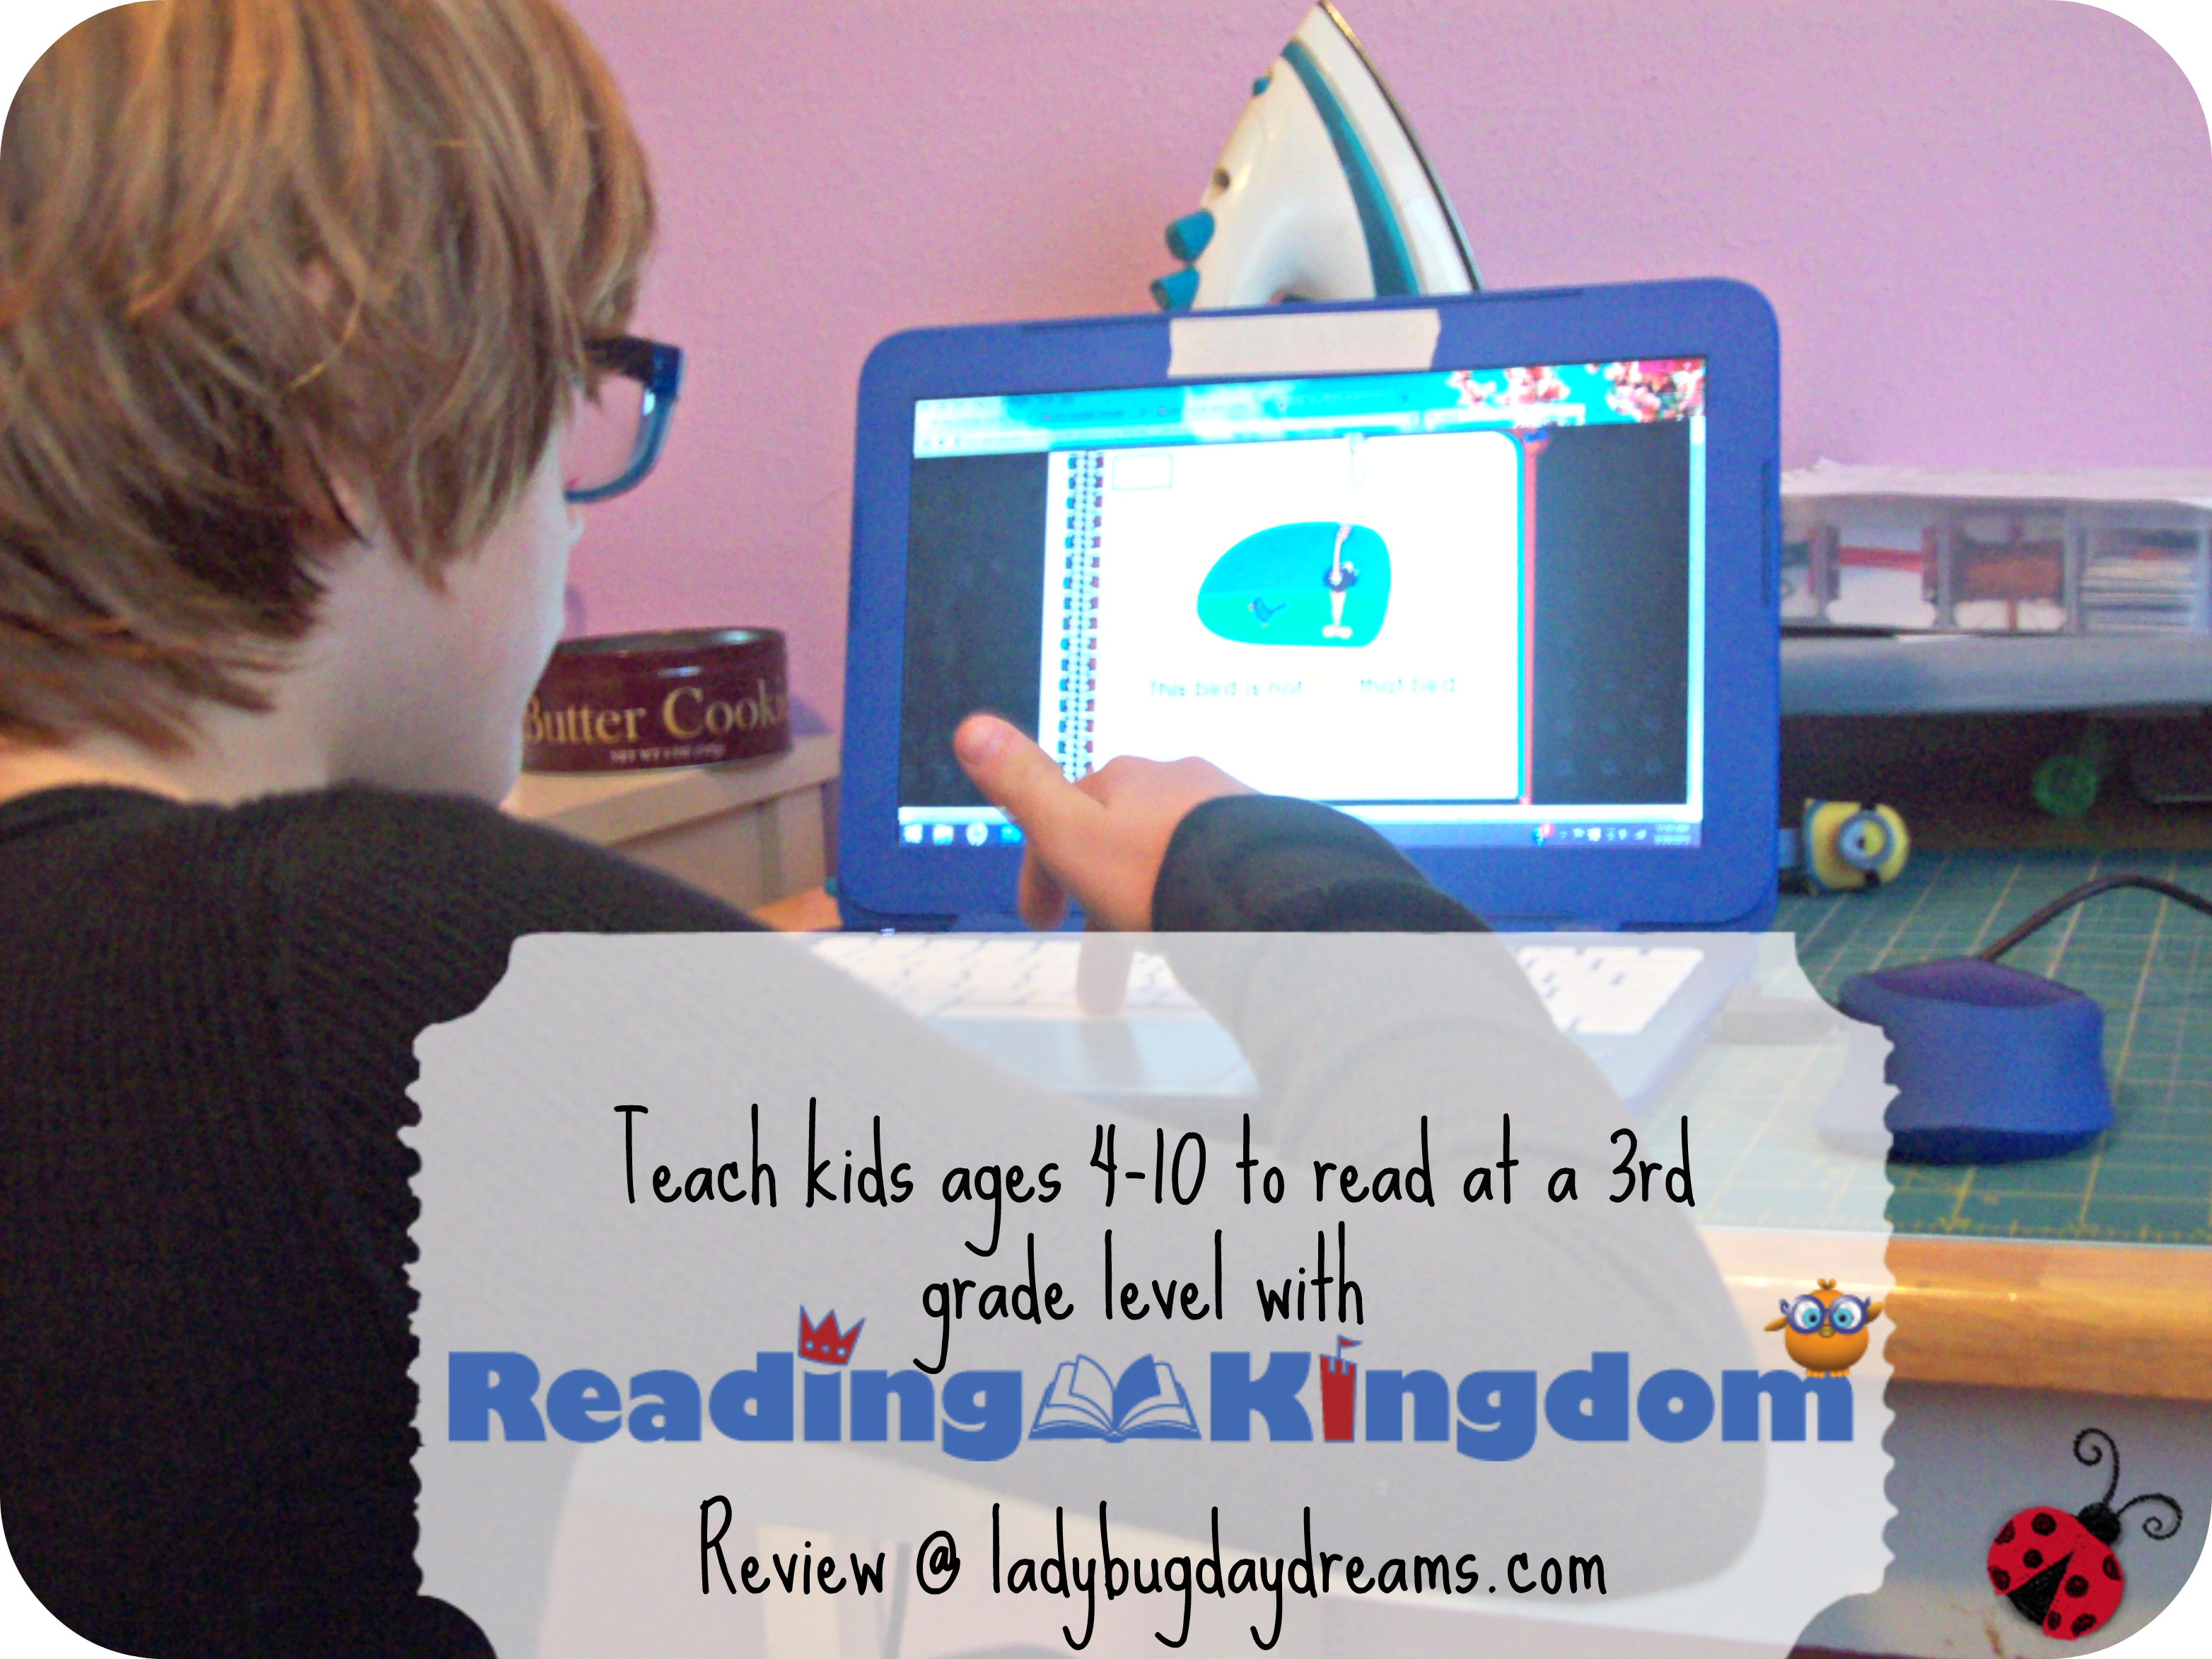
I’d heard of Reading Kingdom before, but had never really explored it in-depth because both of my school-age children are strong readers. I didn’t think we needed a program like this. Based on this personal assessment, I was a little surprised to see my name on the list for reviewers of their Reading Kingdom Online program, but I knew that since the Schoolhouse Review Crew is a team, everyone is expected to be a team player and at least try out the programs we’re assigned to review. With that in mind, I signed Munchkin up for the program right away and had him start last month when we started school. I was initially planning to have Seahawk work on the program, too, but then his new spelling program arrived in the mail, and I made the executive decision that he needed to work on his spelling more than his reading, so I let him skip out on Reading Kingdom – at least for the time being.

Reading Kingdom is a program created by Dr. Marion Blank, a top expert on reading and language. The program offers a series of lessons designed to teach children from ages 4-10 to read and write at a third-grade level. When I was asked by the vendor representative how things were going partway through the review period, I was honest and said I was having my son work through the program for the purposes of the review, but hadn’t noticed much because he was already a strong reader before we started. I received in response a very kind and informative message about why Reading Kingdom can be beneficial even for students who already read above their grade level. These include:

  • Writing. Students who write well read well.
  • Phonics and Comprehension. This might seem like a “no-brainer” in regards to reading, but it’s more than just phonics. Reading Kingdom has a special way of presenting a variety of phonemic awareness. This includes working on blends as well as homophones (to/too/two), homonyms (dog’s bark vs tree bark), and heteronyms (ship’s bow vs bow and arrow).
  • Diligence. For maximum benefit from the program, it is recommended that students work on it at least four days per week. This teaches them to keep pushing forward each day; having the diligence to work on the program on a regular basis is one of the fundamental requirements for success with Reading Kingdom.

The first thing we did was to have Munchkin take the assessment test. Because I’d never tried the program out at all, that was an important step. I had him do the assessment test the day before we started school so that on the “Big Day” he could dive right into the program. He was placed into Level 2 (of 5) of Reading and Writing. Because he didn’t start in a lower level, I can’t really tell you about that, but I can describe the kinds of things he did in the program each day.

reading kingdom 1

Click on any of the images to make them bigger.

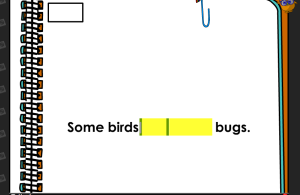
First, there’s a “keyword” in each lesson. This word is typed over and over again into a variety of sentences and paragraphs. As the student progresses through the lesson, more and more words are left out of each sentence, but the keyword is always among the missing.

rk 4Eventually, the student gets to a point where the entire sentence is blank and requires typing (but don’t worry – there’s a very pleasant voice that prompts them into typing the correct words).

After this, a complete paragraph is presented. The student’s job is to find the keyword within the paragraph and click on it. There are three of these paragraphs (in the lesson Munchkin did today, anyway).

rk 6Next is a multiple choice activity. There are a series of choices, each one of which is a real word that’s missing letters. The goal is to find the one “that can become” the keyword, click on it, and then type the missing letters.

Finally, one of the paragraphs from earlier in the lesson is repeated, this time with certain words missing letters. The student chooses the correct word from a list at the bottom of the screen and then types the missing letters.

So, what did we (Munchkin and I) think of this program? He says, “There’s a lot of typing. Other than that, it’s very easy.” I think it would be a great program for families with younger or struggling readers. I really like the idea teaching young children to read at an early age. In fact, if Small Fry was a year or two older, I’d definitely use this program with him. But for use with the other boys? I’m not sure it’s the best fit for them. Will we continue to have Munchkin use it now that the review period is over? Maybe for a few more weeks, but if I don’t see a marked improvement to justify its use for an already-strong reader and writer, I’m not going to force him to continue.

Blessings,

ladybug-signature-3 copy


Reading Kingdom has a program for students on the Autism Spectrum, and some of the reviewers of this program tried that with their students. There are also plenty who reviewed the regular program, like I did. For more information on both of these, click the banner below.

Click here to read more reviews

ladybug review crew disclaimer copy

Picture of the Week: Munchkin’s New Bike

100_2141

Munchkin’s birthday was about three weeks ago; he’s 9 now. We did our traditional “birthday dinner with the grandparents” the night before (his birthday landed on a Sunday), and he chose taquitos with rice and homemade refried beans for that meal. He and Seahawk helped me prepare the food about an hour before everyone was expected to arrive. This made it much less stressful for me! I was glad to have their help, and they learned some valuable kitchen skills at the same time.

100_2140About two weeks before this party, though, my dad came over with Munchkin’s birthday present: a new bike! He (my dad) bought the boys bikes for Christmas two years ago, but the problem with children is that they grow 😉 A seven-year-old is much smaller than a nine-year-old, so it was definitely time for a new bike for Munchkin. Will and I had been debating the best way to make this happen for him, and now we don’t have to!

Happy (belated) birthday, Munchkin!

Homeschool Update ~ Oct 1

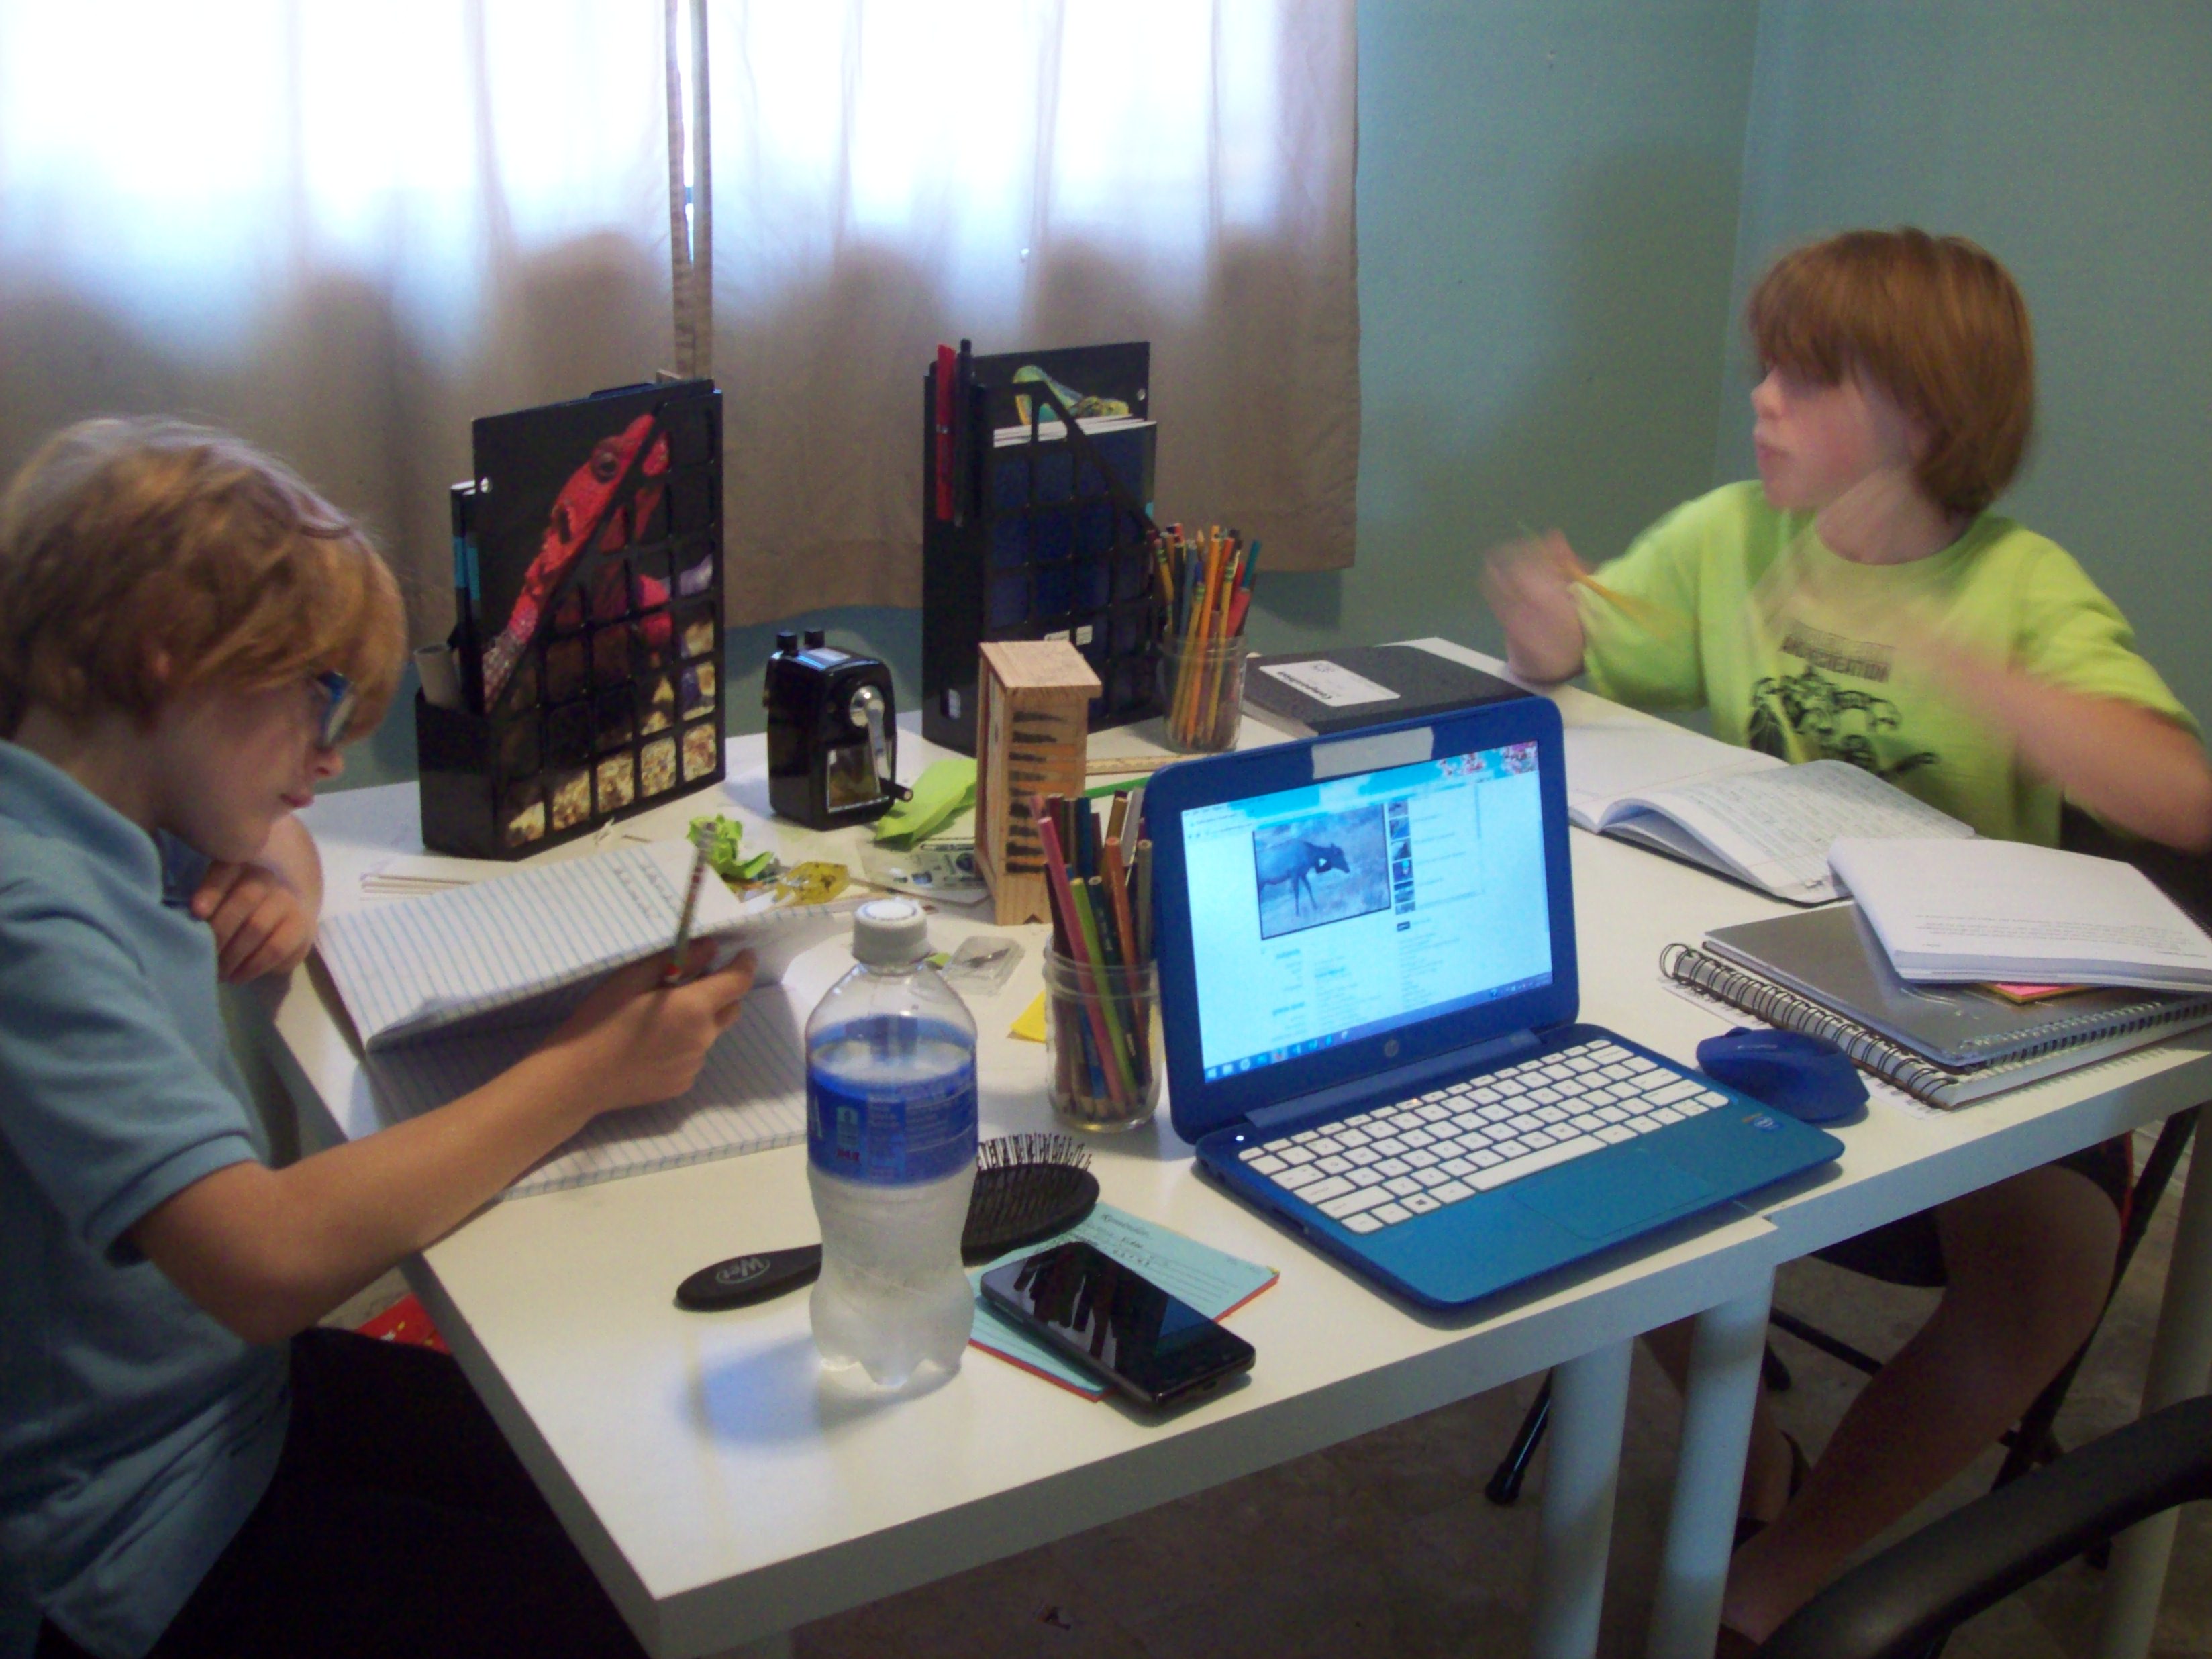
We’ve been “back to school” for almost four weeks now, so I thought I’d do an update on how things are going. In short, “so far, so good.” Things aren’t exactly the way I’d lined them out in my plan when I wrote about what I hoped to accomplish before we started lessons, but isn’t that normal? Even though they’re not precisely what I thought we’d do, I’m very happy with what we’re accomplishing each day, and that matters more than following a plan that was written before I knew how things would go.

100_2174

My method of homeschooling is somewhere between relaxed and purposeful. The boys each have a list of what they must accomplish each day, but half of that is things they can do on their own – hooray for teaching them independence! Those items, they’re allowed to in any order they’d like just so long as they get them done. This is the “relaxed” portion. The rest of the list are things we work on together because they’re either a) slightly above grade level and they need help (I don’t want to frustrate them, but I do want to challenge them, so most things are at their grade level and some things are above) or b) things they both do at the same level despite their different grades and ages. The latter category includes grammar and science, while the former includes our middle-school level literature guide from Progeny Press (more on that in a review at the end of next week). These are examples of my stricter side.

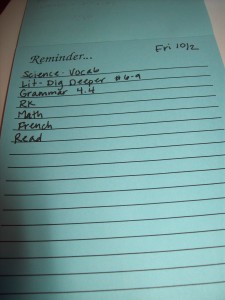
An example of our to-do list. Each child has one every day.

So, how do they know what they need to get done each day? We rely on a simple, tried and true method: the to-do list. For less than a dollar apiece, I bought them each a small (quarter sheet or so) notepad from the local copy store, and each week (usually on Saturdays or Mondays) I map out what they need to accomplish each school day. We do school Tuesday through Friday most weeks, but if I know in advance that there’s something going on one of the other days, we’ll do Monday instead of that day. (An example of this is when I go into the hospital to have Dragonfly. Because he’s coming via repeat scheduled c-section, I know that he’ll be born on a Friday, so we’ll do school on Monday that week since I won’t be around on Friday.) The list includes things that are generalized and specific. For example, they know they just have to do one math worksheet per day, so I just write “math” on their list. But science and literature aren’t that cut and dry, so I write the subject and what I expect them to accomplish (Science – vocabulary, for example) on the list for those subjects. As a rule, the subjects with the extra notes are the ones that we do together.

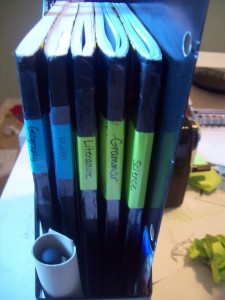
I added labels to the spine of each composition book so the boys wouldn't have to take them all out each time to look at the cover and find the correct notebook. The labels help to streamline everything.

I added labels to the spine of each composition book so the boys wouldn’t have to take them all out each time to look at the cover and find the correct notebook. The labels help to streamline everything.

The last big thing I want to mention is our attempt at notebooking this year. As planned, I purchased each of the boys a set of composition books for all of their school work to go into. Because this is our first year trying the notebooking approach, I’m not entirely sure we’re doing it “right.” Allow me to explain how we’re doing it, and maybe if a notebooking pro ever reads this, they can give me tips 😉

So, they each have one composition book for each subject (except the computer-based ones). A lot of the things we’re studying have worksheets or study guides to help us/them along, but since I don’t have access to a printer very easily, I’ve been handwriting all of the worksheets. Twice. One for each kid. This is very time-consuming, but it’s worth it to me in order to keep the kids at home to educate them. Fortunately, only about two-thirds of the subjects require worksheets (math, literature, science, grammar, and geography).

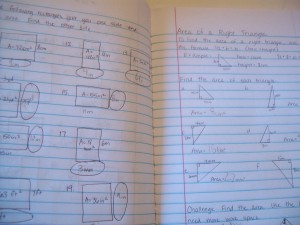
For math, I found a website that details what is expected of students to know by the end of each grade in our state, so I’ve been using that as a guideline and my subscription to Super Teacher Worksheets to create math practice. I teach them the concept (Munchkin is working on area and Seahawk is mastering his fraction skills), and then there are several days of practice so they can master it. I think this is better than the old math workbooks we used to use in that I only add the “homemade” worksheets (not really, just copied from Super

Munchkin's handwritten math worksheets.

Munchkin’s handwritten math worksheets.

Teacher to the notebooks by hand) one week at a time. If I feel like they need more practice in the area, I continue with the same concept the next week. Once I’m comfortable that they’ve mastered the concept, only then do we move on.

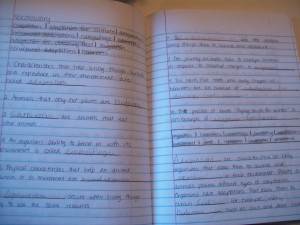
Science and literature are a bit more streamlined, at least right now. We’re using Visual Learning Systems for science, which I reviewed earlier this year. It’s a wonderful combination of explanatory videos, worksheets, and occasional experiments. We’re doing the Life Science unit right now, and every single worksheet is right on the website for you. You can print them, but since that’s not an option for me at this time, I copy them down and the boys complete them like a traditional worksheet. Literature is very much the same. We’re using a Progeny Press study guide, which can be done right on the computer if you’re only using it with one student, but since I’m having both of mine use it, I copy everything

Handwritten science worksheets. Copied from the Visual Learning Systems website.

Handwritten science worksheets. Copied from the Visual Learning Systems website.

down for them, and they complete it. Once we finish our Tuck Everlasting study, things will get a bit more interesting (for me) because they’ll be doing different books, and I’ll probably attempt to write my own study guide for them based on what they’re reading, thereby combining literature and “read your novel” into one subject for them. Doing so will allow them more autonomy in the literature subject each day as well.

So, I guess that’s about it as far as how things are going and what we do/how we make sure everything is accomplished each day. To-do lists, worksheets, notebooks… That’s how we work.


How do you run your homeschool?

Blessings,

ladybug-signature-3 copy