Learning Through Play (USAopoly Review)

usaopoly

If you’ve read this blog before, you know that our family (especially the kids and me) really like games. I pretty much always request the (physical) games when they come up for review through the Schoolhouse Review Crew, and this time, with USAopoly, was no exception. Usually companies send one game for review purposes, but this time they sent two: Tapple: Fast Word Fun for Everyone and Wonky: The Crazy Cubes Card Game. These are both super fun games, so keep reading to find more about them!

Tapple

100_2170

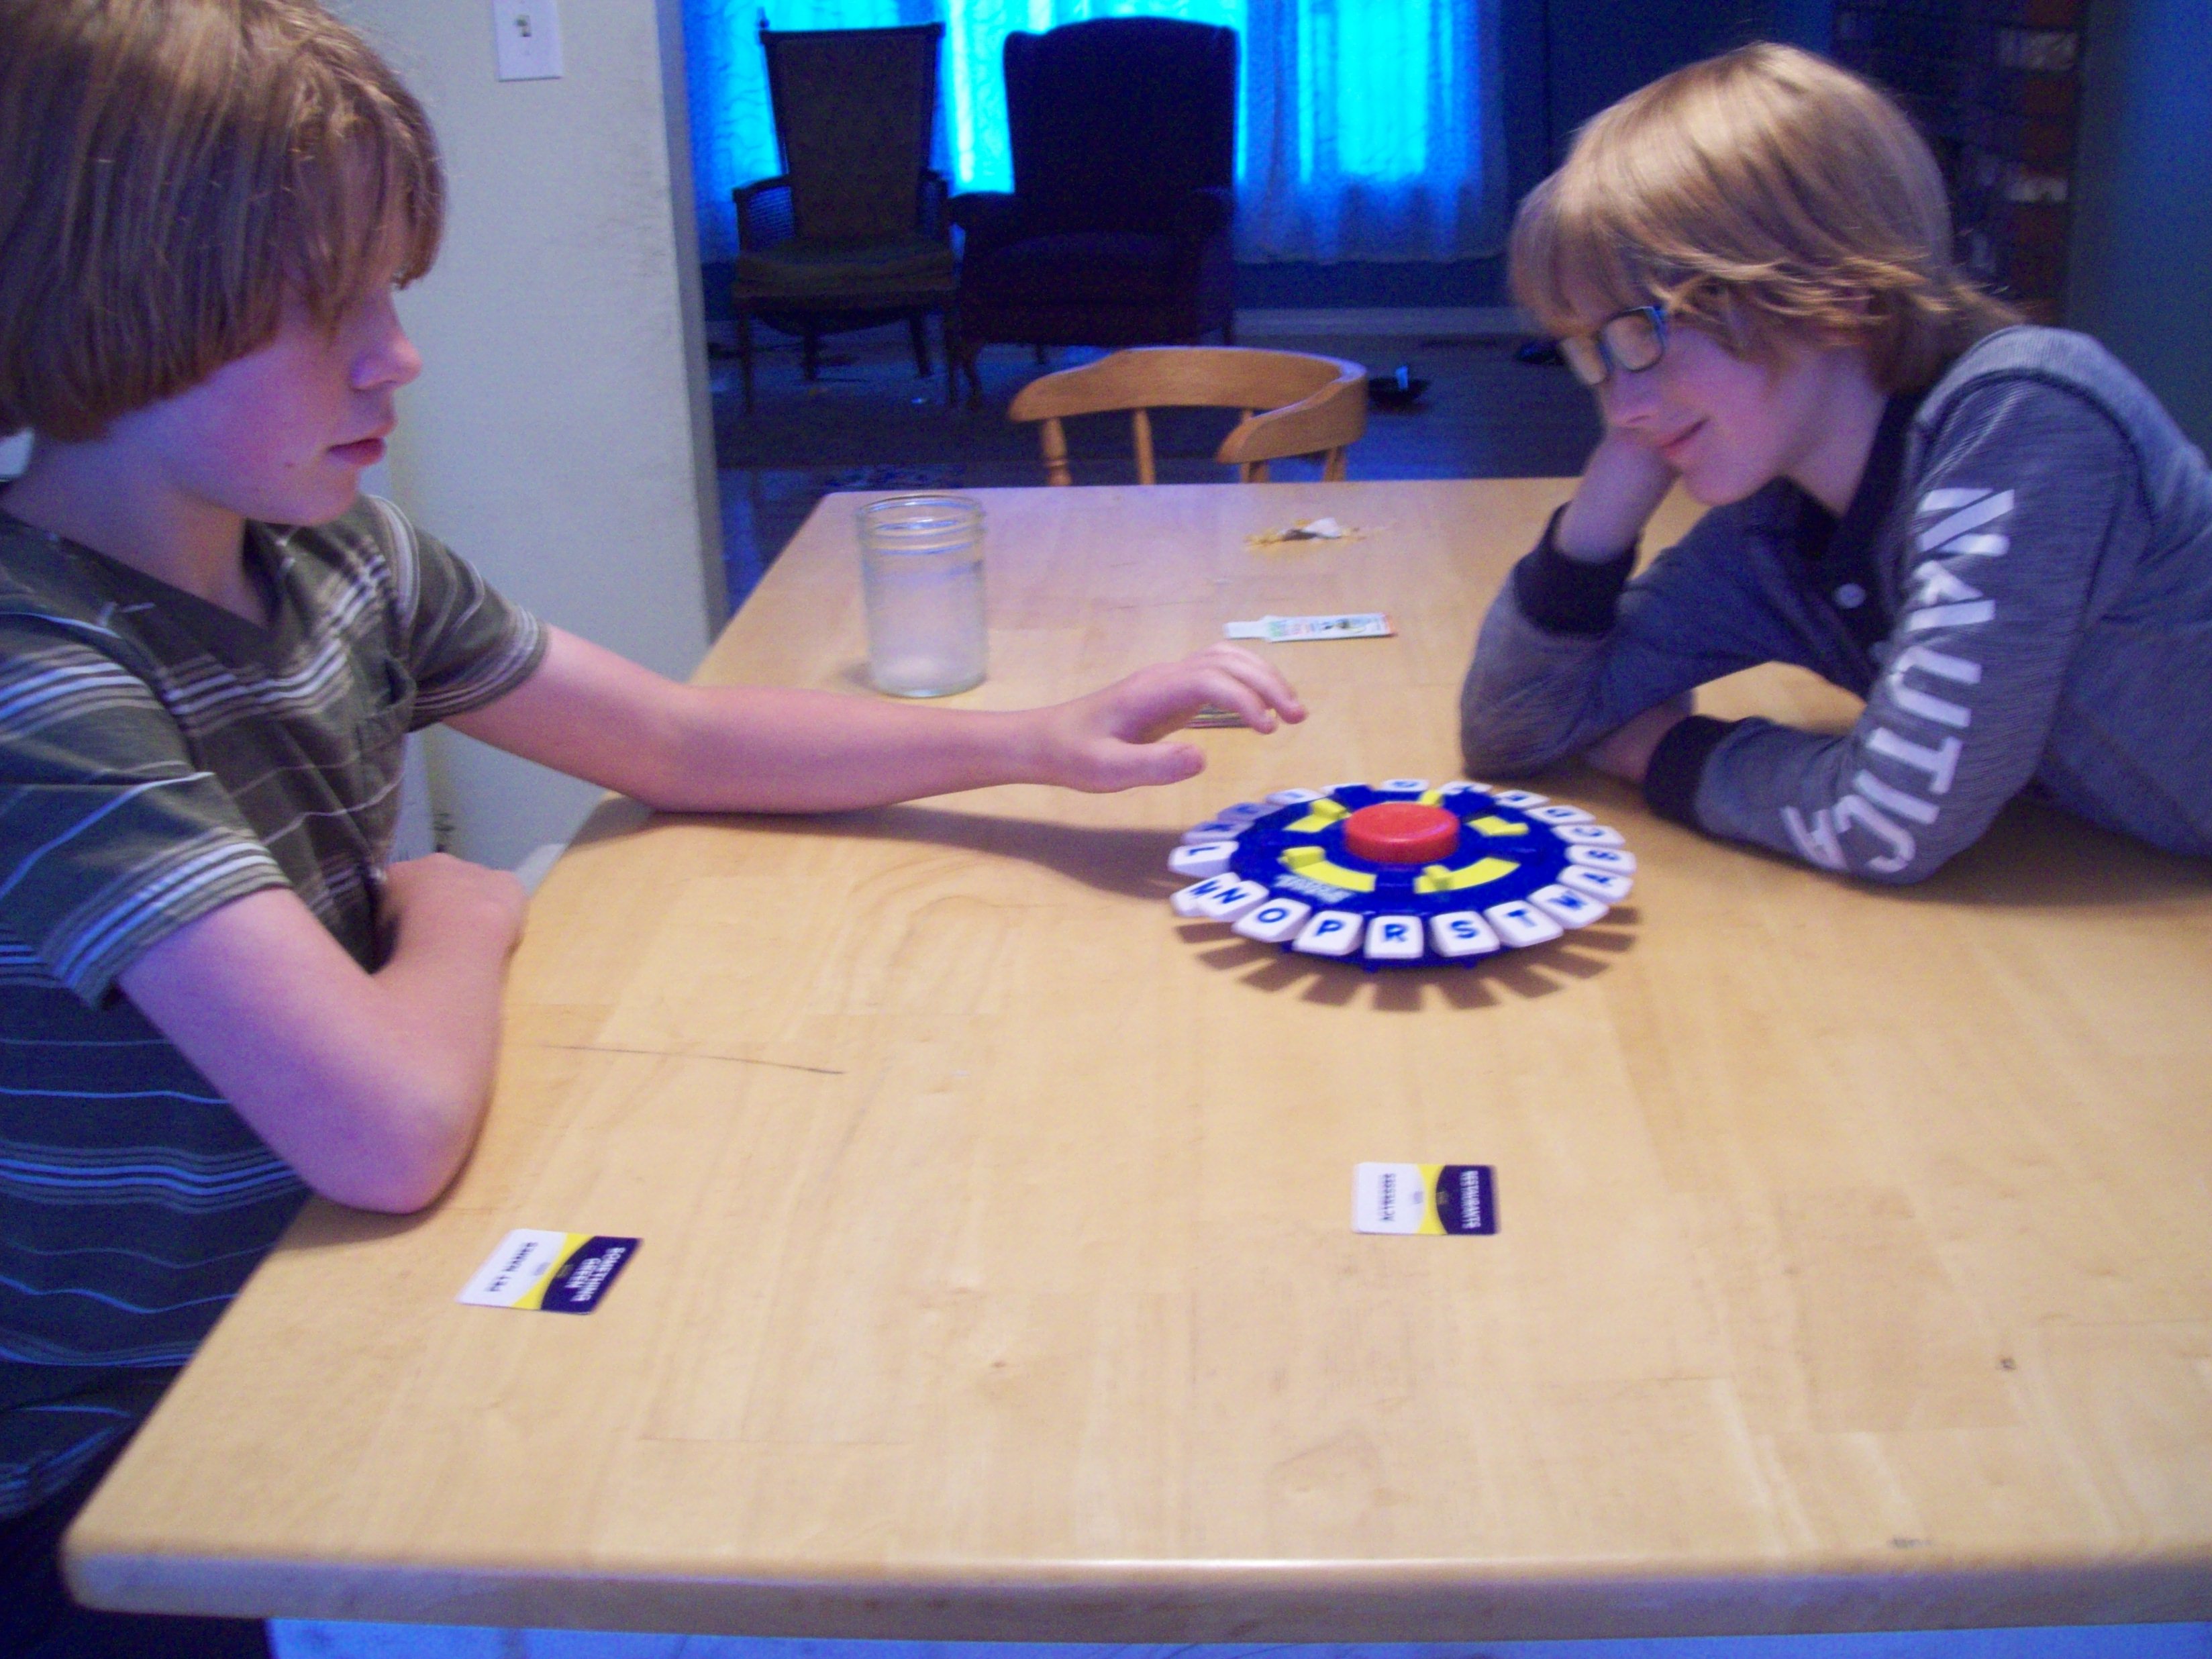
Tapple is a really fun word game. The board consists of a plastic base with letter “tabs” all around the edge and a timer reset button in the middle. There are several category cards (which tuck neatly into the bottom of the game to prevent loss), and the goal is to come up with a word that begins with each letter (there are only 20, not all 26 – the really hard letters like Q, Z, and X are left out) and fits the category.


Example category: Actors

A: Adam Arkin

J: Jon Hamm

F: Fred Savage

And so on. Players have 10 seconds in which to come up with their answer, tap the letter tab (which then stays down for the rest of the round so others know that the letter has been used), and reset the timer by pressing the button in the middle of the board. If a player can’t come up with an answer within their ten-second time allotment, they’re eliminated from the round. Last man standing wins the round (there are special rules in case you finish the board without getting down to just one player, but we never had to use them), and first player to win three rounds wins the game.

Wonky

100_2161

Wonky is completely different. It’s almost like two games in one. First, it’s a card game. Second, it’s a stacking game. It comes with nine blocks (three sizes, three colors) and a deck of cards, as well as a nice cloth storage bag (so you don’t have to keep the box if you don’t want to). To begin, place the blocks within easy reach of all players. Everyone is dealt seven cards, and the rest of the deck is set aside. The first player selects a card from his/her hand and places it in the discard pile, then follows the instructions on that card. This might be anything from “stack the large purple block” to “stack any color of medium block” to “discard this card without stacking any blocks.” The player follows the instructions on the card. If a player can’t play any of their cards, they must draw one card at a time until they get a playable one. The next player does the same thing, but they have to stack their block on top of the block placed by the previous player. Easy enough, right?

Not so fast.

The blocks aren’t quite cube. They’re . . . well, wonky! Each block has several sides that aren’t quite flat, which makes stacking them quite difficult. And very funny for the players. The goal of the game is to be the first to discard all of your cards – without knocking over the tower. (Each time anyone adds a block, the tower must stay up for a count of 3 for it to qualify as a success.) If a player knocks over the tower, they must draw additional cards, thus making it more difficult to win.

How We Played

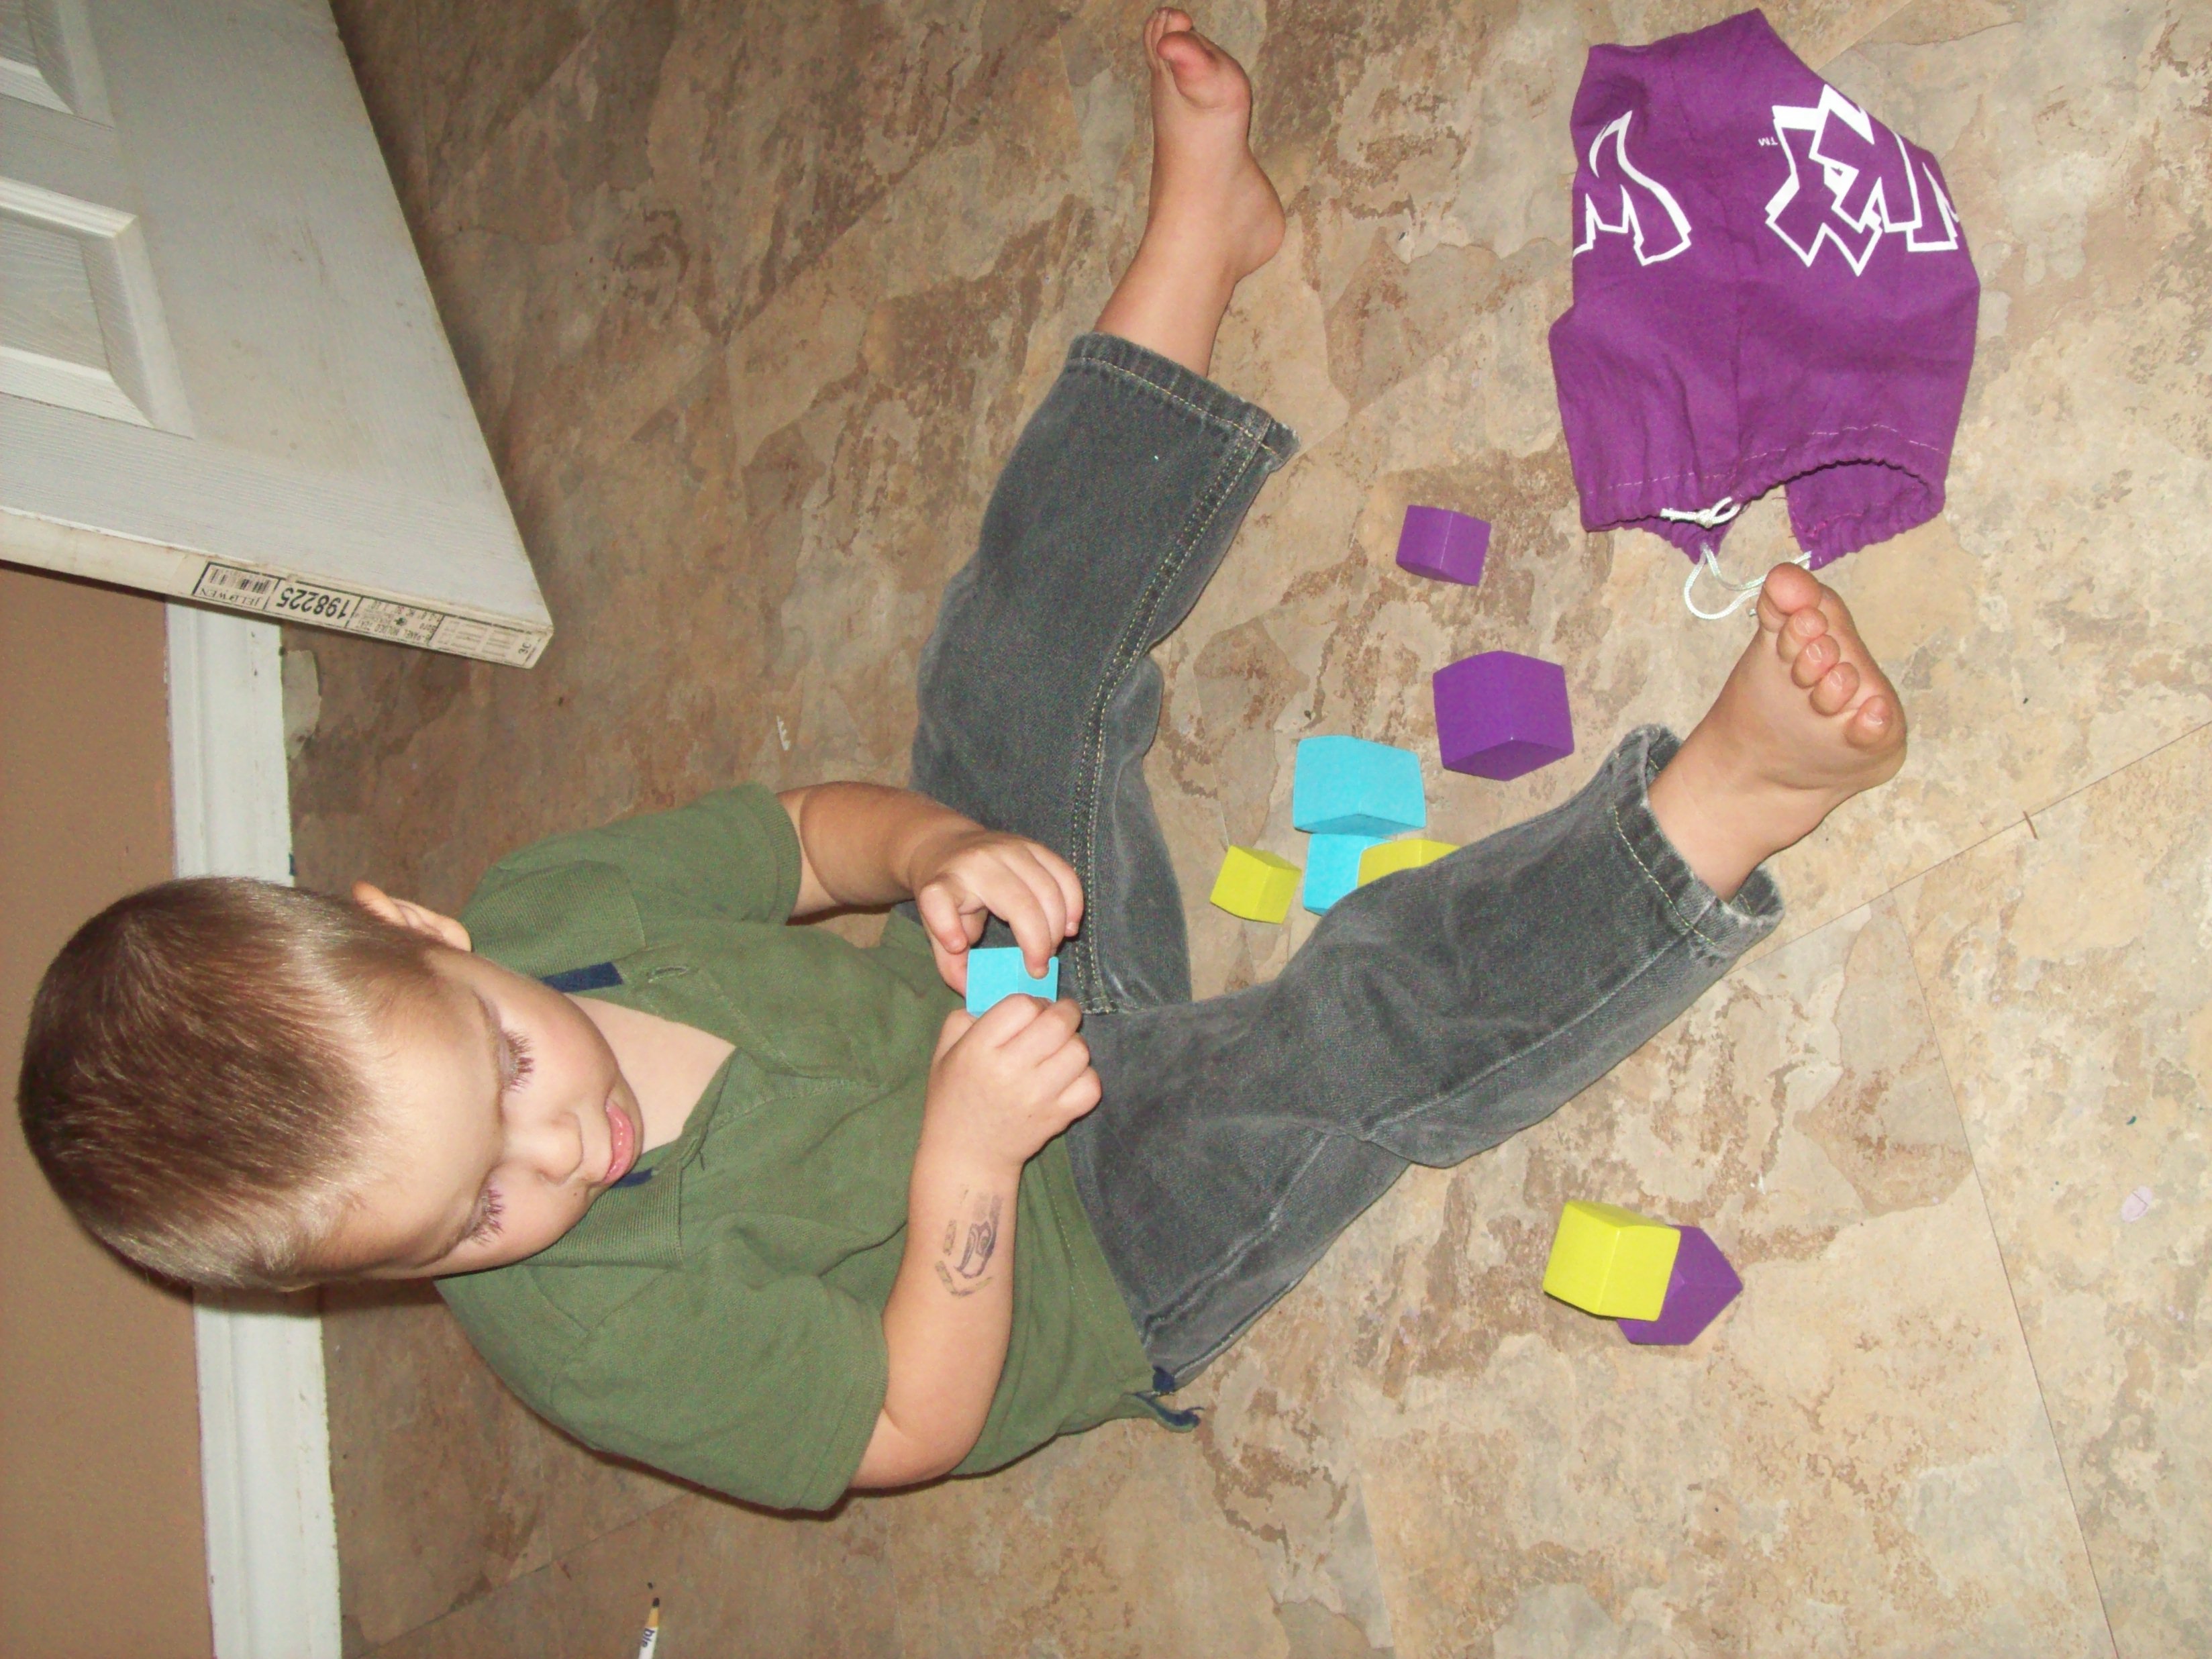
The first several times we played, we followed the rules to a T to get a feel for the games. Before long, though, we decided that we liked Tapple better without the timer. It’s hard enough to come up with words for the categories without the loud beeping reminding you that you’re about to be eliminated! And with Wonky, Small Fry always wanted to join us, but he’s too little to understand the card portion of the game, so we ended up just stacking the blocks a lot, which is fun and challenging in and of itself because of the shape of them. It was good motor skills practice for him.

The Tapple board even made an appearance at Munchkin’s birthday dinner with the grandparents. Small Fry brought it out, and everyone was wondering about it, so we explained it and a spontaneous game erupted. Love that! We only played one round that night, but it was still really fun.

There are so many ways you could adapt these games, though – especially Tapple. As is, it’s a great vocabulary game. Tweak the rules just a smidge and it would be an amazing spelling practice game (words that end with the letter you tap, for example). Additionally, you can use any category you can think of, not just those on the cards the game comes with. For example, at the spontaneous game on Munchkin’s birthday, we did “Bible Characters.”

If you get too frustrated with Wonky’s misshapen blocks, you could use your own blocks as practice and switch back to the crazy blocks later. The possibilities are many with these games.

Our Opinion

I think it’s been pretty clear through my explanations that we really enjoyed both of these games. They’re fun and educational without kids feeling like they’re “doing school.” Other educational games are fun but still have that “learning” feel to them; not so with these two. It really does feel like you’re just playing a game. The kids often bring these games out to play in their free time, both with just the two of them and with friends. This is a pretty big deal – as much as they like games, they’re usually happy to just play with toys. But these games have made appearances over and over again. That speaks very highly of them.

Final Thoughts

Both games are available through the USAopoly website, and we’ve also seen them (Tapple, anyway) in our local Fred Meyer (Kroger to you east coasters) store. From the website, they’re $19.95 each, and I heartily recommend them, especially if your family likes games.

Blessings,

ladybug-signature-3 copy


As always, there are 99 other reviewers from the Schoolhouse Review Crew writing about these games this week. Click the banner below to find a list of all of their blogs and read their thoughts on these games.

Click here to read more reviews

ladybug review crew disclaimer copy

DIY Bookmarks (with photo tutorial for the tassel)

DIY Bookmark header

Will recently switched the paper out that he draws his comics on. Instead of buying a pad of 11×14 paper that he cuts in half to get the size he needs (5×14), he found a paper size that’s 5×17 and is quite a bit less expensive than the 11×14 stuff, even when you consider that he gets “two pads for the price of one.” But 17. That’s more than 14. So I’ve been cutting off the extra three inches for him (using my rotary cutter and mat – yes, I know it’s not good to use the same cutter for fabric and paper, but that’s okay; Will’s said he’d rather pay for replacement blades for me than get his paper cut professionally). This means that we have loads and loads of 3×5 strips for art projects. I typically give them to the kids to color on, or use in any other way they deem fit, but in the beginning, we made personalized bookmarks, so I thought I’d share my method here.

First, unless you have a pro-grade laminator, make sure you use stiff paper (even index cards are probably too floppy). As I mentioned before, we use Will’s comic paper scraps, which is 300 series Bristol board. You can find this in pretty much any art store worth its weight. The other things you’ll need are: coloring supplies (pencils, markers, paints, crayons… whatever you like), box tape or a laminator, a hole punch, and embroidery thread.

Instructions:

1. Cut the paper down to 2×5 (or whatever length you like – I just had the 5″ side predetermined for me).

2. Decorate however you’d like. As you can see from my photograph, I did – what else? – ladybugs. I used my fountain pen with black India ink for the outlines and colored pencils for the color. You can decorate both sides or just one. Really, anything goes here.

3. Laminate your bookmark. If you have a laminator, use that. If not, you can carefully (to avoid air bubbles or wrinkles) cover the bookmark on both sides using box tape. This is what I do. Technically, the lamination is optional, but it does make the bookmark a bit sturdier as well as protects your book from any color flaking off and onto the pages.

4. Trim the edges of the lamination. You don’t want it right up to the edge of the bookmark, but you don’t want loads of excess plastic around the edges either.

5. Punch a hole near the top center. You can measure it if you want, but you don’t have to. Eyeballing it is fine.

6. If you used a laminator, run the bookmark through it again (but without new plastic). This will reseal the places you cut to insure you get a nice, watertight seal, thus protecting your bookmark better.

7. Make the tassel:

bookmark tassel tutorial

     a. This is done by taking the embroidery thread (whatever color you like – it can be complimentary, contrasting, or anything in between) and wrapping it around your first two fingers several times. It really takes a lot to make a nice, full tassel, so err on the side of too many times around than not enough.

     b. Carefully remove the loops from your fingers and cut the thread free from the skein.

     c. Cut another piece of thread – same color – about 8-12 inches long. Tie it around the base of your loops as tightly as you can. I like to use a square knot for this step. The knotted piece should be about 3/4 of the way down on your looped piece.

     d. Trim any long threads.

     e. On the opposite side from where the tie is, cut the loops. This will give you a tassel top as opposed to a weird, looped thing.

     f. Cut a piece of embroidery thread about 6-8 inches and thread a needle with it. Carefully run this thread through the part of your tassel below the tie that is still looped. Tie it tightly.

     g. Tie the other end of the thread (it should be two pieces, similar to a shoelace) into a knot. Again, a square knot is useful here. You can make this any length you like; just cut off any long tails you’re left with.

     h. Run the string of your tassel through the hole you made in your bookmark. Pull it halfway (or more) through the hole, open the loop you made, and thread the tassel head through that loop. Pull it tightly, but gently.

That’s it! It’s a lot of instructions, but isn’t too hard. I hope you try it; if you do, share a link with me in the comments. I’d love to see  your creation!

Blessings,

ladybug-signature-3 copy

Picture of the Week: My Little Drummer

KIMG0006

Small Fry loves to drum. A lot. He’s constantly looking for (and finding!) pencils with which to hit something. Anything. Usually a chair or the rim of a garbage can.

He also likes to play Seahawk’s imperfect child-size guitar (imperfect because it’s missing 3 strings, but it was a hand-me-down gift from a neighbor five years younger), but his real passion is drumming and singing.

Every Sunday at church, he finds pencils in the back of the pew and heads over to the aisle at the end of “our row” (not assigned, just wherever we happen to be sitting on a particular week) to drum on the seat with his pencils while we sing our worship songs. It’s adorable 🙂

Have a great weekend!

Blessings,

ladybug-signature-3 copy

Worksheets for Every Subject (Super Teacher Worksheets Review)

Do your students excel with worksheets? Do you sometimes just need a worksheet for something quick for them to do while you work with another child? Do you want worksheets to help your students with math drills or other topics? Then Super Teacher Worksheets is a website that will be right up your alley. For the purposes of this review, I was given an Individual Membership to the website. An annual membership to this website (which has thousands of worksheets in a huge variety of subjects) retails for $19.95.

The site has worksheets that you can download and print for grades kindergarten through 5th, and I’ve found that it’s been a huge benefit in our school. There are way more worksheets than you’d ever need (I bet), and they cover multiple topics within each major school subject (math, reading, writing, handwriting, grammar, spelling, science, social studies, holidays, puzzles and brainteasers, teacher helpers, preschool, and a “create your own worksheet” feature). It can be a bit overwhelming at first, but it’s really not so bad. The worksheets are all arranged by subject and then by grade level after that. For our family, I found that we ended up using mostly some of the “fun” math worksheets, but I also fully intend to utilize those from the reading and writing category. There are lots of good ones there that I’ll talk about in a minute.

I decided that, at least in the short term, I’d have the boys have a “fun math” day on Fridays. I don’t want them to lose what they’re learning in their other program, but I also want them to keep their addition, subtraction, multiplication, and division skills sharp. Using some of the worksheets from Super Teacher Worksheets seemed like a good way to accomplish this goal. The first one I had Seahawk (6th grade, but needs to practice his long division) was a Bingo game. The goal was for him to solve 8 long division problems and then color in the answers on the Bingo board, seeing if he could get a “bingo.” (He did.)

super teacher 1


While Seahawk was working out the division problems, Munchkin worked on a Mystery Graph worksheet. He hadn’t done anything like this before, and it was a lot of fun for him once he got the hang of it. He was given a series of number coordinates (similar to a Battleship game, but with only numbers instead of numbers and letters) to plot and connect. When he was finished, the dots made a picture (in his case, a school bus).

super teacher 4

Beyond these fun math activities, I want to talk a minute about the language arts worksheets I mentioned earlier. There are so many great options here, but the one that we used the most was the “Writing a paragraph – Hamburger” worksheet. This was so cool because it has a fun picture – a hamburger – and each element of the picture is designed to be a sentence (or a sentence idea) all related to the main topic, which will help the children learn to write a paragraph all on the same topic. I had the kids use this for our Tuck Everlasting study – before we started the book, I had them write a report on Juan Ponce de Leon and the Fountain of Youth (more on that in another review in a few weeks). Using the hamburger worksheet really helped them streamline their ideas into proper paragraphs.

super teacher 5

These are just samples of what we’ve actually used so far. There are so many other amazing resources on this site that I’m really looking forward to using (cause and effect, literature studies, and many more). I’ve only scratched the surface in this review, but fortunately, there are loads of other homeschoolers reviewing this wonderful site this week. I hope you’ll take a minute to see what they all have to say about it (just click the banner at the end of this post). I’ll leave my review at this: I’m really glad I have a whole year to explore this site and utilize all of the amazing things it has to offer.

Blessings,

ladybug-signature-3 copy


Click here to read more reviews


Disclaimer for product from the Schoolhouse Review Crew


What We’re Reading in September

It’s been awhile since I’ve done one of these posts, but it’s always pretty fun. Since we’re beginning the new school year tomorrow, it seemed like the perfect time to dive back into a book-related post.

Read Aloud (everyone)

We had so much fun – and learned so much – when we reviewed the Progeny Press literature guide for Little House in the Big Woods last school year that I was thrilled to be chosen to review for this company again. This time, we’ll be working through Tuck Everlasting by Natalie Babbitt. I’ll read it aloud and the boys will notebook their way through it, using the Progeny Press guide as the backbone.

Me

I recently finished the first book in one of my very favorite series, The Heavens Before by Kacy Barnett-Gramckow. I received that book as a gift from my late mother-in-law before she passed away, and didn’t read it for a very long time – after she was gone. It’s the story of a young woman, Annah, who lives during the time of the great

flood and Noah’s ark. At what seems like a chance encounter, but is really divine intervention from God (called the Most High in the books), she meets Noah’s son Shem. Within a few months, the two are married (though it’s not as clean a story as I just made it out to be). A few months after that, the flood comes. The story primarily follows Annah, but there are plenty of other characters, too – and lots of drama.

The second book is called He Who Lifts the Skies and follows Annah and Shem’s great-granddaughters, Sharah and Keren, through the Tower of Babel era. Even though I’ve read it once before, it’s been several years so it feels brand new, and I’m not very far in so I can’t explain much of the plot beyond this. But I highly recommend the books.

Seahawk (6th Grade)

All on his own, Seahawk decided to pick up the Harry Potter books this past week. They’re reasonable for his reading level, and he’s particularly interested since we recently had a movie marathon (the boys and I) where we watched all eight films over the course of a month or so. We own all seven books, but he couldn’t find the first book when he decided that this series was what he wanted to read, so he started with book two, Harry Potter and the Chamber of Secrets. I hope he ends up enjoying these books as much as I did when I read them several years ago (to give you some perspective, I read them around the time movie 4 and book 6 were just coming out).

Munchkin (4th Grade)

Poor Munchkin had to come home early from church camp a few weeks ago because he was very sick – too sick to stay, even though the week was only half over. He was feeling better within just a couple of days, but by then it was

too late to worry about taking him back (he’d have only been able to go back for the final day). To help make it up to him a bit, Will gave him a copy of The Neverending Story, and he’s been working on it ever since. It’s a much longer, harder book than he’s read before, but he’s really loving it. He’s nearing the end, and I expect he’ll be done with that book in the next few days, so I’ll likely be assigning him a new book soon. I’m thinking it’ll probably be Because of Winn Dixie by Kate di Camillo. I have access to some great literature worksheets for that book (among many others), so it’ll be a good jump to make. Besides that, Kate di Camillo is one of his favorite authors, so I’m sure he’ll love the book.

Small Fry (3 years old)

Small Fry is kind of at the mercy of everyone else since he’s too young to read. He loves being read to, though. Sometimes he gets to hear whatever book the reader (and all four of the rest of us read to him on a fairly regular basis) is willing to read, but oftentimes we let him choose. His current favorites are Horton Hears a Who by Dr. Seuss and any of the Babar books by Jean de Brunhoff. We own several of those, and the one he seems to gravitate toward is Babar and his Children, about the birth of King Babar and Queen Celeste’s triplets. This book is particularly relevant to him right now since we’re coming up on the birth of a baby soon.

What’s on the reading list in your family?

Blessings,

ladybug-signature-3 copy

Ladybug Themed Baby Gifts

A friend of mine recently (well, in late April) had a baby. As soon as she told me that she was expecting, back in November, I knew I wanted to make her some gifts. I just wasn’t sure what. Then I moved my blog here, to Ladybug Daydreams, and it hit me: a ladybug theme! When she told me she was having a girl, it was solidified in my mind that ladybugs would be a lovely theme for the gifts.

100_2012

Newborn Ladybug hat


I love both crocheting and quilting, so I focused my energy into those two mediums for the gift. It was fairly easy to come up with ideas once I had a theme: a baby quilt, a newborn hat, and a stuffed toy. All I had to do then was find patterns. The hat and quilt were easy enough; I’ve made countless hats and quilts over the years, so I got those done first. The stuffed toy took a little more energy to find a pattern for. There are loads of patterns on the internet, but very few for free.


100_2004

Dotty the Ladybug

100_2009

Dotty’s Belly

After hours of searching, I finally found one that was both free and adorable, so that’s the one I went with. (I don’t have the link handy, but if you’re looking for something like this, it’s called Dotty the Ladybug and I found it on Ravelry.) I decided to make the colors so that they’d catch a newborn’s eyes. This means that I chose red, black, and white, with different colored dots on each color (red has black, black has white, and white has red). The pupils in the eyes are just black buttons that I hot glued on. (The black with white spots is underneath the wings.)

Everything is pretty straightforward, but there’s one special thing about the quilt that I want to share. I didn’t use a traditional batting and backing for it. I left the fabric store with my ladybug and flower fabrics and headed next door to Goodwill (where Will and the big boys like to hang out while I’m looking for fabric). They weren’t done browsing yet, so I headed back to the linen section. It’s not unheard of to find great prices on fabrics at Goodwill, after all, and I was definitely not disappointed this time around. While I didn’t find a backing fabric for the quilt, I did find something much better: a two-layer baby blanket that was fleece on one side and that soft velvety stuff on the other side (how’s that for a quilter not knowing fabrics?!). And the best part was that it was tagged with the weekly half price color, so I snagged that for around $1.50 and it served as both the batting and the backing of the quilt.

100_2003When I finished the quilt top, I quilted it right to the fleece side of the blanket (because it was used, the fleece wasn’t all that soft anymore anyway), leaving the velvety side as the backing. Then I stitched the binding on as usual. I think it turned out great!

What’s your favorite baby gift to give expectant mothers?

Blessings,

ladybug-signature-3 copy

30 Weeks (pregnancy update)

There’s not much to report this month, but there are a few things 🙂

First of all, a few days after my last pregnancy post, I decided to move forward with a scheduled c-section again this time. It was a tough decision; I’d originally had my heart set on a VBAC. But several things happened to change my mind. First, at my last ultrasound (in early July), the doctor diagnosed me with having a low-lying placenta. Through some internet research, I learned that this is one definition of placenta previa (where the placenta covers the cervix, making it impossible to have a traditional birth). Second, the local hospital isn’t VBAC friendly, which means that I’d have to go to a hospital farther away to attempt a regular birth. After talking to my insurance company and putting in a call (which was never returned) to that hospital asking if my insurance would pay for a birth there, I couldn’t get a straight answer. Combine both of these things with the fact that I ran a strong risk of ending up with a c-section anyway, and I decided that if I was going to have surgery, I wanted to have it less than a mile from my house rather than thirty miles away.

Secondly, I had my gestational diabetes testing last week. I failed the one-hour version miserably, but I knew I would; I did with both Munchkin and Small Fry already. Because my numbers were so high after the one-hour test (178 when the limit is around 130 or 140), I fully expected to fail the three-hour test as well. Within an hour of getting home from the hospital lab, I had an email telling me that my results were waiting for me in online chart. Hesitantly, I opened the website and logged in, fully prepared to be disappointed. I looked at the numbers first; thankfully the chart listed both the “must be below this” number and my actual results. Then I looked all over the rest of the screen. There was a message at the top that said something along the lines of “Only one of the values from the four blood draws was elevated. You do not have gestational diabetes.” I practically did a happy dance! When it said “elevated,” by the way, it was barely above the cutoff line – only two points. The rest of the numbers were ten or more points below the cutoff, so I was thrilled that I passed the test!

The other big news is that since I passed the 28-week mark, I’m officially in the third trimester. Only about 10 weeks to go! It’s hard to believe I’m nearing the end of this journey.

Blessings,

ladybug-signature-3 copy


I know I promised a picture last time, but I just don’t have one yet, and I wanted to get this post up. I’ll try to have one next week.

Weekly Meal Plan: September 2-8

We have decided to work harder toward eating more whole foods, and this means I needed to find some new recipes. Places like All Recipes are good for finding “standard American diet” recipes, but not that great when you want to cook with foods mostly found on the perimeter of the grocery store – where the “healthy” foods traditionally live (this isn’t a hard and fast rule, of course, just a general one). Because it’s a  new month, it seemed like a great time to kick start the new meal plan into high gear, so I spent a couple of hours earlier this week searching out new recipes. The trick was that when I did a Google search for “creative whole foods recipes,” every single link (on the first page) was from Whole Foods market. That wasn’t exactly what I was looking for. So I tried again, this time with “creative real foods recipes.” I was glad to find two blogs pretty high up on the list this time, both with loads of delicious looking recipes using only real ingredients. I’m not at a place just yet to tackle homemade mayonnaise or marinara sauce (but I do plan on making those jumps in the next six months or so), so I’ll still use the processed versions of some foods, but even so… I’m glad to be making some changes now. I want a healthier me and a healthier family. Fortunately, Will’s on board too 😉

So, with that in mind, here’s what we’ll be eating this week (Wednesday [today] through next Tuesday). I’ve opted to have the list of meals separated into “Lunches” and “Dinners” but not to assign each one a specific day. This allows me to keep the feel of the daily shopping we used to do but without the stress of starting completely from scratch and having to figure out and shop each day what we’ll need. I’ll just pick the lunch and dinner for the day from the list, knowing that we’ll have the ingredients on hand.

Lunches

Chicken Salad Sandwiches on whole grain bread with pear slices (twice)

Healthy Chicken Nuggets, served with homemade ranch dip, bananas, and baby carrots

Bagel Cheese Pizzas, served with apple slices (twice) (whole grain bagels, marinara sauce, and mozzarella cheese, broiled until the sauce bubbles and cheese melts)

Mango Chicken Lettuce Wraps with baby carrots and homemade ranch dip

Healthy Chicken Parmesan Nuggets, with marinara for dipping, apple slices, and baby carrots

Dinners

Garlic Thyme Slow-cooker Chicken with steamed, smashed butternut squash and corn

Chicken Parmesan served over steamed zucchini sticks with marinara sauce

Peach Chicken in the slow-cooker with rice and green beans

Sweet Potatoes with Pineapple Beef with couscous

Moroccan Chicken with Nectarine Sauce with rice and steamed carrots

Turkey Veggie Meatloaf with smashed potatoes and lightly sauteed apples

Sweet and Spicy Chicken with Rice and steamed broccoli

Whew! This will be an interesting week, food-wise for us. What are you eating?

Blessings,

ladybug-signature-3 copy

The World’s Best Pencil Sharpener – Really! (Product Review)

This post contains referral links. If you purchase using one of my links, I get a commission at no cost to you. Thank you for supporting my blog.

If you’ve read very many homeschooling blogs, you’ve likely heard of the “World’s Best Pencil Sharpener.” Offered by Classroom Friendly Supplies, this pencil sharpener is just as good as all the other have said! I’m super excited to have the opportunity to review it for you today.

Product Review The Classroom Friendly Pencil Sharpener

Classroom Friendly Supplies was developed by a teacher who was tired of struggling with his students never having a quality sharpener available with which to sharpen their pencils. The traditional wall mounted, electric, and hand-held varieties just weren’t working. Thus the World’s Best Pencil Sharpener was born.

The pencil sharpener is available in five colors: black, pink, red, green, and blue. Individual sharpeners are available for $24.99 apiece, and there’s a quantity discount for ordering more than one of the same color (specifically in groups of 3 or 36). I chose black for our family for a couple of reasons. First, pink is out since I have only sons. Red and blue were eliminated because one is Seahawk’s favorite color and the other is Munchkin’s favorite color. I didn’t want to have any squabbles over “Mom chose your favorite because she likes you better” (I don’t think that’s very likely – it’s never happened before – but I wasn’t willing to risk it). So that left green or black. Ultimately, I thought the black would be more universally “matching” anywhere we put it than green would.

How it Works

pencil sharpener 1This pencil sharpener is ready to go to work straight out of the box; there’s no assembly required. That’s a definite selling feature in my book.

There are three main parts to the sharpener: the base, the pencil grip, and the handle. The first thing to do is pull out the pencil grip and insert your pencil, making sure it goes through the holes on both the grip and the base. There are teeth to hold it in place while you sharpen, so you don’t have to worry about holding the pencil still while you’re turning the handle. Which is the next step – turn the handle. As you do this, you can watch the pencil and the pencil grip move closer into the base. When the handle goes slack, your pencil is sharp. Gently remove it from the base and grip, and you’re ready to write.

For a better idea of what I’m talking about, here’s a video provided by the company.


In addition to the sharpener itself, you can also purchase permanent mounting hardware; this piece is $14.99 for one, with quantity discounts available just like the sharpener. Also available are replacement parts for the sharpeners: blades ($14.99 each or 2 for $22.99), shavings drawers ($6.99), and clamps ($6.99). I didn’t talk much about the clamp in this review because we didn’t use it for ours. I didn’t find that it was necessary. Due to the pencil clamp that keeps your writing instrument firmly in place during the sharpening process, you have two hands available – one to hold the sharpener in place and one to turn the crank – so I didn’t see the need to clamp the sharpener itself to the table.

Do you know someone besides yourself who might want one of these, but you’re not sure which color to choose for them? Classroom Friendly Supplies even sells gift cards! Available in amounts of $24.99, $53.97, $107.94, and $503.64, they’re exactly priced for various quantities of sharpeners.

Our Thoughts

I could go on and on about this pencil sharpener, or I could just not beat around the bush. Let’s start with the simple answer: we love this product!

100_2137The longer version goes something like this… I love how the sharpener is big enough that it won’t get lost easily (ours has found its home in the schoolroom). I like how easy it is to work; all of us (except Small Fry) were able to sharpen pencils quickly and efficiently. Which brings me to my next love. I really appreciate how quickly this sharpener brings points to the pencils – without the dreaded forearm strain I always get with handheld sharpeners. And when you sharpen pencils, you’re left with shavings… This sharpener deals nicely with those as well. The pencil shavings are contained in a drawer at the bottom of the sharpener, and it’s really easy to slide it out for emptying. There’s really no downside to this product that I could find. I highly recommend that if you sharpen a lot of pencils – regardless of the reason (homeschooling or otherwise) – you invest in one of these!

Blessings,

ladybug-signature-3 copy


Disclaimer: I received a free pencil sharpener in exchange for my honest review. I was not required to write a positive review, nor was I compensated in any other way. I am disclosing this in accordance with the FTC regulations.

Picture of the Week: Balloon Animals

Last weekend, one of the local grocery stores had their official “grand opening” after having been through a lengthy remodel. They were open the entire time during the remodel, so there wasn’t a big reveal or anything, but they still had a little party with loads of samples, cake walks throughout the day, and clowns making balloon creations for free for any kid who wanted one.

Well, being children, my kids did, in fact, each want one. But they weren’t sure what they wanted, so they essentially told the clown, “Surprise me.” Two of them (plus Will) got swords, and Seahawk (who went to a different clown) got a fishing pole with a fish dangling from it. Because of the nature of balloon creations, by the next day they were already beginning to shrink down. So Seahawk, creative boy that he is, untied the swords and made dogs out of them. It was quite impressive from a mom’s perspective.

 100_2120

Blessings,

ladybug-signature-3 copy