Ladybug Daydreams

quilting/sewing

Quilts, Quilts, and More Quilts!

Posted by Wendy on April 9, 2013 4 Comments

Okay, just two quilts, actually.

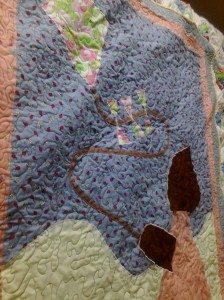
I typically make a blanket of some kind whenever we have a new niece or nephew. So far, we have 4 nieces and 3 nephews. All but one have gotten quilts and the last nephew (born last September) got a crocheted blanket. Well, all but two… Our two-year-old niece (her birthday was April 1st – no foolin’!) somehow got looked over when she was born. Bad auntie! So I’ve made her this quilt featuring Sunbonnet Sue flying a kite. I was able to give it to her on Sunday, and her reaction was priceless. She immediately just wanted her mom to cuddle her up in it. What a way to warm my heart šŸ™‚

IMG_20130403_163045 IMG_20130403_162957

This quilt was my first time using a free-form quilting style, and I must say: I loved it! Because there was no overlapping stitches, it was much easier to keep the fabric from bunching. I definitely see myself using this style again.

The second quilt I want to talk about today is my first attempt at a rag quilt. This one was made using some of Small Fry’s outgrown baby clothes. I seem to have forgotten to take a picture of the quilt by itself, but you can still see it in this picture.

IMG_20130403_162822

My favorite block is underneath Seahawk’s foot, and it’s an emblem from one of Small Fry’s newborn shirts that says “Little Brother” baseball-jersey style. I put it in the center so it would have a place of prominence. My second favorite is the one right next to Seahawk’s knee. It’s a pair of Small Fry’s pants that he wore for months. It was really sad when I finally had to admit that they didn’t fit him anymore! They’re camouflage and oh-so-cute.

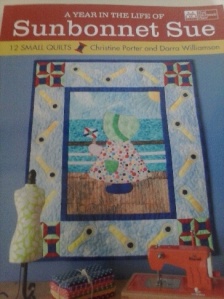
I just got this book from JoAnn a few days ago, and I seriously can’t wait to make these blocks!

543


There are 12, one representing each month of the year. I’ll definitely blog about them when I get started.

name plate copy

Share this:

  • Twitter
  • Email
  • Pinterest
  • Facebook
  • Print
  • LinkedIn
  • Reddit
  • Tumblr
  • Pocket

Like this:

Like Loading...
Posted in: quilting/sewing | Tagged: free form quilting, quilts, rag quilt, sunbonnet sue

Picture of the Week

Posted by Wendy on March 29, 2013 2 Comments

Kids Nov 2012 038

What could be better than a sleeping Small Fry wrapped up in the quilt my late grandmother made for me as a child? I love it so much that I’ve been restoring it the past few weeks, and it’s back in action now!

name plate copy

Share this:

  • Twitter
  • Email
  • Pinterest
  • Facebook
  • Print
  • LinkedIn
  • Reddit
  • Tumblr
  • Pocket

Like this:

Like Loading...
Posted in: quilting/sewing | Tagged: quilt, sleeping baby, sunbonnet sue

Monster Patch

Posted by Wendy on March 28, 2013 2 Comments

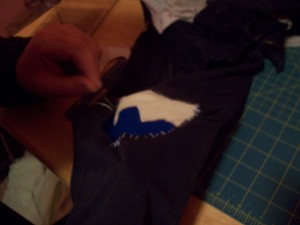
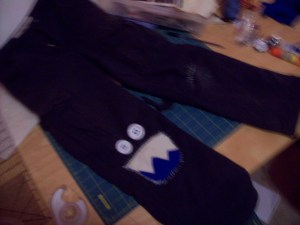
If your kids are anything like mine, you probably have a lot of pants come through your washing machine with ripped out knees. Here’s a creative way to patch them up, courtesy ofĀ Family Fun Magazine!

Kids Nov 2012 033

Kids Nov 2012 034

Kids Nov 2012 035

The tutorial in the magazine had you use white felt for the eyes, but we used buttons instead, mostly because it was 1 a.m. and we were ready to be done with this project! We did it as a surprise for Seahawk – he’s much harder on his pants than Munchkin, which is only compounded by the fact that when we were buying them, Target only one pair in his size. He was dubious at first, but loves his Monster Patch now. Oh, and lest you think I’m the only crafty one in the family, that’s hubby’s hand doing the sewing :).

What’s your favorite way to patch a hole? Let me know in the comments!

name plate copy

Share this:

  • Twitter
  • Email
  • Pinterest
  • Facebook
  • Print
  • LinkedIn
  • Reddit
  • Tumblr
  • Pocket

Like this:

Like Loading...
Posted in: quilting/sewing | Tagged: clothing repair, family fun magazine, jeans, kids clothes, patch

I love gDiapers! The price… not so much

Posted by Wendy on September 10, 2012 4 Comments

The post title pretty much says it all. gDiapers are awesome. For those of you who haven’t heard of them, they’re a hybrid diapering system. They use a reusable cloth outer, a breathable, waterproof, reusableĀ liner, and your choice of insert: either a cloth one that’s washable (obviously) or a flushable one. That’s right: flushable diapers!

I first learned of the system when there was an ad on the side of my gmail for them. I was still pregnant with Small Fry at the time, and my husband and I were just starting to become more environmentally conscious (if you don’t think recycling matters, take a trip to your local landfill and see how much garbage is produced in your area. I dare you not to become environmental after that!), so the idea of diapers that you could flush away instead of sending to “Junk Mountain” was very intriguing to me. I clicked through and fell in love with the concept. The only hurdle was the price: a starter pack for newborns was about $150. Now, that’s no *so* much when you consider what you get (18 cloth outers in two sizes and 160 flushable inserts), but I was trying to convince a skeptical husband (recycling our cans and paper was one thing; spending over $100 on diapers was completely different!), so it was a pretty major problem for me.

I didn’t end up getting the newborn pack.

We used disposable diapers for the first six weeks, which I hated after having learned about the g’s. But finally, we were able to find out that we could buy the individual pieces at Babies *R* Us, so I was able to talk DH into going there to get a “starter kit”: 2 pairs of the outer pants and a pack of 40 flushables for $45. It was priced at $40 on the gDiapers website, but once you added in shipping, it was a wash.

So, we’ve bought the two pairs of “little gPants” and our first package of flushables now. I started using them to diaper Baby E right away, and after just a small learning curve (these don’t have the little yellow line that turns blue when wet like the Pampers we’d been using), I was convinced that I didn’t want to go back to disposables. The problem now? Two pairs of the pants isn’t enough for full-time gDiapering. And extra pants are between $15 and $22 apiece.

What was a crafty mom to do?

Find out how to make my own covers, of course! I found a couple of tutorials and tried theĀ YouTubeĀ oneĀ first. The pants came out looking okay, but they just weren’t good enough to use as a diaper. So I triedĀ the written one. I was skeptical at first, mostly because of my experience with the other one, but oh my, these new ones are *nearly* as good as their store bought counterparts. Because I’m not a professional seamstress by any stretch of the imagination, there are obvious flaws, but not so many that I feel the need to buy “official” gPants.

Including all my mistakes, I was able to make 4 of the covers for about $40. That doesn’t sound like much savings, but I’ve got enough fabric left over to make at least two more; I just need to pick up some more Velcro. Once I get those done, that’ll make the homemade ones about half the price of the purchased ones! (They’ve got a 6-pair pack available for $79.99.) Win!

Share this:

  • Twitter
  • Email
  • Pinterest
  • Facebook
  • Print
  • LinkedIn
  • Reddit
  • Tumblr
  • Pocket

Like this:

Like Loading...
Posted in: quilting/sewing | Tagged: baby, clothes, clothing, diapers, diy, flushable diapers, gDiapers, love, pants, sewing, shopping, style

Nursing Pillow Cover

Posted by Wendy on June 2, 2012 Leave a Comment

We got a Boppy pillow when my second son was born in 2006, and it was so much nicer than just propping up the normal pillows for feeding time (which I did in 2003 when I had my first son). We’ve kept it, and now will be using it when Small Fry arrives next month. However, for a long time, it was Munchkin’s favorite pillow, so it’s a bit stained – that just means it’s been well loved, right? šŸ™‚ In our new quest to not spend money that doesn’t need to be spent, I decided to use some of the Pooh Bear fabric that I got for super-cheap the other week to make a cover for the Boppy. This served the dual duty of refurbishing something we already had rather than buying new as well as making the pillow match the rest of the nursery. Win-win!

Share this:

  • Twitter
  • Email
  • Pinterest
  • Facebook
  • Print
  • LinkedIn
  • Reddit
  • Tumblr
  • Pocket

Like this:

Like Loading...
Posted in: quilting/sewing | Tagged: baby, boppy, boppy pillow, cotton, diy, dual duty, home, nursing pillow, sewing

Receiving Blanket

Posted by Wendy on May 29, 2012 Leave a Comment

I’m the first to admit that I’m not one to make up my own patterns, but I *kind of* did here.

When Munchkin was a baby, we had a receiving blanket from Old Navy (it was a gift) that was much nicer than the “normal” ones from the less expensive stores. It was two-sided for one thing, and made of nicer, thicker material for another. I took that basic idea and put this one together. I also took pictures along the way so I could share with you how to do it should you want to make one.

1. Cut your fabric. You’ll need two pieces each about 35-37 inches square, depending on how big you want your finished blanket to be. You can use the same pattern or a different one for front and back; it’s entirely up to you. I cut mine about 37″ because I just have a gut feeling that Small Fry is going to be bigger than either of his brothers. Time will tell on that account :).

Ā 

2. Using anything round (you can see that I just used a can of water chestnuts) to round the corners. Mark around the can (or other item) with a marking pencil. Do this on all 4 corners of both pieces of fabric.

3. Cut along the lines of all 8 corners.

4. Pin your front and back to each other, right sides together.

5. Sew a quarter-inch seam all the way around, leaving just enough room to turn it right side out. 4-6 inches should be enough, but if you’re worried about it, you can always leave more.

6. Clip the rounded corners. Turn.

7. Press the edges so they’re nice and crisp. (Yes, my ironing board consists of a towel laid out on my table. We try to only have things in our house that are multipurpose, and an ironing board doesn’t meet that qualification.)

8. Pin the opening (from where you turned the blanket) shut. Make sure to fold the edges under so it matches the rest of the blanket. The last thing you want is raw edges.

9. Top stitch close to the edge all the way around, including the opening.

10. Enjoy your new blanket! I’m sure the baby who receives it will :).

Share this:

  • Twitter
  • Email
  • Pinterest
  • Facebook
  • Print
  • LinkedIn
  • Reddit
  • Tumblr
  • Pocket

Like this:

Like Loading...
Posted in: quilting/sewing | Tagged: baby blanket, cotton, flannel, quilt, receiving blanket, sewing, tutorial

Diaper Bag for Small Fry

Posted by Wendy on May 28, 2012 1 Comment

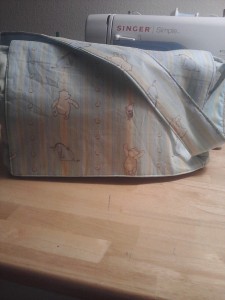
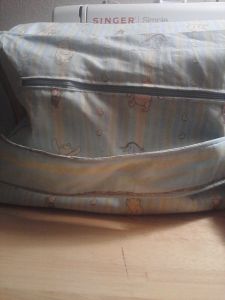
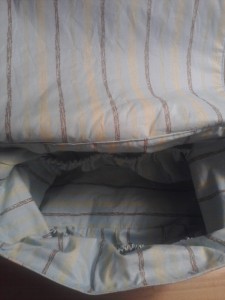
I found a great deal on some fabric over the weekend, so with hubby’s blessing, bought the rest of the bolt of two different fabrics for nursery projects. This diaper bag, made with the tutorial over on A Mingled Yarn’s blog, was my first project. I think it may be the most professional-looking thing I’ve ever made. It’s a great bag. There are 5 external pockets, 5 internal pockets, plus the main one. Now all I need is the g-Diapers (if you haven’t heard of g-Diapers, check out their site; they’re the perfect combination of cloth and disposables with cloth outers and flushable liners – fabulous!) starter kit to fill it up with before baby arrives! For those of you keeping track with me, there’s about 6 1/2 weeks left!

Look for posts over the next few days of the other projects I’ve got planned with these fabrics :).

Share this:

  • Twitter
  • Email
  • Pinterest
  • Facebook
  • Print
  • LinkedIn
  • Reddit
  • Tumblr
  • Pocket

Like this:

Like Loading...
Posted in: quilting/sewing | Tagged: baby, diaper bag, diapers, nursery, sewing, winnie the pooh

Pajama Pants

Posted by Wendy on April 21, 2012 Leave a Comment

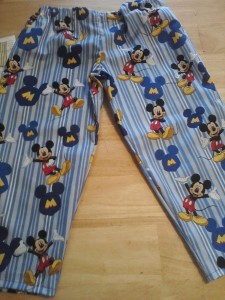
These were made for my nephew’s second birthday. He’s a huge fan of Mickey Mouse. I made similar sets for my two sons for Christmas – the pajama pants along with a bathrobe apiece. My mom thought they were so cute that she asked me to make a set for my nephew. The deal was she’d provide the fabric if I provided the labor, and it would be a joint gift for the little guy. It worked out well!

Share this:

  • Twitter
  • Email
  • Pinterest
  • Facebook
  • Print
  • LinkedIn
  • Reddit
  • Tumblr
  • Pocket

Like this:

Like Loading...
Posted in: quilting/sewing | Tagged: clothes, pajamas, pants, sewing

Knight Quilts

Posted by Wendy on April 20, 2012 Leave a Comment

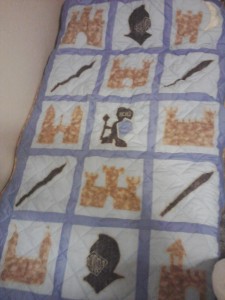
We recently redecorated my sons’ bedroom, and they chose a “Knights in Shining Armor” theme, so of course I had to make them new quilts to go with the new theme! I made the appliques from clip art images, and let each kid choose his own color for the background of the pictures. They both chose blue, but in different shades, so I used the leftovers from one’s for the sashing on the other’s. These took a bit of math, too, because their beds aren’t a standard American size. I planned them carefully so that they would be approximately the size of the beds. I love sneaking in on them while they’re sleeping and seeing the matching quilts keeping them warm!

Share this:

  • Twitter
  • Email
  • Pinterest
  • Facebook
  • Print
  • LinkedIn
  • Reddit
  • Tumblr
  • Pocket

Like this:

Like Loading...
Posted in: quilting/sewing | Tagged: applique, blue, broadcloth, cotton, quilt, sewing

Fan Quilt

Posted by Wendy on April 20, 2012 Leave a Comment

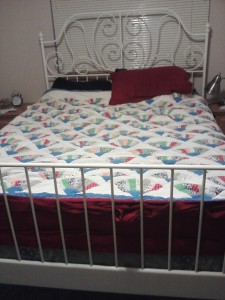
You just saw this quilt underneath “Christmas Present Joe,” but it’s elaborate enough to get its own post! It was made in 2009, and took over a month to complete due to its 900+ individual pieces. I got the pattern from a library book.

Share this:

  • Twitter
  • Email
  • Pinterest
  • Facebook
  • Print
  • LinkedIn
  • Reddit
  • Tumblr
  • Pocket

Like this:

Like Loading...
Posted in: quilting/sewing | Tagged: cotton, patchwork, quilt, sewing
« Previous 1 2 3 4 Next »

Welcome!

Welcome to Ladybug Daydreams! My name is Wendy, and I’m glad you’re here. I am a homeschooling mom to 5 boys. I write about homeschooling, homeschool curriculum, yarn (both knitting and crochet), and more! I hope you enjoy what you read.

Social

  • View ladybugdaydream’s profile on Twitter
  • View ladybugdaydreams’s profile on Instagram
  • View ladybugdaydream’s profile on Pinterest

Subscribe

Join 491 other subscribers

September 2023
S M T W T F S
 12
3456789
10111213141516
17181920212223
24252627282930
« Nov    

Search

MyFreeCopyright.com Registered & Protected

Copyright © 2023 Ladybug Daydreams.

Theme by themehall.com.

loading Cancel
Post was not sent - check your email addresses!
Email check failed, please try again
Sorry, your blog cannot share posts by email.
%d bloggers like this: