Ladybug Daydreams

sewing

My Experience with Cloth Diapering

Posted by Wendy on November 14, 2013 1 Comment

Phone Pics 238

When I was pregnant with Small Fry, at first I never even thought of doing anything besides disposable diapers; that’s what I’d done with the other two kids, and it was easy. But then a few things happened nearly simultaneously.

First, hubby had to take some things to the “dump.” We were living near the actual landfill at the time, not near a “transfer center” like we do now, so the landfill is where he went. He was appalled. It is a huge mountain that you drive your car up and then, once you’re atop the heap, you literally just toss your stuff onto what’s already there. Eventually, they come through with the proper equipment and do what they need to do to make it “safe,” although I’ve come to learn that there’s really no such thing as a safe landfill. A few days later, he took the rest of us to see what we have since dubbed “Junk Mountain.” In the beginning, hubby had given it a less savory name, but we quickly changed it to a more kid-friendly version ;).

The other thing that happened was that there was an ad in my email box (not the actual box, but off to the side – if you have gmail, you know what I mean) for a company called gDiapers. The ad boasted “flushable diapers.” After our trip to the landfill, I was all over this. If I could prevent my baby from sending over 2,000 diapers to the landfill over the course of his diaper-wearing days, I was all over that! I clicked through the ad and read everything I could on their site. I was in love with the concept. Cloth on the outside, flushable on the inside, and nothing to send to the landfill. Brilliant! The only drawback was the price; gDiapers are quite expensive.

We bought a starter set anyway. That came with 2 cloth outers, 2 waterproof liners, and 40 flushable inserts. They were definitely more work than disposable diapers (we didn’t get the g’s until Small Fry was about 6 weeks old), but I didn’t care. It was worth it to me to do just a small part to “save the Earth.”

Something else happened a few weeks into our gDiapering experience (I’m not going to go into the details) that made me want to explore full-on cloth diapering. I spent hours trying to figure out all the different terms (pocket diapers, all-in-ones, the list goes on…), materials, etc involved in cloth diapering, and, like with my initial sticker shock at gDiapers, was dismayed at the cost. Some of the diapers are upwards of $20 apiece! And you need at least 15, but preferably in the neighborhood of 30 or more to cloth diaper full time. One of the best deals I found at the time was a six-pack of reusable diapers for $100. You can do the math, I’m sure. That would mean $300-$500 dollars for diapers! That’s way too much, even if you are using them over and over again.

So I went back to the drawing board.

I was browsing Amazon, drooling over the cloth diapers and gDiapers (don’t mock me), when it suggested that I might like this book: How to Make All-in-One, One-Size-Fits-Most Cloth Diapers. I got the Kindle sample, and was instantly intrigued. So I talked to hubby to make sure there was enough money on our pre-paid card (we never use our real bank card for online purchases…) and bought the Kindle version. For $4.99 I didn’t think I could really go wrong.

I was right!

That was the very best money I spent in my desire to cloth diaper. I spent about a week with the book, going over her suggestions for the materials, and pricing everything through online retailers and JoAnn. I planned my trip carefully to maximize the JoAnn coupons (I didn’t want to wait for online shipping!), and was able to get enough PUL (the outer, waterproof fabric), Alova Suede (the interior, wicking fabric),  Velcro,  elastic, and thread to make 15 diapers for $32.  For another $10 at WalMart, I got a package of 15 microfiber cloths to use as the absorbent layer inside the diapers.

So, for less than $50 and about 20 hours of my time, I was able to make 15 cloth diapers. In case you don’t have your calculator handy, that comes out to just about $3 a diaper. Compared to $20. I call that a win. And the best part is that we don’t have the same “oh, no, we’re out of diapers and it’s the middle of the night” panic attacks that other people go through. Double win.

So. That covers my journey to getting the diapers. What about how they’ve worked since we implemented them?

I could not be happier with them. They are just as easy to use as disposables (I made all-in-one diapers, which means no pockets to stuff or pieces to separate before laundering), and I know we’ve saved so much money going this route. Even if you count all my experiments (with gDiapering, mostly), we’re way ahead in the money-saving department. And there are about a thousand fewer diapers in the landfill than there would be otherwise.

That said, there are a couple of things I wish I could change. First, I wish I’d just embraced that fact that I had a third baby boy; as it is, I chose yellow for the diaper covers because it was a “gender neutral” color, and in case we have a baby girl someday, I wanted to be able to use the same diapers. A year in, I suspect that these diapers won’t hold up for another baby. Don’t get me wrong – these are wonderful diapers, and I recommend them to anyone, but since I made only 15 instead of 30 or 45, they’re taking a bit of a beating. Several of them need to have the Velcro replaced soon (still peanuts compared to Pampers), and one of them needs new elastic, which will involve taking the whole diaper apart and reassembling it. I haven’t tackled that project yet. Plus, after reading a post on The Minimalist Mom, I was convicted by the notion that “saving” clothes from one child to another, outside of those that you really love, isn’t necessarily as frugal as you think. Her main arguments against it were a) you have to have the space to store them, and if you’re living a minimalist lifestyle in a small house, that may not be something you have, and b) clothes still wear out, even if you’re not actively using them. Cotton fibers wear with age, not necessarily use. Elastic gets old and brittle in storage. So it’s better to pass your cloth diapers along to someone who needs them when your baby is done with them than to put them in storage for the elusive “next baby.” If I’d read that post before I made the diapers, I would’ve chosen a cute, very boyish fabric for the outside (monsters or robots, probably) rather than plain yellow.

The second thing is that sometimes I wish I had two or three pocket diapers for nighttime. Going the pocket route allows  you to add more of the absorbent layers when baby needs them most – at night. So we do sometimes buy the throwaways for overnight. Right now, we’re using our trusty yellow diapers, but depending on how much liquid the baby’s had before bed, they don’t always last all night. So that is a definite con. Even when we do use disposables at night, hubby reminds me that we’re still doing a good thing, both for our pocketbook and our planet. A package of Pampers lasts an entire month when you only use one a day, rather than half a week if you use them exclusively. And sending one diaper a day to the landfill, while not perfect, is loads better than sending eight diapers a day there. That has to count for something, right?

So there you go. My personal experience with cloth diapering.

I didn’t write this to try to guilt anyone into using cloth, by the way. I just wanted to share my experience and how it’s worked so well for our family. If I inspire you to try, great! If not, that’s okay too.

Phone Pics 239


Phone Pics 233


–Wendy

Share this:

  • Twitter
  • Email
  • Pinterest
  • Facebook
  • Print
  • LinkedIn
  • Reddit
  • Tumblr
  • Pocket

Like this:

Like Loading...
Posted in: parenting, quilting/sewing | Tagged: cloth diaper, cloth diapering, cloth diapers, disposable diapers, diy, sewing

DIY Cloth Napkins

Posted by Wendy on October 4, 2013 Leave a Comment

I’ve read several blogs lately about making your own cloth napkins. They all have similar techniques for doing so (cut the fabric, fold over the edges, and sew) and reasons for using cloth instead of disposable (more environmentally friendly, save money). While I agree 100% with the reasons behind using cloth over paper, I prefer a much simpler procedure for the making of the napkin. Here’s my version.

Cut out your fabric. I’ve found that flannel is the best for this particular project. It holds water better (for wiping down tables and babies) and is softer on the skin than the regular cotton quilting fabric. I made mine 12×12, but you can make them any size you like. Some people like them bigger, like 20×20. In the 12×12 size, I was able to get 18 napkins out of 2 yards of fabric.

image

Once you have all the squares cut out, do yourself a favor and round the corners. That’ll make the sewing of the edges much easier.

image

Finally, set your sewing machine to a zigzag stitch. You want it as wide as it’ll go (5 millimeters on my machine) and a very short length – my machine has settings from 0 to 4, and I go about halfway between 0 and 1 for this project. Using a complimentary or contrasting thread (depending on the look you’re going for), zigzag stitch all the way around your napkins. This will keep the fabric from fraying, which flannel is especially prone to do.

That’s it! Beautiful, reusable cloth napkins with bothering with the fussiness of folding and pressing edges or stressing about super straight lines.

image

image

Enjoy!

–Wendy

P.S. The procedure for cloth baby wipes is exactly the same, just with 8×8 squares of flannel.

Share this:

  • Twitter
  • Email
  • Pinterest
  • Facebook
  • Print
  • LinkedIn
  • Reddit
  • Tumblr
  • Pocket

Like this:

Like Loading...
Posted in: quilting/sewing | Tagged: cloth napkins, diy, easy, environmentally friendly, frugal, sewing

12 for 12

Posted by Wendy on June 18, 2013 3 Comments

So, I finished the last four “Sunbonnet Sue” blocks…

You can see the first eight here and here.

March:

image

June:

image

This isn’t the June one from the book; I didn’t really like theirs, so I made up my own, which I really like :).

August:

image

December:

image

Now I have the daunting task of making sure they’re all exactly the same size (which they’re not right now…) so that when I put them all together with lattice between, it looks right. I’ll keep you posted on that step when it’s done.

–Wendy

Share this:

  • Twitter
  • Email
  • Pinterest
  • Facebook
  • Print
  • LinkedIn
  • Reddit
  • Tumblr
  • Pocket

Like this:

Like Loading...
Posted in: quilting/sewing | Tagged: quilting, sewing, sunbonnet sue

I love gDiapers! The price… not so much

Posted by Wendy on September 10, 2012 4 Comments

The post title pretty much says it all. gDiapers are awesome. For those of you who haven’t heard of them, they’re a hybrid diapering system. They use a reusable cloth outer, a breathable, waterproof, reusable liner, and your choice of insert: either a cloth one that’s washable (obviously) or a flushable one. That’s right: flushable diapers!

I first learned of the system when there was an ad on the side of my gmail for them. I was still pregnant with Small Fry at the time, and my husband and I were just starting to become more environmentally conscious (if you don’t think recycling matters, take a trip to your local landfill and see how much garbage is produced in your area. I dare you not to become environmental after that!), so the idea of diapers that you could flush away instead of sending to “Junk Mountain” was very intriguing to me. I clicked through and fell in love with the concept. The only hurdle was the price: a starter pack for newborns was about $150. Now, that’s no *so* much when you consider what you get (18 cloth outers in two sizes and 160 flushable inserts), but I was trying to convince a skeptical husband (recycling our cans and paper was one thing; spending over $100 on diapers was completely different!), so it was a pretty major problem for me.

I didn’t end up getting the newborn pack.

We used disposable diapers for the first six weeks, which I hated after having learned about the g’s. But finally, we were able to find out that we could buy the individual pieces at Babies *R* Us, so I was able to talk DH into going there to get a “starter kit”: 2 pairs of the outer pants and a pack of 40 flushables for $45. It was priced at $40 on the gDiapers website, but once you added in shipping, it was a wash.

So, we’ve bought the two pairs of “little gPants” and our first package of flushables now. I started using them to diaper Baby E right away, and after just a small learning curve (these don’t have the little yellow line that turns blue when wet like the Pampers we’d been using), I was convinced that I didn’t want to go back to disposables. The problem now? Two pairs of the pants isn’t enough for full-time gDiapering. And extra pants are between $15 and $22 apiece.

What was a crafty mom to do?

Find out how to make my own covers, of course! I found a couple of tutorials and tried the YouTube one first. The pants came out looking okay, but they just weren’t good enough to use as a diaper. So I tried the written one. I was skeptical at first, mostly because of my experience with the other one, but oh my, these new ones are *nearly* as good as their store bought counterparts. Because I’m not a professional seamstress by any stretch of the imagination, there are obvious flaws, but not so many that I feel the need to buy “official” gPants.

Including all my mistakes, I was able to make 4 of the covers for about $40. That doesn’t sound like much savings, but I’ve got enough fabric left over to make at least two more; I just need to pick up some more Velcro. Once I get those done, that’ll make the homemade ones about half the price of the purchased ones! (They’ve got a 6-pair pack available for $79.99.) Win!

Share this:

  • Twitter
  • Email
  • Pinterest
  • Facebook
  • Print
  • LinkedIn
  • Reddit
  • Tumblr
  • Pocket

Like this:

Like Loading...
Posted in: quilting/sewing | Tagged: baby, clothes, clothing, diapers, diy, flushable diapers, gDiapers, love, pants, sewing, shopping, style

Nursing Pillow Cover

Posted by Wendy on June 2, 2012 Leave a Comment

We got a Boppy pillow when my second son was born in 2006, and it was so much nicer than just propping up the normal pillows for feeding time (which I did in 2003 when I had my first son). We’ve kept it, and now will be using it when Small Fry arrives next month. However, for a long time, it was Munchkin’s favorite pillow, so it’s a bit stained – that just means it’s been well loved, right? 🙂 In our new quest to not spend money that doesn’t need to be spent, I decided to use some of the Pooh Bear fabric that I got for super-cheap the other week to make a cover for the Boppy. This served the dual duty of refurbishing something we already had rather than buying new as well as making the pillow match the rest of the nursery. Win-win!

Share this:

  • Twitter
  • Email
  • Pinterest
  • Facebook
  • Print
  • LinkedIn
  • Reddit
  • Tumblr
  • Pocket

Like this:

Like Loading...
Posted in: quilting/sewing | Tagged: baby, boppy, boppy pillow, cotton, diy, dual duty, home, nursing pillow, sewing

Receiving Blanket

Posted by Wendy on May 29, 2012 Leave a Comment

I’m the first to admit that I’m not one to make up my own patterns, but I *kind of* did here.

When Munchkin was a baby, we had a receiving blanket from Old Navy (it was a gift) that was much nicer than the “normal” ones from the less expensive stores. It was two-sided for one thing, and made of nicer, thicker material for another. I took that basic idea and put this one together. I also took pictures along the way so I could share with you how to do it should you want to make one.

1. Cut your fabric. You’ll need two pieces each about 35-37 inches square, depending on how big you want your finished blanket to be. You can use the same pattern or a different one for front and back; it’s entirely up to you. I cut mine about 37″ because I just have a gut feeling that Small Fry is going to be bigger than either of his brothers. Time will tell on that account :).


2. Using anything round (you can see that I just used a can of water chestnuts) to round the corners. Mark around the can (or other item) with a marking pencil. Do this on all 4 corners of both pieces of fabric.

3. Cut along the lines of all 8 corners.

4. Pin your front and back to each other, right sides together.

5. Sew a quarter-inch seam all the way around, leaving just enough room to turn it right side out. 4-6 inches should be enough, but if you’re worried about it, you can always leave more.

6. Clip the rounded corners. Turn.

7. Press the edges so they’re nice and crisp. (Yes, my ironing board consists of a towel laid out on my table. We try to only have things in our house that are multipurpose, and an ironing board doesn’t meet that qualification.)

8. Pin the opening (from where you turned the blanket) shut. Make sure to fold the edges under so it matches the rest of the blanket. The last thing you want is raw edges.

9. Top stitch close to the edge all the way around, including the opening.

10. Enjoy your new blanket! I’m sure the baby who receives it will :).

Share this:

  • Twitter
  • Email
  • Pinterest
  • Facebook
  • Print
  • LinkedIn
  • Reddit
  • Tumblr
  • Pocket

Like this:

Like Loading...
Posted in: quilting/sewing | Tagged: baby blanket, cotton, flannel, quilt, receiving blanket, sewing, tutorial

Diaper Bag for Small Fry

Posted by Wendy on May 28, 2012 1 Comment

I found a great deal on some fabric over the weekend, so with hubby’s blessing, bought the rest of the bolt of two different fabrics for nursery projects. This diaper bag, made with the tutorial over on A Mingled Yarn’s blog, was my first project. I think it may be the most professional-looking thing I’ve ever made. It’s a great bag. There are 5 external pockets, 5 internal pockets, plus the main one. Now all I need is the g-Diapers (if you haven’t heard of g-Diapers, check out their site; they’re the perfect combination of cloth and disposables with cloth outers and flushable liners – fabulous!) starter kit to fill it up with before baby arrives! For those of you keeping track with me, there’s about 6 1/2 weeks left!

Look for posts over the next few days of the other projects I’ve got planned with these fabrics :).

Share this:

  • Twitter
  • Email
  • Pinterest
  • Facebook
  • Print
  • LinkedIn
  • Reddit
  • Tumblr
  • Pocket

Like this:

Like Loading...
Posted in: quilting/sewing | Tagged: baby, diaper bag, diapers, nursery, sewing, winnie the pooh

Pajama Pants

Posted by Wendy on April 21, 2012 Leave a Comment

These were made for my nephew’s second birthday. He’s a huge fan of Mickey Mouse. I made similar sets for my two sons for Christmas – the pajama pants along with a bathrobe apiece. My mom thought they were so cute that she asked me to make a set for my nephew. The deal was she’d provide the fabric if I provided the labor, and it would be a joint gift for the little guy. It worked out well!

Share this:

  • Twitter
  • Email
  • Pinterest
  • Facebook
  • Print
  • LinkedIn
  • Reddit
  • Tumblr
  • Pocket

Like this:

Like Loading...
Posted in: quilting/sewing | Tagged: clothes, pajamas, pants, sewing

Knight Quilts

Posted by Wendy on April 20, 2012 Leave a Comment

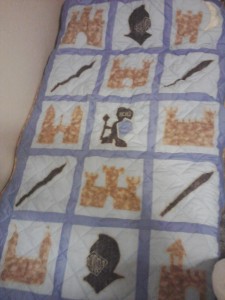
We recently redecorated my sons’ bedroom, and they chose a “Knights in Shining Armor” theme, so of course I had to make them new quilts to go with the new theme! I made the appliques from clip art images, and let each kid choose his own color for the background of the pictures. They both chose blue, but in different shades, so I used the leftovers from one’s for the sashing on the other’s. These took a bit of math, too, because their beds aren’t a standard American size. I planned them carefully so that they would be approximately the size of the beds. I love sneaking in on them while they’re sleeping and seeing the matching quilts keeping them warm!

Share this:

  • Twitter
  • Email
  • Pinterest
  • Facebook
  • Print
  • LinkedIn
  • Reddit
  • Tumblr
  • Pocket

Like this:

Like Loading...
Posted in: quilting/sewing | Tagged: applique, blue, broadcloth, cotton, quilt, sewing

Fan Quilt

Posted by Wendy on April 20, 2012 Leave a Comment

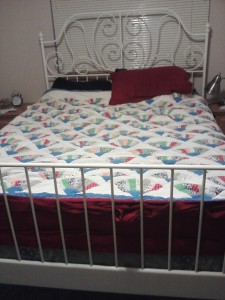
You just saw this quilt underneath “Christmas Present Joe,” but it’s elaborate enough to get its own post! It was made in 2009, and took over a month to complete due to its 900+ individual pieces. I got the pattern from a library book.

Share this:

  • Twitter
  • Email
  • Pinterest
  • Facebook
  • Print
  • LinkedIn
  • Reddit
  • Tumblr
  • Pocket

Like this:

Like Loading...
Posted in: quilting/sewing | Tagged: cotton, patchwork, quilt, sewing
1 2 Next »

Welcome!

Welcome to Ladybug Daydreams! My name is Wendy, and I’m glad you’re here. I am a homeschooling mom to 5 boys. I write about homeschooling, homeschool curriculum, yarn (both knitting and crochet), and more! I hope you enjoy what you read.

Social

  • View ladybugdaydream’s profile on Twitter
  • View ladybugdaydreams’s profile on Instagram
  • View ladybugdaydream’s profile on Pinterest

Subscribe

Join 493 other subscribers

May 2025
S M T W T F S
 123
45678910
11121314151617
18192021222324
25262728293031
« Feb    

Search

MyFreeCopyright.com Registered & Protected

Copyright © 2025 Ladybug Daydreams.

Theme by themehall.com.

loading Cancel
Post was not sent - check your email addresses!
Email check failed, please try again
Sorry, your blog cannot share posts by email.
%d bloggers like this: