Dollar Tree Tiered Tray

I love seeing the tiered trays that Dollar Tree crafters on YouTube make. I really want to have one in my kitchen, but as I mentioned last month, it’s really just too small in there for much of anything. So I did the next best thing: I made one and gave it away! Here’s what I did to make “my” tiered tray.

I started with a set of the burner covers from the Dollar Tree. I went this route instead of getting two cake pans, or a cake pan and pie pan, because I wanted to keep it cheap for my first time out. I painted both pieces black. It was technically chalkboard paint because that was the only black paint they had at Dollar Tree (and I didn’t have any at home). For the piece that connects the two tiers, the YouTubers usually use one of the standard Dollar Tree candlesticks. My store didn’t have any of those when I was there shopping, so I wandered the store for a while to try to find something that would work. I eventually chose a stemmed wine glass. When I got home, I painted that black as well. Then, following the tips from the people on YouTube, I used a combination of super glue and hot glue to connect everything together. The super glue gives you a permanent hold, while the hot glue gives you a semi-instant hold so you don’t have to worry about your piece falling apart while you wait the hours for the super glue to cure.

With the tray done, now I had to fill it up. I decided that I would give this to my mom for Mother’s Day, so I chose items that would fit her personality. I went with a “birds” theme because she loves birds. Some of the items I used almost as-is, and some I DIY’ed a lot.

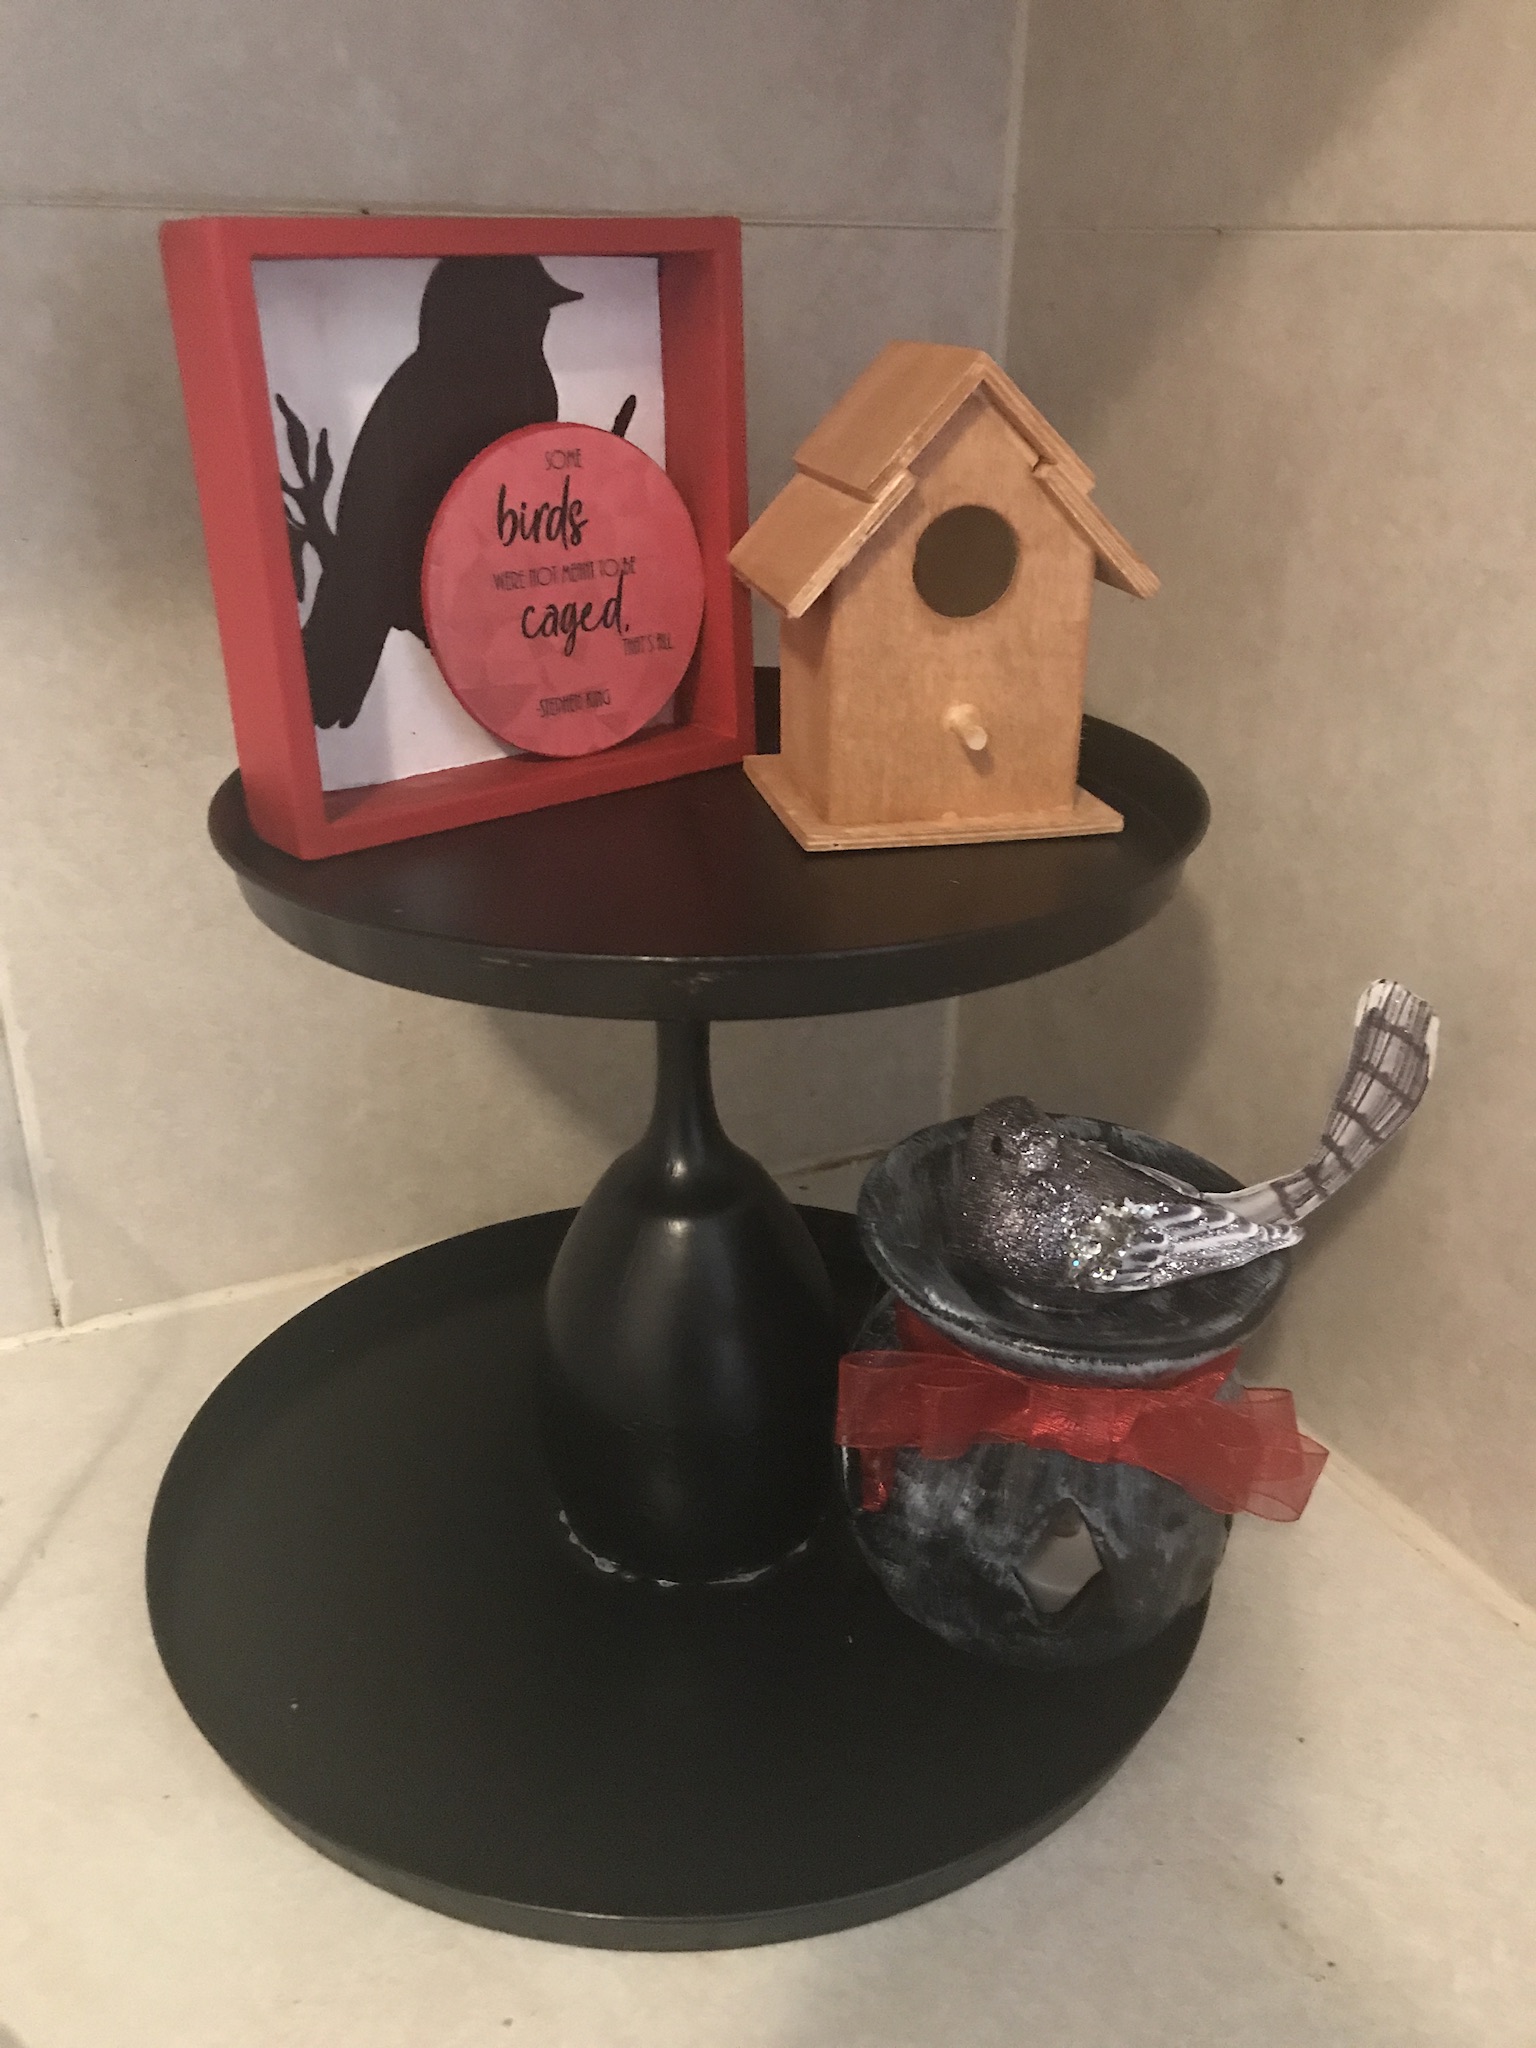
First up was this candle holder. It was gray when I started, but I wanted it to be black so I painted it with my chalkboard paint. I distressed it a bit with some white dry-brushing, and then glued a Dollar Tree bird decoration on top of it and tied a red ribbon around the top. I filled the candle holder with an LED candle from DT because my mom doesn’t use real candles in her home for animal safety reasons. That went onto the tiered tray.

Next, I chose one of the birdhouses from Dollar Tree. I wanted a stained wood look for that, so I took some brown acrylic paint and watered it down. I brushed this all over the bird house, and it gave me exactly the look I wanted. I kept the bird house pretty plain.

I found a packet of wooden dragonflies at the Dollar Tree too, and I painted one of them with the chalkboard paint. I primed the new mini-chalkboard and wrote “Love U” on it, mostly to show that it was a working chalkboard.

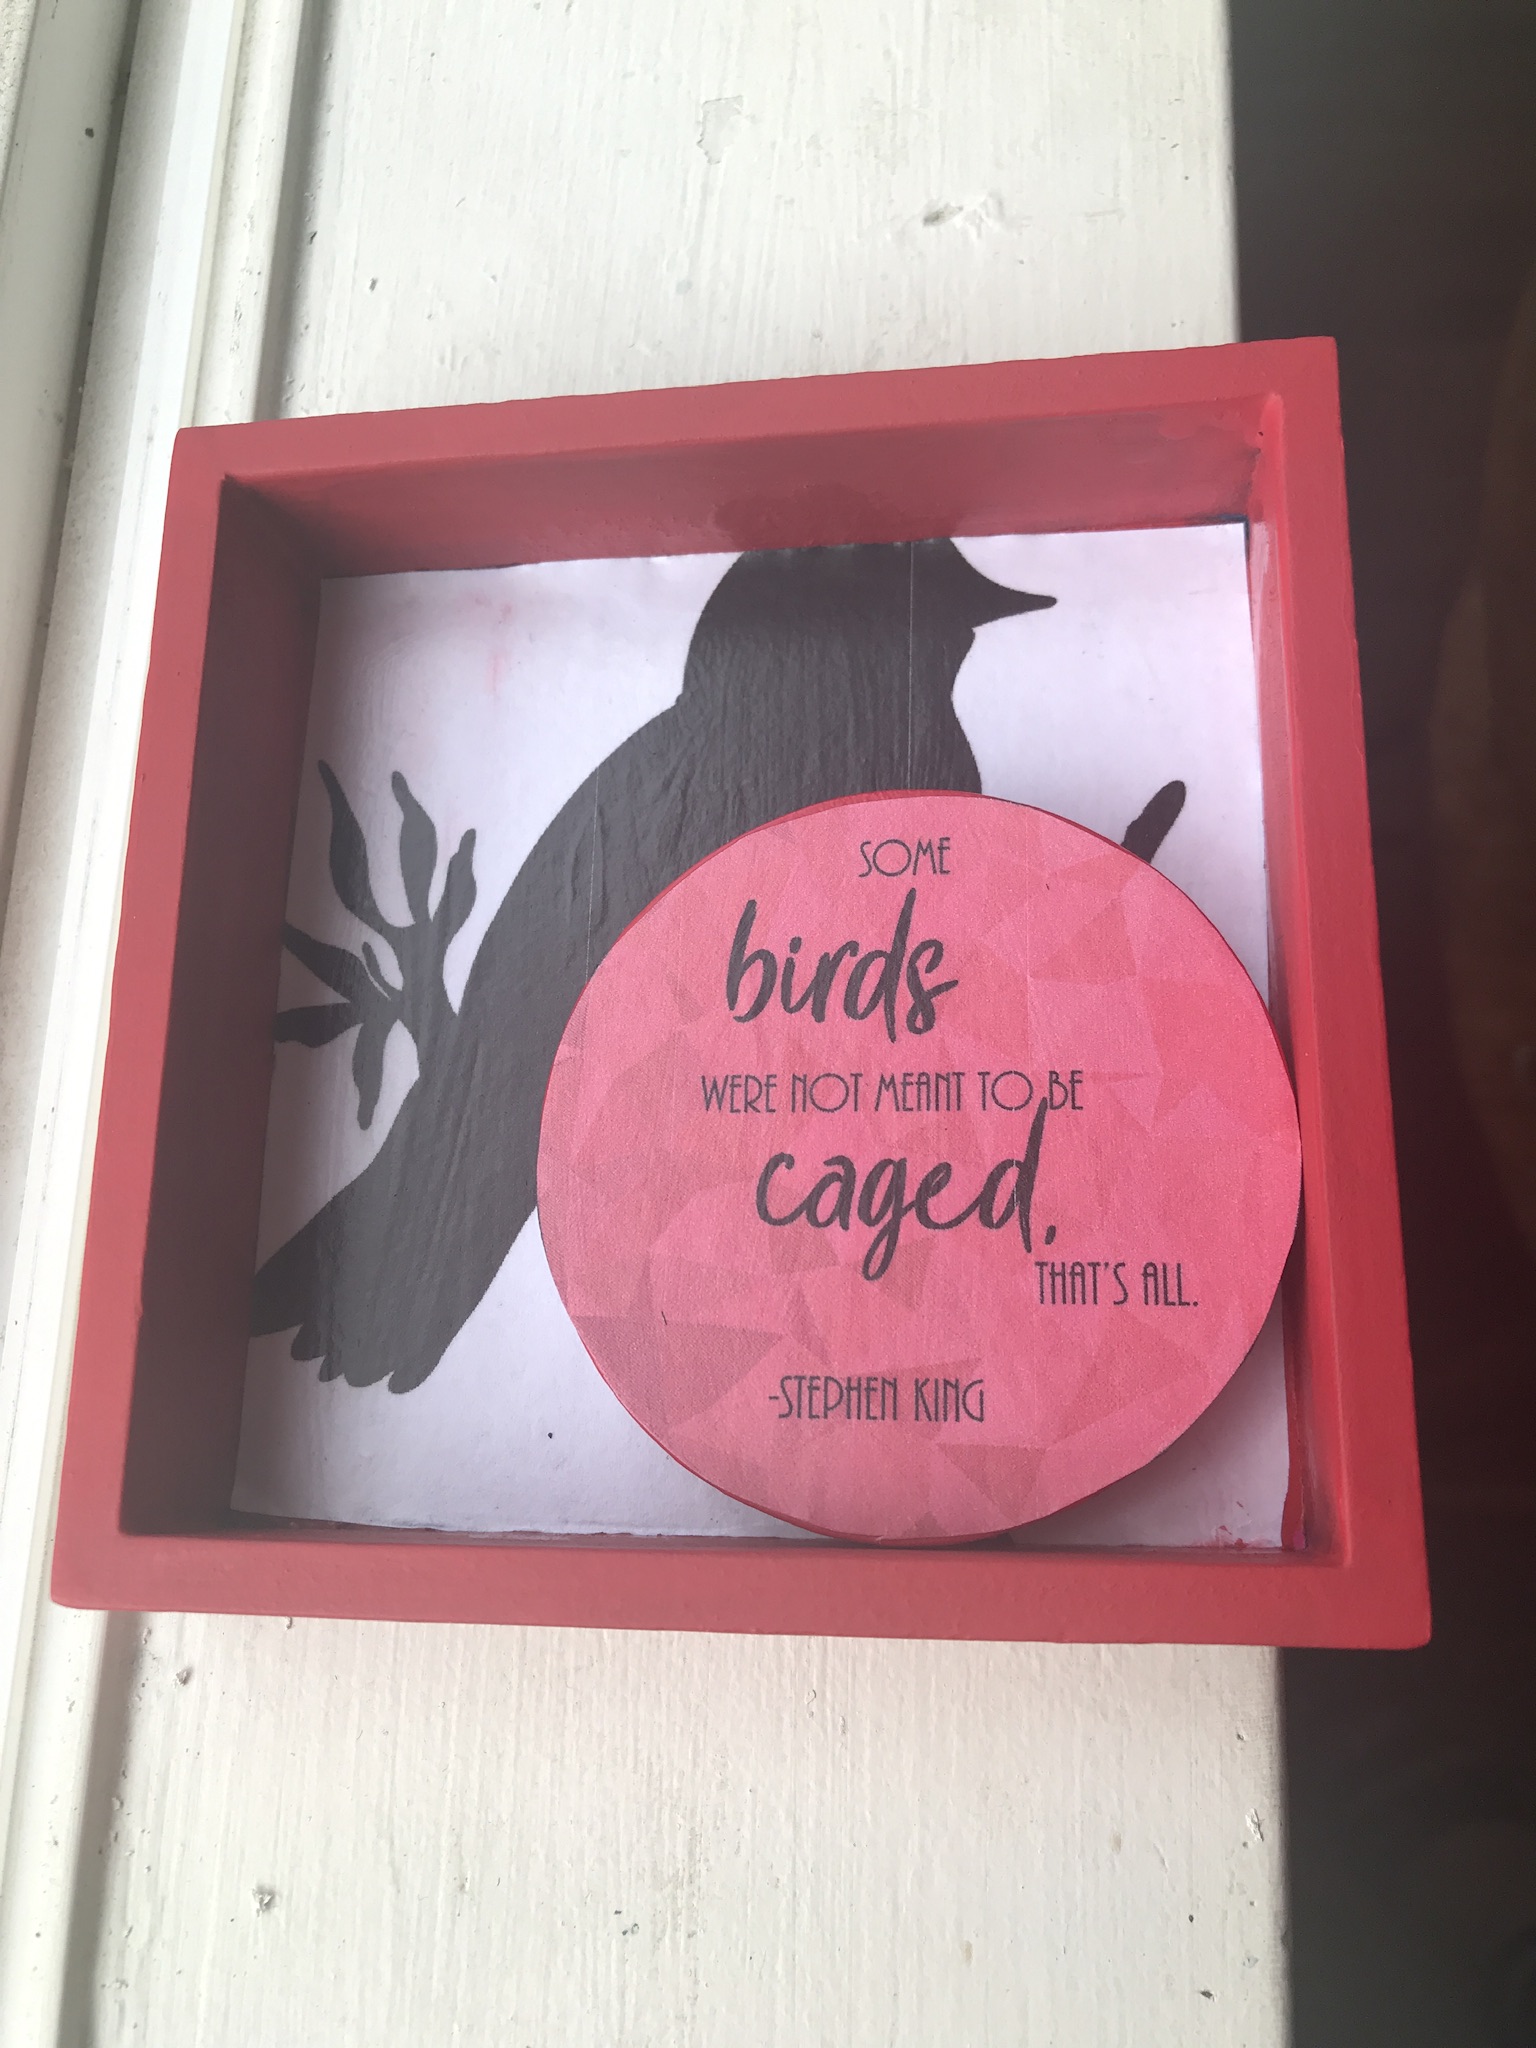
The last piece I added to the tiered tray was the best one I made. I found a cheesy shelf frame at the Dollar Tree. It was sort of like a shadow box frame, but with no glass in the front. It had a wood circle, which I popped off and painted. (It turns out I didn’t need to have painted it because I ended up gluing a piece of paper to the circle later. But I didn’t know that at the time.) I also painted the bright blue frame with red. Next, I went to the computer and found two things. The first was a picture of a bird. The second was a quote about birds. I found a perfect one for my mom – it was about birds, and spoken (or written, I’m not sure) by Stephen King, her favorite author. In Photoshop, I drew a circle the same size as the cutout I’d removed from the frame. I then added a red textured background and then typed the quote over the top of that. I printed out both pieces – the bird and the quote. Then I used Mod Podge to glue the bird into the back of the frame and the quote onto the painted circle. With a bit of hot glue, I attached the circle on top of the bird – in a different place than it had been originally though. I absolutely loved how this piece turned out.

And that was it. Usually a tiered tray is jammed full of cute themed items, but I was having trouble getting inspired, and I left it at just the four items. I will likely make things for my mom to add to it here and there though.

Have you ever made a tiered tray? Or bought one and decorated it?

Blessings,

Speed Drills for Math Practice (review)

Disclosure: I received this complimentary product through the Homeschool Review Crew.

One of the biggest setbacks to a “regular” school schedule is the possibility of losing ground over summer break. This is especially true with math and reading, though reading is easy enough to keep practicing. But math can be a lot harder to stay motivated to work on when it’s “off time.” This is especially true if your student has only recently mastered a new concept – like multiplication or division facts. Math Essentials has an answer for that, though: Math Essentials Speed Wheel Drills! We received all three of the titles in this series: Addition, Multiplication, and Division.

A collage showing the three book covers, the three book spines, and a completed wheel drill

What is a Speed Wheel Drill?

A completed +1 Wheel DrillWhile you may not have heard of a Speed Wheel Drill, once I describe it, you’ll understand where the name came from because it really is exactly what it sounds like. On each page of the consumable workbooks, there are a series of circles. Each circle (wheel) has two smaller circles within it, and a series of spokes coming out. In the very center is a large number (3, for example). In the center section are a series of other numbers, a bit smaller than the center number (7, 5, 2, etc). Your student simply uses the center number as the “base” for each math problem, and then does the specified operation (depending on which book you have), writing the answer in the outer circle. So, with 3 as the center number and 7 as one of the middle numbers, in the multiplication book the child would write 21. Next to the 5, he would write 15. The 2 would get a 6. And so on.

There are a couple of different ways you can use the “speed” portion of the Speed Wheel Drills.

  • Don’t use a timer at all, and just do them as Wheel Drills
  • Time your child as he completed a wheel. Then see if he can best himself on the next one, and the next one.
  • Set a stopwatch and see how far your child gets in the set amount of time. Next time, see if he can complete more of the wheel in the same amount of time.

How We Used the Workbooks

The three workbooks stacked on top of one another, fanned out.My older boys are well versed in their math facts, so I didn’t bother giving these to them. Because we received all three books, which are ideal for different ages, I set up Grasshopper (9, heading into 4th grade) with the Multiplication book and Dragonfly (5, K) with the Addition book. We set the Division book aside for later.

Grasshopper has gone through all of the multiplication lessons in his math curriculum, and has done quite well with them. But that curriculum only has a single lesson for each set of the times tables, and that’s just not enough practice to really master such an important concept. Adding in Speed Wheel Drills has been perfect. We started without the “speed” aspect, just to see how he’d do, and he did pretty well. As I could tell that he was getting quicker with each successive wheel, I introduced a timer. I opted to use the second method that I described before with him. It was great to watch him continue to get faster and faster throughout the summer. And Grasshopper is a kid who loves to best himself, so this type of workbook is perfect for him.

Dragonfly, being just 5, is reasonably new to addition. He’s done a little bit here and there, but his math up to this point has been primarily number recognition, patterns, colors, shapes… you know, Kindergarten stuff. He’s very good at that now, though, which means it’s time to begin some of the more difficult things. We used the Speed Wheel Drills Addition book as a gentle introduction to adding for him. He was a bit confused about how the wheels worked until I explained it to him, and then he thought it was such a great idea. He warmed to the concept very quickly, although he got frustrated with trying to write the numbers himself. We found that they worked better almost as oral drills, and I wrote his answers down for him. We haven’t timed him at all yet.

Opinion and Final Thoughts

Math Essentials Speed Wheel Drills are fantastic resources for students. You can use them during the summertime like we did, or as a supplement to any math curriculum. My kids thrived with them, and I can’t recommend them enough.

Make sure to click through to see what other members of the Homeschool Review Crew think of the books!

Blessings,

Beginning of the School Year Memories

a chalk board with fall leaves around the edge. the title of the post is written in a chalkboard font in the middle.

The beginning of the school year is a special time for students, regardless of what “kind” of school they go to. If you go on Instagram anytime this month, you’ll begin seeing loads and loads of back to school posts. In my feed, a couple of these traditions come to mind; these moms post the same thing every year and it really sticks in my mind. The first is a mom that has a huge frame that she has each of her children hold around their face each fall and spring. It must a dry erase or something, because she writes each child’s grade on it, and it’s different for each of her kids (she also has 5, like me). The second one is a mom who is also a public school teacher. She takes a photograph of her son in the fall and again in the spring standing in front of the school’s sign where he attends. It’s pretty neat to get the same picture nine months apart and see how much taller her son has gotten!

We’ve never really done anything like that, but that doesn’t mean I don’t think it’s a good idea. There are some things from my own elementary school days that I remember having done (mostly from 3rd grade – I must have had a great teacher that year!). Here’s an idea to do with your children/students. At the beginning of the school year, get a manila envelope and have your student write on it: (Name)’s Time Capsule. Do not open until 2046. (Of course, you can choose a different year; I chose that one because it’s 25 years from now.) All throughout the school year, save samples of their work and tuck it into the envelope. Not everything, but a reasonable sample. This will show how much they learn and develop their skills over the course of the school year.

Maybe take some white paper and tempera or acrylic paint and have students create a hand and/or footprint page. This would be a good basic anatomy lesson – I remember being in third grade and not understanding why I had a huge “indent” in my footprint (and trying everything I could think of to fill it in to no avail). Now I know that’s the arch. It would have been nice to have had some sort of explanation for that as a child. Do this again at the end of the school year to show physical growth. When your student opens that envelope as an adult, they will cherish at least some of the papers you’ve tucked inside. I know when my mom gave me my third grade time capsule a few years back, I was excited to see everything in there – the only thing I remembered having done was the footprint. Everything else in there was a surprise.

Last month, I wrote about learning styles. Have you ever considered your students’ learning styles? There’s a personality quiz online that you can have your child take. Garnering information about their specific learning style would be a fantastic way to get the school year off to an amazing start, because you could tailor their work to their specific learning style.

If you’ve chosen your homeschool curriculum already, then you have an idea of what you’ll be teaching this year. How about doubling down on that “before and after” concept this way: Choose something related to one of your year long studies and have your children create something at the beginning of the school year (a world map if you’re doing a heavy geography study, for example) and then recreate that same assignment at the end of the year. Make sure to save the one from now so you can show them how much they learned!

What are some of your favorite “beginning of the school year” memory makers?

Blessings,


This post is part of the Homeschool Review Crew Not-Back-To-School Blog Hop. Click on any of the links below to read more posts on this topic!


Dyslexia Gold (review)

Disclosure: I received this complimentary product through the Homeschool Review Crew.

Grasshopper was slow to read. He fought me tooth and nail for a long time. But finally, I told him it was “time.” He was able to read well enough that he had to read a novel out loud to me. It was slow going at first. For a really long time. But as he read every day, he got better and better. Now, he reads everything in sight. I don’t have to force him anymore. And he even (claims to) like reading!

To further his quick studying in reading comprehension, we signed up to review Dyslexia Gold. This is an online program that’s designed for students who struggle with reading, whether it’s due to dyslexia or for another reason. Grasshopper’s reading took off sometime between when we signed up for the review and when we actually started using the program, so the timing was a bit unfortunate for us. That said, he did learn quite a few things from the program, and I’ll tell you all about them!

The program has four main parts, but after a placement test Grasshopper was only assigned three of them. (The one he didn’t get was Reading Unlocked, which I reviewed last year with Dragonfly. We had amazing success with that program! Read that review for a more in-depth look at that program.) Let’s discuss each of the parts of Dyslexia Gold that we used in more detail.

Engaging Eyes is designed to help your child learn to focus. People with dyslexia often have trouble with their eyes, and that inability to focus easily leads to the words “swimming” in front of them. The Engaging Eyes vision training in Dyslexia Gold is done with a pair of 3D glasses. Students wear the glasses and then shoot the targets using the arrows and spacebar on the keyboard. They have to not only aim the shooter, but also make sure it’s on the same plane in order to hit their target. This game was the most fun for Grasshopper. In fact, he had so much fun with it that everyone else in the family gave it a try at one point or another!

Fluency Builder teaches a child who already knows how to read, how to read well. It has a total of 50 lessons, and each one focuses on a specific phonemic sound. It also teaches children to differentiate sounds that might be similar to an early reader (|f| and |v| for example). Each lesson is broken up into a variety of activities that really drive home the phonics aspect of reading. There is also a passage for children to read and answer comprehension questions.

Spelling Tutor is where I saw the biggest improvement in my son. This part of the program has the child read a passage. Then they are to write the passage down, one sentence at a time. When they’re done, they click “mark” and are able to self-grade their work. If they get everything right, great! If they get anything wrong, that word goes on their “practice” list. The program remembers which words the student needs to practice more, and it gives those words to them many times over the course of the program. At the point the child gets a problem word correct, it moves down on the list and is shown less frequently.

Dyslexia Gold also includes a Times Tables tutor, but we’re swimming in math practice right now, so we didn’t use that.

As mentioned, we didn’t end up “needing” the program as much as I thought we would when I agreed to review it. But Grasshopper had amazing success with the spelling portion, and I’m glad we had access to that to help him understand how to get better at spelling.

Make sure to read more reviews on the Homeschool Review Crew website!

Blessings,

Bible Reading for Kids (review)

Disclosure: I received this complimentary product through the Homesshool Review Crew.

Do you want your kids to love the Bible? Are you concerned about your ability to teach it to them? Then you should pick up a copy of Danika Cooley’s book Help Your Kids Learn & Love the Bible from Bethany House Publishers. In this nonfiction book, she tackles all sorts of issues parents have with the Bible, and specifically developing a Bible study routine with their families.

I’m not one for nonfiction; I am definitely a preferrer of novels. But Help Your Kids Learn & Love the Bible was an easy read, and I didn’t have any issues with the text of the book. I was able to easily read a chapter (or so) each day and get through the book readily.

The book is divided into three parts, each building on those that came before it. It starts with a reminder of sorts, that you (the parents) are the leaders in your family. What you say goes. But it also is a bit of a sobering reminder that if you don’t make the time for the things you claim are important to you (it seems that for most people, these are the Bible and the gym), then your kids pick up on that and those things won’t be important to them either. Being the leader is more than being the boss; it is also being the role model.

Part Two is called Faithful Reading. It gives a brief overview of what the Bible is (a “book of books”) and the men who wrote it. The author tells us about the development of the Bible – why the books we have are the accepted canon. In amongst all the “textbook” feeling stuff, though, readers are also told about ways to make sure they’re keeping the message of the Bible front and center when doing family Bible studies.

The final part is A Daily Walk, and this is the culmination of the other two parts. See, as the leaders in our families, we are responsible for teaching what we want taught in our homes. By reading the Bible faithfully, and understanding what it’s about and why it’s important to us, we encourage our children to do the same. With those two main criteria covered, we are ready for that “daily walk” with God. The author gives us guidance for reading the Bible with your children and ways to help your children “hide God’s word in their hearts.” She explains how to pray the word of God with your family, and even offers suggestions and encouragement for doing your Bible reading on the days you really don’t want to.

I really enjoyed reading this book, especially the bits and pieces of real life anecdotes sprinkled throughout. The author has two sons she writes about regularly in the book, and while the stories are from all ages of their childhood and development, I have sons in all of those ages so it was fun to read about how her children behaved and see some similarities to my own kids. If you’re wanting to start incorporating more Bible reading into your homeschool (or even just your family life), and you’re a bit unsure how to begin and whether you should “carefully omit” certain sections of the Bible (I’m looking at you, Song of Solomon) for children of certain ages, then Help Your Kids Learn & Love the Bible just might be a useful resource for you as you navigate.

Remember to head over to the Homeschool Review Crew to read more reviews of this book as well.

Blessings,