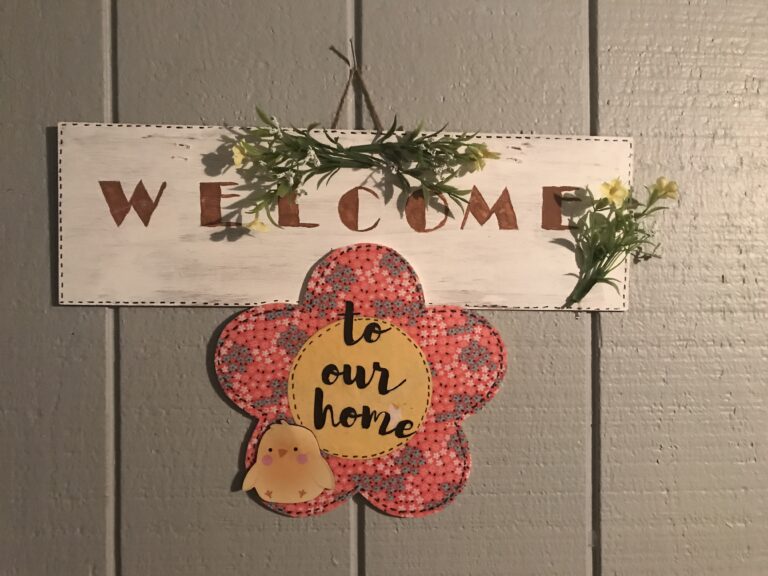
I created a new welcome sign for my front door this year and thought I’d share it here, including how I made it.

I started with one of the standard Dollar Tree rectangular signs. The one I picked up said “Easter Joy,” with the O being a foam chick hot glued on. I started by removing the chick from the front of the sign and setting it aside, as well as taking off the ribbon hanger. Then I flipped the sign over to the back and painted it with Apple Barrel (acrylic paint) in the color Nutmeg. When that dried, I went over it with white paint, allowing a bit of the brown to show through.
I also found a cute wood flower cutout from Dollar Tree and some pretty pink fabric. I removed the twine hanger from the flower and saved it for later. Then I used some Mod Podge glue to attach the fabric to the flower. When it had fully dried, I used an Exacto knife to trim around the edges of the flower. This works much, much better than trying to get close enough with scissors.
With both pieces (the painted and the decoupaged) done, I went to work with the words. I got on the computer and printed out the letters W E L C M and E for Welcome in a font that I liked. I made it pretty big (around 200 point, if I remember correctly). I had the idea to use the chick for the O, but that didn’t work out in the end (the sizing was all wrong). Then, using a technique I’d seen from Krafts by Katelyn on YouTube, I scribbled over the letters on the back of the paper, then placed it right side up on my sign and traced the outline of the letters. This left a very pale outline of the letters from the pencil scribbles on the back of the paper, which allowed me to paint over them very easily, with my painted letters looking just like the font I’d chosen. I painted the letters using the same Nutmeg brown that I used for the base coat on my sign.
I got back on the computer and found another font that I liked and typed out “to our home.” I printed that out and then very carefully cut it out with scissors. I used the Exacto knife to cut out the little bits from the insides of the letters as needed. I also jumped onto Pixabay.com (a free picture site) and found a pretty yellow background. I printed that out too, and then found a little bowl in my kitchen that was a good size to fit inside the flower. I cut out the yellow texture and glued that onto the flower using Mod Podge, and while the top coat was still wet I attached my “to our home” words and added another coat of glue on top of those also. I let the flower dry completely.
With my main pieces now done, I used a bit of hot glue to attach the flower to the bottom center of the rectangle. I considered putting the flower off to one side, but then I realized that it wouldn’t hang straight if I did, so I put it in the middle. I added the little chicken that I’d pulled off the front of the sign as well as the twine from the flower for hanging, and I was done… I thought.
I hung my sign up for a few days, and while I liked it, I didn’t think it was quite ready. It was too plain. So I brought it back inside and grabbed a Sharpie marker, which I used to add “stitches” to the edges of all the main pieces – the rectangle, the flower, and the center of the flower. That helped a lot, but it still needed something else. So I found some faux flowers I’ve had for a while (a freebie from JoAnn’s months and months ago). I cut of the stems of those using wire cutters and superglued them to the top (I was out of hot glue by this point). Now it’s done, and I’m really happy with how it looks!
Blessings,

