Ladybug Daydreams

diy

New York Style Bagels at Home

Posted by Wendy on April 29, 2013 7 Comments

We love bagels at my house. On Sunday mornings before church, I make breakfast sandwiches – egg, cheese, and bacon on a bagel. Yum! We used to buy them from a local coffee shop, but they got a new owner who raised the prices (drastically) and lowered the quality. So I figured out how to make them at home instead. Until this week, I’ve been buying the bagels, but a couple weeks ago there was an article about bagels in the local newspaper, which was accompanied by a recipe. I’d been meaning to try it, but never remembered until it was too late on Saturday night. Well, this week, I remembered on Saturday morning!

So here we go: New York style bagels in 6 basic steps…

image

Make the dough and knead it for ten minutes. (Recipe to follow)

image

Let it rise for an hour until doubled in size.

image

image

image

Divide the dough into 8 pieces and shape into balls.

image

Using your finger, create a hole in each dough ball. Let the bagels rest for 10 minutes.

image

Boil the bagels. This is the step that turns “bagel shaped bread” into bagels.

image

Bake.

I hope you enjoy making – and eating – your own bagels as much as I did!

EASY NEW YORK STYLE BAGELS
Yield: 8 bagels
Recipe from The Oregonian, Tuesday April 2nd

1 1/4 cup water (more as needed)
1 1/2 tablespoons granulated sugar (I use raw, not granulated, and they turned out fine)
2 teaspoons active dry yeast
3 1/2 cups bread flour, plus more for kneading (I used 2 1/2 cups King Arthur bread flour and 1 cup generic whole wheat flour)
2 1/4 teaspoon salt
Egg wash (optional)
Various toppings (optional)

In a small bowl, add 1/2 cup warm water. Pour in sugar and yeast but do not stir. Let sit for 5 minutes, then stir to dissolve.

In a large bowl, combine flour and salt. Make a well in the center and pour in the yeast/sugar mixture.

Add enough of the remaining water (it took about another full cup for me) and mix well to form a moist, firm dough.

On a well floured countertop, knead the dough for about 10 minutes, being generous about working in additional flour. Your finished dough should be firm and stiff.

Lightly brush a large bowl with oil. Add the dough and turn it so it’s coated with oil. Cover and let rise for an hour, until doubled in size. Punch the dough down and let rest for 10 minutes.

Using a bench scraper or knife, divide dough into 8 equal pieces. Shape each into a ball by rolling gently on the countertop.

Coat a finger in flour and gently press your finger into the center of each dough ball to form a ring. Stretch the ring to about a third of the diameter of the bagel and place on a lightly oiled baking sheet. Repeat with remaining dough balls. Cover bagels and allow to rest for 10 minutes.

*note: use a bigger baking sheet than you think you’ll need in this step to avoid dirtying 2 pans. The bagels grow considerably during the boiling process. Mine was 11×17 which was about perfect.

Meanwhile, bring a large pot of water to a boil and heat your oven to 425*. When water is boiling, reduce heat to a simmer. Working in batches of 2 to 3 bagels, gently slide into the water. They should float almost immediately. When they do, set the timer for 2 minutes. Turn and boil for 2 additional minutes. Move to a wire rack to drain.

Return to the oiled baking sheet. If you want to add toppings, brush the bagels with an egg wash and add toppings as desired. If not, omit the egg wash. Bake in preheated oven for 20 minutes.

Enjoy!

Share this:

  • Twitter
  • Email
  • Pinterest
  • Facebook
  • Print
  • LinkedIn
  • Reddit
  • Tumblr
  • Pocket

Like this:

Like Loading...
Posted in: cooking/baking | Tagged: bagels, baking, diy, food, homemade

Make Your Own Wrapping Paper

Posted by Wendy on April 18, 2013 2 Comments

My nephew had a birthday earlier this month, and in our quest for simplicity, I didn’t want to buy wrapping paper or even a gift bag. It seems silly to me to spend money on something that’s going to get torn up and thrown away. So what I did instead was found some stamps at Goodwill for 49 cents and bought an inkpad from the Dollar Tree

stamps

and stamped all over a piece of the brown shipping paper I had left over from making the kids’ human body diagrams.

wrapping paper

To take the simplicity one step further, you could totally do this with a paper grocery bag if your gift is small enough. Then, once you have your stamps and ink, you could always have free wrapping paper (just buy a few groceries first ;)). Score!

name plate copy

Share this:

  • Twitter
  • Email
  • Pinterest
  • Facebook
  • Print
  • LinkedIn
  • Reddit
  • Tumblr
  • Pocket

Like this:

Like Loading...
Posted in: Other | Tagged: diy, rubber stamp, wrapping paper

Homemade Corn Tortillas

Posted by Wendy on March 27, 2013 5 Comments

I know I’m not the first, and I probably won’t be the last, to blog about the joys of making your own corn tortillas, but I gotta tell you, if you’ve never tried it, you MUST!

Tortillas are one of those things that I always thought just kind of “existed.” I never even considered the idea that I could make my own. I started with flour tortillas a few weeks ago, and while they’re better than store-bought, they’re not “I’ll never buy them again” good. The corn tortillas, though, are to die for! It takes about an hour start to finish (plus the time to make your filling), but it’s completely worth it! Here’s how you do it:

First, buy some Maseca from the Hispanic foods aisle of your grocery store. It’s priced comparably to flour, so not too much :). In case you don’t know, Maseca is corn flour – NOT to be confused with corn starch. Maseca won’t thicken your gravy, and corn starch won’t make good tortillas.

Kids Nov 2012 015

Here’s what it looks like out of the bag:

Kids Nov 2012 016

Now, I forgot to take a picture of the next step, but it’s just adding water according to the specifications on the bag to make a dough.

Then you form your dough into balls. I actually made 12, not 5, but again, forgot to take a picture in the beginning.

Kids Nov 2012 023

The next several pictures are essentially one step: flatten the balls into tortillas. If you have a tortilla press, I’ve heard (read) that this is a lot easier. If you, like me, don’t, it’s still not worth not trying over. The most important thing to remember is that you have to use plastic wrap on either side of your tortilla. Using additional Maseca, like flour on a pie dough, doesn’t work. Trust me on that! I tried it that way the first time I made these and almost gave up. Plastic wrap, or a cut open plastic bag, is the way to go.

First, place your tortilla ball between two pieces of plastic:

Kids Nov 2012 017

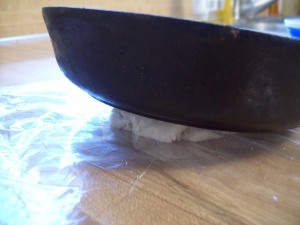
Then flatten it with a cast iron skillet (I found that it’s best to squish it down, then turn the whole thing, plastic wrap and all, over and do it again before moving on):

Kids Nov 2012 018

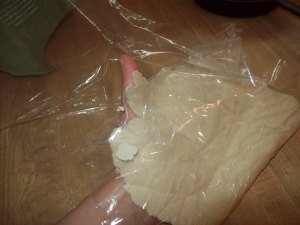
Finally, without removing the plastic wrap, roll it out with a rolling pin (again, flipping it over inside the wrap a time or two):

Kids Nov 2012 020

Kids Nov 2012 019

Kids Nov 2012 021

Kids Nov 2012 022

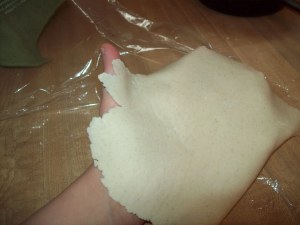
Carefully peel the plastic wrap away and place your tortillas on a baking sheet (with layers separated by plastic – are you sensing a theme here?) to await their turn on the griddle:

Kids Nov 2012 024

Kids Nov 2012 025

Kids Nov 2012 027

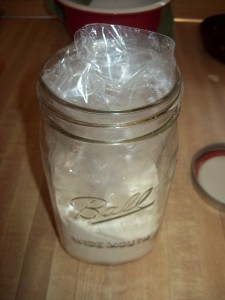
I then put my plastic wrap into my jar of Maseca so I can use it next time. I hate throwing away plastic, so I’m going to use that baby as many times as I can!

Kids Nov 2012 026

Now you’re ready to cook them! They take 45-60 seconds per side.

Kids Nov 2012 028

Kids Nov 2012 030

You’ll more than likely end up with small pieces that break off; cook them anyway and enjoy them as a cooking snack!

Kids Nov 2012 031

That’s it! Once they’re all done, use them the same way you would their store-bought counterparts.

Kids Nov 2012 032

Have you ever made your own tortillas? How did it go? If you haven’t, are you interested in trying? Let me know in the comments!

name plate copy

Share this:

  • Twitter
  • Email
  • Pinterest
  • Facebook
  • Print
  • LinkedIn
  • Reddit
  • Tumblr
  • Pocket

Like this:

Like Loading...
Posted in: cooking | Tagged: cast iron skillet, corn tortillas, dinner, diy, food, homemade

Winter Hats

Posted by Wendy on October 17, 2012 Leave a Comment

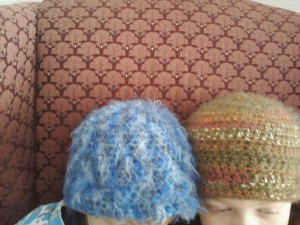
Welcome to fall! With fall comes, of course, cooler weather. And with cooler weather comes … colds. We’re only a third of the way through fall, which means at least five more months of cooler weather before spring, and my older boys have each been sick twice already. This does not make a mama happy. So I headed over to my local JoAnn store to get some yarn using my half-price coupons to make stocking hats for them to keep their heads warm during the next 5-6 months – until springtime.

I wasn’t entirely sure what I was looking for when I went in, except that I didn’t want a “regular” yarn. I wanted something soft and moderately warm so that it would do its job when turned into a hat. What I found was Sensations brand “Angel Hair” yarn. It’s magnificent. If you knit or crochet, I highly recommend you go to your JoAnn store and buy a skein or two to try out. Even hubby agreed it was wonderful feeling :).

The hats are just a basic beanie. You can find the pattern here. You’ll notice that I didn’t do the stripes in the pattern. That’s because my yarn was already striped, and I loved the way each color looked on its own; I didn’t want to take away from the beauty of the main color by adding those stripes. If the yarn had been a single color, I probably would have given each boy’s hat stripes in the other color. But since it wasn’t, I didn’t, so it’s a moot point :).

Share this:

  • Twitter
  • Email
  • Pinterest
  • Facebook
  • Print
  • LinkedIn
  • Reddit
  • Tumblr
  • Pocket

Like this:

Like Loading...
Posted in: crochet | Tagged: angel hair, autumn, blue, clothes, clothing, crochet, diy, fall, hat, kids, love, winter, yarn

Welcoming a New Nephew

Posted by Wendy on October 1, 2012 1 Comment

My sister-in-law just had a baby on September 19th (a week after his due date). He’s my second nephew, joining the ranks of 5 nieces (none of whom he’s related to, although he does have loads of girl cousins on his mom’s side of the family – he’s the son of my brother and his wife). My first nephew is also the son of my brother and his wife, ironically enough, which means my mom is blessed with 5 grandsons and no granddaughters.

But enough about the family make-up. A new baby means, of course, a baby gift!

Here’s what I started with:

And here’s what I made:

When it came time to start crocheting, none of the patterns I looked at “floated my boat” so to speak, so I just did a basic one row of single crochet, one row of double crochet, repeat. Even with such basic stitches, I thought it turned out pretty :). Let me know what you think of it.

Cheers!

Share this:

  • Twitter
  • Email
  • Pinterest
  • Facebook
  • Print
  • LinkedIn
  • Reddit
  • Tumblr
  • Pocket

Like this:

Like Loading...
Posted in: crochet | Tagged: afghan, baby, baby blanket, blue, crochet, diy, grandsons, nephews, september 19th, yarn

I love gDiapers! The price… not so much

Posted by Wendy on September 10, 2012 4 Comments

The post title pretty much says it all. gDiapers are awesome. For those of you who haven’t heard of them, they’re a hybrid diapering system. They use a reusable cloth outer, a breathable, waterproof, reusable liner, and your choice of insert: either a cloth one that’s washable (obviously) or a flushable one. That’s right: flushable diapers!

I first learned of the system when there was an ad on the side of my gmail for them. I was still pregnant with Small Fry at the time, and my husband and I were just starting to become more environmentally conscious (if you don’t think recycling matters, take a trip to your local landfill and see how much garbage is produced in your area. I dare you not to become environmental after that!), so the idea of diapers that you could flush away instead of sending to “Junk Mountain” was very intriguing to me. I clicked through and fell in love with the concept. The only hurdle was the price: a starter pack for newborns was about $150. Now, that’s no *so* much when you consider what you get (18 cloth outers in two sizes and 160 flushable inserts), but I was trying to convince a skeptical husband (recycling our cans and paper was one thing; spending over $100 on diapers was completely different!), so it was a pretty major problem for me.

I didn’t end up getting the newborn pack.

We used disposable diapers for the first six weeks, which I hated after having learned about the g’s. But finally, we were able to find out that we could buy the individual pieces at Babies *R* Us, so I was able to talk DH into going there to get a “starter kit”: 2 pairs of the outer pants and a pack of 40 flushables for $45. It was priced at $40 on the gDiapers website, but once you added in shipping, it was a wash.

So, we’ve bought the two pairs of “little gPants” and our first package of flushables now. I started using them to diaper Baby E right away, and after just a small learning curve (these don’t have the little yellow line that turns blue when wet like the Pampers we’d been using), I was convinced that I didn’t want to go back to disposables. The problem now? Two pairs of the pants isn’t enough for full-time gDiapering. And extra pants are between $15 and $22 apiece.

What was a crafty mom to do?

Find out how to make my own covers, of course! I found a couple of tutorials and tried the YouTube one first. The pants came out looking okay, but they just weren’t good enough to use as a diaper. So I tried the written one. I was skeptical at first, mostly because of my experience with the other one, but oh my, these new ones are *nearly* as good as their store bought counterparts. Because I’m not a professional seamstress by any stretch of the imagination, there are obvious flaws, but not so many that I feel the need to buy “official” gPants.

Including all my mistakes, I was able to make 4 of the covers for about $40. That doesn’t sound like much savings, but I’ve got enough fabric left over to make at least two more; I just need to pick up some more Velcro. Once I get those done, that’ll make the homemade ones about half the price of the purchased ones! (They’ve got a 6-pair pack available for $79.99.) Win!

Share this:

  • Twitter
  • Email
  • Pinterest
  • Facebook
  • Print
  • LinkedIn
  • Reddit
  • Tumblr
  • Pocket

Like this:

Like Loading...
Posted in: quilting/sewing | Tagged: baby, clothes, clothing, diapers, diy, flushable diapers, gDiapers, love, pants, sewing, shopping, style

A New Hat (and an update!)

Posted by Wendy on July 28, 2012 Leave a Comment

Wow, I didn’t realize it had been so long since I’d made a post! I knew it’d been a while, but I didn’t remember just how long.

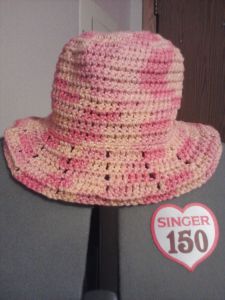
So, I recently made this hat. I love the colors, don’t you? 🙂 Funny thing about this one: I stitched a sample for determining gauge, and adjusted my hook size accordingly, but then when the hat was done, it was way too big, so I ended up pulling the whole thing apart and making it again with a smaller hook. But as my hubby said, “At least you got good entertainment value from that skein of yarn!” He’s always looking at the bright side of things :).

As for the “update” part of this post, part of why it’s been so long since I made a post is because Small Fry was born! He arrived via scheduled c-section (which I do not recommend!) on July 12th, 2012 at 8:15 a.m. PST. He weighed in at 6 pounds, 8 ounces, and was 19 3/4 inches long. He was born with a shock of black hair, which was a surprise for all of us considering both of our other sons have red hair! But his facial features are pretty much identical to Munchkin (our 5-year-old) as a baby, so despite the difference in hair color, there’s no doubt that they’re all brothers.

I’ll still continue to add posts of my creations as I’m able, but until Small Fry is a bit older, it’ll probably be longer between them. Having a newborn makes it hard to find time for crafting! But I wouldn’t trade him for anything.

Share this:

  • Twitter
  • Email
  • Pinterest
  • Facebook
  • Print
  • LinkedIn
  • Reddit
  • Tumblr
  • Pocket

Like this:

Like Loading...
Posted in: crochet | Tagged: adult hat, clothes, clothing, crochet, diy, hat, hat with brim, sun hat, yarn

Baby Shower Gift

Posted by Wendy on June 11, 2012 Leave a Comment

My hubby’s cousin is expecting a baby girl about a month after our Small Fry is scheduled to arrive (4 1/2 weeks and counting!). Her baby shower is coming up in just under 2 weeks, so I made this blanket for her.

I didn’t make up the pattern; I got it from here. But when I was first starting to stitch it, it wasn’t exactly what I expected, so I took a couple of pictures along the way to explain to you guys what to expect so you’re not as surprised-slash-almost-confused as I was. In order to make the additional pictures make sense, I’m going to include the instructions here, but remember, I did not make up this design. 

Supplies needed: Crochet hooks (sizes noted in instructions), yarn (1 skein of “Caron International 1 pound” or other brand to equal 16 ounces/454 grams, 812 yards/742 meters), yarn or tapestry needle (for weaving in the ends), time, and love.

With a size K-10.5 (6.5 mm) crochet hook, chain 94.
Row 1: Turn. Skip the first chain. Single crochet (SC) in each additional chain – 93 SC total.
Row 2: Turn. Skip the first SC. Double Crochet (DC) in the next one. DC in the skipped SC. Continue to end of row. Chain 1.
Row 3: Turn. SC in each DC all the way across. Chain 2.
Rows 4-68: Repeat rows 2 and 3.
Edging: SC all the way around the blanket, except for the last row of SCs you did as part of the blanket. When you get to that row, slip stitch to the first SC. Switch to a size J-10 (6.0 mm) crochet hook. In every other SC all the way around,  {SC, chain 1, SC}. All three of those stitches happen in the same stitch. When you get back to the beginning point, slip stitch together. Fasten off and cut yarn. Weave in ends.

So that’s it :). I hope you enjoy making this project as much as I did!

Share this:

  • Twitter
  • Email
  • Pinterest
  • Facebook
  • Print
  • LinkedIn
  • Reddit
  • Tumblr
  • Pocket

Like this:

Like Loading...
Posted in: crochet | Tagged: afghan, baby, baby blanket, caron international, crochet, diy, girl, kids, love, pink, yarn

Nursing Pillow Cover

Posted by Wendy on June 2, 2012 Leave a Comment

We got a Boppy pillow when my second son was born in 2006, and it was so much nicer than just propping up the normal pillows for feeding time (which I did in 2003 when I had my first son). We’ve kept it, and now will be using it when Small Fry arrives next month. However, for a long time, it was Munchkin’s favorite pillow, so it’s a bit stained – that just means it’s been well loved, right? 🙂 In our new quest to not spend money that doesn’t need to be spent, I decided to use some of the Pooh Bear fabric that I got for super-cheap the other week to make a cover for the Boppy. This served the dual duty of refurbishing something we already had rather than buying new as well as making the pillow match the rest of the nursery. Win-win!

Share this:

  • Twitter
  • Email
  • Pinterest
  • Facebook
  • Print
  • LinkedIn
  • Reddit
  • Tumblr
  • Pocket

Like this:

Like Loading...
Posted in: quilting/sewing | Tagged: baby, boppy, boppy pillow, cotton, diy, dual duty, home, nursing pillow, sewing
« Previous 1 2

Welcome!

Welcome to Ladybug Daydreams! My name is Wendy, and I’m glad you’re here. I am a homeschooling mom to 5 boys. I write about homeschooling, homeschool curriculum, yarn (both knitting and crochet), and more! I hope you enjoy what you read.

Social

  • View ladybugdaydream’s profile on Twitter
  • View ladybugdaydreams’s profile on Instagram
  • View ladybugdaydream’s profile on Pinterest

Subscribe

Join 492 other subscribers

April 2023
S M T W T F S
 1
2345678
9101112131415
16171819202122
23242526272829
30  
« Nov    

Search

MyFreeCopyright.com Registered & Protected

Copyright © 2023 Ladybug Daydreams.

Theme by themehall.com.

loading Cancel
Post was not sent - check your email addresses!
Email check failed, please try again
Sorry, your blog cannot share posts by email.
%d bloggers like this: