Ladybug Daydreams

Month: May 2013

This Moment: Walking

Posted by Wendy on May 31, 2013 Leave a Comment

Inspired by Soule Mama

A Friday ritual. A single photograph – no words – that a capture a moment from the week. A simple, special, extraordinary moment. A moment I want to pause, remember, savor.

“If we take care of the moments, the years will take care of themselves.” ~Maria Edgeworth

If you’re inspired to do the same, leave a comment with the link for all to find.

image

Wishing you blessings this weekend.

–Wendy

Share this:

  • Twitter
  • Email
  • Pinterest
  • Facebook
  • Print
  • LinkedIn
  • Reddit
  • Tumblr
  • Pocket

Like this:

Like Loading...
Posted in: picture of the week | Tagged: picture of the week, siblings

Sourdough Bread

Posted by Wendy on May 30, 2013 2 Comments

I bet you thought I was gonna forget, huh? Lol. Since I make all posts from my phone, I don’t have them saved & scheduled; that’s why they’re not at the same time every day (in case you ever wondered).

Anyway, so sourdough bread… I love the stuff and have tried many times to make it at home, never with very good results. It’s always edible just never sour, no matter how long I leave my homemade starter out to ferment. I was reading a blog a couple months ago (I don’t remember which one unfortunately) and someone commented about Oregon Trail Sourdough. They have sourdough starter that they give (yes, GIVE) you for just the cost of a self-addressed, stamped envelope. So I sent off for a starter. I activated it as soon as I got it, and then just let it sit for a good long time. The trick with sourdough is that it takes way more planning than regular bread. Regular bread goes from raw ingredients to completely done in less than 4 hours; sourdough requires prepping the night before – sometimes 2 nights depending on whether you’ve had your starter in the fridge. Because of that, it took me probably a month between getting the starter and getting around to using it.

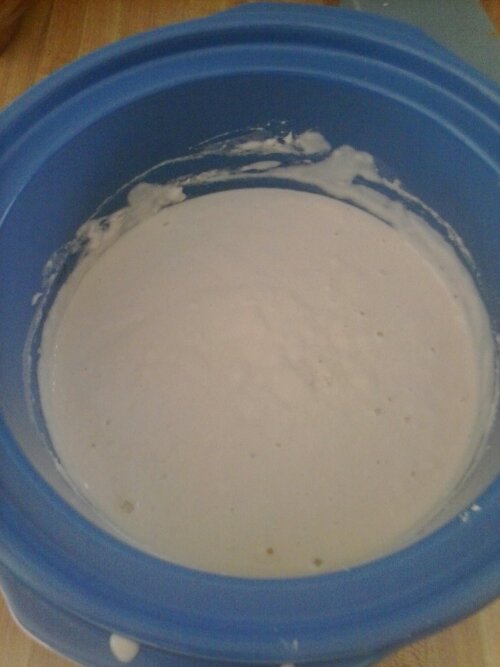
Here’s what my first step looked like. This is the starter, some flour, and water, which had to sit overnight before continuing to finish the dough:

image

The other thing about sourdough is that you have to use glass or plastic, no metal. Well, I only have stainless steel mixing bowls, so it took me a while to figure out how I was going to make bread without buying a special bowl for the task. Then it dawned on me: the ceramic insert for my crock pot!

When you get to the dough stage, it looks just like any other white bread dough, so I don’t have a picture of that.

We’ve been dealing with plumbing issues in the kitchen (I haven’t had a sink since Tuesday…), and one of my loaf pans didn’t get washed before the sink fiasco, so I had to make half my dough into a loaf and the other half into rolls. Here’s the dough:

image

And the finished product:

image

image

The verdict? It’s a little bit more sour than regular homemade bread, but far less so than what’s at the store. I think I’ll leave my starter (it continues to grow, so unless I choose to get rid of it, I’ll never need another one) out of the fridge for a good week before I bake next time to see if I can a better flavor.

–Wendy

Share this:

  • Twitter
  • Email
  • Pinterest
  • Facebook
  • Print
  • LinkedIn
  • Reddit
  • Tumblr
  • Pocket

Like this:

Like Loading...
Posted in: cooking/baking | Tagged: baking, diy, sourdough bread

Summer Wardrobe

Posted by Wendy on May 29, 2013 10 Comments

We went shopping for new clothes yesterday. I’ve gotten a new item here and there, but never a completely revamped wardrobe before, so that was nice :). The kids’ clothes are fine – and we’d shop for them at Goodwill anyway, not Old Navy (since they wear out their clothes so fast, it’s too expensive to buy new for them) – so it was a day for hubby and me.

One slight disclaimer before I post the picture… we are striving toward a minimalist lifestyle. We’re not there yet, but we’ve made huge strides the past 18 or so months. Yesterday was a huge step in the “right” direction.

image

I have these two dresses, which are the only items from my old wardrobe I’m keeping. They’re only about 2 years old, and I haven’t been able to wear them the past 10 months because in order to breastfeed Small Fry, I had to switch to skirt/top combos.

image

These are the new clothes. I got those two skirts (which replace 4 old skirts), 2 black camis, and one white cami. The tops replace 2 white ones and a brown one from before. But the Old Navy ones feel much better than their WalMart counterparts.

I also got a Coobie Bra. No picture of that ;). But seriously, if you’re in the market for new bras, I highly recommend them. This is my first one, and I love it. It’s seriously the most comfortable bra I’ve ever worn, and with a price tag of only $22, they’re comparably priced to a traditional bra. I definitely plan to replace all of my bras with Coobies, one at a time over the next couple of weeks.

You may notice something “missing” from my wardrobe: jeans. Outside of my pajamas, I haven’t worn a pair of pants in years. I don’t even think about it anymore. To keep warm in the winter, I just wear tights.

So that’s it :). And if you’re curious, hubby’s gone minimalist, too. I don’t have pictures of his clothes because he left before I could snap them this morning, but he now has 2 pairs of (identical) pants, 1 dress shirt, and 2 t-shirts. His goal is to get another dress shirt and maybe some better casual shirts. He’s a pretty semi-formal kind of guy, though, so it still remains to be seen what his final shirt selection will be. As for shoes, he has 2 pairs (shoes and sandals), and I have 3 (shoes, sandals, and rain boots).

On the agenda for tomorrow: sourdough bread 🙂

–Wendy

Share this:

  • Twitter
  • Email
  • Pinterest
  • Facebook
  • Print
  • LinkedIn
  • Reddit
  • Tumblr
  • Pocket

Like this:

Like Loading...
Posted in: Other | Tagged: clothes, minimalism, minimalist wardrobe, summer

This is What Happens…

Posted by Wendy on May 28, 2013 4 Comments

when Mommy gets distracted:

image

image

image

Doesn’t he look guilty?

I was sweeping the living room yesterday and forgot that Small Fry is officially a crawler now. Munchkin had left his ink pad out on the floor of the dining room (adjacent to the living room), which I didn’t notice in time. Loose ink pad + crawling baby + distracted mom = disaster waiting to happen!

Fortunately the ink came off the floor and the baby with just water and a rag. It’s still underneath his fingernails a little, but it’ll eventually wear off. I hope.

Share this:

  • Twitter
  • Email
  • Pinterest
  • Facebook
  • Print
  • LinkedIn
  • Reddit
  • Tumblr
  • Pocket

Like this:

Like Loading...
Posted in: parenting | Tagged: baby, cleanup, ink, mess

Off to the Zoo

Posted by Wendy on May 27, 2013 2 Comments

For Christmas last year, we promised our kids trips instead of buying them toys that would get played with for a week and then forgotten. It’s something we’d always talked about doing but never actually done; in our “poorer” years, it was easier to have a Dollar Store holiday than to make promises we couldn’t keep. We gifted them three trips: roller skating (which we did in January), a trip to the lava caves of Mount St. Helens (still to come – we’ve been told that’s a summertime activity), and a trip to the zoo. We did the zoo last Monday with my in-laws.

There were the “normal” animals…

Bears…

image

Monkeys…

image

Cougars…

image

And my personal favorite, elephants.

image

image

The baby, “Lily,” was born just last year. This was our first time seeing her. Even though she’s an elephant, she definitely had “baby” qualities. So adorable!

The African exhibit (which is my favorite, outside of the elephants – our zoo has Asian elephants) had giraffes:

image

There was a body of water (lake? pond? puddle? I’m not sure…) in the giraffe enclosure that, as Seahawk pointed out looked a lot like a giraffe head and neck, so I snapped a picture of that too.

image

There were also the obligatory sleeping hippos:

image

And flamingos. Yes, flamingos! I’d never seen them before; they were absolutely gorgeous birds. They even stood on one of their spindly legs like their stereotype. I suppose they’re stereotyped that way for a reason.

image

When they opened their wings, I was surprised to see that the tips were black. The black wingtips on the pink birds was absolutely gorgeous.

image

In the mongoose exhibit, they had a tunnel that kids could crawl through and be part of the exhibit.

image

There was a model of a bald eagle’s nest you could climb in. I’m pretty sure it wasn’t life size, though.

image

image

The zoo also boasts several statues for kids to climb on throughout.

image

image

I remember playing on some of them when I was a kid!

image

image

image

image

image

A lunch in the zoo cafe let me know why my mom always packed a picnic when I was a kid. Whew, that was overpriced! Lol!

That’s a pretty good overview of our trip :).

What’s your favorite zoo animal?

–Wendy

Share this:

  • Twitter
  • Email
  • Pinterest
  • Facebook
  • Print
  • LinkedIn
  • Reddit
  • Tumblr
  • Pocket

Like this:

Like Loading...
Posted in: Other | Tagged: animals, family trip, oregon zoo, zoo

This Moment: Tired

Posted by Wendy on May 24, 2013 2 Comments

Inspired by Soule Mama.

A Friday ritual. A single photograph – no words – that capture a moment from the week. A simple, special, extraordinary moment. A moment I want to pause, savor, remember.

If you’re inspired to do the same, leave a link to your “moment” in the comments for all to find.

image

Have an amazing weekend!

–Wendy

Share this:

  • Twitter
  • Email
  • Pinterest
  • Facebook
  • Print
  • LinkedIn
  • Reddit
  • Tumblr
  • Pocket

Like this:

Like Loading...
Posted in: picture of the week | Tagged: baby, picture of the week, sleeping, tired

Eight Down, Four to Go…

Posted by Wendy on May 22, 2013 4 Comments

It’s amazing how much faster sewing projects go when you have a working sewing machine! Here are the next four Sunbonnet Sue All Year blocks for my quilt.

January:

image

July:

image

September:

image

November:

image

The marshmallow in the July block is actually a hot dog in the book, but I didn’t have any fabrics that would make a convincing looking frank. When I asked the kids for thoughts, Seahawk had the brilliant idea of making it a marshmallow instead. I’m raising geniuses! Lol!

–Wendy

Share this:

  • Twitter
  • Email
  • Pinterest
  • Facebook
  • Print
  • LinkedIn
  • Reddit
  • Tumblr
  • Pocket

Like this:

Like Loading...
Posted in: quilting/sewing | Tagged: quilt, sunbonnet sue

A Trip to Fort Vancouver

Posted by Wendy on May 21, 2013 5 Comments

image

We didn’t really know what we wanted to do on Saturday other than have a Family Day. So we got in the car and hubby started driving. We ended up in Fort Vancouver. Neither hubby nor I had been there in years, so it was a fun experience for all of us.

The day we were there was a great day to have gone; almost all of the attractions were open and staffed by volunteers in period clothing from the 1840s.

The kids loved seeing real (though no longer functional) cannons. We studied the Revolutionary War earlier this school year and are studying the Civil War now – plus they’re boys – so cannons are fascinating to them.

image

image

Both Seahawk and Munchkin reminded me as I was taking their pictures, “Don’t ever do this!”

Munchkin was fascinated by the old-fashioned wheelbarrow.

image

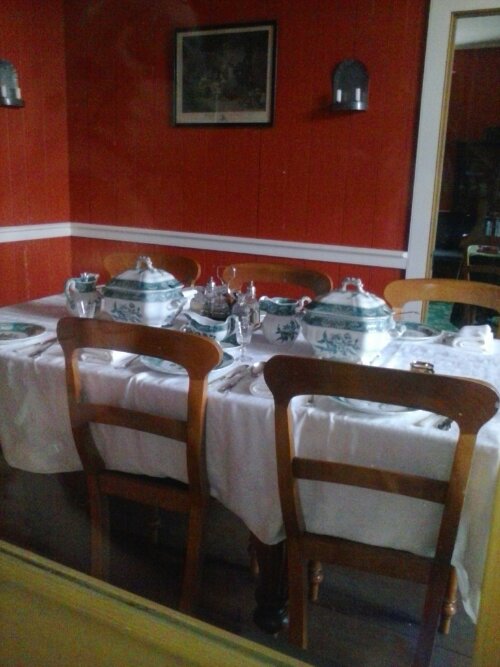
At one point in history, John McLoughlin lived at the fort. His house has been recreated for people to look at. The dishes behind the rope (so the ones in the photograph) are the real ones from the time; the ones the volunteers use (not pictured) are replicas.

image

Here’s the bastion. This is what I always picture when I think of an old military fort, but I now know there’s much more to it than this! We were actually able to go inside the bastion. It’s a 3-story building that’s empty except for the top floor, which you can tell from picture is much bigger than the bottom floors – the top houses several cannons.

image

I didn’t take pictures inside the two main “lessons” we had, but we learned all about 1840s medicine and the fur trade in the area at the time. The military fort was actually built to protect the assets – the furs. It turns out it was never needed; they were never challenged.

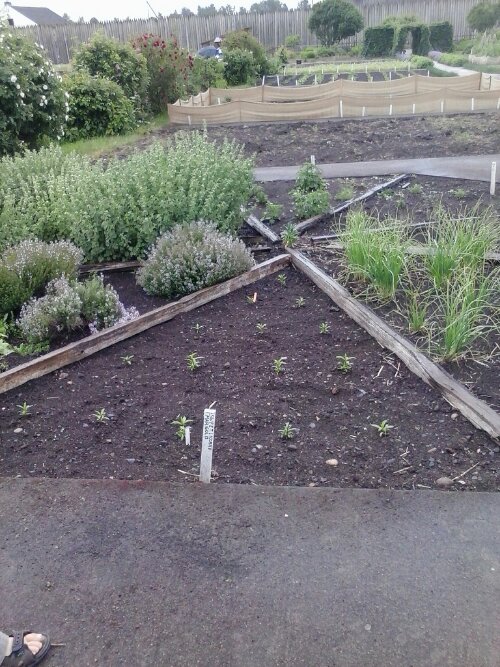
Just outside the fort was an amazing garden. They had loads of flowers, vegetables, and herbs growing. These are used for a summer camp they host: for a fee, people (kids and adults) can come to the fort and learn about the time, eat period food, wear period costumes, and stay the night.

image

image

image

Outside, there was a huge anchor that was drawn out of the Columbia River. They don’t know much about it except that it was made sometime between 1815 & 1850 and it is so huge it was from a ship likely weighing around 1,000 tons. What they don’t know was whether this ship was a freighter, a passenger liner, or something else.

image

image

image

To end the day, I bought a triangle that was actually made on the grounds by a real blacksmith (as opposed to a fictional one :p). I love that it’s made from completely natural materials – cast iron with a leather strap – and not plastic. I plan to use it to call the kids in from outside when they’re playing, like a dinner bell. It’ll be a real voice saver!

image

image

–Wendy

Share this:

  • Twitter
  • Email
  • Pinterest
  • Facebook
  • Print
  • LinkedIn
  • Reddit
  • Tumblr
  • Pocket

Like this:

Like Loading...
Posted in: homeschooling, Other, parenting | Tagged: family day, fort vancouver

This Moment: 3 Brothers

Posted by Wendy on May 17, 2013 5 Comments

Inspired by Soule Mama.

This moment: a Friday ritual. A single photograph – no words – capturing a moment from the week. A simple, special, extraordinary moment. A moment I want to savor, remember.

If you’re inspired to do the same, leave a link to your “moment” in the comments for all to see.

“If we take care of the moments, the years will take care of themselves.” -Maria Edgeworth

image

Have a blessed weekend.

–Wendy

Share this:

  • Twitter
  • Email
  • Pinterest
  • Facebook
  • Print
  • LinkedIn
  • Reddit
  • Tumblr
  • Pocket

Like this:

Like Loading...
Posted in: picture of the week | Tagged: brothers, this moment

Reusable Bags for Produce and Bulk Items

Posted by Wendy on May 16, 2013 5 Comments

Eliminating – and even lessening – our waste has been a very frustrating undertaking. I got Zero Waste Home from the library last week and read it, but the main advice in the shopping chapter is “buy everything in bulk using your own containers.” While I’d love, love, love to do that (she even has access to shampoo and conditioner in bulk in her area!), the bulk foods near me are sadly lackluster. So I’m coming to the (unfortunate) conclusion that a true Zero Waste lifestyle just isn’t possible for my family. Unless the local stores start offering more than nuts and organic chocolate chips (at $9 a pound!) in bulk, we’re going to end up sending more than one quart of garbage a year to Junk Mountain. Especially since I have a friend who’s seen with her own eyes what I’ve suspected for years: the garbage company dumps our recyclables instead of recycling them, even when you take them directly to the recycling center (as opposed to using curbside service). I’m going to try to make additional strides this summer by canning my own tomatoes (never tried before…) and making my own freezer jam (did that once) in reusable glass jars. My first step, though, is a little less advantageous: I made reusable bags for the bulk items that are available (including produce). And with even a smidge of sewing experience, you can too! It’s super easy.

First, cut your fabric to whatever size you want your bag(s) to be. 12×15 is a pretty good size. For a nice strong bag, you want the bottom to be folded, not sewn, so for that 12×15 size, cut your fabric 12×31 (that extra inch allows room to insert your draw strings without compromising the size of your bag).

Next, fold over 1/4″ on each of the 12 inch sides. You can finger press or iron, whichever you’d prefer. Lay your drawstring material (I just use yarn – 18 inches is a good length, and you need 2 per bag) near the raw edge and fold it over again, capturing the yarn inside. Pin into place.

image

Sew that seam down on both sides of each bag, being careful not to catch the yarn – it needs to be free for the drawstring property to work.

I forgot to take a picture of the next step, but it’s easy; you should be able to figure it out. Fold your bags in half, right sides together, with the yarn ends lined up. Sew up the sides, again being careful not to catch the yarn in your seams.

Turn your bags right side out and knot the yarn together on both sides. This keeps it from from just sliding out of the casing.

You’re done! Now go enjoy using your new bags instead of the single-use plastic ones the store provides.

image

Feel free to leave me comments with questions; it’s possible I’ve forgotten some details.

–Wendy

Share this:

  • Twitter
  • Email
  • Pinterest
  • Facebook
  • Print
  • LinkedIn
  • Reddit
  • Tumblr
  • Pocket

Like this:

Like Loading...
Posted in: quilting/sewing | Tagged: cloth bags, reusable, zero waste
1 2 Next »

Welcome!

Welcome to Ladybug Daydreams! My name is Wendy, and I’m glad you’re here. I am a homeschooling mom to 5 boys. I write about homeschooling, homeschool curriculum, yarn (both knitting and crochet), and more! I hope you enjoy what you read.

Social

  • View ladybugdaydream’s profile on Twitter
  • View ladybugdaydreams’s profile on Instagram
  • View ladybugdaydream’s profile on Pinterest

Subscribe

Join 493 other subscribers

May 2013
S M T W T F S
 1234
567891011
12131415161718
19202122232425
262728293031  
« Apr   Jun »

Search

MyFreeCopyright.com Registered & Protected

Copyright © 2025 Ladybug Daydreams.

Theme by themehall.com.

loading Cancel
Post was not sent - check your email addresses!
Email check failed, please try again
Sorry, your blog cannot share posts by email.
%d bloggers like this: