Ladybug Daydreams

Month: October 2013

Pumpkin Carving

Posted by Wendy on October 30, 2013 Leave a Comment

I hate carving pumpkins. There. I’ve said it. But my kids love it, and I forget year to year how much I dislike it. Hubby has a skin allergy to pumpkin flesh (he can eat it, just can’t touch it raw), so carving duties fall to me.

image

image

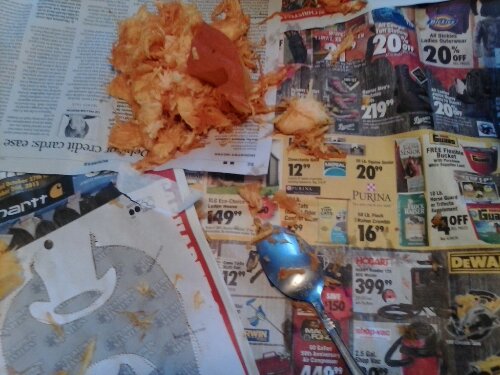
We bought one of the kits with a book of patterns and the carving tools. Munchkin chose a headless guy, which ended up being more difficult than expected to complete. But he liked it, so that’s all that matters.

image

I think it ended up looking like Batman’s logo. But look carefully and you can tell that the top part is actually a top hat, and the bottom is a coat.

Seahawk decided he wanted a spider on his, so I just freehanded a basic spider shape. There was more cutting on his, but less details, so it was easier overall.

image

image

Happy (almost) Halloween!

–Wendy

Share this:

  • Twitter
  • Email
  • Pinterest
  • Facebook
  • Print
  • LinkedIn
  • Reddit
  • Tumblr
  • Pocket

Like this:

Like Loading...
Posted in: Other | Tagged: Halloween, kids, pumpkin carving

One Decade

Posted by Wendy on October 25, 2013 Leave a Comment

That’s how long I’ve been a mom.

Or, that’s how old Seahawk is. Yeah. That makes me sound less old ;).

We had a big week of celebrations. On Sunday, we had the two older boys’ joint “friend” party. We bought white t-shirts from Gen-X and a package of fabric markers and each kid got to decorate their own shirt. Seahawk did his up like a jersey of his favorite football player, Russell Wilson of the Seattle Seahawks (hence his blog name). Munchkin did a space scene. When they were wearing their shirts the next day, I took the opportunity during our daily trek to the store to teach them the planets in order. I learned them in third grade, and to this day I still use the mnemonic device my teacher taught us: My Very Elegant Mother Just Sat Upon Nine Pizzas (Mercury, Venus, Earth, Mars, Jupiter, Saturn, Uranus, Neptune, Pluto). Yes, I know Pluto isn’t technically considered a planet anymore, but it completes the funny phrase nicely :).

Anyway, after the shirt coloring, the kids went outside to play (yay for beautiful weather in late October!). Then I called them back in to do “build your own pizzas.” I made pizza crust, tripling my normal recipe, and divided it into mini-pizza size portions. We put various toppings into bowls and kids got to choose what they wanted. Then we baked them up and served them for dinner (the party ran from 4-6). Overall, a very successful party! Except for the fact that I didn’t take any pictures. That was a tragedy.

On Monday, we had Seahawk’s “grandparents dinner.” He chose baked ziti, which works for me, because it’s easy to make a big pan of that! In lieu of gifts, he asked everyone for a cash donation to put toward his “basketball fund.” He’s never played a team sport (they’re expensive around here!) and really wanted to. Between everyone, he got what he needed, plus a pair of shoes specifically for the gym. I can’t wait to start going to his games next month!

Then on his real birthday, yesterday, I made tamales for dinner – that’s another of his favorites, but we don’t have it very often because they’re very time consuming to make. Because we’d had cake (homemade pumpkin cake – yum!) at the grandparents dinner, I just bought him a doughnut from the grocery store for his real birthday. It’s all about portion control, and one doughnut won’t stick around for days ;). We put ten candles in it for him (which hubby thought was about the funniest thing he’d ever seen – I didn’t tell him in advance I was going to do that) and sang the traditional song. And that was that.

aidan bday


How do you celebrate birthdays?

Share this:

  • Twitter
  • Email
  • Pinterest
  • Facebook
  • Print
  • LinkedIn
  • Reddit
  • Tumblr
  • Pocket

Like this:

Like Loading...
Posted in: Other, parenting | Tagged: birthday

Picture of the Week: Grandma

Posted by Wendy on October 18, 2013 Leave a Comment

image

My mom was over earlier this week, so she and the kids posed together :).

Have a lovely weekend!

–Wendy

Share this:

  • Twitter
  • Email
  • Pinterest
  • Facebook
  • Print
  • LinkedIn
  • Reddit
  • Tumblr
  • Pocket

Like this:

Like Loading...
Posted in: Uncategorized

Picture of the Week: Lincoln Logs

Posted by Wendy on October 11, 2013 Leave a Comment

image

We went to a “Pioneer Experience” farm on a homeschool field trip with some friends of ours. One of the highlights was building with giant Lincoln Logs.

Happy weekending :).

–Wendy

Share this:

  • Twitter
  • Email
  • Pinterest
  • Facebook
  • Print
  • LinkedIn
  • Reddit
  • Tumblr
  • Pocket

Like this:

Like Loading...
Posted in: picture of the week | Tagged: lincoln logs, philip foster farm

K5 Learning

Posted by Wendy on October 9, 2013 Leave a Comment

K5 Logo 400 px

K5 Learning has an online reading and math program for kindergarten to grade 5 students. I’ve been given a 6 week free trial to test and write a review of their program. If you are a blogger, you may want to check out their open invitation to write an online learning review of their program.

I haven’t tried this with my kids yet, but I plan to start it tomorrow. I’ll let you know in six weeks what I think!

–Wendy

Share this:

  • Twitter
  • Email
  • Pinterest
  • Facebook
  • Print
  • LinkedIn
  • Reddit
  • Tumblr
  • Pocket

Like this:

Like Loading...
Posted in: homeschooling | Tagged: homeschool, K5 Learning, kids, math, reading

Picture of the Week: Perfect Form

Posted by Wendy on October 5, 2013 Leave a Comment

image

Maybe, just maybe, teaching him to write will be a breeze ;).

Have a great weekend!

–Wendy

Share this:

  • Twitter
  • Email
  • Pinterest
  • Facebook
  • Print
  • LinkedIn
  • Reddit
  • Tumblr
  • Pocket

Like this:

Like Loading...
Posted in: picture of the week

DIY Cloth Napkins

Posted by Wendy on October 4, 2013 Leave a Comment

I’ve read several blogs lately about making your own cloth napkins. They all have similar techniques for doing so (cut the fabric, fold over the edges, and sew) and reasons for using cloth instead of disposable (more environmentally friendly, save money). While I agree 100% with the reasons behind using cloth over paper, I prefer a much simpler procedure for the making of the napkin. Here’s my version.

Cut out your fabric. I’ve found that flannel is the best for this particular project. It holds water better (for wiping down tables and babies) and is softer on the skin than the regular cotton quilting fabric. I made mine 12×12, but you can make them any size you like. Some people like them bigger, like 20×20. In the 12×12 size, I was able to get 18 napkins out of 2 yards of fabric.

image

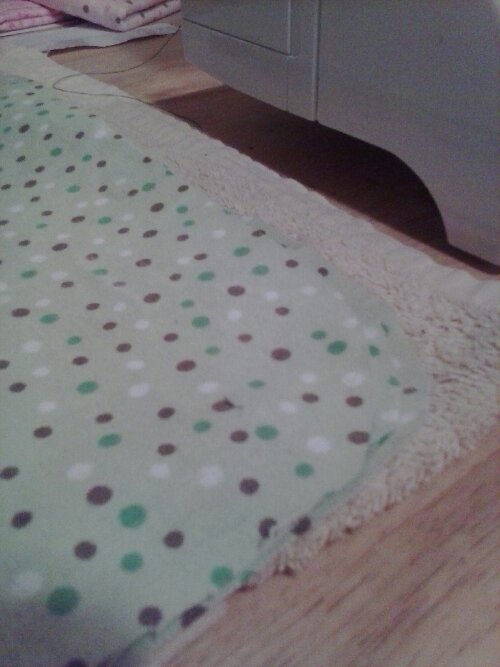
Once you have all the squares cut out, do yourself a favor and round the corners. That’ll make the sewing of the edges much easier.

image

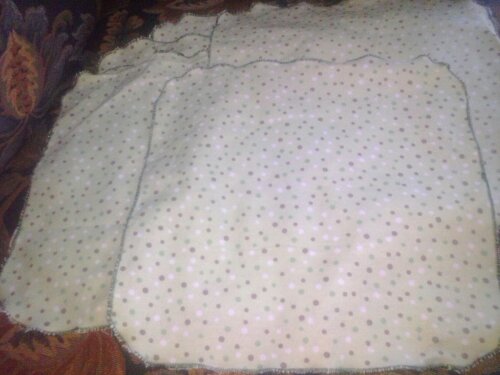
Finally, set your sewing machine to a zigzag stitch. You want it as wide as it’ll go (5 millimeters on my machine) and a very short length – my machine has settings from 0 to 4, and I go about halfway between 0 and 1 for this project. Using a complimentary or contrasting thread (depending on the look you’re going for), zigzag stitch all the way around your napkins. This will keep the fabric from fraying, which flannel is especially prone to do.

That’s it! Beautiful, reusable cloth napkins with bothering with the fussiness of folding and pressing edges or stressing about super straight lines.

image

image

Enjoy!

–Wendy

P.S. The procedure for cloth baby wipes is exactly the same, just with 8×8 squares of flannel.

Share this:

  • Twitter
  • Email
  • Pinterest
  • Facebook
  • Print
  • LinkedIn
  • Reddit
  • Tumblr
  • Pocket

Like this:

Like Loading...
Posted in: quilting/sewing | Tagged: cloth napkins, diy, easy, environmentally friendly, frugal, sewing

Spear a Potato

Posted by Wendy on October 1, 2013 Leave a Comment

Would you ever think you could stab an ordinary drinking straw into a potato? Neither did I. Or my kids.

Until our science experiment last week.

But here it is.

image

A straw in a potato.

Here’s how to do it. You know, in case you have littles at home you want to teach about inertia.

First, soak the potato in water for about 30 minutes. Don’t worry – it’ll still be raw (read: hard). Using a strong, fast thrust, push the straw into the potato.

It won’t break. The straw, that is. The potato will. Its skin, anyway.

Why it works: basic inertia. An object at rest (the potato) wants to stay at rest. An object in motion (the straw) will keep moving until it can’t anymore.

Each time we do an experiment, the kids also do a little paper. Very basic. It lists the name of the experiment, the procedure, what the kids think will happen, what actually happened, and why it worked.

–Wendy

Share this:

  • Twitter
  • Email
  • Pinterest
  • Facebook
  • Print
  • LinkedIn
  • Reddit
  • Tumblr
  • Pocket

Like this:

Like Loading...
Posted in: homeschooling | Tagged: experiment, homeschool, inertia, science

Welcome!

Welcome to Ladybug Daydreams! My name is Wendy, and I’m glad you’re here. I am a homeschooling mom to 5 boys. I write about homeschooling, homeschool curriculum, yarn (both knitting and crochet), and more! I hope you enjoy what you read.

Social

  • View ladybugdaydream’s profile on Twitter
  • View ladybugdaydreams’s profile on Instagram
  • View ladybugdaydream’s profile on Pinterest

Subscribe

Join 493 other subscribers

October 2013
S M T W T F S
 12345
6789101112
13141516171819
20212223242526
2728293031  
« Sep   Nov »

Search

MyFreeCopyright.com Registered & Protected

Copyright © 2025 Ladybug Daydreams.

Theme by themehall.com.

loading Cancel
Post was not sent - check your email addresses!
Email check failed, please try again
Sorry, your blog cannot share posts by email.
%d bloggers like this: