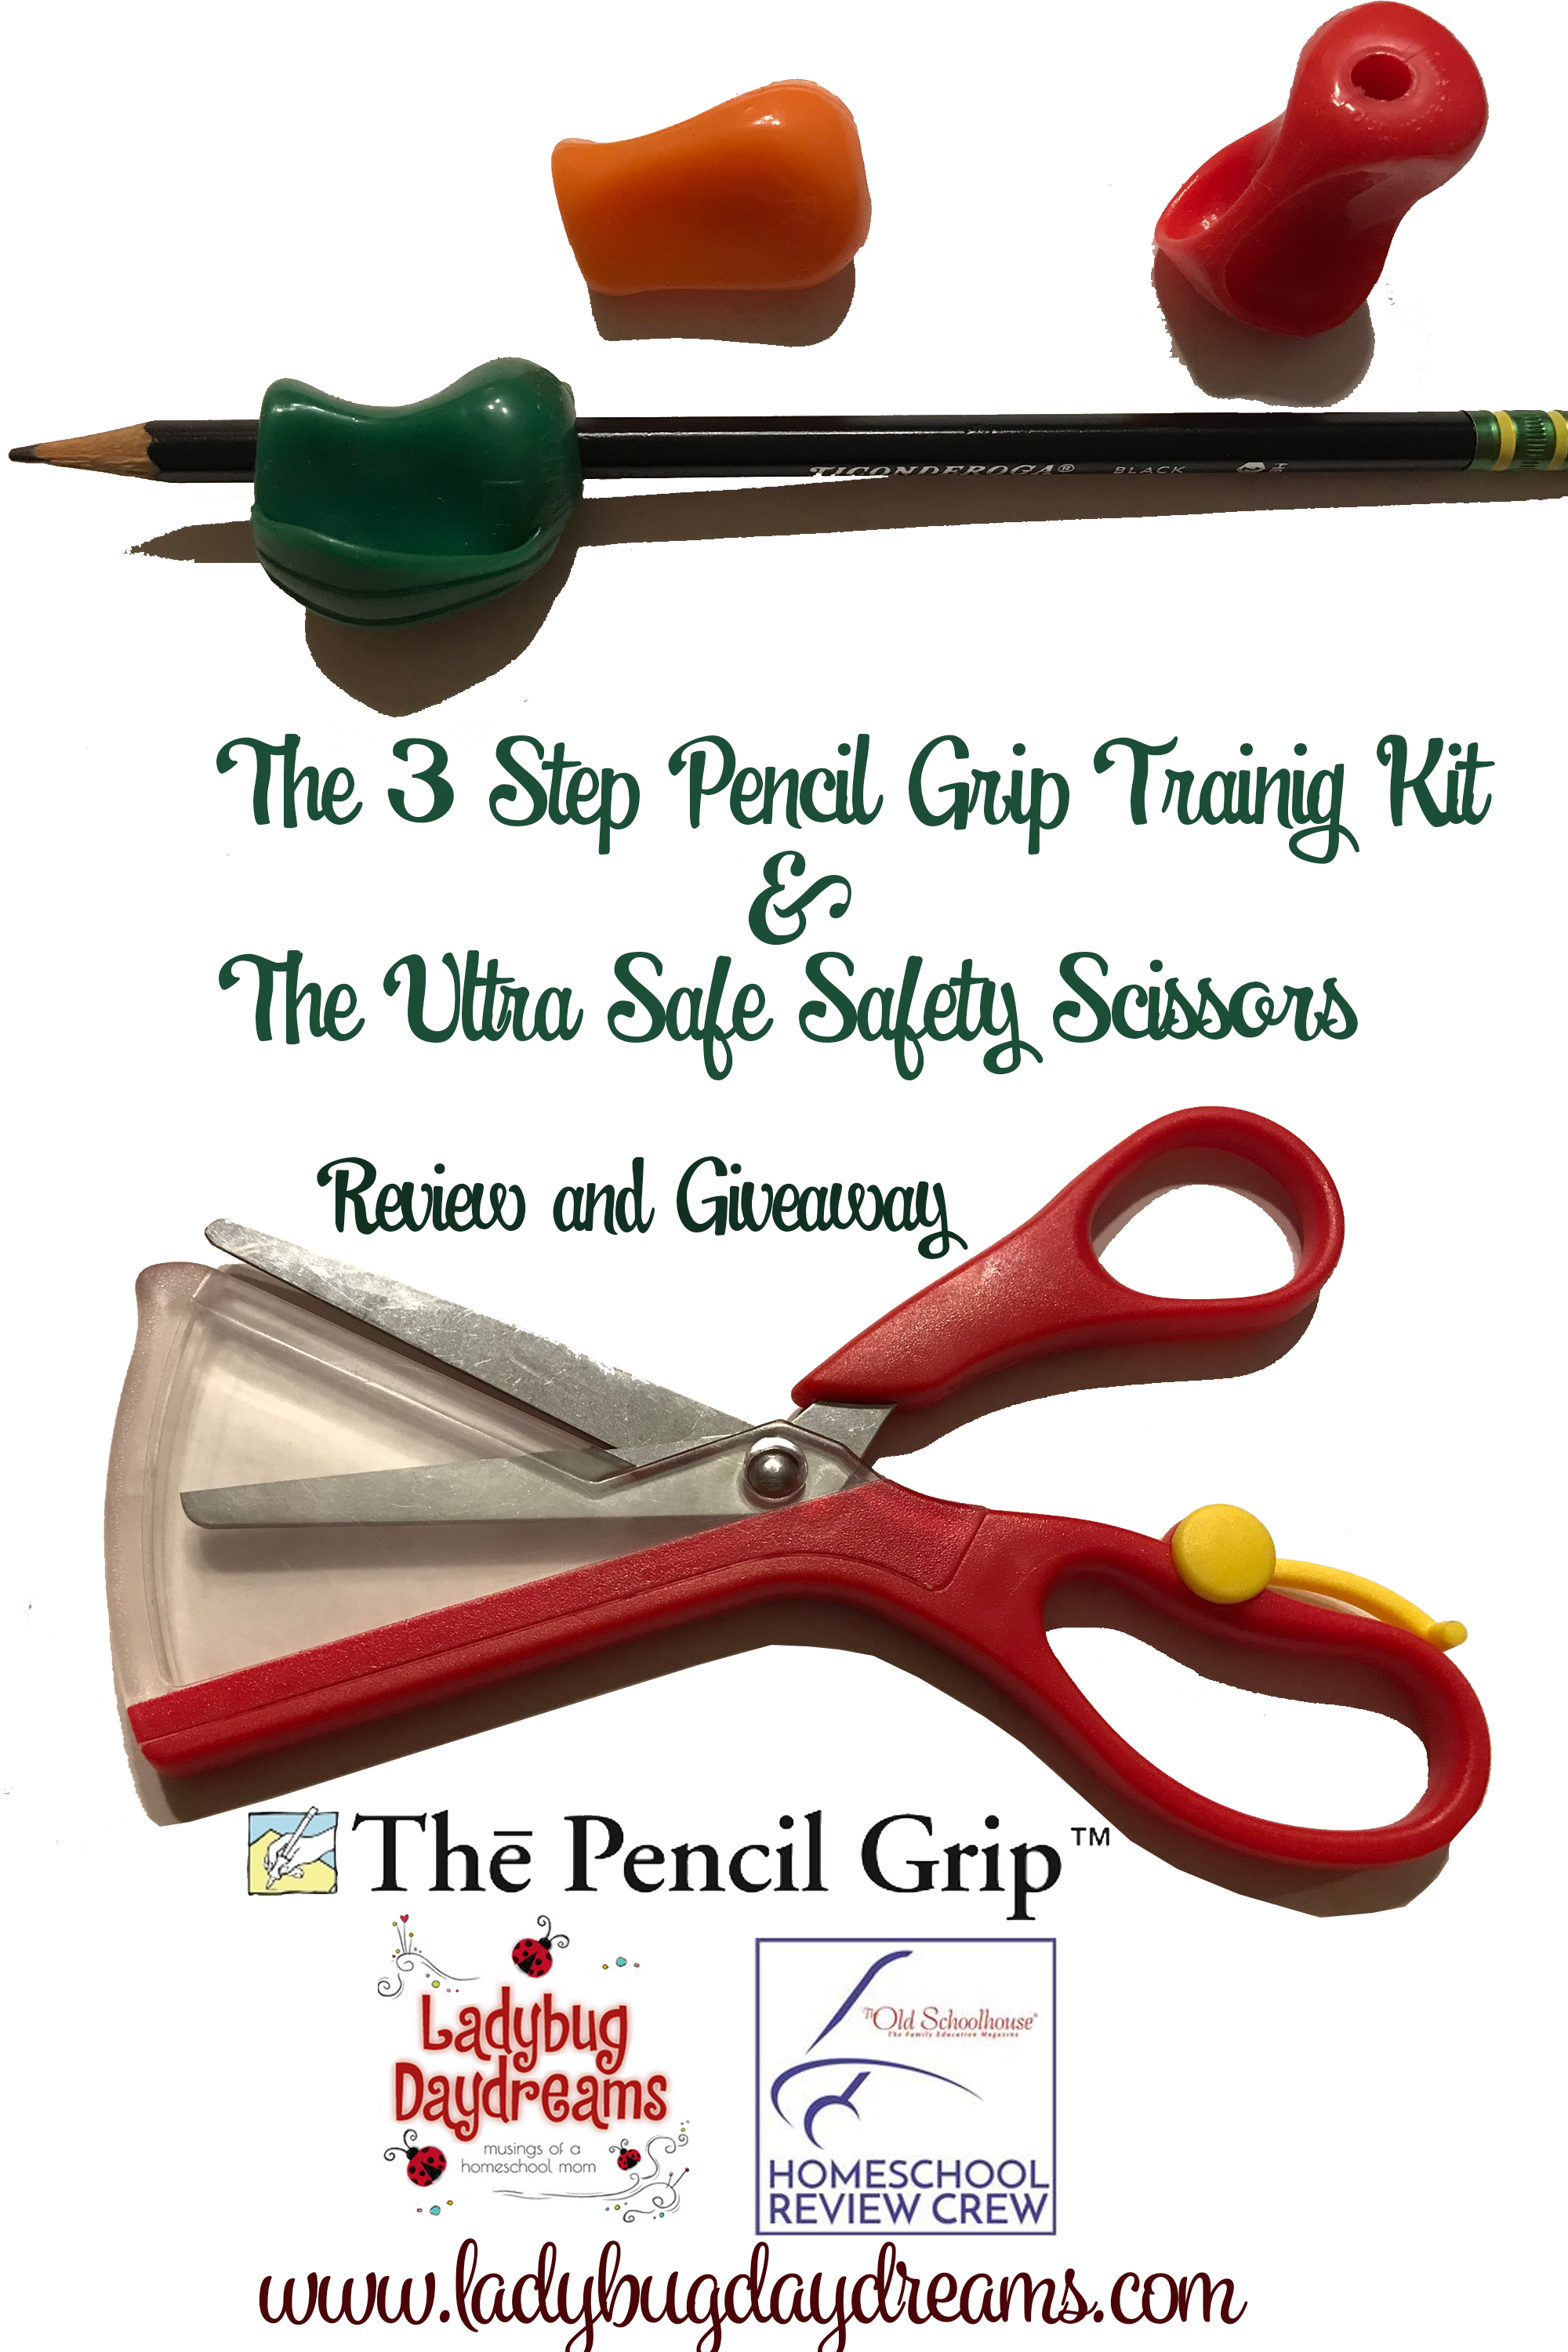
Safety Scissors That Aren’t Dull and Pencil Grips (review and giveaway)

Pencil Grips and Safety Scissors Giveaway

We have been fans of The Pencil Grip, Inc. for quite some time now. My kids, especially Small Fry, adore creating art with their Kwik Stix fast-drying, no-mess tempera paint sticks. This time, we got something  completely different to review – The Ultra Safe Safety Scissors and The 3 Step Pencil Grip Training Kit.

The Ultra Safe Safety Scissors 

safety scissorsA lot of companies make safety scissors for children. This is usually code for “dull” and/or “blunt.” After all, if the scissors are neither sharp nor pointy, children can’t cut themselves, right? Wrong! Besides being faulty logic (we’ve all cut ourselves on dull blades, am I right?), it also makes the process of cutting the intended object difficult or impossible. When a young child is first learning to use scissors, this can be a very frustrating experience.

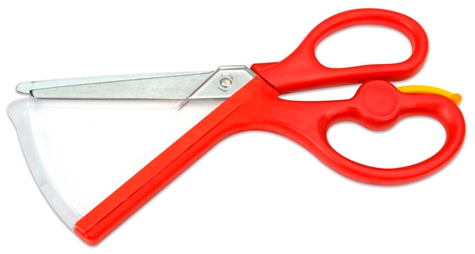
This is where The Ultra Safe Safety Scissors are different. They are neither dull nor blunt. So how are they safe for children then? I’m glad you asked! The Pencil Grip, Inc. has installed a permanent plastic guard for the bottom blade to slide into. This guard is positioned in such a way as to make it impossible for little fingers to find their way between the blades, whether the scissor is opened or closed. To cut the paper, the child opens the blade, slides the paper between the top blade and the safety guard, and then proceeds to cut like normal.

Another feature of The Ultra Safe Safety Scissors is that little yellow piece you see attached to the lower handle. If you flip that guy up, it gives your child a little extra help getting the scissor open again after making his cut. This is especially helpful for children with little hand strength.

005F539C-A4B1-4B99-AE0C-35B8F2C17F65
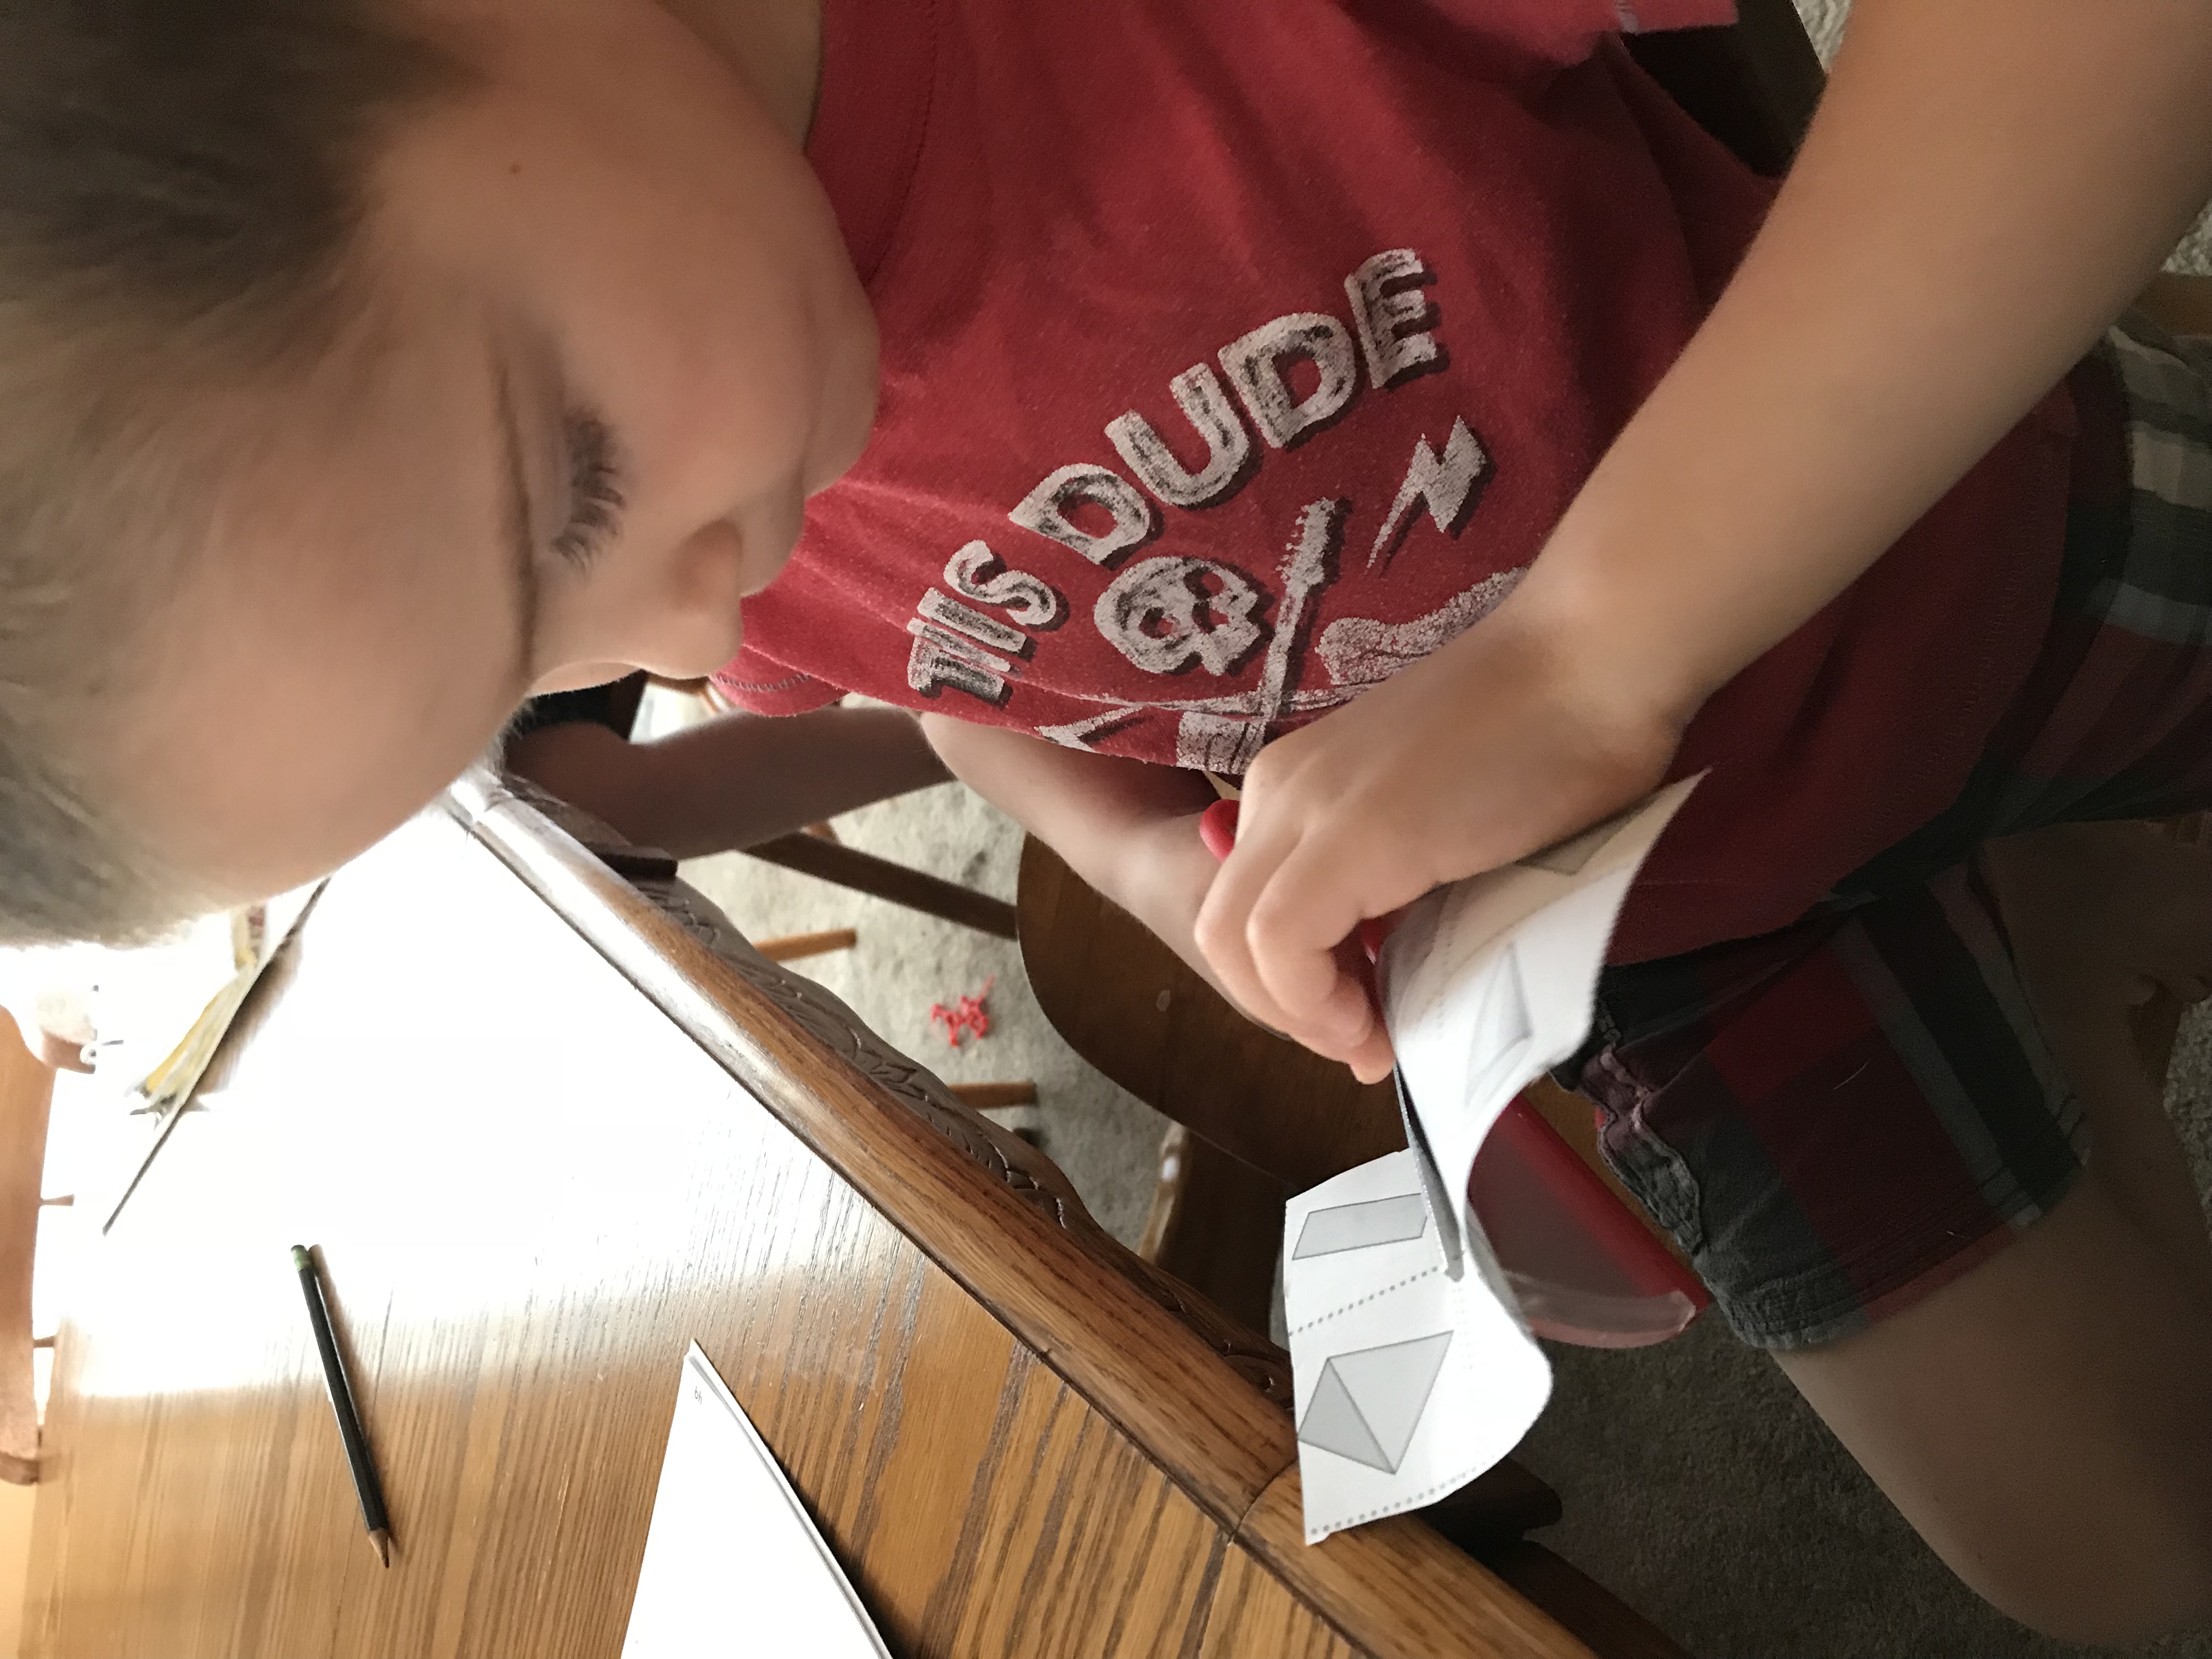
Small Fry (age 5) has had loads of fun learning to cut with these scissors. I love that he can learn this important skill without putting his (or any of his brothers’) fingers in danger. This is a really great product that I highly recommend.

The 3 Step Pencil Grip Training Kit

pencil gripsThese little doodads are what The Pencil Grip, Inc., is famous for. In fact, it’s the name of their company! I’m sure a lot of parents remember these from their own childhoods; I know I do.

A lot of people (myself included) hold their pens and pencils incorrectly, resulting in tendon damage and hand fatigue. The 3 Step Pencil Grip Training Kit helps you to adjust your grip, allowing you to write longer with less hand trouble. 

How It Works

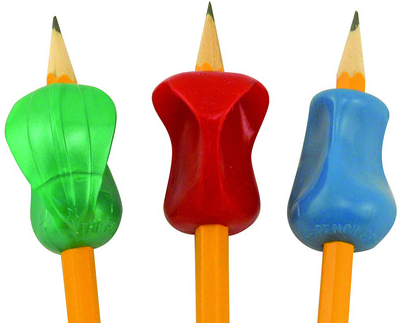
There are 3 Pencil grips in the set, and each one is a little different, but they all do basically the same thing. You slide on onto your pencil and it forces you to have the correct grip (which is thumb and pointer finger on each side, middle finger behind – nothing overlapping). If you’re very set in your ways, you need to start with step 1, which has a “superhero cape” that physically gets in the way of you overriding the grip to hold the pencil in your normal way.

Once you’ve used this one for a while and feel pretty confident with your new grip, you can move onto step 2. The second Grip is much like the first one, except instead of the full cape, it has just a small tag to get in your way, preventing overlap.

And finally, step 3, which is the traditional Pencil Grip. It guides your fingers into the right positions without actively preventing bad grip. 

The 3 Step Pencil Grip Training Kit works for both right- and left-handed students. There is an L and an R on each one, and this gives you the placement for the thumb to be able to get the rest of the fingers in the right places.

Each of my kids used one of these, even though they’re each a little different. We gave Small Fry the Step 1 Grip, because as a kindergartner he’s the most flexible and willing to learn. He’s been using it every time he has a pencil in his hand, and he really likes it. Seahawk and Munchkin have been trading the other two back and forth, depending on their moods. They don’t use them every time, but they use them often enough to gain some good habits. They both told me that they like them quite a bit. I think the lack of use is more out of habit than out of dislike.

The Pencil Grip, Inc. has generously offered to give away one set of the items in this review to one of my readers. The lucky winner will receive one pair of The Ultra Safe Safety Scissors and The 3 Step Pencil Grip Training Kit. Just fill out the Giveaway Tools widget below for your chance to win. The winner will be chosen randomly by Giveaway Tools on Tuesday morning, October 24, 2017. Good luck!

Blessings,

ladybug-signature-3 copy


Ultra Safe Safety Scissors & Pencil Grip Training Kit {The Pencil Grip, Inc. Reviews}
disclaimer

Knitting 101: The Knit Stitch

F24A5CE1-B6A7-460B-A4DE-0B4D2D2CBCFA

Knitting consists of four things: casting on, the knit stitch, the purl stitch, and bonding off. Yesterday I taught you to cast on, and today we’ll cover the knit stitch.

When you use the knit stitch for ever row in a flat project, you get what’s known as garter stitch. Garter stitch is defined by its horizontal dashes and squishy feel. For this sample, it’s what I used.

Special thanks to Seahawk for being my photographer.

978B7BCA-FE08-4BCD-80C6-BF126A651CEC

Once you’ve cast on, you’re ready to knit. Here are the steps.

Put the needle with the stitches into your left hand and the empty needle in your right hand. Make sure the working yarn (the part attached to the ball) is behind your work, and also that you’ve pulled it under your needle, not over. If you pull it over the needle, you’ll create an extra stitch, which is not what you want to do.

C048AC04-8437-479F-B1FC-75510B0930F1

Slide the right needle through the first stitch on the left needle. It should go in through the front and out the back.


Wrap the yarn counterclockwise around the right needle.

3E346305-26D3-4DFD-8FF0-66FE2A419805

Using the right needle, pull the wrapped yarn through the loop. This will move your needle back to the front of the other one.

3B5ECDAB-26B7-49D2-BF1A-E297DEDA97F4

Slide the old stitch off of the left needle. The new stitch you just created will be on the right needle. Continue in this manner until you get to the end of the row. When you’ve worked all the stitches on the left needle, you’ll be left with a full right needle and an empty left one. Switch the needles and start all over again.

AC2BB1FF-BCB7-4CD1-9F43-11268AE9E140

Thats it! If you’ve worked through this tutorial with me, you can officially call yourself a knitter. Tomorrow I’ll teach the purl stitch.

Blessings,

ladybug-signature-3 copy

Knitting 101: Casting On

F24A5CE1-B6A7-460B-A4DE-0B4D2D2CBCFA

Before you can start a knitting project, you have to cast on. This just means adding stitches to your needle so you have something to knit. Let’s take a look at how to do that.

There are dozens of ways to cast on, but I’m just going to show you one of them: the long tail cast on.

The first thing you have to do is pull out a fair amount of yarn from your ball. To do this cast on, you’ll use up yarn from both the tail you’ve pulled and the ball. That’s why it’s called the “long tail” cast on.

A2B00B16-234C-4DE6-8FB1-762504E2DD2E

Next, make a “gun” with your pointer finger and thumb. Drape the yarn over these two fingers with the end of the tail on the thumb side.

9D212E37-E717-4EBB-8B4A-5AA6DFAF419B


Step three is to place a knitting needle on top of the yarn and carefully guide it down so it looks kind of like an upside down A.

4C93D6B6-C5A3-4382-9E4F-E1D0906981A4


Now the magic starts. Draw the point of your needle through the loop on your thumb,

7984C93B-806C-46A5-A151-B5DBF5A3D951

over the loop on your finger,

0DDD5F77-865F-481C-A1CB-DE5E7DCDA2E5

and back through the thumb loop.

86C64CA1-BF46-4585-9B32-D556873607E0

Pull your thumb and finger out of the yarn and tighten it around the needle – not too tight or it will be hard to knit the first row. You have now cast on the first two stitches.

A9C4C47F-3169-4100-AB99-DC044AE6B191

Repeat these steps for each additional stitch you need to cast on. Only the first one creates two stitches; every other cast on repeat will add one stitch to your needle.

Keep practicing this today. Tomorrow I’ll be back with a tutorial on creating the knit stitch (and a review and giveaway that you won’t want to miss, especially if you have small people in your life!)

Blessings,

ladybug-signature-3 copy

Knit vs. Crochet

Knit and crochet have a few things in common and a lot of things different. Let’s talk about crochet first.

crochet

Crochet hooks and fabric

Crochet is done with yarn and a single hook. This hook can be any number of sizes (just like knitting needles, as I discussed earlier this month). The size of the hook will determine the size of the stitches. Crochet has dozens of different types of stitches, and they each look a little different. Building them on top of one another allows you to make things like hats, blankets, scarfs, and more. Because of the way the stitches lie, the fabric you create crocheting often takes on a chevron-type feel, even if the edges are perfectly straight.

Knitting is done with two needles, and the fabric you create is much thinner and smoother than crochet fabric. When you see a sweater in the store that’s made up of tiny V shaped stitches, that’s knit (although I’m pretty confident the clothes in the store are machine knit).

knit

Knit fabric

Both are essentially looping yarn around itself to make a solid piece of fabric. The way knitting or crocheting differ from sewing is that instead of taking fabric and cutting it into the shape of piece you need to create a garment, you just make the fabric that shape in the first place.

A lot of people say that crochet is easier because you only have to maneuver one tool besides your yarn. A lot of people say that crochet is faster for the same reason. And for these two reasons, I think a lot of people prefer crochet. One thing to keep in mind, though, is that crochet uses up about 30% more yarn than knitting, so your budget may not go as far if you just crochet.

There was a time in my life (when I knew how to crochet but not knit) that I thought people could only really master one of the two crafts. I knew tons of people who could crochet and tons who could knit, but none who could do both. (It turns out my father-in-law can do both, but I didn’t realize that at the time.) Even though I liked crochet, I didn’t love it, but I’d practically resigned myself to never being able to knit because it was one or the other and I already knew crochet. Silly, huh? I’m so glad I didn’t stick to that mantra because I love knitting. I love it in a way I never really did love to crochet. I’m glad I have both skills, but knitting is definitely my preferred craft.

Neither one is better than the other; it’s all a matter of preference. Both have their own kind of beauty (though I vastly prefer the look of knit to the look of crochet, which is why I don’t really do the latter anymore), and both can be very rewarding. I just like the versatility of knitting better – it’s better for a wider variety of projects. If you’re in the “market” to learn a new craft, I recommend knitting. But if you’re worried about being able to handle two needles and the yarn all together, then by all means – try crochet. You can always learn to knit later.

Blessings,

ladybug-signature-3 copy

My Favorite Knitting Resources

F24A5CE1-B6A7-460B-A4DE-0B4D2D2CBCFA

During the past several months, since I learned to knit, I’ve found lots of great resources online to further feed this addiction. Here are some of my favorites.

YouTube

There are really only two YouTube channels I watch with any regularity (at least the knitting/yarn related ones), and each comes with a blog. 

For knitting techniques and tutorials, Very Pink (website here) is my absolute go-to. The host, Staci, is very relatable and her videos are super pro. It’s just the right balance of seeing her face and the cutting away to just her hands during the actual knitting. She posts new videos every Wednesday and a podcast on Thursdays.

For dyeing, I cannot recommend Rebecca from Chem Knits (website here) enough. I found her channel from a YouTube rec, and I’m glad I did. After watching her videos just for fun inspired me to dye my own yarn, and that was a really rewarding experience. Her videos are very sporadic, but have been quite frequent lately, including a lot of live videos. She’s also starting a weekly video series called Dye Pot Weekly later this month.

Other Sources

If videos aren’t your thing and you’d rather read than watch, there are lots great sources, depending on what fancy is.

Knitting Paradise is a forum with a huge membership base. If you ever have a question about knitting, ask it there are you’ll likely have dozens of answers within just a few minutes.

Knitting Help is another one. It’s very similar to Knitting Paradise, but not quite as active. Knitting Help also has loads of “how to knit” videos that I used when I needed a reminder in my early days of knitting. 

Tin Can Knits are my absolute favorite pattern designers. They have tons of hats, mittens, sweaters, cowls, and scarfs, and virtually all of them are sized “from baby to big.” This is unusual in a pattern, but it’s awesome because it means that you can knit a sweater for your baby or child – and a matching one for yourself! In addition to having tins of sizes, each of their patterns is seamless, so when you bind off your knitting, you’re done – no sewing of pieces required.

Finally, Ravelry. This is the knitter and crocheter’s best friend on the internet. It’s a place to find and purchase patterns. It’s a place to offer your own patterns for sale or free. It’s a place to store your patterns as well as those you’d like to knit someday. You can also keep an inventory of the yarn in your stash. This is especially useful if you have a large stash and struggle to remember what’s available. You can also view other projects from patterns you’re considering, which is one of my favorite things to do on Ravelry. They sort those projects by timeline (most recently finished first), but you can also look at them based on which yarn was used. This is especially useful if you know you want to make a pattern but you aren’t sure which yarn to choose. Just hop onto Ravelry, find the pattern, and choose “yarn ideas.”

This list is far from comprehensive as far as knitting resources online, but they’re the ones I gravitate toward most often.

Blessings,

ladybug-signature-3 copy

Teaching Children to Knit

F24A5CE1-B6A7-460B-A4DE-0B4D2D2CBCFA

I have this strange desire for my children to share my interests. Maybe it’s not so strange, I don’t know. But it’s there. The problem with this is that I only have sons. And that I’m not particularly interested in things like Star Wars and Legos. I’ve tried teaching them to knit and crochet in the past anyway, with varying degrees of success. Today I’ll share a few of the tips I’ve gleaned from other sources on teaching children to knit.

Don’t force them.

D8E3DD46-FA59-4022-BE38-860DF5094B2EThis is a hard one for me because I really want my boys to learn the craft. But generally speaking, they’re mildly interested at best, but not at all interested more often. Forcing children to do something they don’t want to do, as any parent knows, usually just makes things worse.

Sit next to them, not across from them.

An adult has the ability to understand opposite hands a lot easier than a child. So when you take an adult knitting class, you might find yourself sitting across from the instructor, and you know you need to do the opposite of what you see, but children have a hard time mimicking that way. It’s best to sit next to them while you’re showing them what to do so they can see the actions the way they actually need to be performed.

Help them with their work. Don’t try to show them on your own needles and yarn.

5D6BD3EA-8D5B-4127-BDBC-C72C6C2F3955This was the hardest part for me to figure out. When I took my class, the instructor had her yarn and needles, and each pupil had theirs. She showed us by doing it herself. When I tried to teach Munchkin (11 now, but we started when he was 9) to knit following this method, it didn’t work out so well. He could cast on just fine, but struggled to actually knit. When I held his hands and guided them in the proper motions, he had a lot more success.

If your child is younger, you might even do part of the work for them on a fairly regular basis, especially in the beginning. With Small Fry (5), I cast on for him, and then taught him how to put the needle through the stitch. I then wrapped the yarn, but taught him to pull the yarn back through. This way, he was doing 2/3 of the work (and so still learning), but by not having him work the yarn he didn’t have to learn (yet) the most difficult part of knitting: manipulating yarn and needles together.

Keep it simple.

While knitting boils down to just two stitches (knit and purl), they can be combined in dozens of ways to make stunning garments. But when you’re first learning, it’s best to work for a long time on just the basics. When teaching a child, I recommend letting them work with just the knit stitch for a long time. Knitting is easier than purling, so make the, very comfortable with knitting before you add in purls. 

Ultimately, there’s not really a right or wrong way to teach them to knit. These tips are just some I’ve come across online and in my own experience with my boys.

Blessings,

ladybug-signature-3 copy

Learning to Knit

F24A5CE1-B6A7-460B-A4DE-0B4D2D2CBCFA

There are a lot of options for learning to knit. If you’re a very private person who prefers to do things in the comfort of your own home, YouTube is a great place to start. There are practically unlimited options there for teaching yourself to knit. I tried several of them in my quest to learn, and none quite worked for me. I still wanted to learn, though, so I looked into other sources. It turns out that the yarn store I go to had classes. And there was one coming up in just a week or two. So I got signed up, and by the end of the two hour class, I’d learned all the basics. By the time I’d driven the half-hour home, I’d forgotten most of them – but I had them stuck in my head somewhere, so the videos made a lot more sense this time, and I was able to pick up the craft again more easily.

I will have a specific list of resources on Saturday, and next week I’ll even be doing my own series of tutorials on how to knit. If you’re interested in learning, I hope you’ll stick with me. Maybe my photo tutorials will be helpful to you.

Blessings,

ladybug-signature-3 copy

Where to Buy Yarn

F24A5CE1-B6A7-460B-A4DE-0B4D2D2CBCFA

This post will be short and sweet 🙂

There are loads of places to buy yarn, and yarn to fit every budget. You can get skeins from craft stores like JoAnn and Michael’s, and virtually every yarn in those stores will be under $6 ($10 If you go for the super sized ones). Any regular store that’s big enough to have a crafting department will also have yarn. I’ve purchased from Walmart and Fred Meyer (a supercenter type store here on the west coast, owned by Kroger) before.

There are practically unlimited sources for buying yarn online. I’ve never bought yarn from an online company before, but I’ve read on some forums about a few, and most come with good reviews. Hobium Yarns is one. Handsome Fibers is another.

And then there’s my favorite: the local yarn store. I frequent Oregon Knitting Co., but I’ve also purchased from Nitro Knitters. Because these shops are local to you, they’ll be different depending on where you are. A lot of the, have similar inventory and prices, so it’s just a matter of finding one you like and developing a relationship with the owners and employees. 

Blessings,

ladybug-signature-3 copy

The Brinkman Adventures (review)

8F3D95F1-5B49-49CB-92A1-50F757F58286
We’ve had the pleasure of joining the Brinkman family in their missionary stories twice before. We loved them both times, so when the opportunity to review them again, this time Brinkman Adventures Season 4, my kids (especially Seahawk) practically begged me to request it. 

Brinkman Adventures tells the story of a fictional missionary family who travel the world, meeting other missionaries and participating in heart-pounding thrills. These stories, while dramatized, are based on the lives of real missionaries. Season 4 finds the Brinkmans traveling all over Asia and Eastern Europe, witnessing and preaching to the lost. The boys have been listening to their new CDs at night as they relax into sleepiness. They’ve also listened during their playtime in the afternoons. Now I’ll have each of them tell you about their favorite episode from this season.

Munchkin

65ABBFBC-BA9D-40FA-80F5-57BAF3BDE49FMy favorite episode is Cambodian Quest. In this story, Mrs. Brinkman and one of her daughters (I forget which one) travel to Cambodia so that they can teach young girls there to sew and knit. These skills will give them a leg up in their country – a way to work and support themselves. Supporting themselves is the only way many of them can avoid slavery. The daughter becomes good friends with one of the Cambodian girls, and they go to the market together one day. While they’re there, they meet a man who fixes sewing machines. This is perfect because one of their machines needs repair. The Brinkman daughter gives the man their address so he can come fix the machine. 

The whole way home, the Cambodian girl is very quiet and reserved. The Brinkman girl doesn’t know why until the Cambodian girl finally confides that the sewing machine repairman is her former slave master. She’d escaped from him, and now is terrified because he has her current address. She is very afraid now, and understandably so. 

When they get home, the Cambodian girl runs away. The Brinkman daughter searches for her and finally finds her in her former home. Together, they have to escape the slave master. The picture on the cover is from this story.

I don’t want to say anymore and spoil it, but trust me that this was a great story!

Seahawk

My favorite episode this season is Paradise Lost. In this story, the Brinkman family is camping at Paradise Lake, where s missionary is expected to come give a presentation. His plane is delayed due to a hurricane, so he has to cancel. The family has to figure out how to occupy the whole week with these unexpected circumstances prevailing.

In the meantime, the dam that keeps the lake filled breaks due to flooding from the mountains nearby. In the process of the dam breaking, all the excess water also crushes the bridge, which is the only way in or out of Paradise Lake. To stay busy, the family puts together a series of games that teach the kids to prepare for the mission field. 

The first game is about Bible translating. Mrs. Brinkman wanders around the campground pretending to be Dutch. The children have to find her and communicate their memory verse to her using only gestures so she can write it down in “her” language.

The next game teaches them how to smuggle Bibles. This game is a lot like Capture the Flag, except the kids start with the flag (which is really a piece of paper with a Bible verse written on it).

The final game is a trusting game. All the kids but one are blindfolded and tied together with a rope. The seeing kid has to lead them around a series of obstacles. This teaches them to trust in God even when the way is unclear.

Opinion

Both boys told me that this is their favorite season of Brinkman Adventures so far. It has a good balance action and character development. There’s enough calmness to keep it from being overwhelming, but enough action to keep it from being boring.

As for me, I’m really glad these stories exist. My kids like to fall asleep to sounds, and I much prefer they listen to something with substance instead of rowdy music. Brinkman Adventures fits the bill beautifully.

Click the banner below for more Crew reviews on these fun audio dramas.

Blessings,

ladybug-signature-3 copy

Brinkman Adventures Season 4
disclaimer

The Yarn Stash and How to Store It

There’s a time in every knitter’s life when you have a yarn stash – even if you’re a project buyer. Almost no project will use up an exact even number of skeins with no leftovers. A pair of toe-up socks is the possible exception (though I’ve never made those, so I don’t know from experience, only what I’ve heard). If you’re a stash buyer, your yarn collection will grow even faster. Eventually you’ll have to figure out how to store it all.

Because I’m a project yarn buyer, my yarn stash is rather small. I keep the leftovers from other projects in a “Dokument” wastepaper bin from IKEA. It’s taken me about 18 months to get to the point where my little bin is full. There have been a few times when I’ve bought yarn “just because,” and most of those yarns are sitting untouched in my bin, which is why I don’t buy yarn this way. Despite the fact that they don’t get used terribly often, though, it’s quite convenient to have yarn around. Just last week, my kids were invited to a birthday party with only three days’ notice. Rather than buying a gift, I decided to see what yarns I had on hand and I made a hat and mitten set for the boy. If I hadn’t had that yarn stash, however meager it is, that wouldn’t have been possible.

For stash people, a small wastepaper basket won’t do the trick for storage, as you might guess. So if you have enough yarn in your house to open a yarn store of your own, what do you do with it? Here are a few photographic ideas from around the internet. None of these photos are mine.

B6F6F63C-DF68-4A19-8C8E-BB64292AE1A1

BC13AB09-F480-4227-96EB-9AE18F65545A
D03EA29E-3B0D-4C0C-9CE0-9CABCDE59BAC

842A0D79-CBDA-474C-A517-6B13B034D757

Finally, here’s an article from Lion Brand on dealing with your yarn stash.

Blessings,

ladybug-signature-3 copy