LeapFrog Academy (review)

Disclosure: I received this product free through the Homeschool Review Crew.

If you’ve had little kids any time in the last 20 years (maybe more), you’re likely familiar with LeapFrog® . I remember borrowing LeapFrog DVDs from the library 12 years ago when my teenagers were small, but I’d largely forgotten about them until the opportunity to review their website and app, LeapFrog Academy®, was presented.

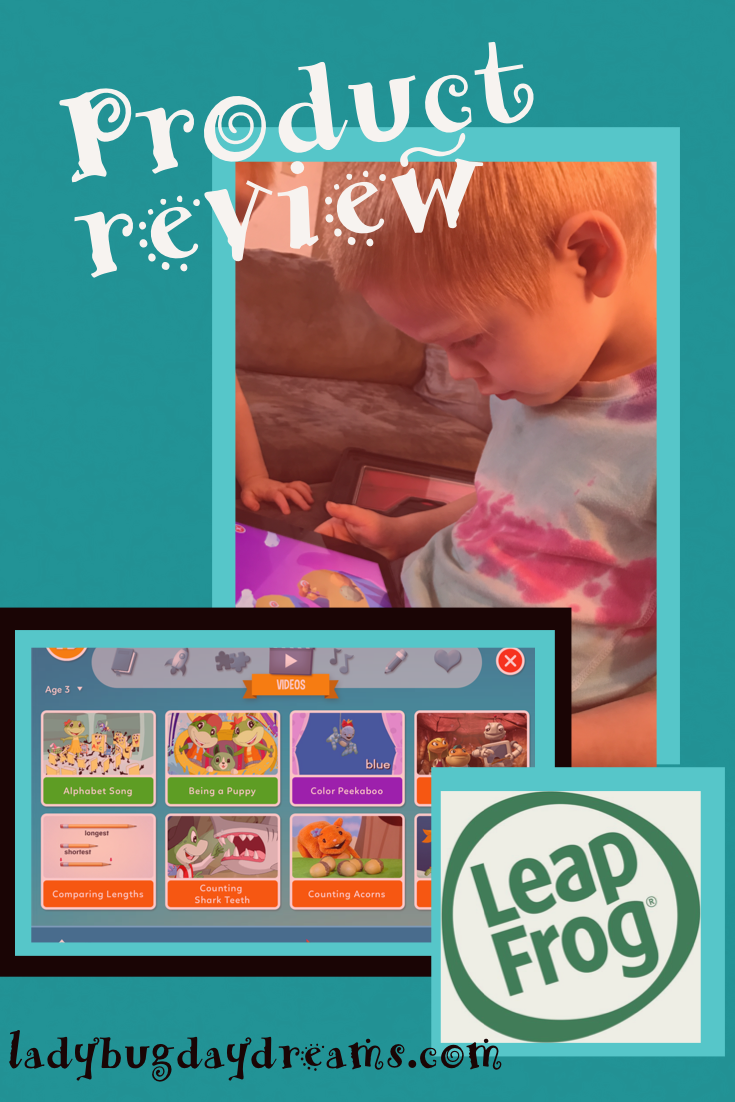
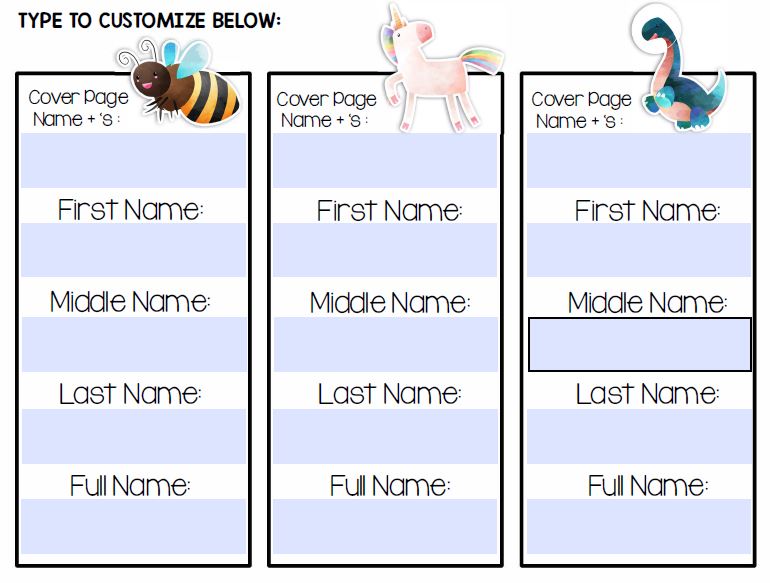
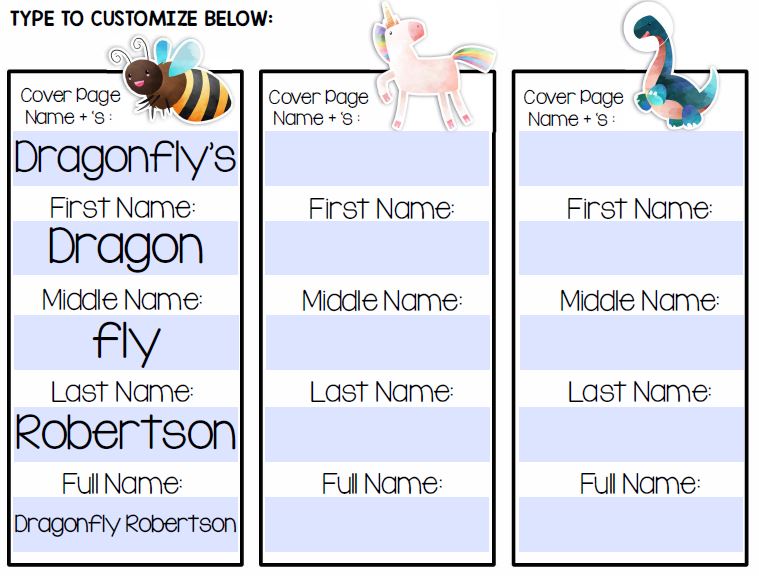
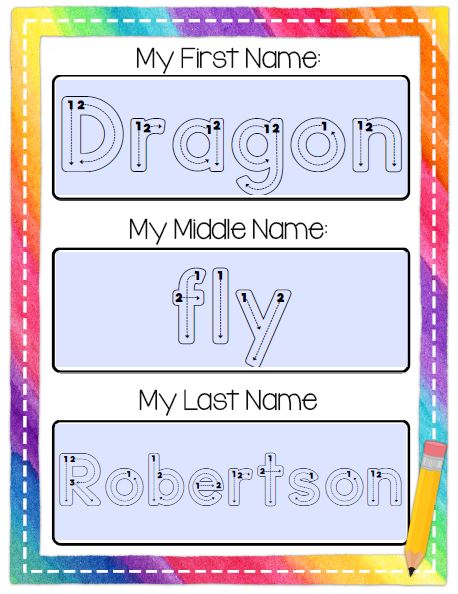
LeapFrog® is a learning resource for kids ages 3-6. Even though I technically only have one child in that age range, I had three of my kids get accounts. Bumblebee is 2 1/2, Dragonfly is 5, and Grasshopper is 8. They have all been having loads of fun with the app over the past few weeks!

Bumblebee isn’t quite ready for much on this app. He’s almost at the 3-year suggested age, but because he was such a slow talker, we’re focused more on increasing his vocabulary and working on preschool milestones unrelated to reading (counting, colors, etc). Despite that, I tried working with him a little bit on the “regular” lessons portion of the app, but it was just too much. But that was okay! LeapFrog Academy® has simpler things like videos for just that situation. In fact, he’s watching the ABC song video as I write this review.

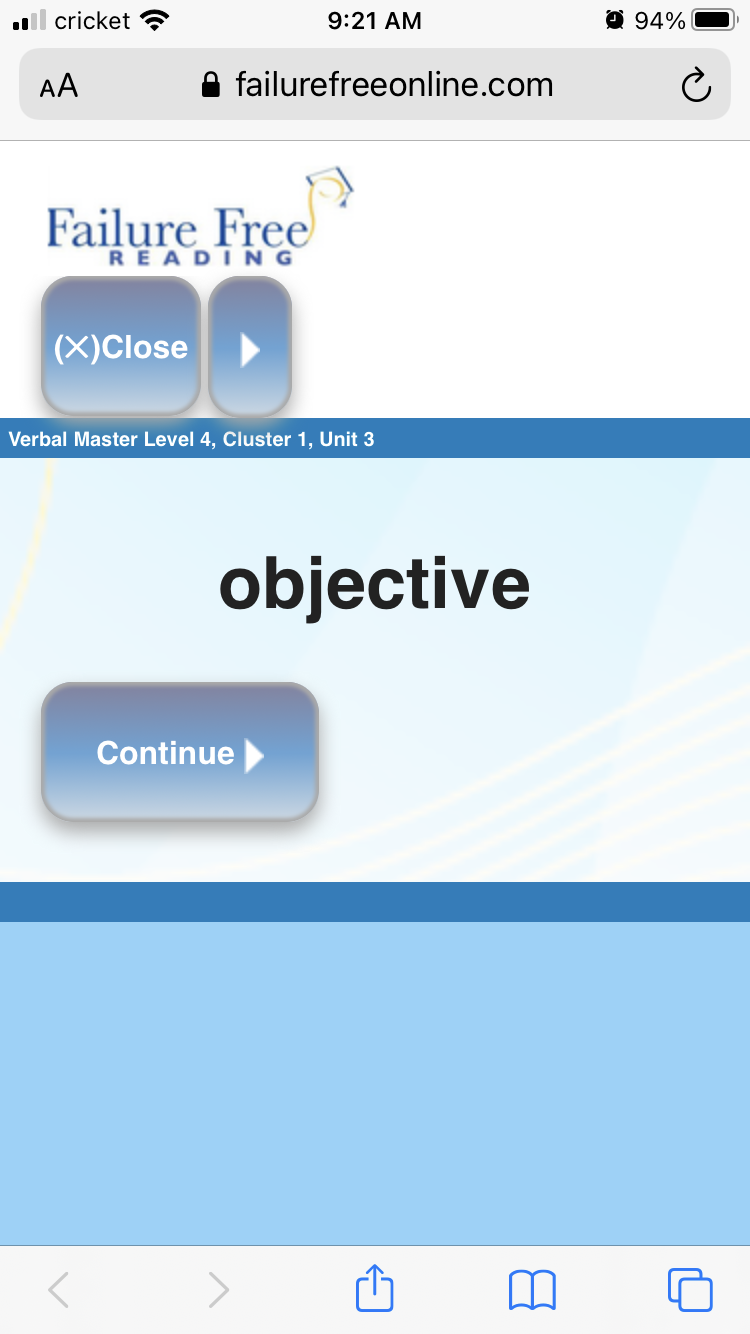
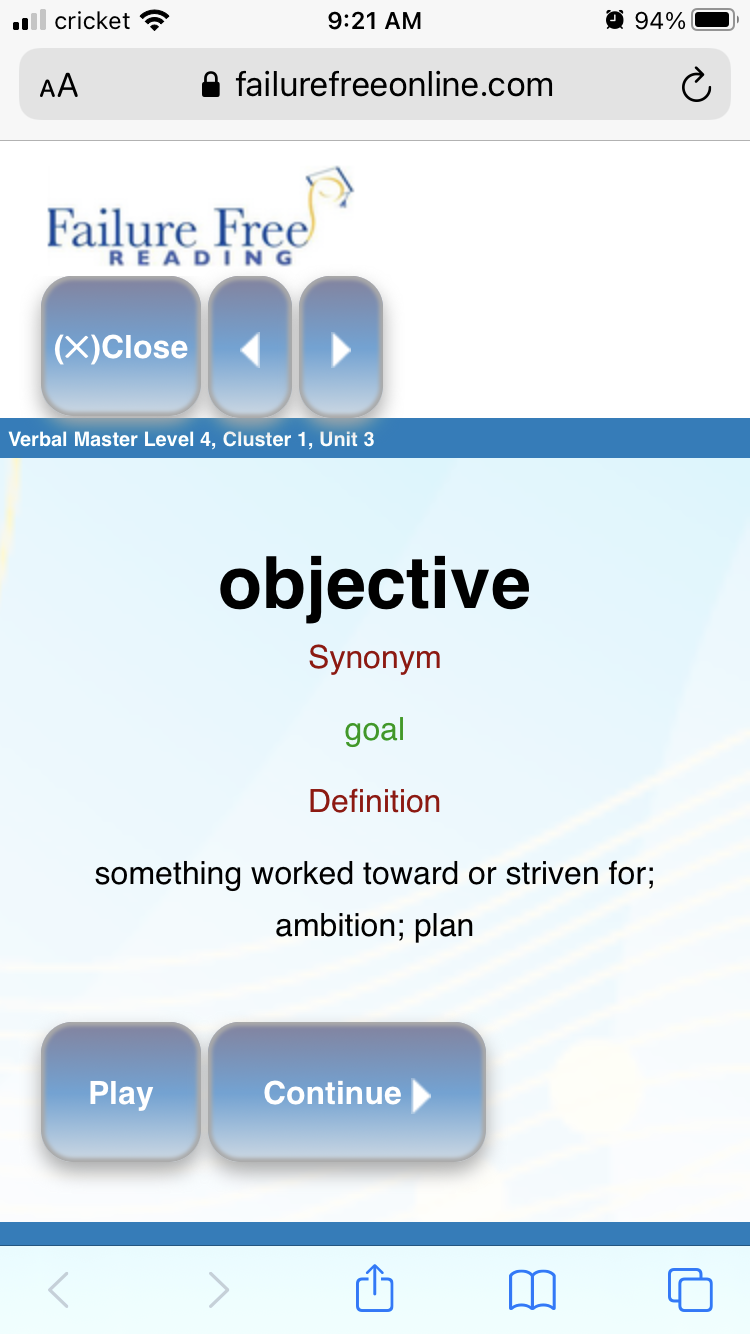
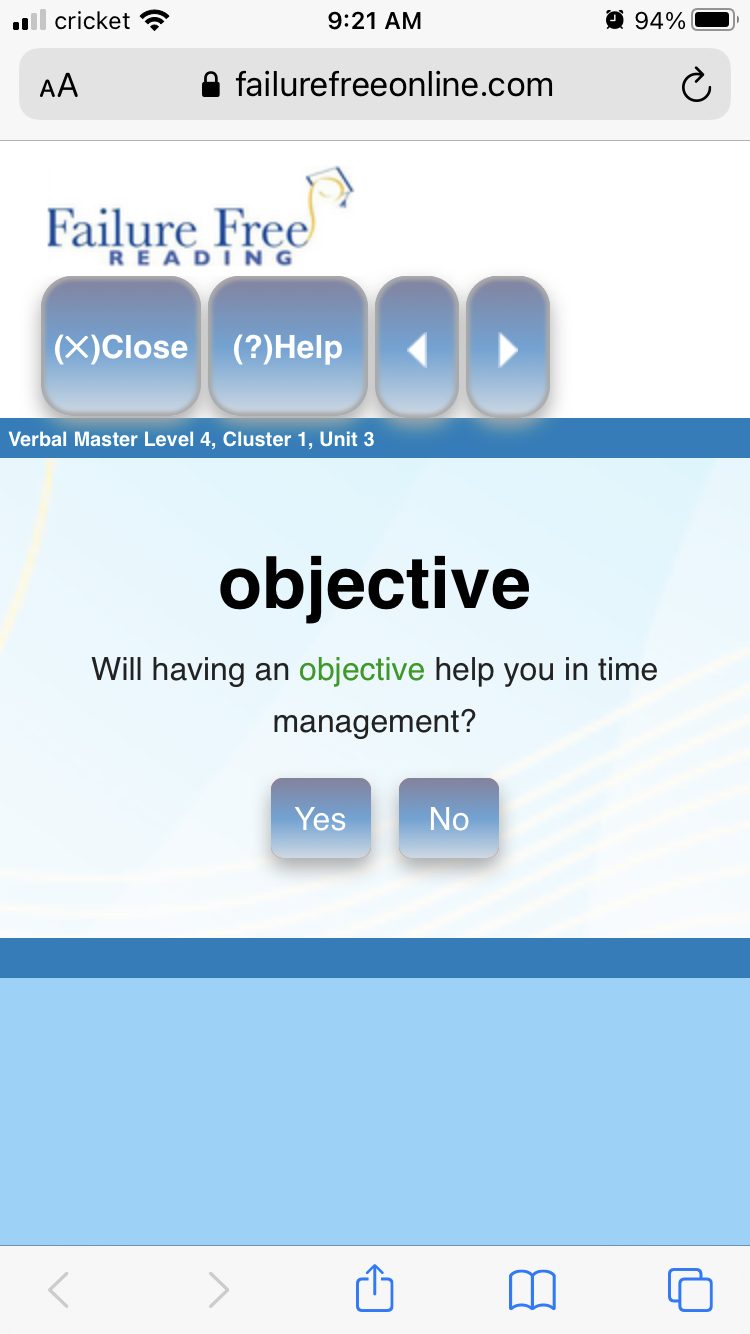
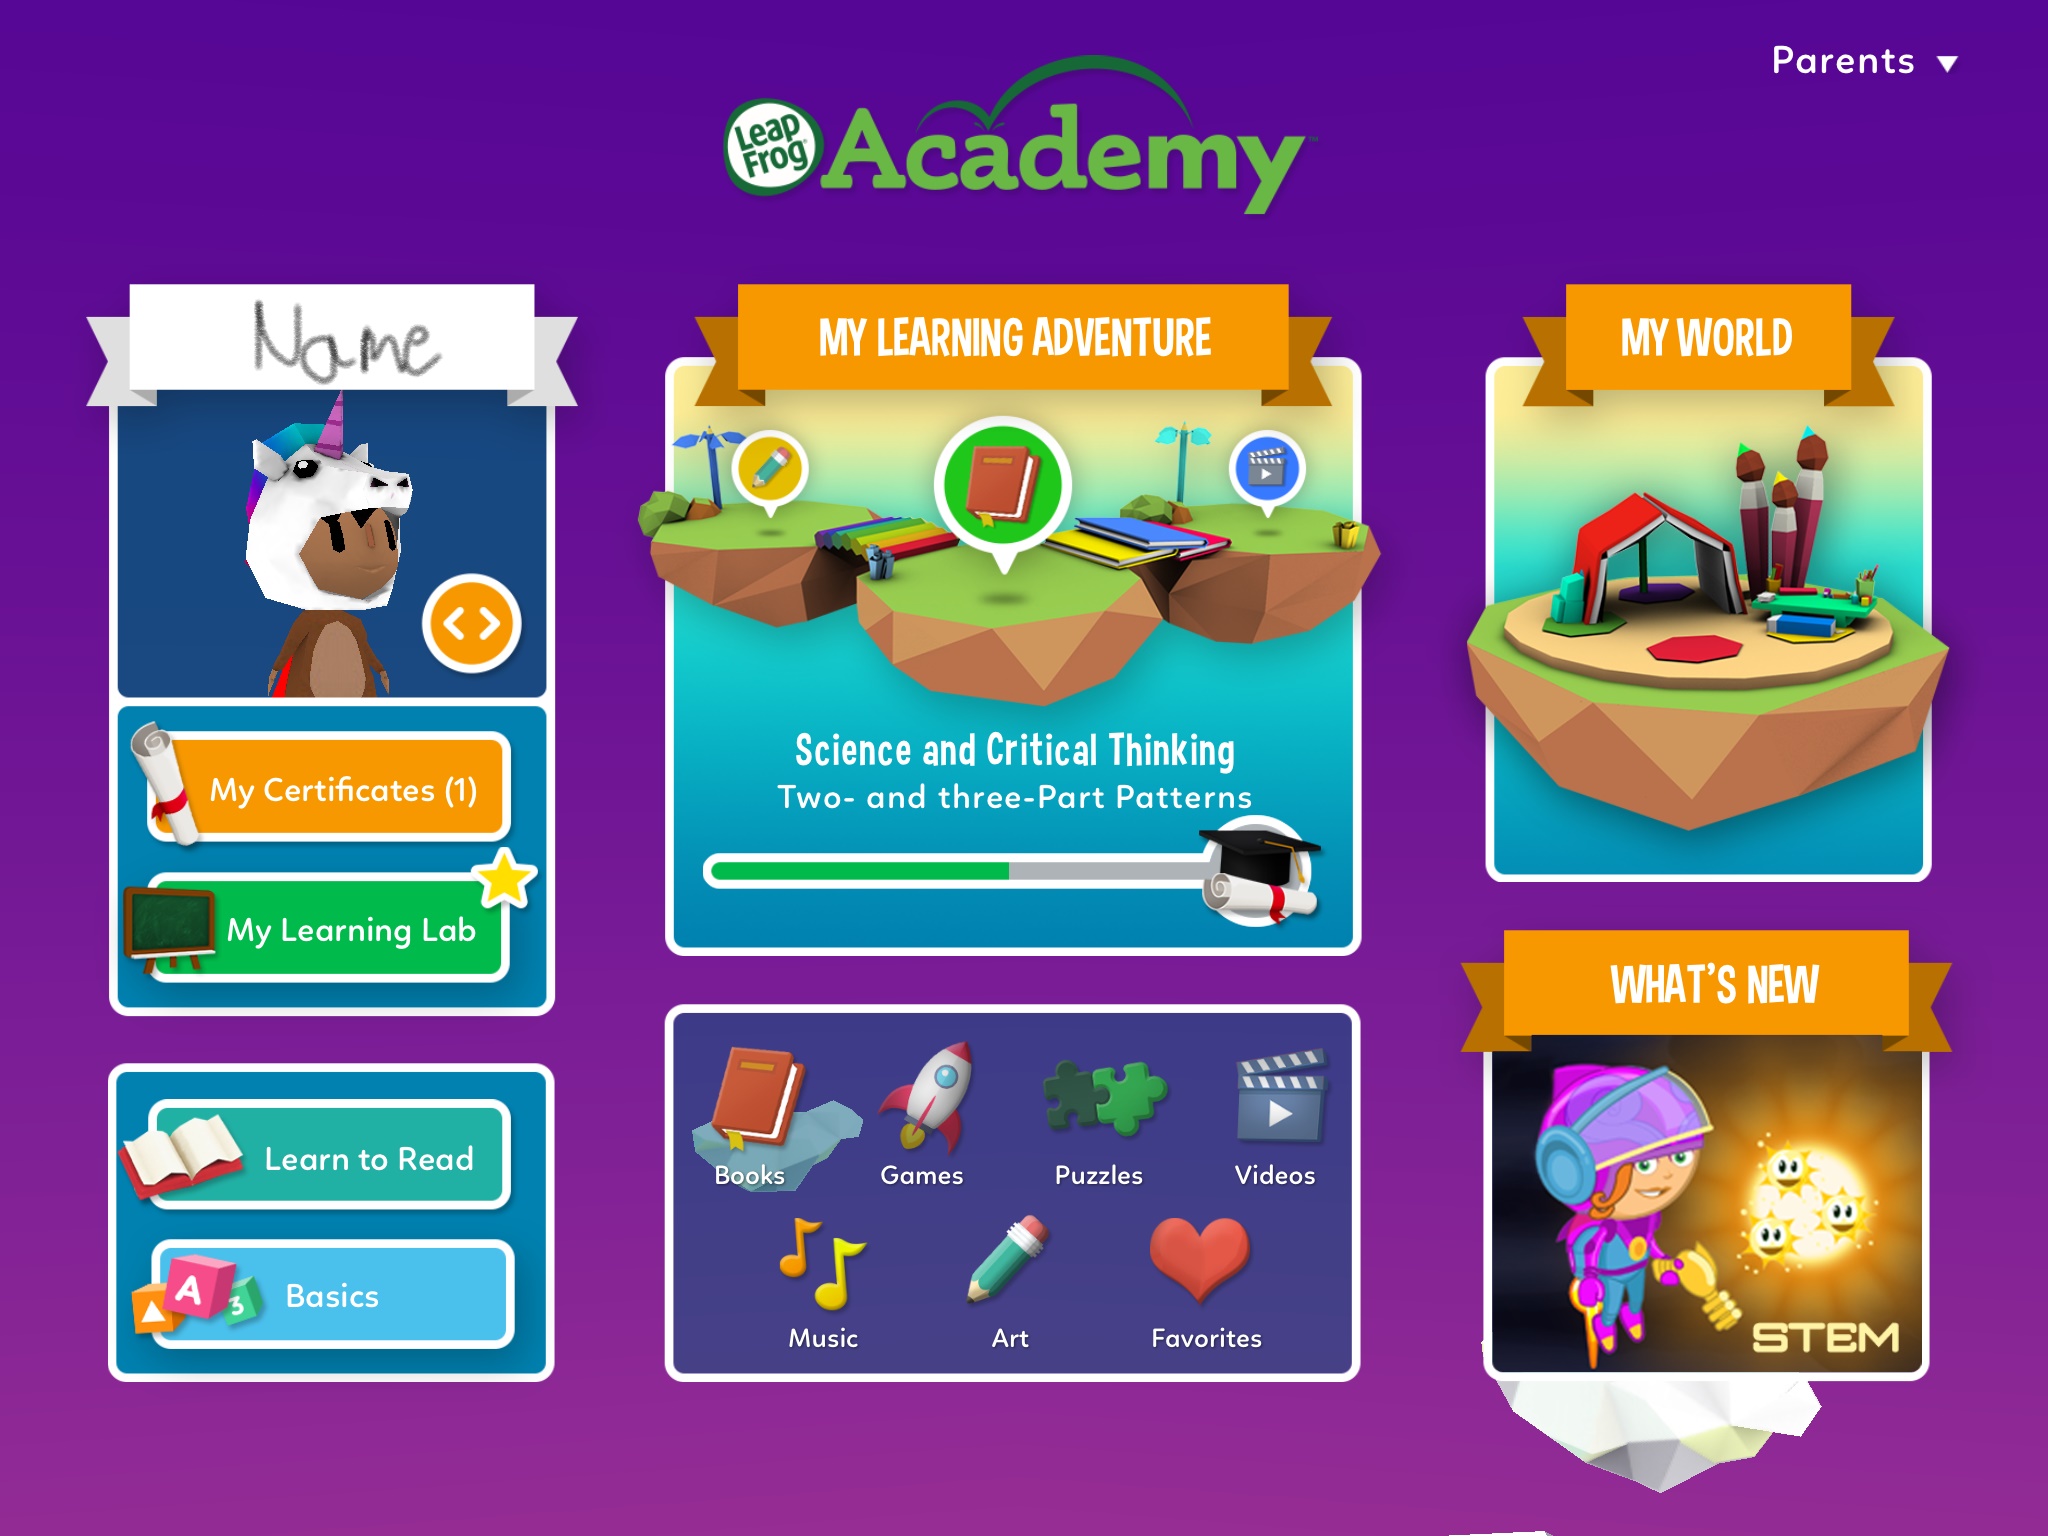
Dragonfly is currently an early reader. He’s been working through another reading app for the past several months and knows many sight words as well as loads of simple words. With this background, he was able to to have a lot of success with LeapFrog Academy®. But that’s not all this app has to offer! While my previous experience with LeapFrog® was mostly alphabet and reading, this time around I’m discovering that it’s much, much more than that! Besides reading, there are sections that deal with health, science, math, and more. It really is an all-inclusive preschool/Kindergarten supplementary curriculum.

Grasshopper was above the age range for this app, but I knew he would feel left out if he didn’t get an account, and I was right. He has also been working on the app using the first grade level (the highest it goes). It’s very similar to the Kindergarten map, but harder questions and games. He also has been loving it!

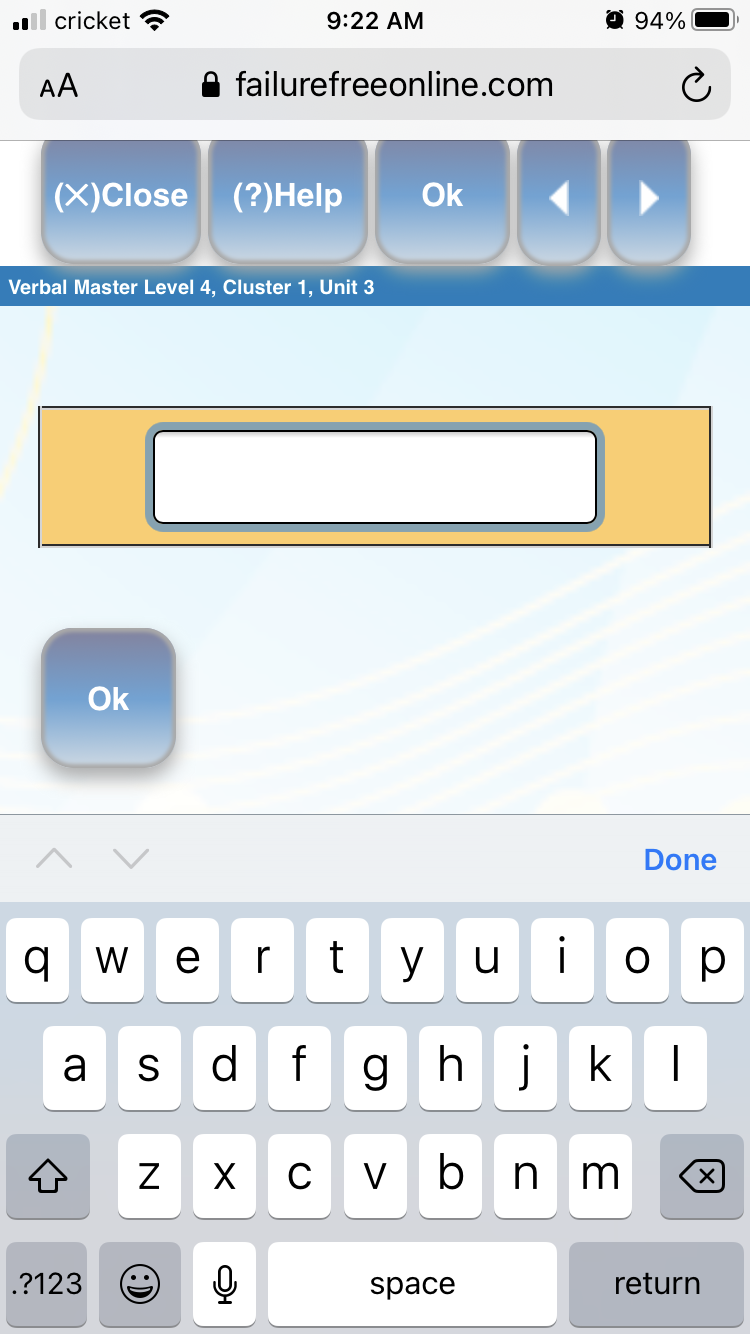
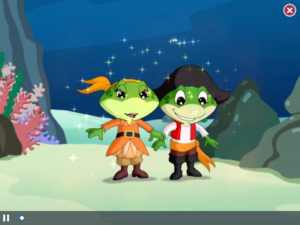
When you first open the app, you choose which child is working, and from there you can decide which section to work on (lessons, videos, etc). The app automatically assigns them a grade level based on their age – preschool, Kindergarten, or first grade. Grasshopper and Dragonfly worked pretty much exclusively in the map (which is the lessons portion of the app), and Bumblebee watched the videos, like I mentioned before. To be perfectly honest, I didn’t watch/help the kids every time they used the app, so I don’t have a complete understanding of the ins and outs, but I do know that it follows a treasure map-style progression. The character moves through the map when the child taps on the different parts of the path, and when they get to a lesson (delineated by a large icon on the map’s path), they have to complete it in order to move on. When they finish a single lesson, a bridge appears to allow them to move forward on the path. When they complete a map, they are given a new piece of their pirate ship. None of my kids have completed their pirate ships yet, but Dragonfly especially is super excited each time he gets a new piece.

My kids have been loving the LeapFrog Academy® app! They never argue when I suggest they work on it, and I love that they’re spending a portion of their screen time learning. I definitely recommend LeapFrog Academy® for kids this age. You won’t regret it!

Make sure to read more reviews from the Homeschool Review Crew too!

Blessings,

Moon Stairs

My mom recently gave me a decor piece that she’s had for as long as I can remember – a wood cutout of a crescent moon with stairs and banisters, and three stars to match. She told me that her grandfather made it, and I’m really glad to have it in my own home now (even though it’ll be weird going to her house and not seeing it anymore). Even though I never met her grandfather (that I can remember), it feels like a piece of my own history to have this, and I’m really glad that she gave it to me.

But… I’ve been watching a lot of Dollar Tree DIY videos on YouTube lately, and they inspired me to take this family heirloom piece and give it a bit of a makeover. As much as I loved the piece before, I really like it a lot more now. Here’s what I did.

I started with a coat of white paint. I just used Apple Barrel White gloss finish paint because that’s what I had on hand. I really like the feeling of the gloss finish paint, and it’s not so glossy that it’s shiny. It just gives a very smooth finish to your work. I didn’t trust myself to be able to put the piece back together if I took it apart, so I did my best to just paint into the nooks and crannies of the entire piece. The stars were a lot easier because they’re flat. I didn’t bother painting the backs of any of the elements. I like knowing that they’re still the original color wood – it’s another reminder of my ancestry and the man who created the piece.

I chose to put the phrase “When you wish upon a star” onto the stars, and I knew I wanted the word WISH to be on its own star, and I wanted that one to have gold glitter. Other than that, I didn’t have a super specific design in mind. So I got onto the computer and found a font I liked (I used Garamond in all caps for WISH and Princess Sofia for the rest of the words), then typed the phrase into Word and printed it out. I used the same transfer method as on my most recent welcome sign to add the words to the stars, then painted them with Apple Barrel paint in the color Cool Blue. When the paint dried, I added a bit of gold glitter glue to the WISH star and spread it out with my finger to cover the entire star.

My mom never put anything on the stairs that I can remember, but I wanted to utilize that space for something pretty. I picked up a package of 3 mini terra cotta pots from the Dollar Tree, as well as a roll of ribbon, some Spanish moss, and “vase filler,” which was basically some miniature gold painted pinecones and other random bits of stuff that matched. I used hot glue to attach the ribbon to the tops of the pots, right where the rim is. Then I filled the pots with the moss (hot glued in place for security), then hot glued some pieces from the vase filler on top. Each one is a little different. (There are only 2 in the picture because I wasn’t sure I wanted to use all three, but decided later that I absolutely did want that.) Finally, I hot glued the pots onto the stairs. I did this so that I wouldn’t have to worry about them falling off, but also so that in a pinch, they would be removable.

Have you ever taken a piece from your past and given it new life?

Blessings,

Dollar Tree Welcome Sign

I created a new welcome sign for my front door this year and thought I’d share it here, including how I made it.

I started with one of the standard Dollar Tree rectangular signs. The one I picked up said “Easter Joy,” with the O being a foam chick hot glued on. I started by removing the chick from the front of the sign and setting it aside, as well as taking off the ribbon hanger. Then I flipped the sign over to the back and painted it with Apple Barrel (acrylic paint) in the color Nutmeg. When that dried, I went over it with white paint, allowing a bit of the brown to show through.

I also found a cute wood flower cutout from Dollar Tree and some pretty pink fabric. I removed the twine hanger from the flower and saved it for later. Then I used some Mod Podge glue to attach the fabric to the flower. When it had fully dried, I used an Exacto knife to trim around the edges of the flower. This works much, much better than trying to get close enough with scissors.

With both pieces (the painted and the decoupaged) done, I went to work with the words. I got on the computer and printed out the letters W E L C M and E for Welcome in a font that I liked. I made it pretty big (around 200 point, if I remember correctly). I had the idea to use the chick for the O, but that didn’t work out in the end (the sizing was all wrong). Then, using a technique I’d seen from Krafts by Katelyn on YouTube, I scribbled over the letters on the back of the paper, then placed it right side up on my sign and traced the outline of the letters. This left a very pale outline of the letters from the pencil scribbles on the back of the paper, which allowed me to paint over them very easily, with my painted letters looking just like the font I’d chosen. I painted the letters using the same Nutmeg brown that I used for the base coat on my sign.

I got back on the computer and found another font that I liked and typed out “to our home.” I printed that out and then very carefully cut it out with scissors. I used the Exacto knife to cut out the little bits from the insides of the letters as needed. I also jumped onto Pixabay.com (a free picture site) and found a pretty yellow background. I printed that out too, and then found a little bowl in my kitchen that was a good size to fit inside the flower. I cut out the yellow texture and glued that onto the flower using Mod Podge, and while the top coat was still wet I attached my “to our home” words and added another coat of glue on top of those also. I let the flower dry completely.

With my main pieces now done, I used a bit of hot glue to attach the flower to the bottom center of the rectangle. I considered putting the flower off to one side, but then I realized that it wouldn’t hang straight if I did, so I put it in the middle. I added the little chicken that I’d pulled off the front of the sign as well as the twine from the flower for hanging, and I was done… I thought.

I hung my sign up for a few days, and while I liked it, I didn’t think it was quite ready. It was too plain. So I brought it back inside and grabbed a Sharpie marker, which I used to add “stitches” to the edges of all the main pieces – the rectangle, the flower, and the center of the flower. That helped a lot, but it still needed something else. So I found some faux flowers I’ve had for a while (a freebie from JoAnn’s months and months ago). I cut of the stems of those using wire cutters and superglued them to the top (I was out of hot glue by this point). Now it’s done, and I’m really happy with how it looks!

Blessings,

The Crafty Classroom (review)

Disclosure: I received this product free through the Homeschool Review Crew.

Kindergarten is such a fun age! Kids are excited to learn, and the learning they do is so laid back that it’s just a great time to be a parent. To enhance Dragonfly’s kindergarten experience, we have had the pleasure of reviewing the Tracing Bundle from The Crafty Classroom. Dragonfly loves to trace stuff, so this was a great fit for him. The Tracing Bundle comes with two files: Editable Name Tracing Pack and Tracing Bundle C. I want to talk about the latter first.

Tracing Bundle

This file is a 297-page printable PDF with loads and loads of things for your child to trace. Dragonfly and I looked over it together and he picked a few pages he wanted to trace. I also chose a couple that I wanted him to work on to help him in his early penmanship. Then I printed them all out and stuck them in a folder to distribute to him slowly. Each day we worked on these (about 3x a week), I gave him one of “his” pages and one of “my” pages. His were mostly shapes and pictures; mine were mostly words and numbers.

The Tracing Bundle includes things like the uppercase and lowercase alphabet, numbers, colors, shapes, days of the week, months of the year, seasons, and sight words. Then there are images – dogs with bones, seashells and waves, and more. As you move through the pack, the emphasis changes to drawing the shapes in the right order – for your square, starting in the upper left corner, going straight down, then to the right, then up, and back to the left. This guidance is helpful for “pre-writing,” encouraging children to do things in the right order. That way, when they’re ready to write letters, they understand the concept of doing things in the right order.

Editable Name Tracing Pack

This one was really cool! The very first page of this PDF is the instructions on how to edit it properly. (The main thing is that it has to be opened in Adobe Acrobat, not a web browser or other program.) Then you scroll through until you get to this page:

As you can see, there are three choices here. Each one is attached to a theme. Pick the one you want, and type in your child’s name(s), and the PDF will pop those names into the appropriate pages for printing

This gives you the same types of tracing pages, but all entirely personalized. This is fantastic for kids from around 3-4 and up who are learning to write their names. I wish I’d had this for my older kids! You can bet I’ll be using it next year with Bumblebee, though, as well as working with Dragonfly sooner with it. What a fantastic resource for helping kids to write their name!

Final Thoughts

I am super glad we got to review the Tracing Bundle. It has been really great to have something simple for Dragonfly to work on while I’m doing more intense work with the bigger kids. He adores writing and drawing, as I mentioned before, so he’s been happy as a clam with these pages, and I’m happy to print out as many of them as he can work through.

The Crafty Classroom has offered a variety of different products to the Homeschool Review Crew members, so make sure to check out more reviews by clicking through.

Blessings,

Excellence in Literature (review)

Disclosure: I received this product free through the Homeschool Review Crew.

My oldest son has been working on writing a novel with his girlfriend, so I thought he might benefit from the Excellence in Literature Handbook for Writers from Everyday Education. The PDF e-book is over 400 pages long and has tons of valuable information for writers from middle school on up.

From Ballet Boy:

The part of the book that I used was Pointers and Tips on how to write what’s considered a “good” essay from a logical perspective. It included information on how to structure sound arguments, and thus how to fulfill the purpose of an essay. It touched on the fact that an essay is not meant to deliver facts so much as it to convey a convincing point of view, or to sell an idea.

The author discusses the weakness of starting your essay with something that is a trivial or obvious claim. For example, if your essay is about Hamlet and your opening sentence says “Hamlet was the Prince of Denmark and he dies at the end of the play,” that neither conveys new information to the reader nor takes a stand about anything. Another weak sentence starter it gives as an example is “The French Revolution, which started in 1789, brought about many changes.” This, too, is a fact that can be checked by any reputable source and therefore can’t be the topic of an essay. It’s only something that can guide you toward a sound and logical argument.

This is not to say that an essay shouldn’t have the facts in it. But the mistake people often make in writing essays is that they get hung up on the facts, myself included. Then their essay becomes the answer sheet to a trivia game instead of someone trying to convince you of a point or position. This renders the essay redundant.

Moving over to the novel I’m writing, I have started using some of these same principles to create a more engaging story, one that is less concerned about delivering facts and descriptions (talking about the time of day and how the wind blows) and is more about invoking concern, emotion, and feeling in myself and my future readers.

Recently I was writing a scene where my two main characters are interacting with each other, and one of them is injured, lying on a couch. Instead of having a description of the room that they’re talking in, I have different characters interact with their surroundings. For example, instead of describing that the couch has lots of pillows on it, I have one of my characters grab a pillow and move it slightly to better support his head. And instead of describing how the room has a soft rug (or carpet), I instead talk about how their feet sink into the soft ground whenever they take a step.

All in all, I’d say this is a very good resource that I would recommend to a beginner or someone who intends to write anything of importance, whether a thesis statement in grad school or a fantasy novel for teenagers.

Make sure to read more reviews from the Homeschool Review Crew!

Blessings,

Patchwork Quilt Crochet Blanket

F84F03D1-47D3-49A4-B9B0-3F69337CBC17

I spent half of February making the 2020 Calendar Blanket from Jayda inStitches on YouTube. I had begun this project in January 2020 but got quickly frustrated when my square wasn’t square; it was a trapezoid. I created another method of making this square, but then it turned out very rectangular, so I abandoned the project. When I needed another big project because I’d finished the other blankets on my agenda, I tried it again. This time, all worked out with the January square, so I moved on to the other 11.

A717D36D-9C39-47A1-B9D6-82C1CF024D81

These are the 12 squares I created on my own using Google images as inspiration

I was able to complete a square in about 1-2 hours, so the project went fairly quickly. I finished all 12 squares in about a week using scrap yarn. I sewed the blocks together and decided it was much too small for a proper blanket. Instead of making a second square of each of Jayda’s, I ended up using my past quilting experience combined with the techniques from the tutorials to make 12 different blocks. With all 24 stitched together, the blanket was perfect! I moved on to the border.

2FB1C284-33D3-4CCF-9F82-2B702B24B8A5

These are the 12 squares from Jayda’s original patterns

When it was all done, I gifted it to one of the girls in our neighborhood. She’s a very sweet girl, one of Grasshopper’s best friends, and I was happy to give it to her. (I gave her cousin, who lives with her, my Blazers blanket. She was at our house when I finished it and was instantly in love because she’s a Blazers fan too, and I wasn’t using it that often anyway. Maybe I’ll make another one someday…)

Blessings,

ladybug-signature-3 copy

The Reading Game (review)

Disclosure: I received this product free through the Homeschool Review Crew.

Reading should be fun. If it’s not, kids will rebel against the process of learning it (ask me how I know…). So I’m always on the lookout for products that help in that goal, and as such I was really excited about getting to review The Reading Game, 2nd Edition from Allsaid and Duun, LLC.

ABA255F2-D7B8-4776-8CEC-BD44D8C0D5CC

I have two kids who are on the spectrum of “learning to read.” My 8-year-old, Grasshopper, is one who’s rebelled against reading. (He’s just like his oldest brother in that regard.) My 5-year-old, Dragonfly, is super excited about learning to read – in fact, he had mastered some simple words when he was still 4. (He takes after his second oldest brother.) So something that would make the idea of reading fun for both of them seemed like a win in my book.

Contents of The Reading Game:

  • Six decks of 60 cards: Skunk, Snake, Bear, Penguin, Unicorn, and Zebra
  • Six sets of 3 flashcards that match the animal decks
  • Six books that match the animal decks
  • Game play instructions

The Reading Game is very similar to the age-old game of Memory, but with a twist. It comes with 6 decks of cards, each assigned a color and an animal. Each deck of cards has six sets of 5 pairs of words, and they are numbered on the backs. So for example, your kids start with the Skunk deck, which has sixty cards. 10 of these have a 1, 10 have a 2, and so on. Because there are 10 cards of each number, that’s 5 words with which to play Memory. You start with level 1 of the Skunk deck. You can have basically an unlimited number of kids (within reason, of course), but you do need one person who is a strong reader already (parent, teacher, etc). Just like in regular Memory, kids choose 2 cards. They need to read each word on the cards. If the words match, the child keeps the cards. If not, they put them back and the next child takes a turn. When the teacher feels like the students have mastered the words in the 1 series, they add in the 2s, then the 3s, 4s, 5s, and 6s.

IMG-7325As they move through and master the words, there are flashcards for each deck (3 per deck – 1s and 2s; 3s and 4s; and 5s and 6s). These flashcards create sentences from the words they’ve worked on in those sets – only those words. And when all six sets from an animal group are mastered, the child is ready to read the matching book, and then move on to the next animal to repeat the process with new words.

Grasshopper, Dragonfly, and I played the game a few times a week. I started them both at Skunk 1, and we gradually moved up as the boys mastered the words. Grasshopper (8) was able to move more quickly than Dragonfly, but they both made incredible progress as we played. As we continued to add word cards, the kids quickly realized that they had better luck if they chose their cards with the same numbers on the back. (This was obvious to me, but they were very pleased when they “discovered” it themselves.)

When it was time to read the book because they’d done so well with the card game portion, the boys were a bit intimidated (especially Dragonfly – he’s done lots of reading of individual words but not much in the way of full stories). But when they could do it, they were so excited! And I was so proud of them too.

We will absolutely keep using The Reading Game. It is a wonderful resource for teaching kids to read – or for encouraging struggling (or rebelling) readers if that’s what your family needs.

Make sure to read more reviews on the Homeschool Review Crew. Also on the Crew blog, there’s a giveaway for The Reading Game. Five lucky winners will each win a copy, so please head over there and enter today! (Open to US addresses, ages 18+ only. Giveaway runs March 8-15, 2021. Void where prohibited.)

Blessings,

ladybug-signature-3 copy

Crochet V Stitch Basket (free pattern)

519317A0-F80D-4655-8C47-EC3D7FF84BF6

I have a new crochet pattern to share today. I just finished making this little basket/bowl, and I just love how it turned out! It would make a lovely addition to anywhere you have just a little bit of space that needs organization. I’m using mine for a fruit bowl in my pantry, but you could really put it anywhere and fill it with anything. 

4DA82D90-349E-470E-AAD2-8B2B583F19E9To give stability to the basket, you will crochet using 3 strands of yarn together, but not upsize your hook too much. I used a J, but you could a little bigger if you want. It would work well using different colors of yarn, like I did (mine is Big Twist from Joann in the colors teal, aqua, and black), and would be a great project for any yarn fiber. 

Crochet V-Stitch Basket

Stitch definitions

V stitch: DC, ch 1, DC into same stitch

Shell: 5 DC into same stitch 

Round 1: In a magic circle, chain 3 (counts as DC here and throughout), then double crochet 7 more. Join to top of ch 3 with sl st; ch 3. (8)

Round 2: DC into same stitch as joining and into the next st. *2 DC into every st* around. Join to top of ch 3 with sl st; ch 3. (16)

Round 3: DC into same stitch as joining and into the next 2. *2 DC in same stitch, DC in next* around. Join in top of ch 3 from previous round; ch 3. (24)

Round 4: DC into same stitch as joining and into the next 2. *2 DC in same stitch, DC in next 2 stitches* around. Join in top of ch 3 from previous round; ch 3. (32)

F19DB18D-A690-463B-8672-41EE2D3CC664Round 5: DC into same stitch as joining and into the next 3. *2 DC in next, DC into next 3* around. Join in top of ch 3 from previous round; ch 3. (40)

Round 6:  DC into same stitch as joining and into the next 4.*2 DC in next, DC into next 4* around. Join in top of ch 3 from previous round; ch 3. (48)

Round 7: DC into same stitch as joining and into the next 5.*2 DC in next, DC into next 5* around. Join in top of ch 3 from previous round; ch 3. (56)

Round 8: DC into BLO of every stitch around. Join in top of ch 3 from previous round; ch 3. (56)

Rounds 9-11: DC around. Join in top of ch 3 from previous round; ch 3. (56)

 Round 12: DC around. Join in top of ch 3 from previous round; ch 4 (counts as DC + ch 1). (56)

Round 13: DC into same stitch as chain 4. *Sk 1, V st into next* around. Skip the last stitch. Slip stitch into third chain from previous round. Slip stitch into the ch-1 sp. Ch 4. (28 V stitches)

Rounds 14-19: DC into the ch-1 sp you just worked out of. *V st into each ch-1 sp all the way around.* Slip stitch into the ch-1 sp. Ch 4. (28 V stitches)

Round 20: DC into the ch-1 sp you just worked out of. *V st into each ch-1 sp all the way around.* Ch 3. (28 V stitches)

Round 21: DC into each DC around. Join in top of ch 3 from previous round; ch 3. (56)

Round 22: 4 DC into same stitch, SC into next stitch. *Shell, SC* around. Join in top of ch 3 from previous round. Fasten off and weave in ends. (28 shells, 28 SC)

Fill your new basket with anything you’d like! 

If you make this, please tag me on Instagram (@ladybugdaydreams); I’d love to see!

Blessings,

ladybug-signature-3 copy

Failure Free Reading (review)

Disclosure: I received this product free through the Homeschool Review Crew.

For the past few weeks, Grasshopper (8 years old) has been working with the Failure Free Reading Home Edition. As a kid who’s struggled with reading, I thought it might be helpful for him.

0CE9FA77-F0B0-4299-B0AE-21F675822151

When I first received access to this program, it was easy enough to set up the account. There are two options for student login: with a picture or without one. I set Grasshopper up using the “with a picture” option. This means that when you click “log in,” you only have to type the password. From there, a grid of pictures is on the next page and your student has to choose the correct one associated with their account to complete the login process. Once we had that set up, the first thing the program had us do was the placement test.

I liked how all throughout the placement test process, we were reminded that it wasn’t a big deal. It’s important, obviously, but it was okay for students to get some of the answers wrong – that’s the point of a placement test, after all. This test was long. It took us 2 schooldays to get through it, and that was with me helping him heavily. There would have been no way Grasshopper could have made it through the test at all without my help.

But we did make it through, and Grasshopper was put into a vocabulary building section of the program. We used the program 3-4 days a week, except for the week we didn’t have WiFi because of the winter storms. (We were lucky to never have lost power, but our internet was down for an entire week, which caused problems for homeschooling.)

The word building part of the program introduces lots of new words (I think 5 per week, but I never actually counted them), and they are complicated words, especially for a child. I think that’s great though. The words are vocabulary that an older teen or adult probably use regularly, but are new and difficult for a younger child (think obstinate, recalcitrant, and other words like that). This is perfect for a vocabulary program! Each day, the process is a little different from the day before, but all the lessons build on one another.

IMG-7270First, the word is introduced. The program doesn’t require your student to know the words or be able to read them in advance – good thing for a vocabulary lesson! It will read everything out loud to them. The student should listen to what’s being said and examine the word carefully as everything is happening though. They’ll need all the information about each word that they can absorb during the lesson. When they feel comfortable with this, they can click continue to move on to the next step.

IMG-7271After learning and hearing the word (and hopefully examining its spelling), a synonym and definition is introduced. For most of the words, I found the synonym to be more helpful than the definition. And for words with multiple (but similar) definitions, I thought the voiceover reading was a bit too quick between the definitions. They tended to run together too much for my taste. But my son didn’t seem to have any qualms over the speed, so maybe it was just me. Again, here students should examine the screen and really focus on the word and its definition(s).

IMG-7272The next step is comprehension – using the word in context. The program gives a sentence using the word and the student’s job is to determine whether that word has been used correctly based on the context of the sentence. This comes in handy because in later lessons of the week, a paragraph is provided using all the words of the week (these can be a bit clunky and unnatural; imagine a 3-4 sentence paragraph incorporating 5 vocabulary words). Having had a bit of introduction to sentences with the words already makes that a bit easier to wrap young minds around.

IMG-7273Remember before when I said students should examine and memorize the word? That’s because they’re going to be asked to type it correctly before the day’s lesson is over. This will happen with each word of the week.

These steps repeat for each word. And this is all on the first day of the new list. Activities change throughout the week, but they all use the same set of words.

So what did we think? I’m a bit torn, honestly. First of all, I thought the placement test was way too hard. Maybe that’s because my son doesn’t care about reading (he takes after his oldest brother in that regard), so getting through it was like pulling teeth. But when we did, and we were able to move on to the actual lessons, it was smooth sailing. I liked the vocabulary aspect. I don’t think it provides “failure free reading,” but I think it is a fantastic resource for vocabulary words.

Make sure to read more reviews from the Homeschool Review Crew, too.

Blessings,

ladybug-signature-3 copy