Ladybug Daydreams

diy

Simplicity: DIY Liquid Laundry Detergent

Posted by Wendy on February 24, 2014 Leave a Comment

laundry title

Laundry detergent is one of those things that, until about a year ago, I thought just “existed.” It never occurred to me to make my own. Then I started reading blogs, and one of them was talking about how much cheaper it was to make your own laundry soap. I was intrigued. We were just barely into our simplicity lifestyle, had just moved into our current house, and the time seemed ripe for me to try something like this.

Before I get to the “recipe” and how-to, let me explore for a minute why I think homemade detergent fits into a simplicity lifestyle.

First off, it is way cheaper than buying the commercial stuff. (I’ll give a price breakdown later on in this post.) Think about this. Every time you buy something, you’re trading your life (or your husband’s, if you’re a stay at home mom) for that item. You (or he) had to work – spend the time – for that money. Now you’re trading the money for the thing. Therefore, it takes life to buy stuff. So why wouldn’t you be a conscious consumer? Now, I get that making laundry detergent takes more time than just running to the store and buying some. But not that long. Definitely not as long as it would take to earn the money to buy said detergent.

Secondly, this stuff is pretty much all natural. I haven’t done the research on Borax beyond what it says on the box, but it claims to be natural. And I’ve read other bloggers who have done the research and come to the conclusion that the Borax company isn’t lying about that. Washing soda is another natural substance. Besides those, the only other ingredients are soap and water. Water is about as natural as you can get, and based on your preferences, you can use whatever kind of bar soap you like for this recipe. The first time I made it, we used an unscented, organic bar, but now I just use Fels Naptha (it’s about a third the price of that organic bar). Since no one in my family has overly sensitive skin, the Fels Naptha is just fine for us.

Finally, it’s kinda fun. And that is, after all, the point of living a simple lifestyle – to have more time for fun. Now, don’t get me wrong, it’s not as fun as going to an art museum or riding a roller coaster, but it’s more fun than going to the store, I promise you that.

So, here we go.

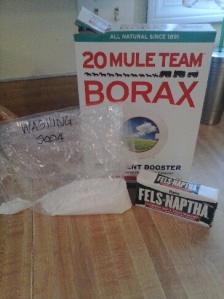
First thing you need to do is gather your ingredients. You’ll need 1 bar of Fels Naptha (or your choice of bar soap), one cup of Borax, and one cup of Washing Soda (not to be confused with baking soda, although I’ll have another trick for you on that in a second). Besides those three ingredients, all you need is tap water. You can find all the ingredients you need for making your own laundry detergent on the laundry aisle of your regular store. (So, yes, the first time you make this, you’re not getting out of going to the store. But the boxes of borax and washing soda will last a long time, so if you buy more than one bar of soap, you can avoid it next time!)

laundry 1

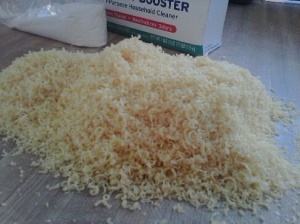
Start a big pot of water to boil (you’ll need roughly 4 quarts of water in your pot). While you’re waiting for the water to boil, grate your soap. When I first made this, I was a little leery of using my cheese grater on soap, but then I realized that it’s just soap. Every time you wash it, what do you put on it? Soap. So yeah. No big deal.

laundry 3

Once your water is boiling, add one cup each of washing soda and borax as well as your pile of soap shavings. Stir this until the powders dissolve and the soap melts. Then set the timer for five minutes and let it keep going, just to be sure everything’s all combined.

After the five minutes are up, remove your pot from the stove and carefully (remember, this was just boiling!) pour it into a five-gallon bucket. Fill the bucket the rest of the way with hot tap water. Let your bucket sit for 24 hours to cool. Be sure to either put the lid on tight or keep the bucket out of reach of little ones.

Here’s the price breakdown that I promised you.

Borax: $4.39 for a 4-pound box, which has 9 1/2 cups in it. Each cup therefore costs $0.46.

Washing Soda: Here’s the trick I mentioned earlier… You can either buy washing soda from the laundry aisle, or you can make it by cooking your baking soda at 400 degrees Fahrenheit for an hour. This is what I did. So, one box of baking soda costs $0.62 at my store; therefore one cup of homemade washing soda costs $0.31.

Fels Naptha Soap: This costs $1.33 a bar at my store.

Tap Water: The water in my town is really expensive. It’s $3.79 per ccf. A ccf is 7.48 gallons. Therefore my tap water costs $0.50 a gallon.

So, doing the math. 46 cents for borax, 31 cents for washing soda, $1.33 for soap, and $2.50 for water. Grand total: $4.60. And believe me, 5 gallons of laundry soap will last a long time. I make it about once every 4 months is all.

You do have to take into account the price of the electricity to heat the water and the price of the bucket if you don’t already have one, I suppose. I paid $5 for my bucket, but that was a one-time expense. Now I just use the same one every time. And I’m not savvy enough to be able to calculate the price of electricity to heat the water, so if you are, let me know! Even so, making your own laundry is very rewarding.

A few closing thoughts on this detergent. It’s not completely smooth like the stuff you buy at the store. During the cooling process, the soap congeals a little. But it’s not a big deal. Just stir the detergent before you scoop it into your washer, and it’s fine. Also, this will not get all sudsy like the commercial detergents. But as I’ve learned over the past year, suds do not equal clean. I typically use between half a cup and one cup per load of laundry. It depends on the size of the load and how dirty your clothes are.

Finally, do not under any circumstances use this for cloth diapers. I did, and that was the only time Small Fry has ever had diaper rash. And it was a doozy of a rash. It took almost a month and a prescription cream to clear it up. Save your little one the pain my little one went through and use a specific cloth diaper friendly detergent.

Have you ever made your own? How did it go?

Blessings,

Wendy

Posted in: simplicity | Tagged: diy, laundry, laundry detergent, make your own

My Experience with Cloth Diapering

Posted by Wendy on November 14, 2013 1 Comment
Phone Pics 238

When I was pregnant with Small Fry, at first I never even thought of doing anything besides disposable diapers; that’s what I’d done with the other two kids, and it was easy. But then a few things happened nearly simultaneously.

First, hubby had to take some things to the “dump.” We were living near the actual landfill at the time, not near a “transfer center” like we do now, so the landfill is where he went. He was appalled. It is a huge mountain that you drive your car up and then, once you’re atop the heap, you literally just toss your stuff onto what’s already there. Eventually, they come through with the proper equipment and do what they need to do to make it “safe,” although I’ve come to learn that there’s really no such thing as a safe landfill. A few days later, he took the rest of us to see what we have since dubbed “Junk Mountain.” In the beginning, hubby had given it a less savory name, but we quickly changed it to a more kid-friendly version ;).

The other thing that happened was that there was an ad in my email box (not the actual box, but off to the side – if you have gmail, you know what I mean) for a company called gDiapers. The ad boasted “flushable diapers.” After our trip to the landfill, I was all over this. If I could prevent my baby from sending over 2,000 diapers to the landfill over the course of his diaper-wearing days, I was all over that! I clicked through the ad and read everything I could on their site. I was in love with the concept. Cloth on the outside, flushable on the inside, and nothing to send to the landfill. Brilliant! The only drawback was the price; gDiapers are quite expensive.

We bought a starter set anyway. That came with 2 cloth outers, 2 waterproof liners, and 40 flushable inserts. They were definitely more work than disposable diapers (we didn’t get the g’s until Small Fry was about 6 weeks old), but I didn’t care. It was worth it to me to do just a small part to “save the Earth.”

Something else happened a few weeks into our gDiapering experience (I’m not going to go into the details) that made me want to explore full-on cloth diapering. I spent hours trying to figure out all the different terms (pocket diapers, all-in-ones, the list goes on…), materials, etc involved in cloth diapering, and, like with my initial sticker shock at gDiapers, was dismayed at the cost. Some of the diapers are upwards of $20 apiece! And you need at least 15, but preferably in the neighborhood of 30 or more to cloth diaper full time. One of the best deals I found at the time was a six-pack of reusable diapers for $100. You can do the math, I’m sure. That would mean $300-$500 dollars for diapers! That’s way too much, even if you are using them over and over again.

So I went back to the drawing board.

I was browsing Amazon, drooling over the cloth diapers and gDiapers (don’t mock me), when it suggested that I might like this book: How to Make All-in-One, One-Size-Fits-Most Cloth Diapers. I got the Kindle sample, and was instantly intrigued. So I talked to hubby to make sure there was enough money on our pre-paid card (we never use our real bank card for online purchases…) and bought the Kindle version. For $4.99 I didn’t think I could really go wrong.

I was right!

That was the very best money I spent in my desire to cloth diaper. I spent about a week with the book, going over her suggestions for the materials, and pricing everything through online retailers and JoAnn. I planned my trip carefully to maximize the JoAnn coupons (I didn’t want to wait for online shipping!), and was able to get enough PUL (the outer, waterproof fabric), Alova Suede (the interior, wicking fabric),  Velcro,  elastic, and thread to make 15 diapers for $32.  For another $10 at WalMart, I got a package of 15 microfiber cloths to use as the absorbent layer inside the diapers.

So, for less than $50 and about 20 hours of my time, I was able to make 15 cloth diapers. In case you don’t have your calculator handy, that comes out to just about $3 a diaper. Compared to $20. I call that a win. And the best part is that we don’t have the same “oh, no, we’re out of diapers and it’s the middle of the night” panic attacks that other people go through. Double win.

So. That covers my journey to getting the diapers. What about how they’ve worked since we implemented them?

I could not be happier with them. They are just as easy to use as disposables (I made all-in-one diapers, which means no pockets to stuff or pieces to separate before laundering), and I know we’ve saved so much money going this route. Even if you count all my experiments (with gDiapering, mostly), we’re way ahead in the money-saving department. And there are about a thousand fewer diapers in the landfill than there would be otherwise.

That said, there are a couple of things I wish I could change. First, I wish I’d just embraced that fact that I had a third baby boy; as it is, I chose yellow for the diaper covers because it was a “gender neutral” color, and in case we have a baby girl someday, I wanted to be able to use the same diapers. A year in, I suspect that these diapers won’t hold up for another baby. Don’t get me wrong – these are wonderful diapers, and I recommend them to anyone, but since I made only 15 instead of 30 or 45, they’re taking a bit of a beating. Several of them need to have the Velcro replaced soon (still peanuts compared to Pampers), and one of them needs new elastic, which will involve taking the whole diaper apart and reassembling it. I haven’t tackled that project yet. Plus, after reading a post on The Minimalist Mom, I was convicted by the notion that “saving” clothes from one child to another, outside of those that you really love, isn’t necessarily as frugal as you think. Her main arguments against it were a) you have to have the space to store them, and if you’re living a minimalist lifestyle in a small house, that may not be something you have, and b) clothes still wear out, even if you’re not actively using them. Cotton fibers wear with age, not necessarily use. Elastic gets old and brittle in storage. So it’s better to pass your cloth diapers along to someone who needs them when your baby is done with them than to put them in storage for the elusive “next baby.” If I’d read that post before I made the diapers, I would’ve chosen a cute, very boyish fabric for the outside (monsters or robots, probably) rather than plain yellow.

The second thing is that sometimes I wish I had two or three pocket diapers for nighttime. Going the pocket route allows  you to add more of the absorbent layers when baby needs them most – at night. So we do sometimes buy the throwaways for overnight. Right now, we’re using our trusty yellow diapers, but depending on how much liquid the baby’s had before bed, they don’t always last all night. So that is a definite con. Even when we do use disposables at night, hubby reminds me that we’re still doing a good thing, both for our pocketbook and our planet. A package of Pampers lasts an entire month when you only use one a day, rather than half a week if you use them exclusively. And sending one diaper a day to the landfill, while not perfect, is loads better than sending eight diapers a day there. That has to count for something, right?

So there you go. My personal experience with cloth diapering.

I didn’t write this to try to guilt anyone into using cloth, by the way. I just wanted to share my experience and how it’s worked so well for our family. If I inspire you to try, great! If not, that’s okay too.

Phone Pics 239


Phone Pics 233


–Wendy

Posted in: parenting, quilting/sewing | Tagged: cloth diaper, cloth diapering, cloth diapers, disposable diapers, diy, sewing

DIY Cloth Napkins

Posted by Wendy on October 4, 2013 Leave a Comment

I’ve read several blogs lately about making your own cloth napkins. They all have similar techniques for doing so (cut the fabric, fold over the edges, and sew) and reasons for using cloth instead of disposable (more environmentally friendly, save money). While I agree 100% with the reasons behind using cloth over paper, I prefer a much simpler procedure for the making of the napkin. Here’s my version.

Cut out your fabric. I’ve found that flannel is the best for this particular project. It holds water better (for wiping down tables and babies) and is softer on the skin than the regular cotton quilting fabric. I made mine 12×12, but you can make them any size you like. Some people like them bigger, like 20×20. In the 12×12 size, I was able to get 18 napkins out of 2 yards of fabric.

image

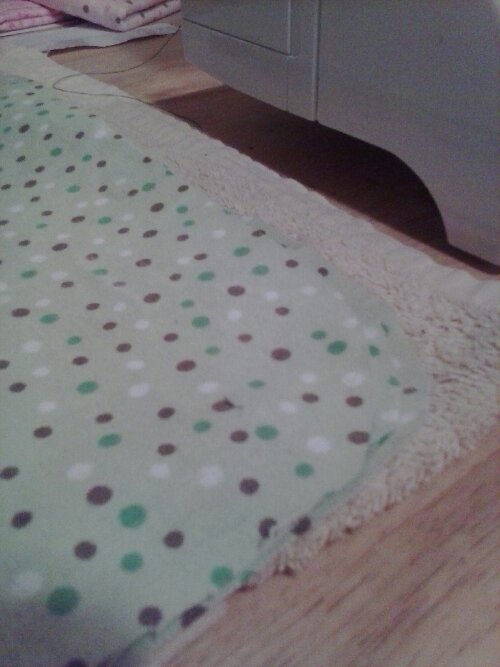
Once you have all the squares cut out, do yourself a favor and round the corners. That’ll make the sewing of the edges much easier.

image

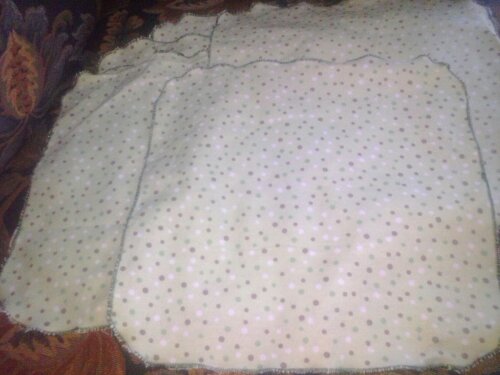
Finally, set your sewing machine to a zigzag stitch. You want it as wide as it’ll go (5 millimeters on my machine) and a very short length – my machine has settings from 0 to 4, and I go about halfway between 0 and 1 for this project. Using a complimentary or contrasting thread (depending on the look you’re going for), zigzag stitch all the way around your napkins. This will keep the fabric from fraying, which flannel is especially prone to do.

That’s it! Beautiful, reusable cloth napkins with bothering with the fussiness of folding and pressing edges or stressing about super straight lines.

image

image

Enjoy!

–Wendy

P.S. The procedure for cloth baby wipes is exactly the same, just with 8×8 squares of flannel.

Posted in: quilting/sewing | Tagged: cloth napkins, diy, easy, environmentally friendly, frugal, sewing

Homemade Cinnamon Rolls

Posted by Wendy on September 25, 2013 Leave a Comment

cinnamon rolls

Fresh from the oven cinnamon rolls are something special. Very little is as satisfying in the morning – especially when you’ve made them yourself rather than reverting to the cans. (Incidentally, I hate those things! The cans, not the prefab cinnamon rolls.)

Start with your favorite biscuit dough. I use a basic baking powder biscuit recipe that I’ll share at the end of the post.

Roll the dough out as though you were making biscuits, only thinner.

image

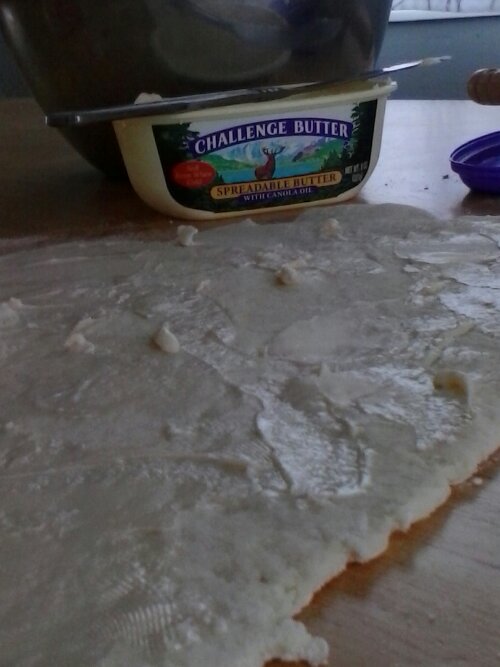
Spread softened butter over the dough. You could also use margarine. I don’t happen to buy margarine; I figure something natural (churned cream) has to be better than a bunch of chemicals formulated to taste like the natural item. Anyway.

image

Next, mix about 1/3 cup sugar (granulated or raw/turbinado) with about 2 teaspoons ground cinnamon. Or you could use the pre-mixed stuff from the spice aisle.

image

Sprinkle the cinnamon sugar over the buttered dough.

image

Roll the dough up, starting from the long side.

image

Cut the dough into discs.

image

Place in a pan, cut sides up (and down…).

image

Bake at 425° for 12-15 minutes.

image

You can make a glaze to go on top if you want, but I never do. These are good enough that they don’t need one!

Baking Powder Biscuits

2 cups flour
1/2 tsp salt
1/3 cup shortening
1 tbsp baking powder
3/4 cup milk

Combine dry ingredients in a bowl. Cut in shortening until dough resembles peas in size and shape. Mix in milk until dough pulls away from the sides of the bowl.

You can use this dough for a variety of things: drop biscuits, cut biscuits, cinnamon rolls, and pot pie topping just to name a few.

Enjoy!

–Wendy

Posted in: cooking/baking | Tagged: baking, cinnamon rolls, cooking, diy, homemade

A New Door

Posted by Wendy on August 6, 2013 1 Comment

We moved into our current house in December of last year. We knew it would need some work, but we had faith in the landlord (he’s sort of extended family – my brother’s wife’s dad), and now that the weather’s good (not too hot, but also not rainy) we’re starting to get some of the work done.

The first big project to tackle was the sliding glass door that  leads out to the back deck. When it was installed, they somehow put it in backwards. I don’t even know how that happened. It also didn’t quite fit in the hole properly, so we had gaps where the outside air could seep in.

image

You can imagine how awesome that was in January when it was 18 degrees outside.

Here are some other “before” pictures.

image

image

image

Back in April, our landlord bought the replacement door. He got a great deal from the Habitat for Humanity ReStore. The new door just sat in our garage until this past Saturday. It took 4 men (hubby, landlord, a friend from church, and landlord’s son – who happens to be the previous tenant here) 8 hours to get the job done.

image

image

image

image

It was a very elementary, though time consuming, project. Once the got the old door out, moving the new door into place took all 4 of them plus our neighbor. Then there was the removal of the moulding, some cutting away of the siding and floor to make the hole big enough for the new door, the door installation, and replacing the moulding. From a spectator’s perspective, it seemed very difficult! But I’m told it really wasn’t, other than the size of the project (the weight of the door, the use of power tools, etc).

The new door… is fabulous!! It’s glass, like the one they took out, but is a traditional door, not a slider. So there’s a door-sized window on the left and a door on the right.

image

image

It’s so nice not to have to fight with a incorrectly installed sliding door anymore!

–Wendy

Posted in: Other | Tagged: diy, home repair

A “New” Desk

Posted by Wendy on July 9, 2013 1 Comment

Hubby is always on a quest for the “perfect” home office. It’s always a very elusive goal, but for the first time in years, we seem to be on the right track in getting him what he wants.

We live in a split-level home; you enter on the landing between the stairs and the top floor is the main living areas (living room, kitchen, 3 bedrooms, & 2 bathrooms). The bottom floor is half underground (the windows, while normal height inside are ground level outside) and has the kids’ playroom, one bedroom, a half bathroom, and laundry facilities.

Hubby took the downstairs bedroom for his office.

When we moved in, it was an awful shade of blue – too light to be “blue” but too dark to be “white” – and had blue trim just a few shades darker than the walls. The light fixture covering was a huge yellow sun, and when you turned on the light, the yellow of the sun combined with the blue of the walls made the room appear green.

Needless to say, the first thing hubby did when he decided to make the room his home office was to take down the sun. The next thing he did was paint. He chose charcoal gray for the walls and crisp white for the trim. That alone made the room about a million times better.

His next task was furnishing it.

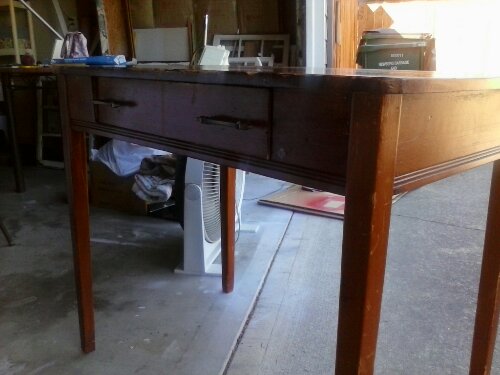
Our church was getting rid of this desk. Hubby loved it, so he brought it home.

image

It was quite nice as-is, but the color didn’t really go with his new gray-and-white office. Our neighbor is a wonderful lady, and she offered to help paint the table. She taught us a technique called “chalk paint” (not chalkboard paint). Basically, you mix up some Plaster of Paris with water and add it to any latex paint to make it a bit thicker, then apply as normal.

Here’s the desk after the first coat:

image

Tip: If you’re painting something and you need to get all the way to floor-level, lift the item to be painted up on something. In our case, we were painting the desk legs, so we propped each one up on an old spray-paint can lid.

image

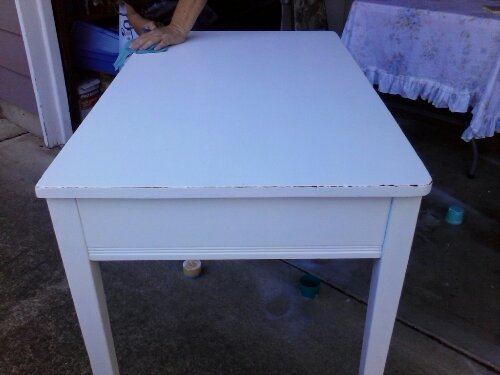
It took a total of 3 coats to get the brown completely covered. Then our neighbor took some sandpaper and distressed the edges of the table.

image

We polished it up with a bit of wax, and it was like a whole new desk!

image

Before:

image

After:

image

It looks so amazing in the room now!

–Wendy

Posted in: Other | Tagged: diy, home improvement, paint, refurbish

Picture of the Week: Baking Bread

Posted by Wendy on June 21, 2013 5 Comments

image

I’ve recently been serving only homemade bread instead of store-bought, and since it wasn’t hot yesterday, I made it bread baking day. I use this recipe from “the mrs” – I tried a few and this one is by far our favorite. I make a few modifications, though. Her recipe calls for honey, and since babies can’t have honey for their first year, I substitute agave nectar so Small Fry can enjoy it. I only own 2 loaf pans, so I cut the recipe in half. And I don’t have a stand mixer, so I do it all by hand. Oh, and she grinds her own flour; I don’t have the ability to do that, so I use half all purpose (I buy it in 25 pound bags) and half whole wheat. Considering all my modifications, I’m sure hers is much better! lol. But it’s still amazing bread.

Anyway, so the picture. When it was time for the kneading process, Munchkin wanted to help. So of course I let him :).

Happy First Day of Summer!

–Wendy

Posted in: picture of the week | Tagged: baking, diy, homemade bread, kids cooking

The Only Purse I Don’t Hate

Posted by Wendy on June 20, 2013 3 Comments

I haven’t bought a purse in years. Whenever I feel like I want a new one, I just make one. I’ve tried several patterns over the years, but always come back to the Lindie bag. It was the first one I ever made, and to this day is the one best suited for me.

image

It’s small enough that my family doesn’t feel the need to put all of their stuff in it but big enough to hold my stuff along with a single diaper for short trips out when I don’t need the full-on diaper bag I made.

So if you have even a little sewing experience (the tutorial is very well-photographed and clearly explained) and need a new purse, I highly recommend the Lindie!

–Wendy

Posted in: quilting/sewing | Tagged: craft apple, diy, handbag, Lindie bag, purse, tutorial

Homemade Ketchup

Posted by Wendy on June 3, 2013 2 Comments

We ran out of ketchup last week, and as I was writing the word on my grocery list, I thought, “I bet I could make that.” So I looked online and found a recipe that took two hours instead of two days and bought the ingredients instead of a bottle of premade. It was a bit more expensive this time because I only had about half the necessary spices, but next time it will be super cheap :).

So here we go. Recipe courtesy of JS Online.

Ingredients:
2 cans (28 oz each) whole tomatoes OR 3 pounds roma tomatoes, peeled and chopped
1/2 yellow onion, cut into chunks
2 garlic cloves, peeled
1/2 cup cider vinegar
1/4 cup sugar (more or less to taste)
1 stick cinnamon
2 tsp mustard seeds
1 tsp cumin seeds
1 tsp whole cloves
1/2 tsp celery seeds
6 black peppercorns
1/2 tsp dry mustard
1/4 tsp cayenne (more or less to taste)
1/2 tsp salt

image

Blend the tomatoes, with their juices, along with the onion and garlic (half at a time so as not to overload your blender) until smooth. Pass the liquid through a mesh strainer, pressing with the back of a spoon as necessary. Discard solids.

*I don’t have a mesh strainer, so I skipped this step, and my ketchup is still delicious. It’s just not as smooth as factory ketchup. So know that if you opt out of this step, your ketchup won’t be ruined.

Pour tomato mixture into a saucepan and bring to a simmer over medium heat.

image

Continue simmering until it’s reduced by half. This will take 1-2 hours.

image

Meanwhile, combine all other ingredients in a second saucepan and bring to a boil. Stir to dissolve the sugar and turn off the heat. Let it sit while the tomatoes continue to reduce.

image

When the tomatoes have reduced by half, strain the spices out of the the vinegar; discard the whole spices. Stir the vinegar into the tomatoes.

image

See that black line in the middle? That’s my vinegar mixture :).

Continue to simmer the ketchup, stirring occasionally (but be careful not to let it burn!), until it is thick. This will take about 20-40 more minutes.

Taste for salt and spice, adjusting to your liking.

Let cool, then transfer to jars. The ketchup will keep in the fridge for 2-3 months.

image

I got 2-16 oz jars (a repurposed Alfredo sauce jar and a new jar). And let me tell you, this stuff is delicious! And the best part is that you can adjust it to your family’s liking. For example, I left the cayenne out altogether, but if you like spice, you can totally use more. It’s a wonderful recipe. It does take some time, but it’s not all hands-on time. Pay enough attention to keep it from burning, but other than that, it practically cooks itself.

I hope you “take the plunge” and try your hand at homemade ketchup once you run out of the commercial stuff :).

–Wendy

Posted in: cooking | Tagged: bbq, diy, ketchup, recipe, summer

Sourdough Bread

Posted by Wendy on May 30, 2013 2 Comments

I bet you thought I was gonna forget, huh? Lol. Since I make all posts from my phone, I don’t have them saved & scheduled; that’s why they’re not at the same time every day (in case you ever wondered).

Anyway, so sourdough bread… I love the stuff and have tried many times to make it at home, never with very good results. It’s always edible just never sour, no matter how long I leave my homemade starter out to ferment. I was reading a blog a couple months ago (I don’t remember which one unfortunately) and someone commented about Oregon Trail Sourdough. They have sourdough starter that they give (yes, GIVE) you for just the cost of a self-addressed, stamped envelope. So I sent off for a starter. I activated it as soon as I got it, and then just let it sit for a good long time. The trick with sourdough is that it takes way more planning than regular bread. Regular bread goes from raw ingredients to completely done in less than 4 hours; sourdough requires prepping the night before – sometimes 2 nights depending on whether you’ve had your starter in the fridge. Because of that, it took me probably a month between getting the starter and getting around to using it.

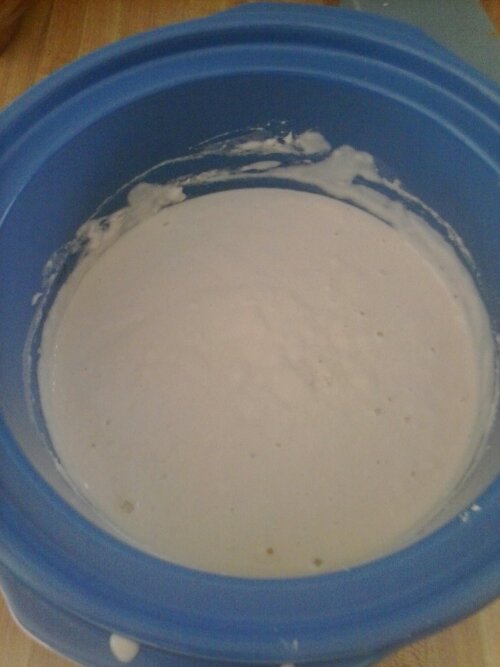
Here’s what my first step looked like. This is the starter, some flour, and water, which had to sit overnight before continuing to finish the dough:

image

The other thing about sourdough is that you have to use glass or plastic, no metal. Well, I only have stainless steel mixing bowls, so it took me a while to figure out how I was going to make bread without buying a special bowl for the task. Then it dawned on me: the ceramic insert for my crock pot!

When you get to the dough stage, it looks just like any other white bread dough, so I don’t have a picture of that.

We’ve been dealing with plumbing issues in the kitchen (I haven’t had a sink since Tuesday…), and one of my loaf pans didn’t get washed before the sink fiasco, so I had to make half my dough into a loaf and the other half into rolls. Here’s the dough:

image

And the finished product:

image

image

The verdict? It’s a little bit more sour than regular homemade bread, but far less so than what’s at the store. I think I’ll leave my starter (it continues to grow, so unless I choose to get rid of it, I’ll never need another one) out of the fridge for a good week before I bake next time to see if I can a better flavor.

–Wendy

Posted in: cooking/baking | Tagged: baking, diy, sourdough bread
1 2 Next »

Welcome!

Welcome to Ladybug Daydreams! My name is Wendy, and I’m glad you’re here. I am a homeschooling mom to 5 boys. I write about homeschooling, homeschool curriculum, yarn (both knitting and crochet), and more! I hope you enjoy what you read.

June 2025
S M T W T F S
1234567
891011121314
15161718192021
22232425262728
2930  
« Feb    

Search

MyFreeCopyright.com Registered & Protected

Copyright © 2025 Ladybug Daydreams.

Theme by themehall.com.