My Favorite Knitting Needles

F24A5CE1-B6A7-460B-A4DE-0B4D2D2CBCFA

There about as many different types of knitting needles as there are knitters who use them. Plastic, metal, hardwood, bamboo, even bone. And that’s just the materials the needles themselves are actually made from. You also have straight needles, circular needles, and double pointed needles (more on those differences tomorrow). And the size of the needles is another thing to consider. 

Big box stores are going to have a much smaller selection to choose from. If you go there, you’re likely to only find plastic or aluminum needles. At a “local yarn store” (LYS) you’ll have many more options. 

FE333921-DFC5-4EA0-A416-1330F1583D5C

My focus is on my favorite needles, though. Not all the different varieties on the market. My taste in knitting needles is quite small; in fact, I’ve really only used two kinds. I have a couple of sets of bamboo double pointed needles that I bought cheap from Amazon, and they do a fine job. But my very favorite are my Knitter’s Pride Dreamz needles. These are the basic needle available at my LYS, and therefore the kind I bought for my knitting class. They are made from a strong, polished wood, and each size (diameter) is a different color so you can tell the apart quickly and easily. The points are sharp enough to allow you to go through stitches easily, but not so pointy that you split stitches. Because they’re wood, they give your yarn a little grip, making the dreaded dropped stitch less of an issue (not a nonissue, though). I can not recommend these needles enough, especially for a beginner.

7C884DF6-6181-45E8-BCD7-FB5CE2CAD3B8

This post is not sponsored in any way. Every pair of needles I own, I’ve purchased. Knitter’s Pride has no idea who I am, and I was not compensated for this post. I just really love their product and wanted to write about it today.

Blessings,

ladybug-signature-3 copy

Yarn Fibers

F24A5CE1-B6A7-460B-A4DE-0B4D2D2CBCFA

We’re still talking about yarn today. Yesterday was all about the different thicknesses available; today is about the different fibers you’re likely to come across as you shop for yarn.

If you purchase your yarn from a craft store or supercenter type store, you will likely be limited to acrylic yarns. Acrylic is a byproduct of oil, so acrylic yarn is basically plastic. Don’t let that deter you though; not all acrylics are created equal. Some are really terrible and some are softer and cozier than wool. Acrylic is very easy to care for (almost  all are machine washable and dryable) and easy on the budget, so it’s a great choice for knitting or crocheting items for babies and children.

The next most popular fiber for yarn is probably wool. There are as many different types and feels of wool yarn as there are species of sheep (and llamas and alpacas, and…). That is, quite a lot. Most of the pure wool yarns I’ve worked with tend to be pretty scratchy, but with some TLC and wool wash, they soften up.

Cotton is a popular yarn for making things like washcloths and summer garments. It’s cool and breezy, but also tough. It can tend to be pretty heavy, so it’s not ideal for heavier clothing like winter sweaters.

These are the main types of yarn I’ve seen as “pure.” There are also a nearly infinite number of blends on the market. Some of the lower-cost companies have wool-acrylic blends available, for example. I’ve used a cotton-bamboo yarn for a shawl I made, and that yarn has a nice drapy quality that was perfect for the shawl. I’ve tried that same yarn for other projects (a sweater and a pair of mittens), and it was no good for either of those. If you’re making socks, the best yarn to find is a wool-nylon blend. They nylon gives you the strength you need for the heels and toes, while the wool keeps it from being a nylon sock.

This list barely scratches the surface on yarn fibers, but it covers the kinds I use most, so I’m going to leave it here. Come back tomorrow for the next most important thing you need to knit: needles.

Blessings,

ladybug-signature-3 copy

Yarn Weights

F24A5CE1-B6A7-460B-A4DE-0B4D2D2CBCFA

Welcome back! Today I want to talk about yarn weights, by which I mean thicknesses (as opposed to pounds). You might remember from yesterday’s post that your label will tell you what weight your yarn is. But what do those terms and numbers mean? I’m going to enlighten you right now.

Size 0 is also called lace, fingering, or thread weight. As you might guess from its first name, it is often used for creating airy, lacy knits. I have never personally used yarn this small; I tend to mostly knit sweaters, which require thicker yarn for warmth.

Size 1 also has a few different names. You might hear it called “sock,” “fingering,” or “baby.” This is the yarn you use for knitting socks if you want them to fit inside your shoes. It’s also a really nice feeling yarn for shawls and baby blankets.

Size 2 is called Sport or Baby yarn. It’s a little thicker than sock yarn, but used for a lot of the same types of projects.

Size 3 is called DK, which is short for “double knitting.” I’m not entirely sure why it’s called that, because double knitting is a technique also; perhaps double knitting works best with this weight of yarn. I’m not sure, though. DK weight yarn is suitable for just about any project. I’ve used it for numerous sweaters and shawls.

EC357700-6E71-447D-8C06-75332A675E2D

These are the yarn sizes I work with the most. This picture shows the differences between sizes 2, 3, and 4.

Size 4 is called worsted in the United States and Aran in much of the rest of the world. This is the yarn you’ll get if you buy it anywhere that’s not a yarn-specific store (JoAnn, Michael’s, the craft section at Walmart, etc). It’s the “standard” yarn and is great for warm sweaters, Afghans, and more.

Size 5 is the beginning of the really thick yarns. Commonly called chunky or bulky, it’s good for a quick blanket (thicker yarn means bigger stitches, which means your project goes faster). 

6 and 7 are very similar to 5, just a bit bigger.

For a nice printable on yarn thicknesses, visit this post at Moogly.

Now that we’ve discussed thicknesses and ideas for projects in different yarn weights, I want to briefly mention how yarns get to be different thicknesses. This is done by twisting strands of spun yarn together. The fewer the strands, the thinner the yarn. Size 0 yarn uses 1-3 strands, while size 7 can use in excess of 16 strands. Understanding those numbers, it’s easy to see how and why the thicknesses are so different!

Blessings,
ladybug-signature-3 copy

Reading a Yarn Label

F24A5CE1-B6A7-460B-A4DE-0B4D2D2CBCFA

For my first post on the joy of knitting, I wanted to start super basic, with the most important thing you’ll need: yarn. Of course, you need knitting needles, too, but yarn is even more important than the needles because a) it creates the fabric that will be your finished product and b) there are tutorials out there for knitting without needles (finger knitting, for example).

So… yarn. How do you know what you’re getting when you buy yarn? While it can be pretty confusing as first, the yarn companies do what they can to make it easy – or at least understandable – for you. They put all the information you need right on the label, or ball band, of the yarn. Today I’m going to go over the information on a skein of yarn I have on hand.

DDA96078-7B8D-47B9-B18A-CBF5328A3284


On the front of the label, you’ll see the name of the company that made the yarn (Berroco), as well as the name of the product line (Comfort DK). Below this is the name of the yarn weight and a description of the fiber content.

FBD4669E-2757-40FB-A6D8-66C553DE4BEF

When you rotate the ball of yarn, you come to a new panel on the label. This one has a series of tiny pictures. The three main ones tell you approximately what gauge (a fancy term for “stitches per inch”) you should get using this yarn and the specified needle sizes. The gauge you need will be listed on your pattern, but using the guide on the yarn label can give you an idea of whether your yarn and pattern are compatible. There are these gauge pictures for both knitting and crochet. Below that is another little picture; this one looks like a skein of yarn with a number on it. This gives you another clue as to the weight of the yarn (besides the name on the front, because not all yarns will list the weight there). I’ll talk about yarn weight in more detail tomorrow. Also on this panel is the size of your skein. This is usually listed in ounces and grams (for weight) and meters and yards (for length).

2ACC5F4B-7D09-450A-81D6-CF704FAABB4D

Rotate the ball one more time and you get to the final third of the ball band. On this section are the washing instructions for your finished garment, the color number and dye lot number, and the store’s pricing sticker. The dye lot is probably the most important piece of information on the label, especially if you’re making a project that will require more than one skein of yarn. By matching the color and dye lot, you can be assured that your yarn is all exactly the same color. (Matching dye lot numbers means they were colored in the same dye bath.) Even if two balls of yarn have the same color number, if their dye lots are different, it’s very possible that they won’t quite match. They’ll be close of course, but subtle variations are possible. 

And that’s the information you’ll find on a yarn label. I hope you’ll come back tomorrow, when I’ll be discussing the different weights of yarn.

Blessings,

ladybug-signature-3 copy

31 Days of Writing

There’s a challenge going around the “blogosphere” this month, and that is to write something each day all month long. That’s 31 blog posts (though I’ll have a few more since I have some reviews this month that will be sprinkled in). There are a few different bloggers hosting different versions of the challenge, and the one I chose to participate in is to write a little bit each day about a single topic. I’ve chosen to focus on my favorite hobby: knitting.

F24A5CE1-B6A7-460B-A4DE-0B4D2D2CBCFA

I’ll cover all sorts of topics related to the subject. Here’s my basic road map for the series:

10/2: Reading a yarn label

10/3: Different weights of yarn

10/4: Different fibers of yarn

10/5: My favorite knitting needles

10/6: The difference between straight needles, circular needles, and double pointed needles

10/7: What is an “interchangeable needle set”?

10/8: Buying yarn for a single project

10/9: Buying yarn “just because”

10/10: The “yarn stash” and how to store it

10/11: Where to buy yarn

10/12: Where to learn to knit

10/13: Teaching children to knit

10/14: My favorite resources (YouTube channels, books, websites, etc)

10/15: Knit vs Crochet

10/16: Basics of Knitting: casting on

10/17: Basics of Knitting: the knit stitch

10/18: Basics of Knitting: the purl stitch

10/19: Basics of Knitting: binding off

10/20: Attaching a new ball of yarn to a project

10/21: Choosing a pattern

10/22: Reading a knitting pattern

10/23: Knitting a gauge swatch

10/24: Knitting flat vs in the round

10/25: Knitting a seamless garment vs knitting pieces and sewing them together

10/26: Knitting things that aren’t clothes: wash cloths

10/27: Knitting things that aren’t clothes: dish scrubbies

10/28: Knitting things that aren’t clothes: bookmarks

10/29: How to dye yarn with food safe “ingredients” in your kitchen

10/30: My experience with food-coloring dyeing

10/31: Conclusion

Some of these will be longer than others, but I’m committing to writing about all of them this month. I’m excited about it, and I hope it’s as fun for you as it will be for me.

Blessings,

ladybug-signature-3 copy

Recent Knitting (and yarn) Projects

I haven’t talked much about my knitting lately. This is partially because after we moved, I went through a period of feeling like I didn’t really know how to adapt to my new circumstance (we don’t currently have our own home – we’re living with my husband’s dad and stepmom). There were even a few weeks when I felt like I was losing part of my personality. I took a few steps, though, and I’m feeling (mostly) great right now. I’ve redeveloped my hobbies, and even finished up 2 fairly large knitting projects. Here’s what I’ve been working on recently.

First, I have this sweater for Seahawk. I love the way it looks, but I really don’t like the act of making it, so it tends to fall to the bottom of my “to do” pile. It will eventually get done – I just hope he doesn’t outgrow it before I finish making it.

jones sweater

I’ve done 2 or 3 washcloths since we moved; those are one of my favorite projects to do. They’re small, easy, and useful. When I was in the yarn store on my birthday (they give a 25% discount if you shop on your birthday), I picked up some “scrubby” yarn. I’d been wanting to try it for a while, so I used the opportunity to get some. My first project with the scrubby yarn was a washcloth that’s part scrubby, part cotton. Seahawk and Munchkin (the official dishwashers) were so impressed with it that they asked me to do one that was just scrubby, so I did (I don’t have a picture of that one, though). That has taken the place of all sponges since then. They don’t even like sponges anymore!

washcloth

Next up is this blue sweater. I entered a giveaway on another blog and won 5 skeins. It’s from Lion Brand, and it’s called Jeans. The name refers strictly to the color; it’s not made of denim or cotton. It’s a 100% acrylic yarn, which I don’t normally like because acrylic is an artificial fiber, but I’ll never turn down free yarn! 5 skeins is enough to make two sweaters – one for Dragonfly and one for Small Fry – so that’s just what I’m doing. (I may even have some left over at the end!) I love the idea of them having matching sweaters this fall. The one in the pictures is Dragonfly’s; I always start with the smaller sizes because they work up so much quicker. I chose the buttons for this one; I thought the idea of forest animals was just perfect with the tree motif on the sweater. It turns out I was right ;). For Small Fry’s, I let him pick his own buttons. He chose watermelons. It won’t complement the sweater quite as well as the “forest babies,” but it will definitely be something unique for him.

old growth 1

old growth 2

Back in February, I went to a “Knit Along” at my local yarn store. In case you’re not familiar with the concept, a Knit Along (or KAL as they’re commonly called) is where a group of people, either in real life or in an online forum, get together and all knit the same pattern. For this one, the pattern was called “Illegal Triangles.” It was named this because the designer said “this pattern is so much fun to knit that it should be illegal!” I chose a pink, purple, and brown yarn for that project, and I knit it as a gift to have on hand. In March, we were invited to a party for my dear friend’s daughter who was turning 12. I packed up that scarf and gave it to her, and have been told several times since then that she loves it. That just warms my heart 🙂 After we moved, when I was feeling pretty down about myself (and my knitting), I remembered how much fun I’d had knitting that scarf, so I decided to knit another one. It was just as pleasurable as I’d remembered, and I’m really glad I made the decision to knit it again. Here is my second “Illegal Triangles” scarf.

illegal triangles

Besides knitting, I’ve also dabbled in dying my own yarn over the past few weeks. I wanted to do a teal yarn with pink, purple, and blue speckles. Here is my first attempt:

dyed yarn 1

It’s not exactly what I was aiming for, but it’s still quite beautiful, and I’m looking forward to knitting something with it. I envision it turning into a cowl and hat for someone for Christmas.

My second attempt was more what I had in mind. The thing I didn’t fully realize until I’d dyed this yarn, though, was that that color scheme is what Sully from Monsters, Inc. looks like. When I pulled the yarn out of the steamer after adding the speckles, it became quite obvious to me that I’d just created “Sully yarn.” Because Small Fry has been asking for a “Sully hat and mittens” since last winter, this yarn will end up being turned into those for him. I even have some Monsters, Inc. buttons to accessorize them with when they’re done. I’m looking forward to that project a lot!

monster yarn

Blessings,

ladybug-signature-3 copy

Easy Knitted Teething Ring

When you have a baby, teething is just a fact of life. There are loads of commercial teething toys you can buy in all different sizes, shapes, and colors. You can get the kind that are filled with water and kept in the fridge, or just some that are textured for babies to chew on. When Dragonfly was teething as a young baby, I was in the middle of making cotton washcloths. The skeins of cotton yarn didn’t work out to all get used up evenly for the washcloths, so I decided to use some of the extra to make teething rings. It was really easy; here’s how I did it.

Teething Ring ~ Easy Knit Pattern

Make an “I-cord” (instructions to follow) in whatever width and length you like, then sew the two ends together to make a ring shape.

In case you’re not familiar with an “I-cord,” this is a technique developed by knitting master Elizabeth Zimmermann, and it creates a wonderful cord that you can use for a plethora of things – as a belt for a cardigan, as a drawstring inside any garment that requires one, or as I’m demonstrating today, as a teething ring for baby, among many other things.

The phrase I-cord is short for Idiot Cord because Mrs. Zimmermann thought that any “idiot” who knows how to knit would be able to make one. All you need is some yarn and two double pointed needles (DPNs). The technique is very easy: cast on your desired number of stitches, slide the stitches to the other end of the DPN, knit across, slide down, knit across, and repeat the sliding and knitting until your cord is the desired length. The sliding (rather than turning the work) requires you to pull the yarn across the back of the work, and as you continue to add to your cord, this pulls it closed into the cord shape. What you end up with is a round piece of knitting that is stockinette on all sides. It’s very attractive, and very easy to work.

For my teething rings, I used 100% cotton yarn. This is what I use for washcloths, and it works really well for the teething rings for a few reasons. First, cotton yarn has very little stretch. There’s virtually none, actually. This means that the ring maintains its shape. Second, it freezes and thaws well, which is really important for a teething ring. Finally, because it’s an all-natural fiber, you don’t have to worry about your baby putting it in his mouth. And if you use organic cotton yarn, even better.

So, what you do is create an I-cord using your desired number of stitches on whichever size needles you like. I used four stitches on a size 8 needle, but there’s really no right answer here. Find a size needle you’re comfortable with (remembering that bigger needles will make bigger stitches and vice versa) and make your I-cord any thickness you like by adjusting the number of stitches you cast on. Make your I-cord at least 8-10 inches long. Longer will give you a bigger circle; shorter, a smaller one. When it’s a length you like, bind off, knot your yarn leaving a long tail, and then use that tail to sew the two ends together. Wash your new teething ring, then get it nice and wet and stick it in the freezer. If you make several of these, you’ll always be ready to offer one to your baby when his poor gums need it. They thaw quickly, but even the texture seems to help babies, so that’s okay.

Blessings,

ladybug-signature-3 copy

Picture of the Week: Sweaters for Elephants

I came across this article earlier in the week, and it was something I definitely wanted to share because elephants are my absolute favorite animals. So for Picture of the Week this week, I’m sharing something that’s not about our family…

India is going through quite the cold snap, and one of the elephant refuges is concerned about their charges. To combat the cold, they’ve enlisted the help of some local ladies to knit giant sweaters for the elephants. What a cool thing to do!!


There are even more pictures, as well as good information, in the article I linked above. I encourage you to check it out.

Blessings,

ladybug-signature-3 copy

Knitted Christmas Sweaters

It’s a little deceiving to call them “Christmas sweaters,” because they’re not designed in a Christmas motif. But they are sweaters that I knitted for Christmas gifts, so I’ll stick with Christmas sweaters.

A lot of these pictures are straight from my Instagram account, so if you follow me there, you may have seen these already. But I want to share them here as well.

For almost all of them, I used the same basic pattern (Flax by Tin Can Knits). I made some changes to several of them, though, for a couple of reasons. First, I wanted to add some interest for myself as the knitter. I didn’t want to knit the same exact pattern a billion times in just a few short weeks. Second, I wanted the siblings receiving the sweaters to not have them be identical (except for the color), so I made minor modifications so each one would be unique.

Here are my projects:

flax-for-dad

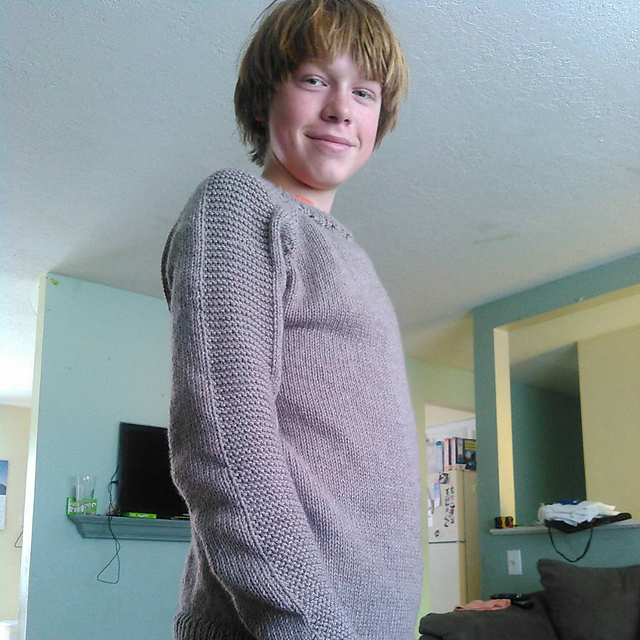
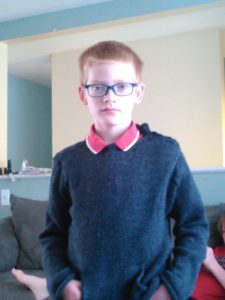
This brown one was made for my dad. It was the first one I made, so I followed the pattern exactly as written. It’s an adult size S/M, and I used 5 hanks of yarn, each one of which was 100 grams. I had a little bit left over, so it didn’t use up the full 500 grams. Because Seahawk is about the same size as my dad, I had him be my model and “tryer-onner.”

flax-green-fair-isle

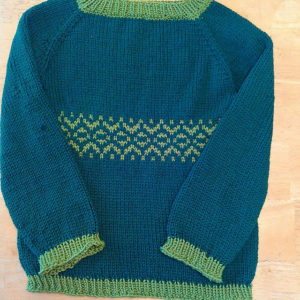
This green sweater was my first foray into fair isle knitting. I’d knitted three of the sweaters “plain” by this point, so I was ready for something a bit more challenging. The size for this sweater (a 6/8, for my 6-year-old nephew) had the exact same stitch multiple as the Color My Cowl pattern from Very Pink Knits, so I decided to put that pattern into the middle of the sweater. I think this was a really good introduction to fair isle knitting, and I’m really pleased with the results. The colors in the actual sweater are better than the picture conveys – it’s a nice forest green for the main color and lime green for the embellishments.

Purple Sweater Flax Hack

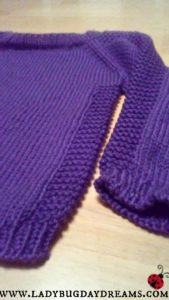
The purple one was made for one of my nieces. I was nearly done with sweaters by the time I’d made this one, and I was very interested to see what the Flax design would look like with a garter stitch panel down the sides of the sweater as well as on the sleeves. While I won’t come right out and say I was disappointed with the result, it wasn’t exactly what I’d had in mind. Also, in my naivete, I had no idea that garter stitch doesn’t line up properly when knit in the round, so I had to do some research and fiddling to get the side that was the “beginning of the round” to not look awful. I only moderately succeeded.

20161223_155455
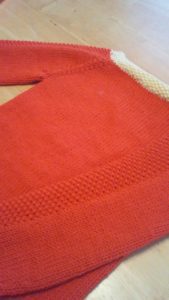
The orange one was the last sweater I did, and I was ready for something really challenging by this point. I find a knitted seed stitch to be rather beautiful, but it’s one of those things that always eludes me. I’ve done it before, but I always mess it up. There’s absolutely never been a time when I’m knitting seed stitch and I look back at my work and realize that several rows back, I’ve got some ribbing instead. I thought that perhaps my difficulty lay in the fact that I was knitting seed stitch flat (back and forth), and maybe it would be easier to work the pattern in the round. I was right. It wasn’t foolproof – I spent over an hour one day reconfiguring several rows of stitches to correct my mistake – but it was a lot better. And I learned that properly done seed stitch is very beautiful.

Apparently I don’t have pictures of the others, which is unfortunate. Here’s the lowdown on what I made that’s not pictured:

  • A Flax sweater as written made in lilac colored yarn (purple with a hint of blue) for my 8 year old niece
  • A Flax sweater in yellow without the sleeve texture and with a blue design around the bottom of the waist and sleeves for my 7 year old niece
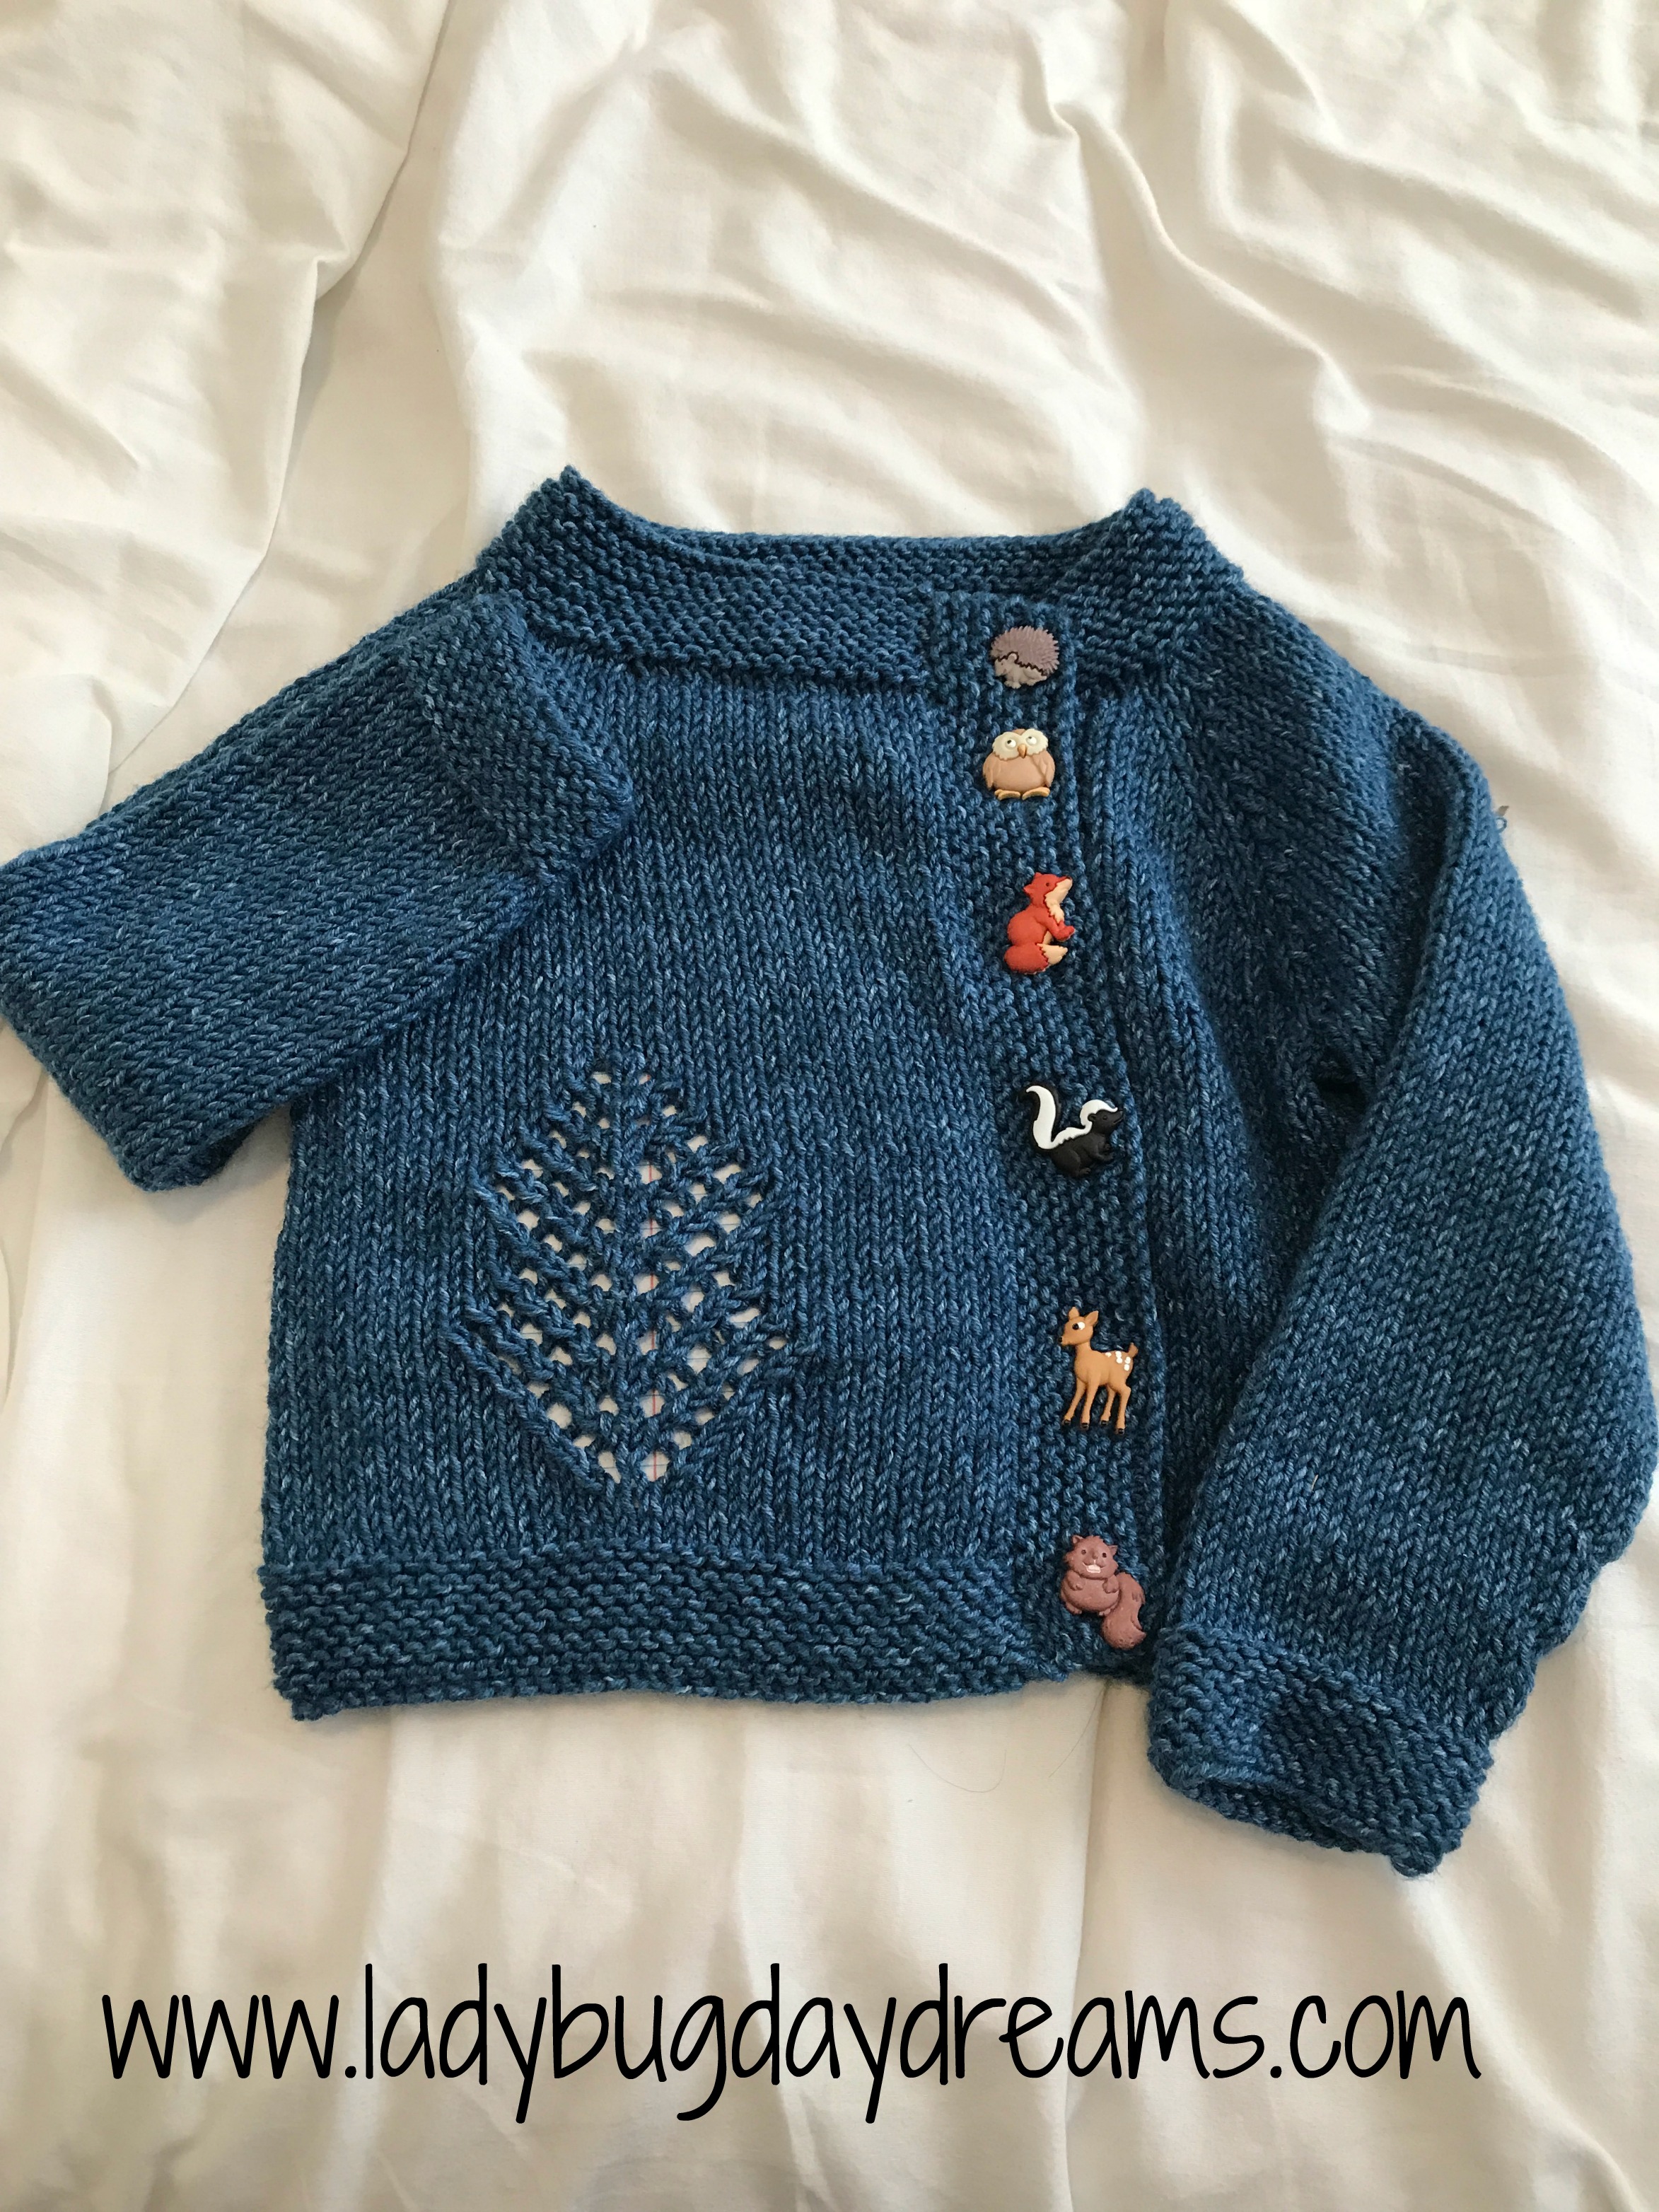
  • A Simple Baby Pullover in dark blue (not quite navy) with “transportation” buttons and extended sleeves for length for my 2 year old nephew
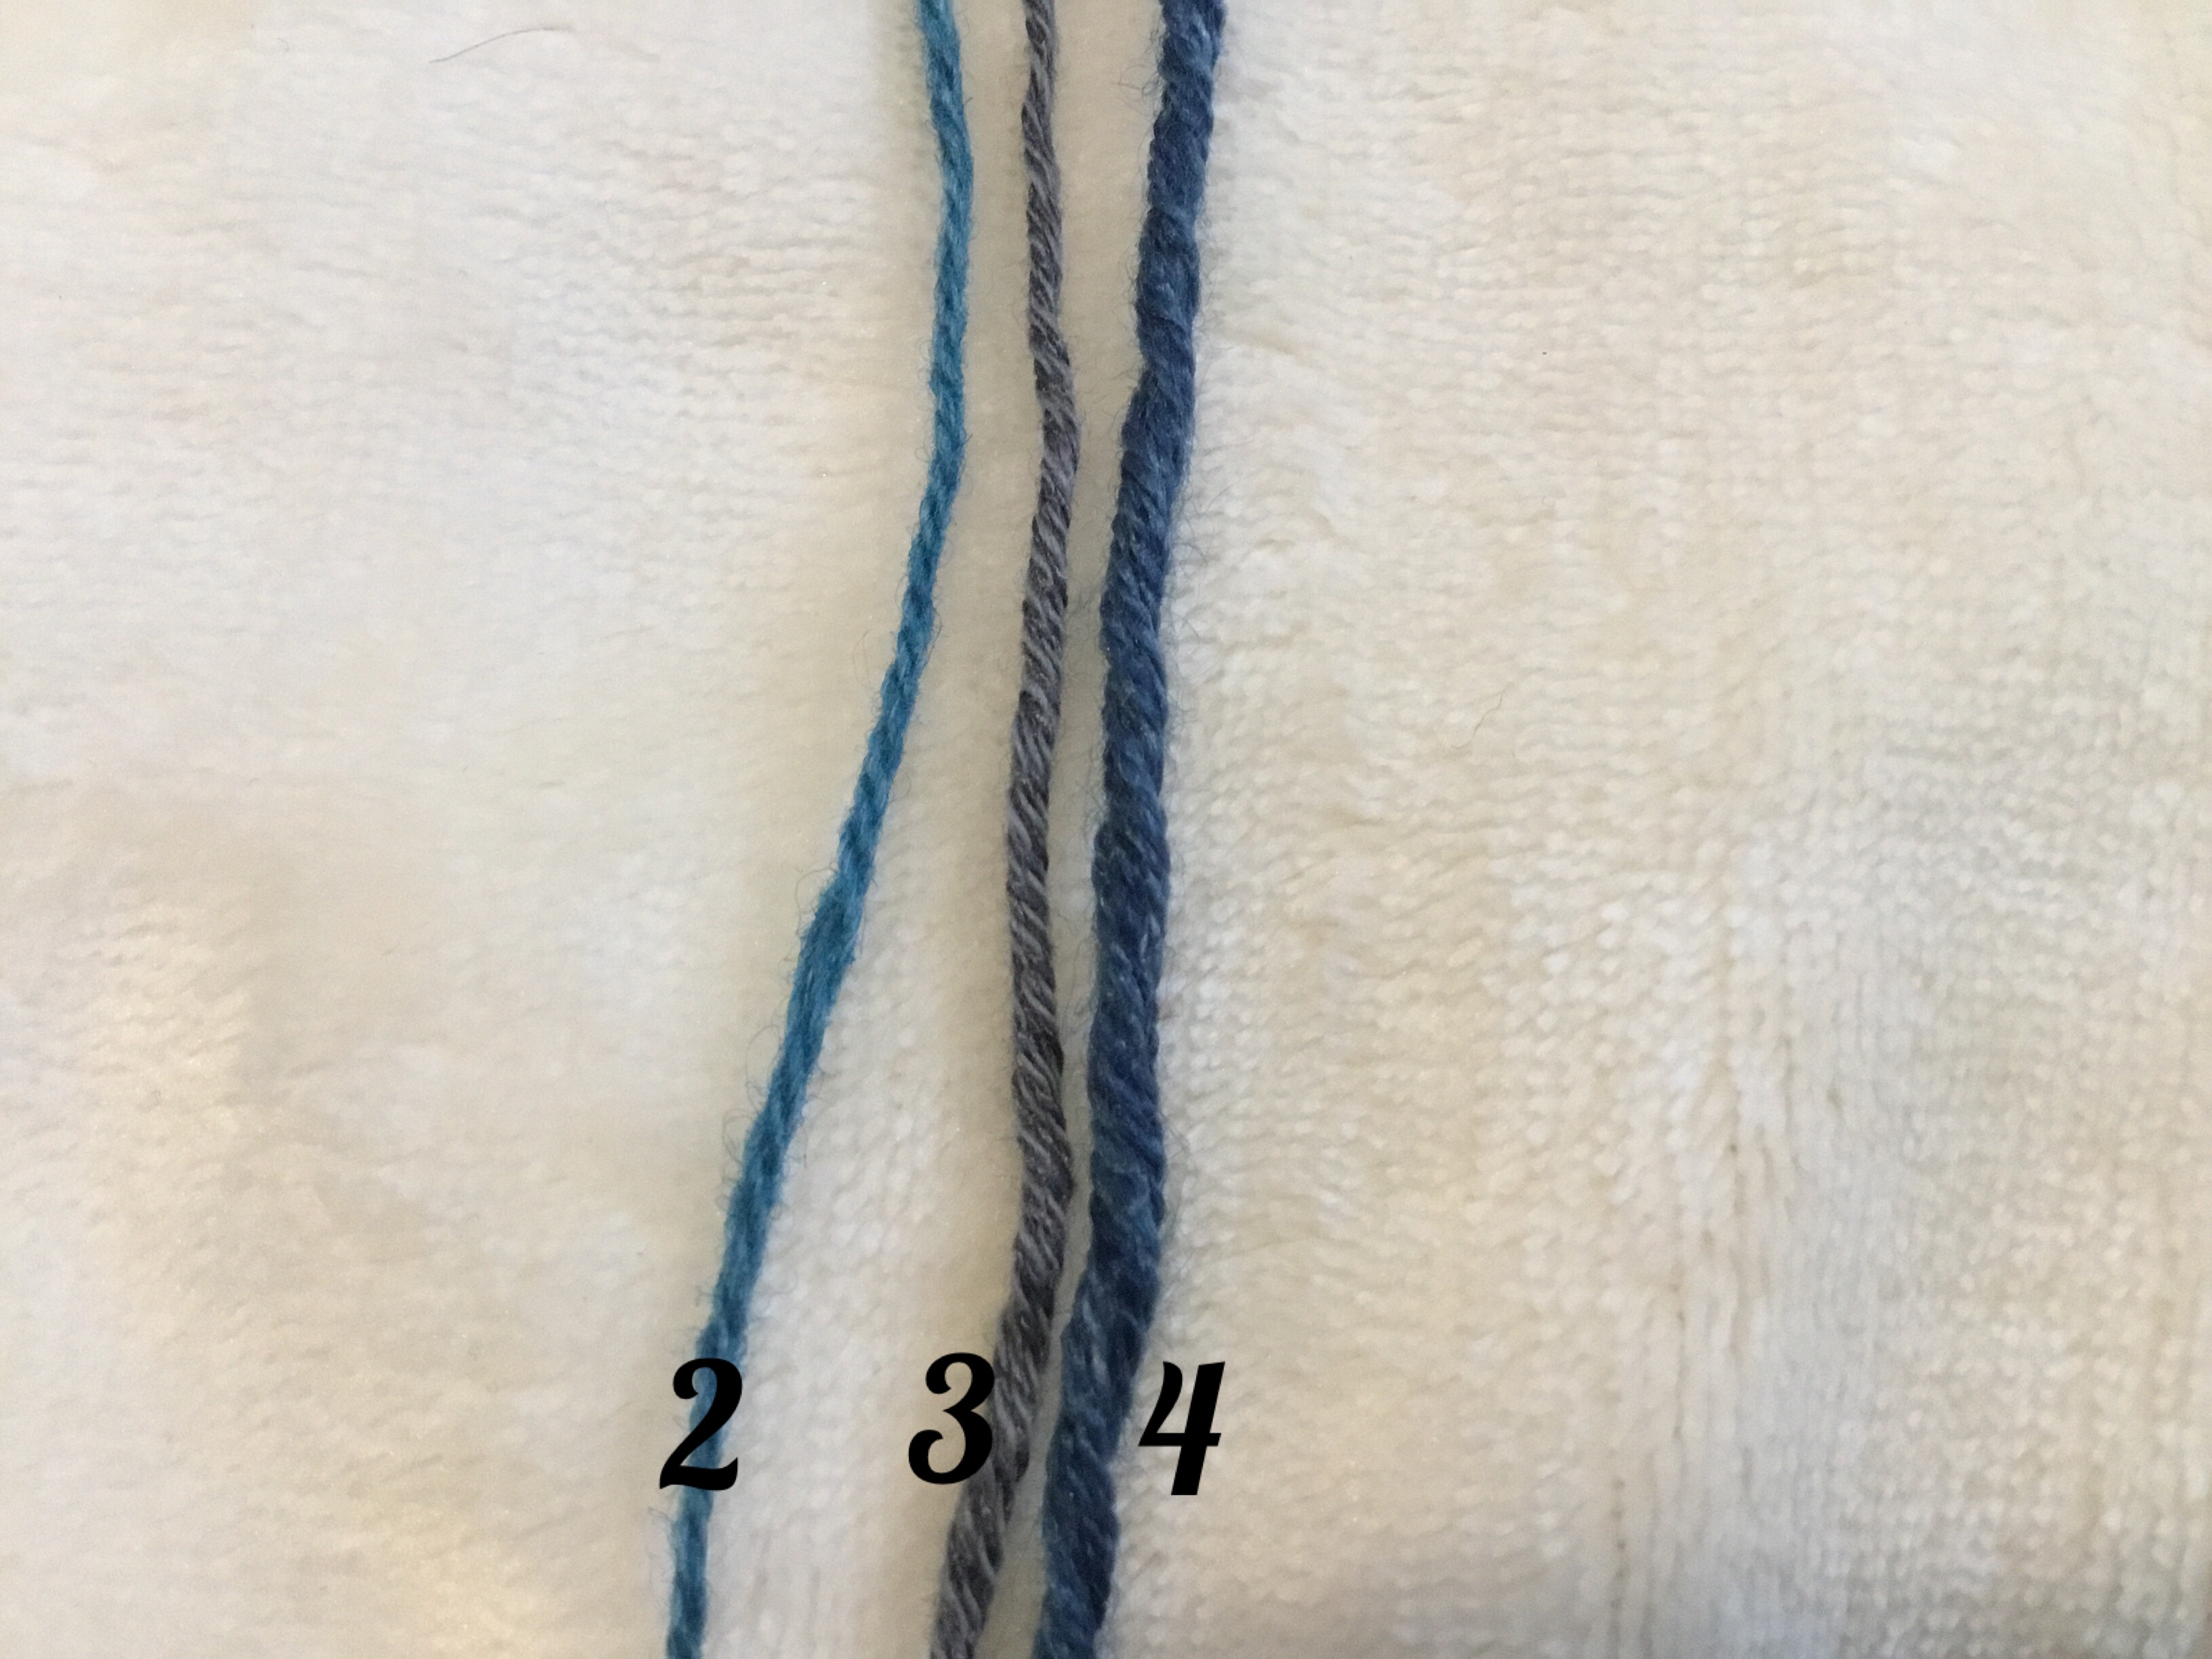
  • A Flax sweater as written in Tide Pool colored yarn (blue with a hint of teal woven throughout) for my 4 year old nephew
  • A Flax sweater as written in white and brown variegated yarn for Small Fry
  • A Flax sweater as written in “bird’s egg” blue yarn with the edges (neck, waist, and wrists) made in leftover brown from my dad’s sweater for Dragonfly

And a few more that I found pictures for on my Ravelry page:

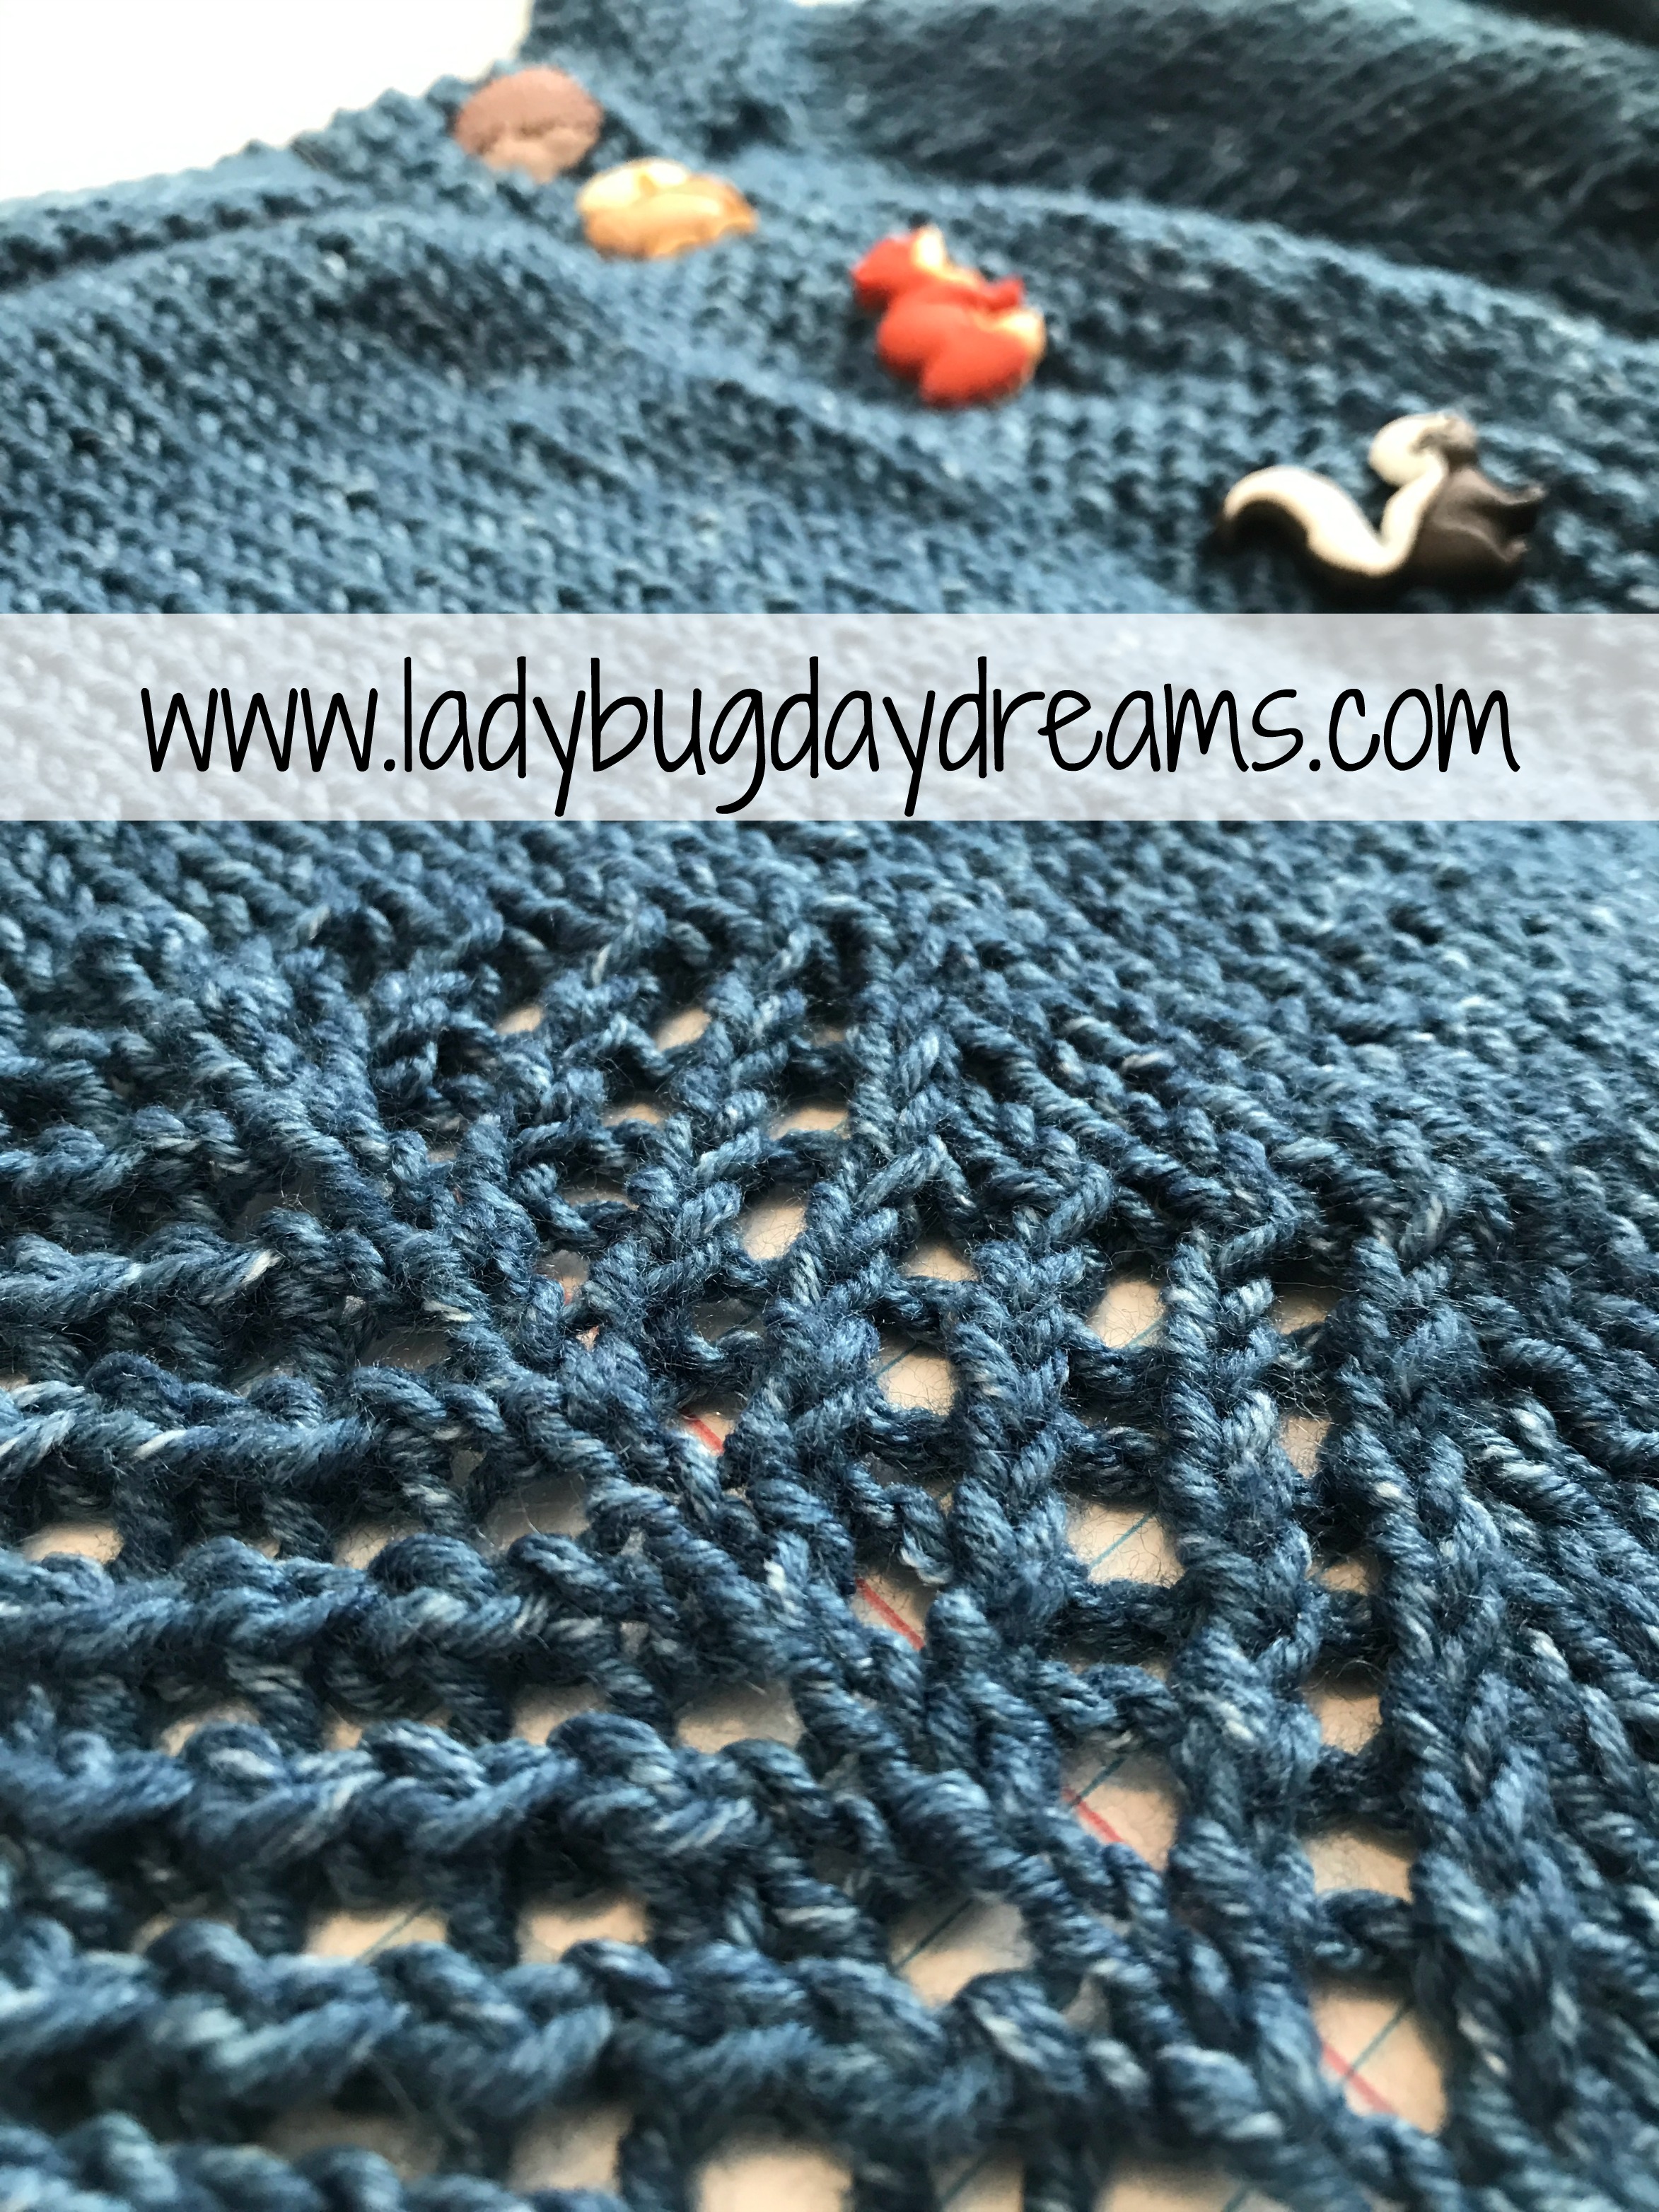
A Simple Baby Pullover as written in the same bird’s egg blue as his other sweater (also with transportation buttons) for Dragonfly – this one is his favorite! The picture was taken before I added the buttons.

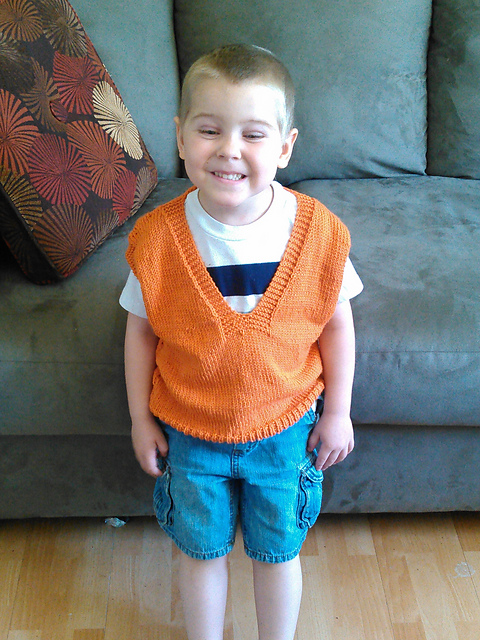
A Dexter vest (sleeveless, v-neck) in orange for Small Fry. This was my very first sweater ever, and I chose it because I was terrified of the prospect of knitting in the round or adding sleeves to a sweater. I had no idea how that would work, so for my first time out, I just avoided it!

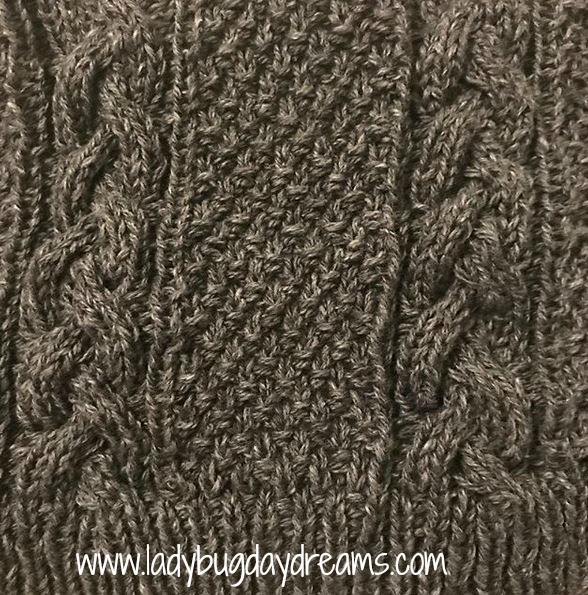
A Kangaroo Pocket sweater in charcoal for Munchkin. This is the one and only sweater of “mine” that’s been knit in pieces and sewn together. While I know that some patterns benefit from this technique, I do prefer the single piece, in the round style better.

Not all of those were made for (or around) Christmas, but that’s the complete list of all the sweaters I’ve made to date. I’m taking a bit of a break from sweaters for the time being, but I’m excited to get back into them soon. Next up, something with long sleeves and a v-neck for Seahawk. 🙂

Blessings,

ladybug-signature-3 copy

Knitting Projects: October-November 2016

kimg0520As we enter the cooler months, I’m beginning to think about creating Christmas gifts. Last time I did a knitting projects update, I hadn’t quite started the sweater I was making for my dad, and I was still working on one for Munchkin. Well, I’ve since finished both of those projects – and done a few others to boot. Here’s what I’m currently working on and what I have planned but not started/purchased for yet. But first, a picture of the completed sweaters.

kimg0010
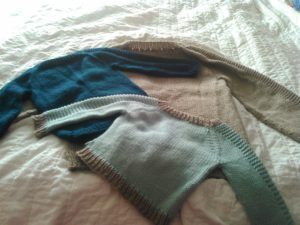
The large brown one is the one I made for my dad, the dark blue one is for my 4-year-old nephew, and the light blue one with brown edges is for Dragonfly.

Now, on to upcoming projects. Currently on my needles is a sweater for my 6-year-old nephew. I followed the same basic pattern, but after making three of these sweaters already, I was ready to make it a bit more interesting for myself so I bought two different shades of green yarn and found a basic fair isle pattern. I used this one from Very Pink Knits (she has my absolute favorite knitting tutorials!), which was actually designed as a cowl (a short, circular scarf). I wasn’t making a cowl, though; I was making a sweater. Luckily, the pattern repeat matched up with the number of stitches in the sweater size I was making, so it worked out beautifully. This sweater is done except for sleeves, which go pretty quickly.

Small Fry has a special relationship with my dad, so he wanted a sweater to match “Papa.” But again, I want things to be a bit interesting for me as the knitter – especially since I’m still knitting the same pattern. So I found a yarn that has a similar brown color, but it’s variegated with white. I’m excited to see how it turns out; I think it’s going to be really pretty handsome.

When I need a break from sweater knitting, I’ve been making square cloths out of cotton yarn. At home, we’ve been using them for washcloths (for baby faces and wiping down tables and counters, mostly). They also make wonderful cloth napkins, which I love. They’ll last a lot longer than flannel squares and be a lot more cherished as well. So far, I’ve made 5 or 6 of them. My goal is to get up to about 12.

I mentioned in last week’s Random 5 post that I didn’t think I’d be able to get more sweaters made for our nieces and the remaining nephew, but I think I want to try. Kid sweaters go so quickly that it should be doable. I definitely won’t have time to do those and more adult sweaters, though, so I’m going to keep my focus on the kid sweaters. (Adult sweaters take me about 4-6 weeks; a kid sweater can be done in as little as a week or two.) I like the idea of gifting handmade items, though, so perhaps I’ll continue adding cloths to my arsenal and give each person a stack of those along with a “regular” gift.

I think all of these projects should keep me plenty busy for the foreseeable future!

Blessings,

ladybug-signature-3 copy