Dollar Tree home decor sign


I decided recently that I wanted to redo our bathroom. Even though it’s fairly cliche, I decided on a beach theme. We live fairly near the coast (about 30 minutes away), and spend a reasonable amount of time looking at the ocean. (We haven’t been able to go actually down on the beach lately because of COVID restrictions.) I love to see the Pacific Ocean, and so I was okay doing a fairly unimaginative theme in there based on my likes.

The first thing I did was to cover the ugly yellow countertop with a blue shower curtain, which I taped down. Because we rent, I couldn’t do anything super permanent about the counter. I cut out a hole for the sink, which was a lot harder than I thought it would be. I also bought a blue toothbrush holder (we’d been using a kitchen glass before that) and a blue votive holder with “coastal breeze” scented candles. For the finishing touch, I bought a package of seashells from the Dollar Tree and spread them out on the counter.

And the piece de resistance (lol). I took a summertime sign from the Dollar Tree:

0BB82E94-4945-4F31-BB14-88DD616C670F 
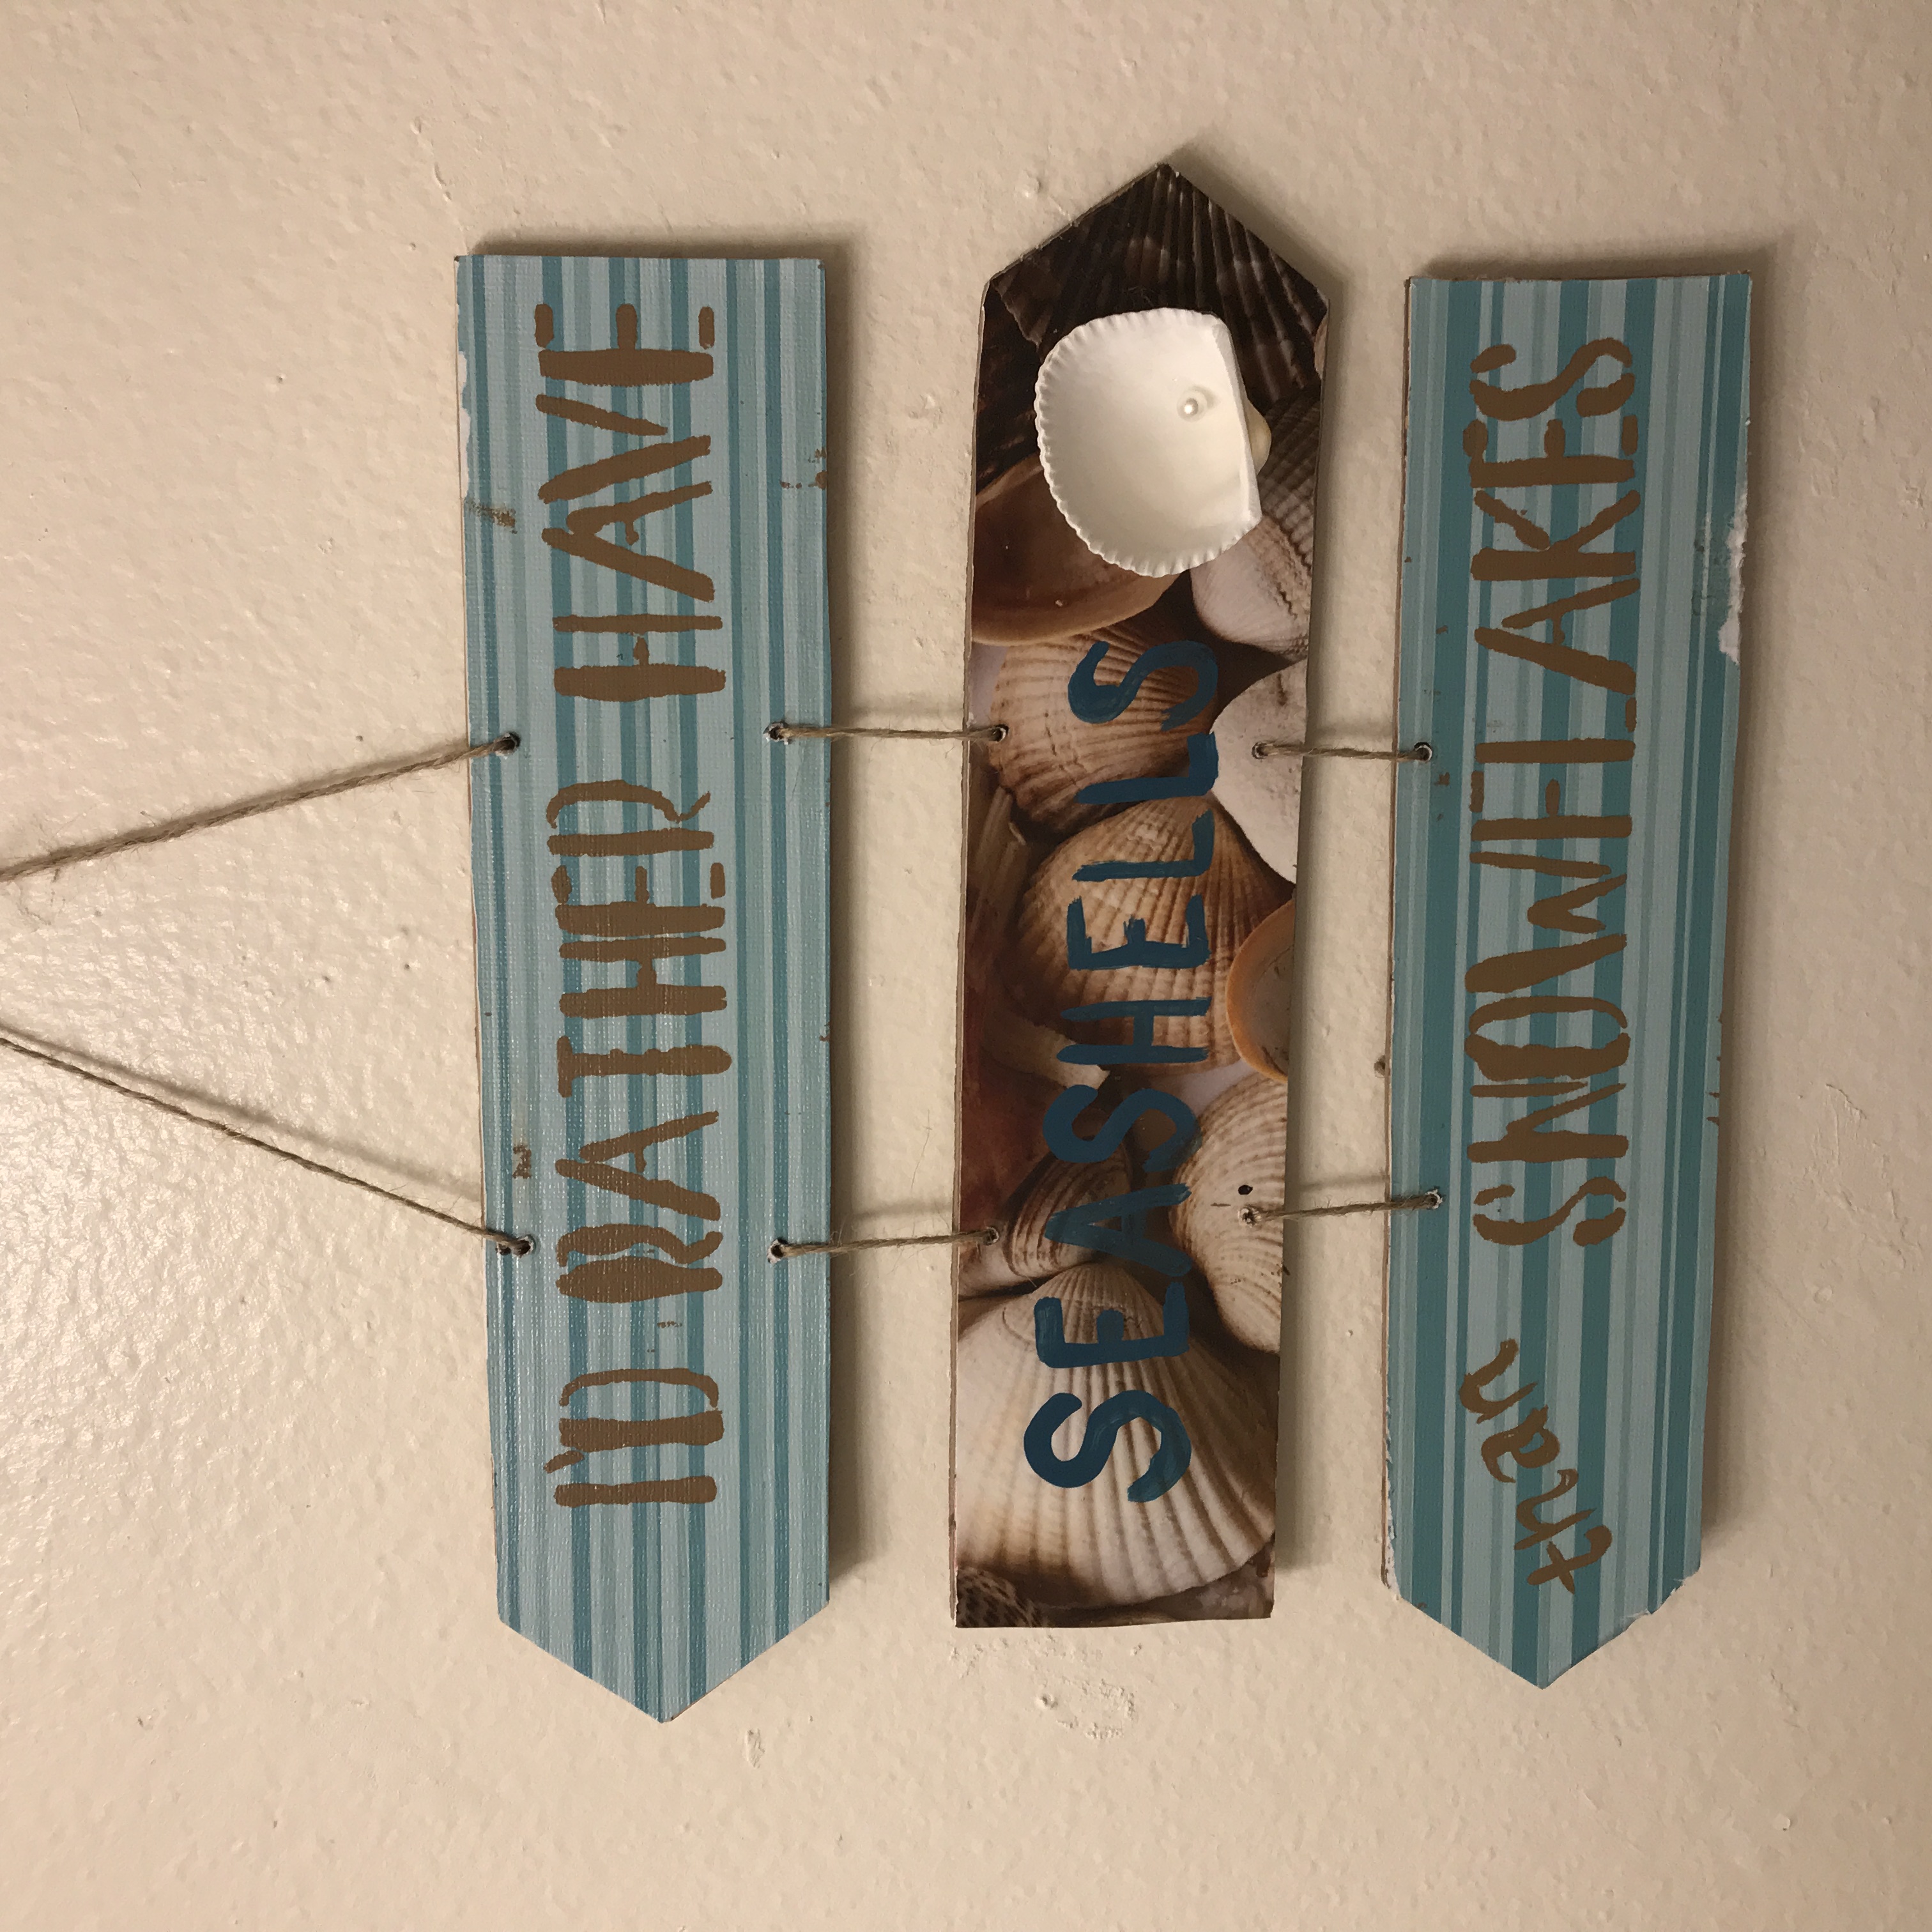
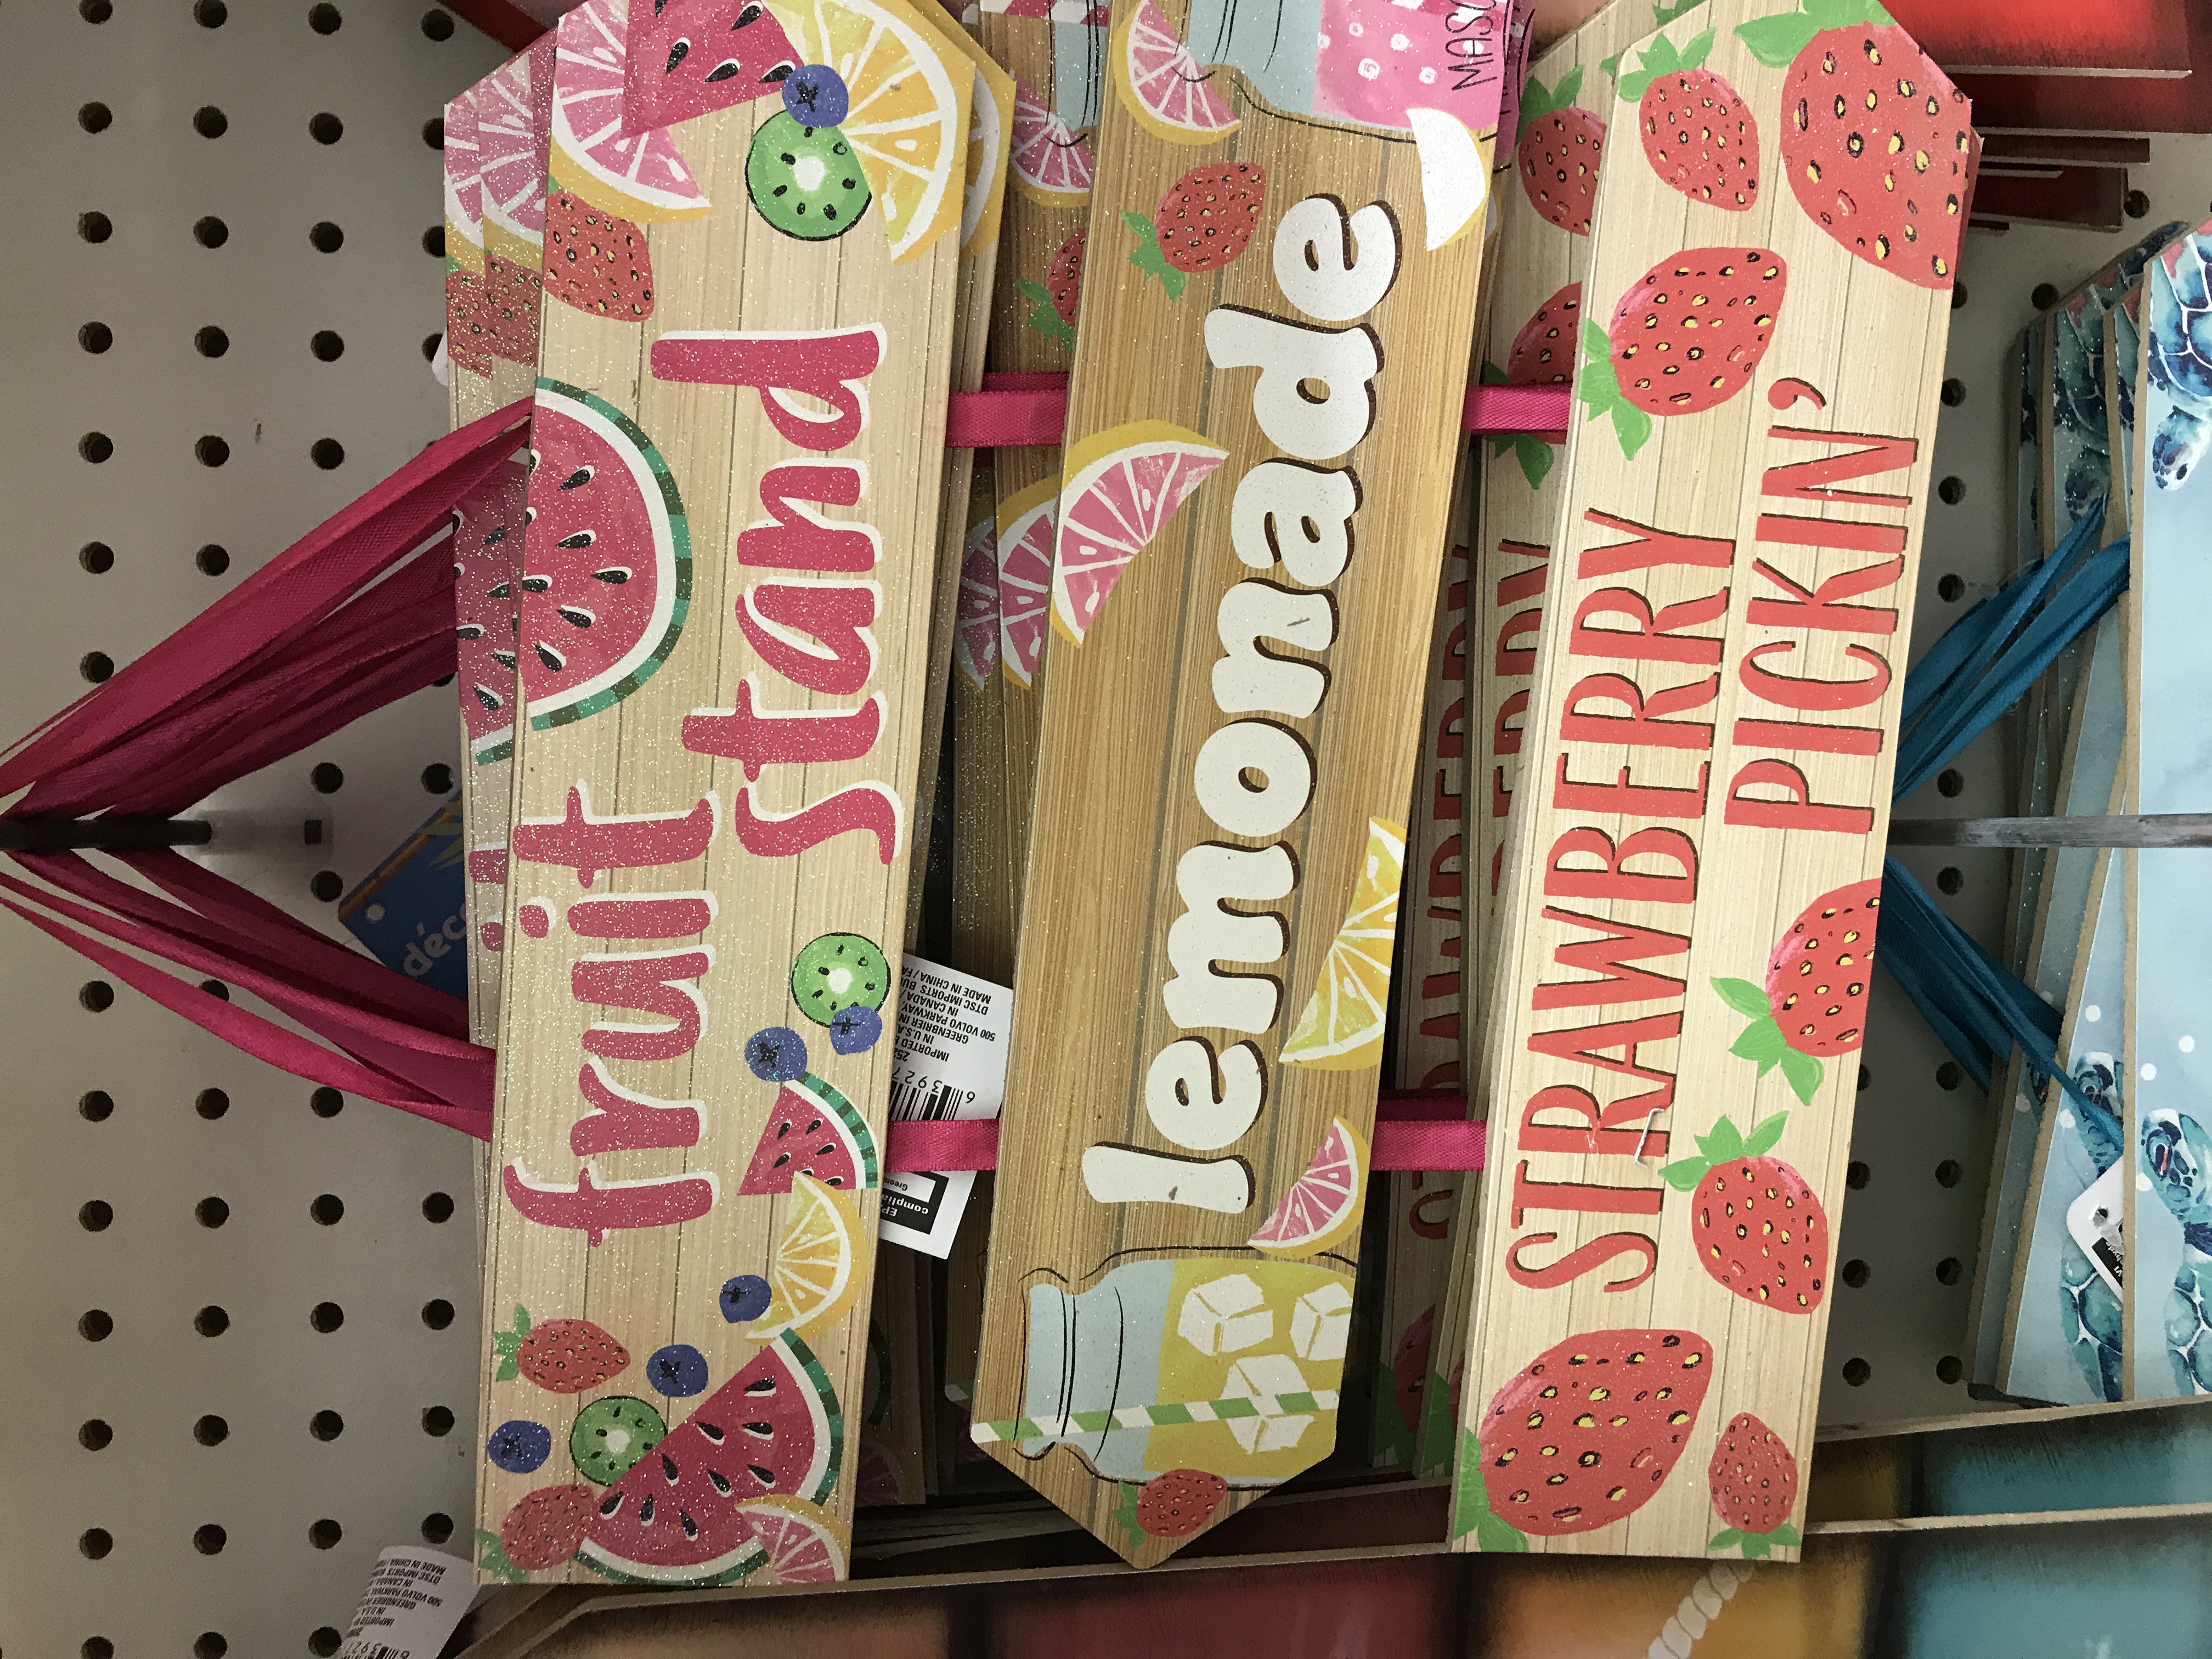
and turned it into this:

9B06711C-EA36-42CC-8ED2-7864AC4C72BE

How I did it:

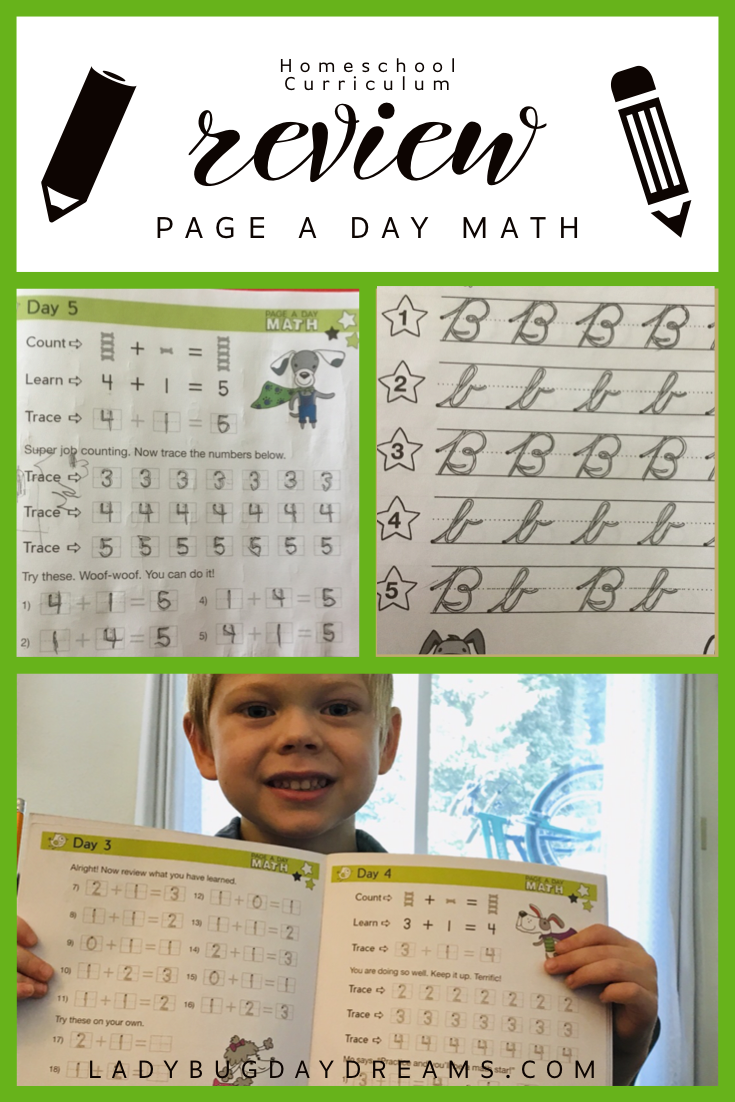
I bought two pieces of scrapbooking paper from JoAnn. I really love the seashell one! I googled “beach theme home decor phrases” and found one that I liked – I’d rather have seashells than snowflakes. I really love that it’s not just something basic like “Life’s a Beach” or something. And it went with my paper perfectly!

 I first dismantled the sign. I knew I wasn’t going to want to keep the bright pink ribbon holding it together, so I wasn’t concerned with keeping it nice. Then I took the arrow boards and traced them onto the back of the paper and cut it out. Using school glue (I was out of Mod Podge and forgot to buy more), I glued the paper onto the sign pieces, and then had trim the edges a little bit.

When the glue dried, I did the stenciled words on the blue tiles. This wasn’t as perfect as I’d hoped, but it turned out okay enough. I freehanded the word “than,” and decided that I liked that a lot better than what I’d stenciled, so I decided to just paint the “seashells” freehand on the center board instead of using my stencil. When all the words were painted and dry, I used my school glue to seal everything down. It worked really well! I love the firm, glossy feel it gave my sign.

After the glue dried, I had Ballet Boy drill new holes in the sign so that I could reattach them to one another. I threaded some twine into a yarn needle and then used it to tie the signs together in the right order. For the final flourish, I took one of my seashells and hot glued it to the seashell part of the sign. Ballet Boy had a small artificial pearl on hand, so he glued it into the shell.

Overall, I’m pretty happy with how the room turned out – especially the sign. 

Blessings,

ladybug-signature-3 copy

Pursuing Art

Disclaimer: I received a FREE copy of this product through the HOMESCHOOL REVIEW CREW in exchange for my honest review. I was not required to write a positive review, nor was I compensated in any other way.

I live in a family of artists, literally. My husband does graphic art and comics for a living, and our older boys are following closely in his footsteps by doing illustrations for some new stories we’re working on. The younger set also want to begin learning all about art, so this review from Artistic Pursuits Inc. was well received. Because I’m not much of a “traditional” artist (I knit and crochet, of course, but that’s not so helpful in something like this), I delegated the teaching of Art for Children, Building a Visual Vocabulary to Ballet Boy (16). He and Grasshopper (7) spent several days working on art class together.

F7DAEFF2-71F3-4C6E-9933-B8D353A45F9E

Art for Children, Building a Visual Vocabulary is part of an 8-book set, and each book has 18 lessons. The entire course is designed to take four years, giving your student a complete elementary-level art history education. Each book comes with a DVD and a Blu-Ray with video lessons to go along with the text lessons of the book. We don’t have a player for either of those, so my kids used the book alone and didn’t have any trouble with it (but again – artists).

6DF68DCF-2B33-48B5-9F66-AF30B1C3EDC1The book has a focus of building an understanding of the elements of art, rather than just looking at pictures. Students are given lessons in landscapes, still life, animals, figures, and portraits. Rather than going through in order, we ended up selecting lessons based on the supplies we had on hand. (Yes, they’re artists, but we work mostly with pencil and/or pen and ink in our family.) This meant that the kids dove in to the still life lessons.

From Ballet Boy:

2009465F-4A4C-4D5A-837F-6DB4154FB0E7To start off the still life lesson, they provide examples of images that capture the essence of what still life is supposed to do, which is to capture your imagination and fascinate you with everyday items. It casts normal household things in a new light that draws you in, holding your interest. For example, they show a van Gogh painting of a table covered with various sized, colored, and shaped dishes. They explain to you something that you don’t even notice that you’re noticing. That is the focal point, the thing the artist wants you to see. In this case, he wanted you to notice a chipped dish, and so all of the dishes on the table are arranged in such a way as to draw you into the painting. All of them are angled the exact way to catch the light just right to make it so that you focus on exactly what he wants you to, like a magician. The art of still life is not, therefore, in drawing what you see, but it is in capturing the attention of the viewer and making them see it through your eyes and feel it the exact way you want them to.

12121422-6B69-4DEB-8E5A-5E4812297032The way I taught this to my little brother was, as I was going over the information, he was really confused. I had to make him learn to take what he was looking at tell his own story through the items. I had to demonstrate to him how to make the art “make itself” – how he could feel something when he was drawing and let the drawing show him where he should draw the next line. You can never fully understand still life until you know how to put feeling into your lines. To do this, I had him draw a triangle. Then I made him draw another one. Then I had him throw in a square for good measure. As he saw what was happening, I could see his eyes light up. What was happening was a mosaic of shapes, all with that feeling in them – the feeling of confidence in what you were doing. Knowing where the next line needed to be. He filled a page, every square inch, with shapes and shadings. Then I made him look at what he’d drawn very carefully, for at least five minutes. When he was able to see the outline of a horse hidden away in those lines, I drew a line right down the middle of his page and on one side (his choice) I drew a tiny circle and colored it yellow. I said, “Everything on the yellow side is in the light. The other side is in the dark. Color it black.” He did, and he ended up with a very stylized, elegant horse drawn in a cubist style.

Since then, he’s been doing cubist drawings of everything, so I figured we’d take a stab at putting that feeling into another style of art. He and I worked together to create this still life of a NERF gun. He truly has begun pursuing the artist in himself!

C928175C-2CFE-4561-9626-9551DE0C8311

Other members of the Homeschool Review Crew have been working with a variety of books from Artistic Pursuits Inc. and reviewing them this week. Click through to learn more!

Learning Math, one page per day

Disclaimer: I received a FREE copy of this product through the HOMESCHOOL REVIEW CREW in exchange for my honest review. I was not required to write a positive review, nor was I compensated in any other way.

DCF33324-6AE0-445E-8BB2-9704B0B2A9CD

Basic math skills are so important for kids. Starting strong when they are young really makes a difference, especially if they’re excited to start learning. That’s why I was super interested in the idea of the PreK Math Starter Kit from Page a Day Math for Dragonfly (4 years old). We had (and are having) such great success with him reading that I wanted to take advantage of his eagerness to start learning more, and this kit was the perfect thing. Page a Day Math was so generous to us reviewers, however, and didn’t limit us to just one product for one child. In addition to the PreK Math Starter Kit (physical books), I was able to get downloadable copies of their other Math Starter Kits for Grasshopper (7 years old), and some of the handwriting books for him as well.

What is Page a Day Math?

Well, just like it sounds, these books are designed to help your kids with their math facts – with just one worksheet per day. Dragonfly, as mentioned before, has been using the PreK kit, and Grasshopper has been using the Multiplication Starter Kit (he’s pretty strong with his addition and subtraction facts already) and I Can Write in Cursive! My first cursive writing book.

How We Used It

B05E8DDE-CC2E-4A30-ADE7-509CA57F9AB1Page a Day Math Kits are designed to be a math fact supplementation system. It works with any math curriculum you’re already using, because its goal is simply to drill the math facts into kids so they internalize them over the long run. We received a physical set of the PreK kit and digital versions of the others. The first thing I did was to go over their website and look for the kits I wanted. Once they were purchased, I downloaded them to my computer (zip files) and then was able to extract them and print out the books I needed. I printed the pages on both sides so that it would feel more like a book, and then put the sheets into a folder for Grasshopper. Of course, none of this was necessary for the physical books that came in the mail.

Each day, I would have my kids do one page of math. It’s mostly tracing numbers and solving problems. In the PreK level (for ages 3-5), you start the day by teaching your child one math fact (0+1=1, for example). Go over it with them a couple of times, then they start tracing the numbers. You can see an example of what I mean in the photograph at the top of this post. There are three sets of numbers to trace (on the first day, it’s 0, 1, and 2; on the second day, 1, 2, and 3; third day, 2, 3, and 4; and so on). Then they trace math facts. As you continue through the books, more math facts are introduced. It’s very slow and methodical, so it’s never overwhelming for the child. At such a young age, it’s important to keep things very simple, and Page a Day Math does a great job with that – just one new problem each day. And then lots and lots of tracing. I love that there’s so much tracing involved here because it really helps kids to learn what each number looks like and how to write it. Such vital skills!

DFC761C1-E642-4409-A5BD-C08061167615The PreK Starter Kit consists of 10 books, and each one has 2 weeks (14 lessons) of instruction. It starts very simply, as I described above. As more problems are introduced, they are added into the “review” section of each lesson (the back side of the page), but the front side is primarily dedicated to the new addition fact. By the end of the tenth book, students are adding up to 10+10=20.

The Multiplication Starter Kit is very basic as well, starting at the very beginning of the concept (0 x 1 = 0). It mixes in addition and subtraction, too, so there’s no loss of skill while learning a new one. It is mostly tracing, just like the PreK kit, but the main difference is that students are expected to write in the answer themselves. (In the PreK kit, it’s traced all the way through.) The Multiplication Kit has 12 books with 14 lessons each, and by the end of the kit students are doing all standard times tables through the 12s.

The handwriting books are basically the same as the math books, but with letters instead of numbers. Grasshopper is pretty good at writing in print at this point, so he was excited to begin learning cursive. I started him with the basic book, which teaches the uppercase and lowercase cursive alphabet, one letter (two sides of the page) per day. While he’s enjoying this, I think he’ll be even more excited to work on it when two things happen: first, when he gets his cast off (next week!); and second, when the letters start connecting into words.

What We Think of it

Each day when I ask Dragonfly if he wants to do his “number tracing,” I get a very enthusiastic “Yes!!” He calls the main dog mascot, Mo, his “best friend.” It’s really cute. We keep a pencil in the box with all of the workbooks so it’s always ready to go. He insists that his pencil must be “needle sharp,” so sometimes we have to sharpen it for him before he begins, but it’s always in the box so we can find it. I have never once had even an iota of hesitation from him over it. And he is learning. I love watching him make the connection between just counting and reading/recognizing numbers. He gets excited when he realizes what he’s seeing, and it’s magical to watch. I know it sounds like he’s my first kid when I gush like this, but the fact is that it doesn’t matter that he’s the fourth – watching your child learn (every child), is the most gratifying thing in the world.

Grasshopper, on the other hand, is much like his oldest brother. He likes to learn, but he doesn’t like formal lessons. That said, he liked tracing the letters in the cursive lessons. I am convinced that if it wasn’t for his broken arm, he’d be more engaged in the lessons. Even though the cast is on his non-dominant arm, he still has to hold it at an awkward angle in order to hold the page in place.

Page a Day Math is a fantastic product, and I’m so glad we’ve had the opportunity to review it. It will definitely keep a prominent place in our lessons through the summer. Both boys will be using these workbooks for many, many more weeks.

Blessings,

ladybug-signature-3 copy


Over 50 members of the Homeschool Review Crew are reviewing Page a Day Math this week. Make sure to click through to read their thoughts, too.

Crochet Pig (free amigurumi pattern!)

86A24D9C-8760-4542-BAB6-3C6EEFF4EA16

It’s no secret that I’ve spent much of April and May making crochet toys (also known as “amigurumi”). After making so many, I got the idea stuck in my head that I wanted to make a pig. I loved the patterns from Jess Huff so much that I decided to base my pig off of her design. Hers all follow the same basic pattern, and they really are some of the cutest I’ve ever come across. The parts of the design that are my own I will give a pattern for here. Those that are hers, I will link to (it wouldn’t be right to republish her pattern).

The pig can be made two ways: like a “farm” pig, or more like a “teddy bear pig.” Everything but the legs (and arms, in the case of the teddy bear style) are the same for both. The main difference is the direction in which you sew on the head. Whichever way you choose, it’s sure to be a cherished gift!

Crochet Pig pattern

Supplies:
Worsted weight pink yarn (I used JoAnn brand Big Twist in the colors bubblegum and light rose)
Worsted weight brown yarn if you’re making the teddy bear style pig (I used Red Heart Super Saver in the color cafe latte)
Size E (3.5 mm) crochet hook
Yarn needle
Fiber Fill (I used Poly-fil)
12-15mm safety eyes

Key:
sc = single crochet
dc = double crochet
inc = increase (2 sc into one stitch)
blo = back loop only (single crochet using only the back loop of the stitch, not both loops like normal)
flo = front loop only (single crochet using only the front loop of the stitch, not both loops like normal)
dec = decrease (one sc over two stitches – I use the invisible decrease)
R[number] = round

Note:
This pig, in either style, is made in continuous rounds (a spiral). In order to know where the beginning of each round is, you can count very carefully, or you can use a stitch marker to help you keep your place. I don’t recommend trying to find your spot based on seeing the increase pattern, because you can’t really see it due to the increases being shifted slightly from one round to the next. I used to just count really carefully, but now I use a stitch marker when I’m making amigurumi. It’s much less stressful to use the marker!

90289AE1-80D1-4AC0-9955-4EC836CAE3CDSnout and Head

R1: 6 sc in magic ring
R2: inc around (12)
R3: *sc, inc* (18)
R4: sc, inc, *sc 2, inc* 5 times, sc (24)
R5: in blo, sc around (24)
R6-9: sc (24)
R10: in flo, *sc 3, inc* (30)
R11: sc 2, inc, *sc 4, inc* 5 times, sc 2 (36)
R12: *sc 5, inc* (42)
R13: sc 3, inc, *sc 6, inc* 5 times, sc 3 (48)
R14: *sc 7, inc* (54)
R15: sc 4, inc, *sc 8, inc* 5 times, sc 4 (60)
R16-24: sc around (60)
R25: sc 4, dec, *sc8, dec* 5 times, sc 4 (54)
R26: *sc 7, dec* (48)
R27: sc 3, dec, *sc 6, dec* 5 times, sc 3 (42)
R28: *sc 5, dec* (36)
R29: sc 2, dec, *sc 4, dec* 5 times, sc 2 (30)

At this point, stuff head ¾ full and shape eye sockets (this post shows you how; just scroll down to the right spot on the page). Insert safety eyes (or embroider eyes). 

R30: *sc 3, dec* (24)
R31: sc, dec, *sc 2, dec* 5 times, sc (18)
R32: *sc, dec* (12)

Finish stuffing

R33: decrease around (6) 

Finish with ultimate finish.

C85C37C1-C9D7-442D-A8F3-07F576C14765Ears (make 2)

R1: 6 sc in magic ring
R2: sc, inc (9)
R3: sc (9)
R4: sc, inc, *sc 2, inc* twice, sc (12)
R5: *sc 3, inc* (15)
R6: sc 2, inc, *sc 4, inc* twice, sc 2 (18)
R7: *sc 5, inc* (21)
R8: sc 3, inc *sc 6, inc* twice, sc 3 (24)
R9-11: sc (24)
R12: inc, sc 23 (25)
R13: sc, dec over 3 stitches, *sc 2, dec over 3* 4 times, sc (15)
R14-15: sc (15)

7A435114-A520-434C-B2D7-69B76D60B0B5

To make an invisible decrease over three stitches instead of two, simply insert your hook into the front loops only of three stitches, yarn over, pull through, yarn over, and finish the stitch.

Fasten off. Flatten and slip stitch closed (do not stuff). Sew to head.

Body

Any of the bodies from Jess Huff (except the giraffe) will do. Although, I do recommend making the neck (the later rows of the pattern) shorter than written if you’re making the farm style pig. I didn’t do this, and I wish I had. If I make this again, I’ll likely stop after round 27.

41EB5B02-3B75-41C0-93FF-339AECC296E4Arms and Legs (teddy bear style)

Again, any of the patterns from Jess Huff will do; they’re all the same.


D5FDCD0E-B254-4A02-8872-A0BF77BD1EFELegs (farm style) (make 4)

R1: 6sc in magic ring
R2: inc around (12)
R3: *sc, inc* (18)
R4: sc, inc, *sc 2, inc* 5 times, sc (24)
R5-9: sc around (24)
R10: sc, dec, *sc 2, dec* 5 times, sc (18)

Fasten off, leaving a long tail for sewing onto body.

Tail

Ch 29
dc into third ch from hook
dc twice into each chain all the way down. Fasten off, leaving long tail to sew onto body.

The tail can be made longer or shorter according to your preference (just chain more or fewer chains).

When all the pieces are made, stuff them and sew them all together.

8B01E6C3-5407-40A8-A7D0-9EDCAA5CF11F

I loved designing and making these pigs, and I hope someone out there will make one and love it too. If you do, would you let me know?

Blessings,

ladybug-signature-3 copy

Picture of the Week: Auntie selfies

We had Will’s sister and her kids over to our house recently (I’m so glad our county is opening up in the “early aftermath” of COVID!). Auntie has a tradition of taking a selfie with some of the kids (at least Bumblebee, though Dragonfly got in on the fun this time) every time she’s here; here’s the one from this week.

7AF7F210-BD9B-424E-BE57-657DD0B22CD4

Blessings,

ladybug-signature-3 copy

Mastering Essential Math Skills (review)

Disclaimer: I received a FREE copy of this product through the HOMESCHOOL REVIEW CREW in exchange for my honest review. I was not required to write a positive review, nor was I compensated in any other way.

2E98B93B-C555-456A-958F-6A3FD3EE12F1

Math… You either love it or hate it, am I right? Personally, I rather like math. Perhaps not as much now as when I was a kid, but I definitely don’t hate it. My kids, on the other hand… even the ones who claim they love it aren’t very willing to do their math classes! And with the teenagers, it’s always been a struggle. In fact, they have always fought me on basic things like learning their times tables. This is why I requested a copy of Mastering Essential Math Skills Book 2 Middle Grades/High School from Math Essentials. We’ve had great experiences with Math Essentials in the past (I’ve done reviews of No-Nonsense Algebra and Math Refresher for Adults), so I knew this would be another fantastic choice for my family.

Mastering Essential Math Skills is a 158-page, softcover book, and like its name implies, it goes over all the most basic essential skills of mathematics. There are chapters on Whole Numbers (adding, subtracting, multiplying, and dividing), Fractions, Decimals, Percent, Geometry, Integers, Charts and Graphs, and Word Problems. It concludes with a final review (could be used as a test if desired) and the answer key, with the final ten pages being a resource center. This includes things like a glossary of terms, reference sheet of math symbols, times table, list of prime numbers, squares and square roots, and fraction-decimal equivalents. The book comes with free access to a plethora of instructional videos taught by author Richard W. Fisher. Everything covered in the book has a corresponding video lesson, which is great if you as the parent/teacher are unfamiliar with a concept – you don’t have to be able to teach it! For the more basic lessons, the “helpful hints” on each page is probably enough, though. For example, on the subtraction page the “helpful hints” are:

  1. Line up the numbers on the right side
  2. Subtract the ones first
  3. Regroup when necessary

For most of us (and our older children, whom this book is geared toward), this is enough information to get through the lesson. On the off chance it’s not, though, you can refer to the appropriate video lesson.

351D6FC6-0062-431D-998C-E7FCA04A04BEMy teens, as I mentioned before, aren’t as quick as we’d like them to be on their times tables. They know them, but they have to think about anything above 5s. So I had them dive into those lessons first (we skipped addition and subtraction). The book allows a little bit of space for working the problems, as well as a column for recording answers, so I had Ballet Boy work right in the book. The lessons took him under 20 minutes, and while he was quite rusty at first (a reasonable number of wrong answers), just a little bit of practice had him up to speed easily.

Mastering Essential Math Skills Book Two has been just as great an asset to us as I knew it would be. I will continue to have the kids work through the book on a regular basis; it is going to be really great for reinforcing the math skills they’ve learned in the past as they look to move into more advanced math programs in the future.

The Homeschool Review Crew is reviewing three books from Math Essentials this week. In fact, it’s the two books I’ve previously reviewed (Math Refresher for Adults and No-Nonsense Algebra) and this one. Make sure to click through to learn more about those books.

Blessings,

ladybug-signature-3 copy

Fermenting Food (Fermentools review)

Disclaimer: I received a FREE copy of this product through the HOMESCHOOL REVIEW CREW in exchange for my honest review. I was not required to write a positive review, nor was I compensated in any other way.

C05F4AA1-565F-4435-B543-83F1633DBEF3

I don’t have much experience with fermented foods, but I’ve read that they’re very good for you (due to all the probiotics produced during the fermentation process). So I was curious about the idea of using the Starter Kit from Fermentools to give fermenting a try.

The Fermentools Starter Kit was designed to be able to turn any wide-mouth Mason jar into a fermenting vessel. You provide the jar, food, and  distilled water; Fermentools provides the rest. The kit includes:

  • a glass weight specifically designed to fit inside a wide-mouthed jar
  • a stainless steel lid
  • an airlock
  • two rubber stoppers (one with a hole and one solid)
  • a rubber canning stopper
  • a 1-lb bag of Himalayan powdered salt
  • an instruction guide, which includes a recipe for basic saurkraut

4A57384D-776A-45FF-AC6B-E2524C434AE9When I first opened my kit and read the instruction guide, I didn’t fully understand all the terminology used (“airlock,” for instance), so I found a couple of helpful videos on YouTube to get me started. Then it was time to go to the store, where I bought some wide-mouth jars (I don’t can as much as I wish I did, so I only had a single regular-mouth jar on hand) and asparagus. I’d read that asparagus ferments really well, and I was able to get a fantastic deal on it at the store. I got home and started it right away. From what I’d read, you don’t need to add other stuff to the ferment if you don’t want to, so I opted to try just a very, very basic recipe. I prepared a 2% brine solution using the salt provided with the Fermentools kit and distilled water, poured it over my asparagus, added the glass weight to the top of the jar (this is to keep the food below the level of the brine for proper fermenting), lidded my jar, and waited.

BEB1F8DF-78C7-4355-A707-C6BC07F46EECTo prepare the brine, all you need is non-chlorinated water (so no tap water) and the salt included in the kit. The salt is super finely ground so that it will dissolve in cold water. On the bag of salt, there’s a table to help you figure out the proper solution you need/want. On one side of the bag, it tells the number of grams you need based on the amount of water you’re using. On the other side, it gives an approximation gram-to-tablespoon ratio, so it’s more user-friendly for an average home cook.

Fast forward one week, and I took my jar out of the cabinet where I’d stashed it. (You’re supposed to keep the fermenting jar somewhere dark.) I was surprised to see that things were a bit bigger than they’d started. In fact, there was a bit of liquid coming up out of the airlock, which surprised me. It probably shouldn’t have, because upon rereading the instruction pamphlet, it says to leave extra space for this in your jar. But that was okay. It didn’t leave a mess in the cupboard or anything. I popped open the jar and gave each of my kids a piece of asparagus. I expected them all to love it because we love pickles in our house. And the teenagers did like it okay. But the younger crowd didn’t like it at all. I liked it okay, but it wasn’t my favorite thing ever.

I didn’t want this review to be a fizzle, so I tried my hand at fermented cucumbers. You know, because my kids like pickles. But because of quarantine, I didn’t have a lot of “off the wall” ingredients on hand (like fresh dill), so I again went with a very basic recipe: thickly sliced cucumbers and brine. I followed the same steps as I had for the asparagus, but this time I used a 3.5% brine solution. A few days later, Grasshopper and I tried the cucumbers. He didn’t like those, either. And frankly, I didn’t love them either.

So, thus far, our fermenting journey hasn’t been super successful. I’m not at a point where I’m considering giving up yet, but I probably will take a break until I can get my hands on some of those more unusual ingredients. I really do want to have a fermenting success story, but that hasn’t happened yet.

I do know, however, that some of my fellow Homeschool Review Crew members have done great things with the Fermentools Starter Kit, so go to the blog there and read some of those reviews. I know I plan to, just to see where I went wrong!

Blessings,

ladybug-signature-3 copy

Beautiful Handwriting ebook (review)

Disclaimer: I received a FREE copy of this product through the HOMESCHOOL REVIEW CREW in exchange for my honest review. I was not required to write a positive review, nor was I compensated in any other way.

1A60FA82-3B6A-47DB-ADDF-70855F8B39C7

Many people dislike their own handwriting. I am not one of those people. But I was interested in reviewing the Perfect Reading, Beautiful Handwriting ebook from Everyday Education, LLC anyway because it promises to be able to teach you how to write in italics. The idea of that really appealed to me, and that was my intention of how to use the book. But then when I started working on it, a couple of my kids (Grasshopper, age 7, and Scorpion, age 13) showed some interest too, so we went back to the beginning and worked on it together. And that made it even better!

Janice Campbell, the owner of Everyday Education, used a book when her first child was young that taught reading and handwriting at the same time. She loved its approach, and was excited to use it again when she had another child ready for that teaching. Imagine her dismay when the book was out of print! Many of us would have given up at that, perhaps feeling sorry for ourselves for a few days, but we would have eventually moved on and found another curriculum. Janice didn’t do that. She tracked down the author, Caroline Joy Adams, of her beloved book and convinced her to republish the book with Janice’s company. This way, Janice was sure to have the book in print for a very long time, for any homeschooling families who might want to use it.

55FF7DC5-F0BE-4953-B071-56DBAE28E15DThe book has six chapters, and the first five are primarily teaching a child to read (although the writing is intimately involved with that process). Chapter 1 is an overview for the teacher. Chapter 2 teaches the alphabet. Chapter 3 is basic English sounds and blends and words that use them. (For example, “short a,” “short e,” “sh, th blends,” “compound words,” etc). Chapter 4 is similar to chapter 3, but with different sounds (long vowels, more complicated blends, etc). Chapter 5 are the most complicated parts of English: silent letters, endings, contractions, and more). Chapter 6 is where the author suggests starting if your main goal is to simply improve your own handwriting. This is the chapter for people who already know how to read and are learning more beautiful handwriting techniques. This is where I would have spent most of my time except that, as I mentioned before, my kids joined me. Even if it had just been Scorpion and me, we would have worked there, but Grasshopper doesn’t read very strongly yet, so we started at the beginning with all of us.

The PDF ebook is printable, and because of the nature of the book (lots of practice pages), that would be a great approach for a lot of families. For us, I just set up my iPad on the table to the right page, and we all worked onto regular paper instead. When you’re learning the alphabet (which I actually recommend, even if you’re mostly interested in the italics portion of the book), the instruction/practice pages teach you the letter, an example of a word with that sound, and how to write that letter, stroke by stroke. It’s that last part that makes me recommend going through the alphabet pages even if you’re already a proficient reader. Most of these were “normal,” but a couple of them were different from the way we (my family) normally write. I’m thinking specifically the lowercase e, the capital M, and the capital Q.

I have really enjoyed doing these handwriting lessons with my boys. It gives us something to do together during the school day, and those types of things can be few and far between when you’re working with as wide an age range as I am. And for me to be able to join them was really special too. Because Grasshopper was joining us, we moved slower than we otherwise would have, but that was okay too. I fully intend to keep going with these lessons, and we’ll make it through the entire book soon enough.

Don’t forget to read more reviews from the Homeschool Review Crew.

Blessings,

ladybug-signature-3 copy