2021 Blue Ribbon Awards

Each year, the Homeschool Review Crew members vote on their favorite products of the year. Here are my choices, and the list of winners. Links take you to my reviews of the product.

Image by Peter Lomas from Pixabay

Favorite Literature Reading Resource: The Reading Game
Winner: The Reading Game

Favorite Literature Resource: Progeny Press
Winner: Progeny Press

Favorite Vocabulary Resource: (no vote)
Winner: The Critical Thinking Co. Vocabulary Virtuoso

Favorite Language Arts Resource: Words Rock!
Winner: Words Rock!

Favorite History/Social Studies Resource: Figures in Motion
Winner: Home School in the Woods

Favorite Science Resource: The Critical Thinking Co Science Mind Benders
Winner: Greg Landry’s Homeschool Science

Favorite Math Curriculum: CTC Math
Winner: CTC Math

Favorite Math Supplement: Triad Math
Winner: MathRider

Favorite Bible Resource: Bible Breakdowns
Winner: Teach Sunday School Easter Escape Room

Favorite Children’s Bible Resource: Tommy Nelson Roar Like a Lion
Winner: Roar Like a Lion

Favorite Fine Arts Resource: (no vote)
Winner: ARTistic Pursuits

Favorite Martial Arts Resource: Practice Monkeys
Winner: Practice Monkeys

Favorite Elective Resource: The Fallacy Detective
Winner: The Fallacy Detective

Favorite Book/Book series: Buck Academy
Winner: YWAM Publishing

Favorite College Prep Resource: ACT Mom
Winner: ACT Mom

Favorite Helpful Tool or Resource: Fermentools
Winner: Fermentools

Best Resource I Didn’t Know I Needed: ACT Mom
Winner: WORLD Watch

Favorite Preschool Product: Reading Eggs
Winner: Buck Academy Baby Buck

Favorite Elementary Resource: Words Rock!
Winner: YWAM Publishing

Favorite Middle School Product: (no vote)
Winner: Teaching Textbooks

Favorite High School Product: Triad Math
Winner: CTC Math

Favorite Mom/Teacher Product: Fermentools
Winner: The HomeScholar

Kids Choice, Grasshopper: Words Rock!
Kids Choice, Dragonfly: Reading Eggs
Kids Choice, Bumblebee: Reading Eggs
Winner: Reading Eggs

Teen Choice, Scorpion: Practice Monkeys
Teen Choice, Ballet Boy: Triad Math
Winner: LightSail Education

All Around Favorite: Practice Monkeys
Winner: Creating a Masterpiece

What has been your favorite homeschool product you used this year?

Blessings,

He Man Birthday Party

When Dragonfly turned 6 last weekend, he decided he wanted a He Man and the Masters of the Universe themed party. It was a lot harder to find decorations for that theme than it was for Cocomelon, so we ended up making a lot of them ourselves using the Cocomelon party kit we’d purchased as a guide. 

I mostly chose images from online since I wasn’t posting them publicly; I knew that within our own home there wouldn’t be any issues with copyright. I chose 9 images and used them over and over for the different decorations. Invitations were made easily using a template on Adobe Spark (similar to Canva).

Once those were mailed, it was time for the actual decorations. First, to make the Happy Birthday bunting just inside our front door, I popped each of the images into Photoshop and added one letter to each picture. Then I printed them out, roughly 5×7 (so I was able to get 2 per page). Using the Cocomelon bunting as a template, I cut the images out into a fun shape and then attached them using a blue ribbon.

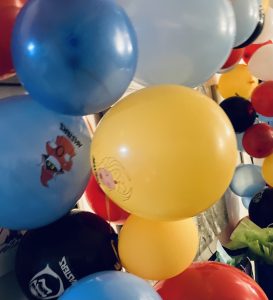
We were able to find a large banner and a package of themed balloons on Amazon. The day of the party, we blew up the balloons and Ballet Boy tied them all together using a bit of ribbon, and we hung the balloon arch on the wall. We supplemented the themed balloons with some plain ones from Walmart. The banner we were able to get was 9 feet tall and 20 inches wide, so it didn’t fit onto the same wall as the Cocomelon banner had. The big kids hung it in the dining room, right over the table where the snacks and cakes were. That ended up being pretty perfect.

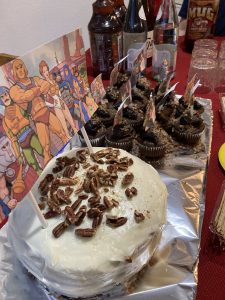
I made two kinds of cakes. I did a carrot cake from scratch and chocolate cupcakes using a box mix. When both were baked, cooled, and frosted, I added toppers to each one. I couldn’t find the toothpicks at Walmart, so I used straws to stick them into the cakes. For the big cake, I printed out one of the pictures I mentioned before, but this time without any letters on it.

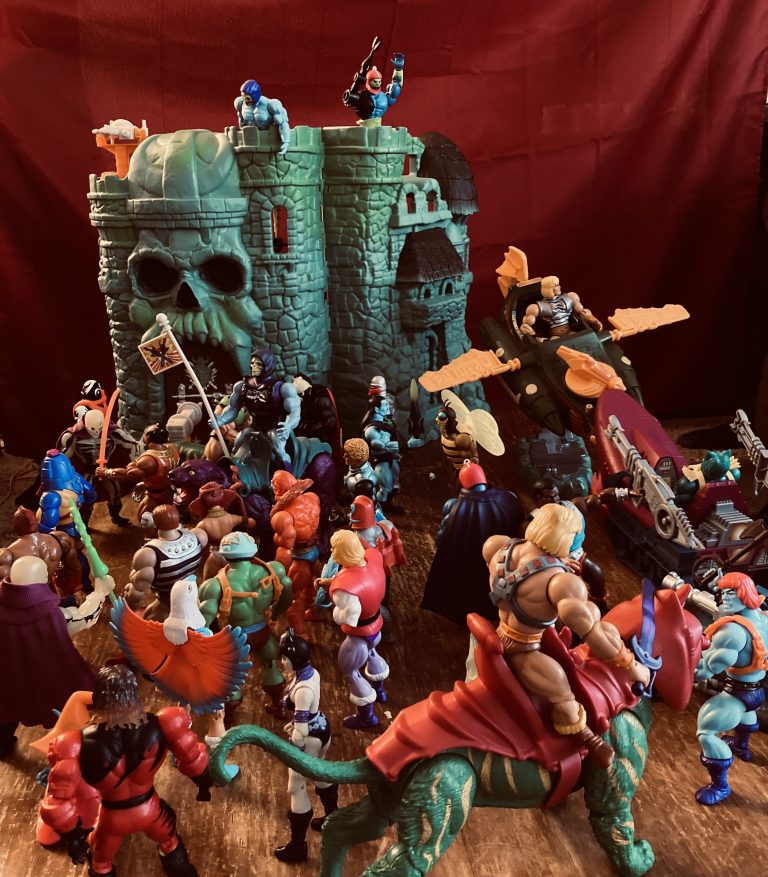
Our final bit of decor was bringing out all of the kids’ He Man toys. They have loads of them; Will was really into He Man when he was a kid, so when the toys started being reissued he was thrilled and has been buying our kids one or two a month for over a year. So yeah… their collection is huge. After the photo ops were done, though, the kids decided to take the toys back into their room and play with their cousins.

Overall, the party was a huge success. It’s really fun to prepare and host these themed parties. I’m excited to do it all again next year! (We’re all out of birthdays in our family until next July.)

Blessings,

Practice Monkeys for Self-Defense

Disclosure: I received this complimentary product through the Homeschool Review Crew.

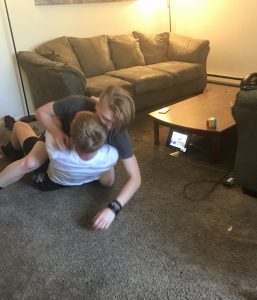
Several months ago, my husband took a Brazilian Jiu-Jitsu class. Without telling anyone. Then when he came home, he challenged Ballet Boy to a roughhousing match (they horse around all the time – have since Ballet Boy was small), and took him out. This was quite a surprise for Ballet Boy because as he’s grown, he’s gotten closer and closer to being able to win in these matches against his dad, but after the secret self-defense class, Dad gained the upper hand once and for all.

Then we found out the Practice Monkeys review. Ballet Boy was quite interested in taking their self-defense class. That incident with Dad was a motivator, but he likes being physical in general, so he would have been interested in the class even if it hadn’t happened.

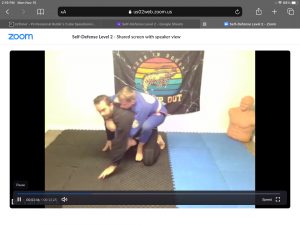
The self defense class (for ages 5 and up) through Practice Monkeys teaches Brazilian Jiu-Jitsu (BJJ), and when you sign up the first thing you have to do is schedule an initial assessment. This, and all the classes, are live sessions taught via Zoom. The assessment is a private meeting with the teacher of the class, Dr. Peter van Kleeck. Once you’ve had the initial assessment to determine which level your child needs to start with, he will add the proper lesson to your dashboard. Classes are taught live with Dr. van Kleeck and his son, Titus, four days a week. Each class lasts 15 minutes and students are encouraged to practice an additional 15 minutes each day on their own. Each student needs a partner for this class (unlike the music classes that Practice Monkeys offers), so Scorpion took the class with Ballet Boy. Our initial plan had been to have Grasshopper and Dragonfly also take the class, but after just a lesson or two they decided they weren’t interested. It is helpful to have the students be of similar size for the class.

After our initial assessment, the kids were put into Level I. This wasn’t a surprise as they hadn’t had any sort of training in this art before. The classes were at the same time every day (Monday through Thursday), so I set an alarm on my phone to help us remember to sign in for the live classes. To access the Zoom call, you have to first sign into the Practice Monkeys website. From there, you can find the Zoom link on your dashboard. Because of the nature of Zoom, the daily classes aren’t private. All of the students at your level in your course are there together, but you don’t see them; on your end, you only see Dr. van Kleeck and Titus. They teach the material and then have your students practice while they watch. It was pretty rewarding on my end to hear him praise my kids during the lessons (“Yes! Good job, Robertsons!”), and I also appreciated hearing him talk to the other families taking the course. It really showed that he was watching all the kids and making sure they got the material.

What if you miss a live class? While the live classes are better because of the feedback you get from Dr. van Kleeck, you don’t miss out if you can’t make it. All of the Zoom calls are recorded and at the end of the week added to your “treehouse.” This is where you go to watch past lessons, either for extra review or because you’ve missed one (or more) live class. I do wish that these classes were uploaded later on the same day they were recorded, but I understand why that might not be feasible for the van Kleecks.

After you’ve been in the class for a while, you’ll be invited to take an assessment in order to move up a level. In the self-defense class, this was an individual Zoom call with Dr. van Kleeck. You have to schedule them through your account in the Practice Monkeys website, and then you access the Zoom call the same way you do a live class at the right time. The assessments take 25 minutes. To determine whether my sons were ready to move from level 1 to level 2, they were given a spoken instruction and Dr. van Kleeck watched to see if they succeeded based solely on the name of the move. They did, and by the time of their next class, our account had been updated to allow them into the level 2 class instead of the level 1 class (same thing, just 15 minutes later).

Ballet Boy and Scorpion have been having a blast learning self-defense with Practice Monkeys! We haven’t made it to every live class, but they do their best to make up the classes on their own when we miss one. The classes take place in the middle of the afternoon in our time zone, so it’s not always feasible to make it live (sometimes Ballet Boy is working, for instance). There have also been times when Zoom was acting up and the kids could see the class but couldn’t hear the instructions, so to avoid the inevitable frustration that would cause they opted to do those classes later as well.

Practice Monkeys’ main emphasis is instrument instruction, so if you or your child have ever wanted to learn violin, cello, piano, or guitar, then you should absolutely give them a chance. Practice Monkeys is priced per instrument (or BJJ) for the entire family. So if you have two guitar students, they can take the class together (at the same time). If you have a piano student and a cello student, though, you would need to purchase 2 subscriptions for those lessons.

I can’t recommend Practice Monkeys enough; Ballet Boy is even interested in continuing his BJJ lessons beyond our review subscription (that’s something he’ll be talking to Dad about!). Make sure to head over to the Homeschool Review Crew site and learn more about all the different types of lessons, though.

Before I finish up, the biggest question still remains: Can either of the kids “take out” Dad now?

Not quite. But with the skills they’ve learned, they don’t go down quite so easily.

Blessings,

Math Practice with I Know It

Disclosure: I received this complimentary product through the Homeschool Review Crew.

Getting enough math practice done in the elementary years is vital for future math success. I Know It is a supplemental curriculum that can help your children with just that – practicing all sorts of different age-appropriate skills in a no/low-stress environment. We have been using I Know It with Dragonfly (age 6, kindergarten) for the past few weeks.

I Know It is a supplemental math practice website for kids in grades K-5. Each child will need their own account, but they all fall under just one log in, which is nice because you can have an account for each of your children without the need to remember several usernames and passwords. When you get logged in, you’ll get a pop up that shows each of your children with individual icons, and you just need to choose the child who’s working at the moment. Once you select the right icon, it will load up the proper lessons so your child can get started with their math practice right away.

As I mentioned, I’ve been working on I Know It with Dragonfly for the past few weeks. Since he’s in kindergarten, that’s the level we’ve been working at and that’s the level I’ll be discussing in today’s review.

I Know It provides lots of opportunity for math practice, but it’s not a teaching program. You won’t be able to use it on its own (unless you’re ready to teach the concepts and then use the program as an online “worksheet”), but it makes a great supplement for any other math curriculum. Because Dragonfly is just in K, we actually have been using it exclusively, but he already knows the basic concepts being practiced in the kindergarten lessons. We’ve just been having him get lots of extra practice to get him ready for more advanced things in the coming weeks and months.

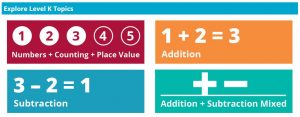
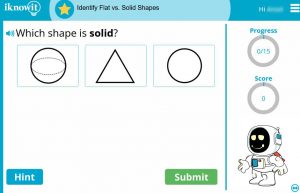
The kindergarten level has 12 topics, and each topic has between 5 and 10 different lessons. The lessons each have 15 questions and they’re all related, based on what topic and lesson within the topic you’ve chosen. The questions are reasonably easy; my kindergartner didn’t have any problems getting 100% on every lesson he did (except one at the beginning, where he missed a single question). With each correct answer, your student gets an approving message (“Yes!” “Great!” etc) and the robot mascot does a little dance. If your student gets a wrong answer, there’s no robot dance or words of affirmation. Instead, the program pops up a window to explain the correct answer.

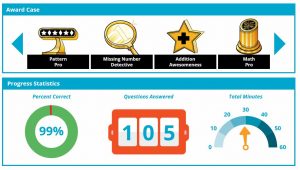
When the lesson is complete, depending on the child’s score they’re given a “trophy.” These trophies collect in their progress dashboard. I found that Dragonfly really got off on earning trophies more than he did the robot dances. At the end of every lesson, he’s excited to learn what award he earned that day. Today, he was an “Awesome Adder.” He enjoys going back and looking at his past trophies, too.

If you’re using the program with an older child, you can show them how to log in and then send them on their way. It’s a very intuitive program to use – easy enough for a child. There’s also a way to assign specific lessons, but since I have been working right along with Dragonfly I didn’t explore that aspect of the program.

Are you a co-op parent or public school teacher? You can use I Know It in those situations, too. They have special pricing for teachers vs families vs entire school districts. So I Know It really can be used in any situation.

Overall, we’ve had a lot of fun firming up Dragonfly’s math skills using I Know It for daily math practice. I’m very happy with his progress in the program, and he enjoys doing his “robot math” each day, too.

Please click through to find out what my fellow Homeschool Review Crew colleagues thought of this program.

Blessings,

Happy Birthday, Dragonfly!

Wishing a very happy 6th birthday to my Friday the 13th baby today! (Yes, I know today is Saturday, but the year he was born, it was a Friday the 13th.)

Photo from September when we got to “meet” a local alpaca and the kids got to pet and hug it.

We’ll be having a He-Man and the Masters of the Universe themed party tomorrow; look for a post with photos on Thursday next week.

Crochet Cocomelon Blanket

When we were planning Bumblebee’s Cocomelon birthday party, one of the options for large banners really caught my eye. We chose a different banner for the party, but I couldn’t get the other one out of my head. I knew it would be pretty easy to create a crocheted blanket inspired by that banner, so I set out to do just that.

I started by making a rainbow chevron blanket. The chevron, or zigzag, blanket is a pattern nearly as old as crochet itself (the way I understand it), and almost every designer has their own take on it. The one I’ve always had the most success with is the version by Jayda in Stitches on YouTube. I followed her pattern exactly, except that I changed the colors and added 2 repeats to what she does on her tutorial. I wanted a decent size, so I chose to do 16 rows of each color. Because it’s a double-crochet blanket, that gave me about 8 inches per color, and my blanket ended up being about 40×48 – perfect for a toddler! My favorite border for a chevron blanket is a simple, one-row single crochet border. I love the design of the chevrons so much that I don’t want my border to detract from the blanket itself, so every time I make one of these blankets that’s the border I use. For this blanket, I chose white.
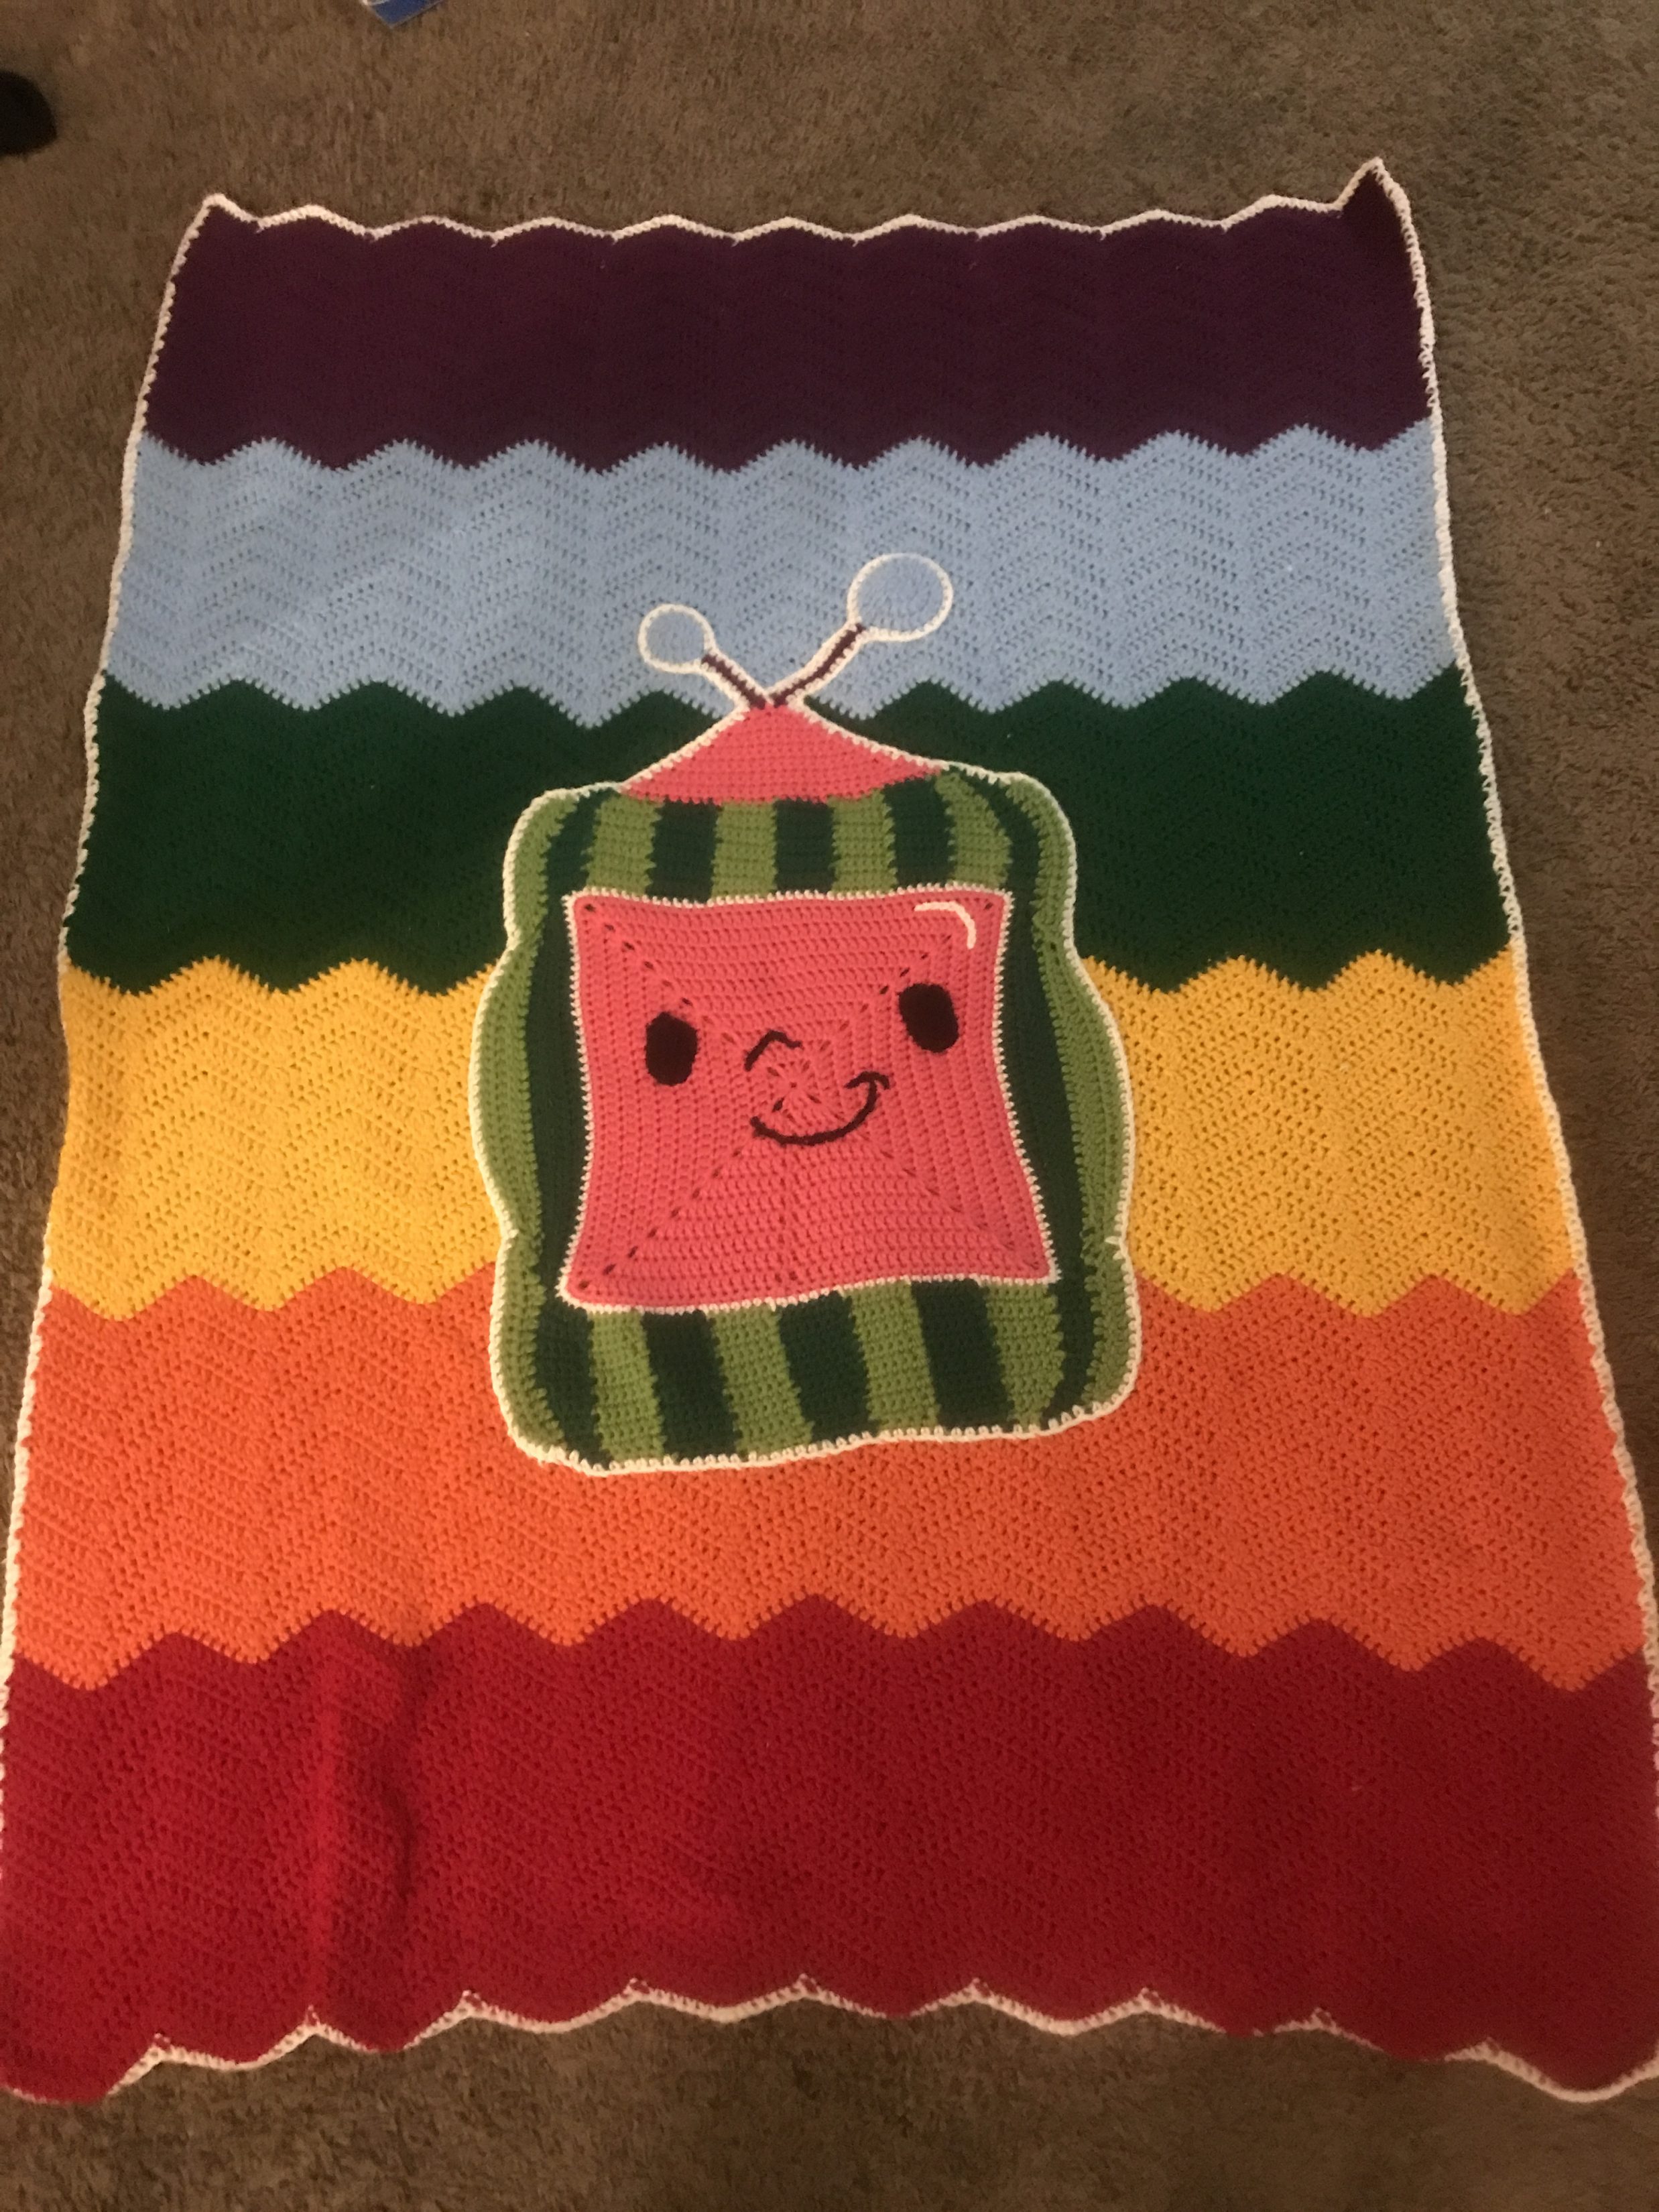
When it came time to make the Cocomelon logo, I referred to Google images for the inspiration. Rather than giving a specific pattern, I’m going to describe my method instead; if you want to make this, I hope it’s easy enough to follow. If not, feel free to leave questions in the comments and I’ll try to answer them.

I went back to Jayda to get started, making a solid granny square (10 rows around) for the main portion of my watermelon logo. When I finished making that, it was time for the green stripes. I finished the square off by making an eleventh round, but this time using single crochet stitches. I also did 3 single crochets in each corner instead of the standard sharp corner to get the rounded look I wanted. Then I lined the square with a row of white single crochets. I made 2 single crochets into each of the corner stitches from the row before.

When my square was done, it was time to figure out the watermelon stripes. I started with dark green. My square was 44 stitches on each side, so to get that “round” shape to the melon, I did 7 sc, 7 hdc, 16 dc, 7 hdc, 7 sc. I repeated this pattern for 3 rows of dark green and then 3 more rows of light green.

The top ended up having 46 stitches once I incorporated the corner stitches, so I divided that up into the 9 sections of the logo. The two on either end were technically continuations of the dark green side, so I did 4 stitches for each of those. That left me with exactly 6 stitches available for each of the other stripes. I used the method of joining as you go for these stripes (as seen in this video – again, thanks to Jayda in Stitches). I didn’t count my rows, but each one is about 3 inches tall. The edge stripes start decreasing about halfway up – decrease on the outside edge (3), crochet 3 rows, decrease on outside edge (2), crochet 1 row, decrease (1), crochet 1 row. The rows in the middle of the melon are only decreased at the top, either on the last row or second-to-last row of each stripe (again, I wasn’t super careful here, hence the variation). The main thing is to end each stripe with 4 stitches at the top instead of 6. This pulls it in a bit at the top and bottom to round it out a little.

After finishing all of that, I realized that I needed a bit more of the light green at the top and bottom on each side, so I took a moment to add those in – 1 sc, enough dcs to “feel” right, and another sc.

For the pink nubby thing at the top of the cocomelon, I started my yarn a few stitches in and single crocheted across the top, stopping the same number of stitches from the other side. I did a single crochet decrease on both sides in every row, and worked until I had just 4 stitches left.

To make the antennae, I attached my dark purple yarn and chained up (16 for one of them and 11 for the other). Then I slip-stitched back down and fastened off.

The blue circles at the top of the antennae were made separately. If you’ve every made a crochet hat, you’ll know how to do this. Work 8 DC into a magic circle. For the second round, work 2DC into each stitch. Round 3: *2DC, 1DC* all the way around. One of the circles was 2 rounds and the other one is 3 rounds. Set these aside.

For Cocomelon’s eyes, here’s the pattern (make 2 of these using black yarn):

Chain 5.

R1: 2 SC in first stitch. SC in next 2. 5 SC in last chain. SC in next 2 (bottom of chain). 3 SC in last chain. Total of 14 stitches.

R2: 2 SC in first stitch. SC in next 4. 2 SC in each of the next 3. SC in next 4. 2 SC in each of the next 2. Total of 20 stitches.

Fasten off, leaving a long tail for sewing.

Sew the eyes onto the face, referring to a picture for placement. For the nose and mouth, use surface slip stitches to add them using black yarn. Use the same method but with white yarn for making the “shine” in the upper right corner.

Now you get to put the whole thing together! Starting anywhere you like, single crochet around the entire Cocomelon in white. When you get to the top of the antennae, place your blue circles there and continue single crocheting around them, joining them to the antennae. Put the bigger circle at the top of the longer antenna. I recommend increasing your circles during this phase (*2SC in first st, 1 SC in next 2* around for the bigger one; follow round 3 above except using SC stitches for the smaller one). I didn’t do this, and my circles were a bit tricky to flatten out when I sewed them onto the blanket. When you’ve finished your final border, sew your (giant!) applique onto the blanket in whatever position you’d like. There are about a million ends on this project, but the good news is that you don’t have to weave in any of them! Just make sure they’re tucked underneath your applique as you sew and you’ll be good to go.

My Cocomelon didn’t turn out perfectly. It’s a bit wobbly and more square than rectangular, but it’s close enough to get the job done. And most importantly, Bumblebee loves it!

If you make this, please tag me on Instagram (@ladybugdaydreams) so I can see!

Blessings,

Resources for a Literature Based Homeschool

The past few weeks, I’ve focused quite a bit on what a literature-based homeschool looks like, at least in our family. Today, I’m just going to do a short roundup of some of the best resources for this type of schooling experience that I’ve come across. This is by no means comprehensive, but I hope it will give you a jumping off point and encourage you to dig around the internet for even more resources as you homeschool your own children.

Ambleside Online

This is a free homeschool curriculum that uses the Charlotte Mason technique of homeschooling. We used them as our core curriculum one year when my teens were in elementary school, and it was a great year. We learned a lot that year, and were introduced to tons of great books. It is a lot of reading, but the books are wonderful so it’s not tedious.

Homeschool Share

This is a place I’ve discussed very recently because we’ve been using their animal lap books for Dragonfly’s kindergarten classes. We also recently started a Hanukkah lap book with both Grasshopper and Dragonfly, and I’ll share more about that in a couple of weeks. But Homeschool Share also has tons of lap books and unit studies that are based on children’s novels, and those are some of my very favorite ways to teach my kids!

As We Walk Along the Road

I first came in contact with Leah when we were both members of the Homeschool Review Crew years ago. I still am a member there, but she’s moved on as her kids have aged and now she is focused more on providing fantastic literature-based studies for other homeschool parents. She has over 50 literature-based unit studies available as a free ebook (just sign up for her mailing list) as well as loads of paid ones, too. You should definitely check her out; you won’t be sorry!

Moving Beyond the Page

I had the absolute pleasure of reviewing a couple of their courses a few years ago, and let me tell you: if budget wasn’t a consideration, we would be using them exclusively. I loved their curricula. It was such a great way of learning in a hands-on, living-book way. Even if you can’t afford their full year curriculum, I think everyone should try out at least one of the classes at some point.

Sonlight

I don’t actually have any experience with this one personally, but I know of a lot of families who do, and I’ve never heard a single bad word about it. Sonlight was founded in 1989 by a missionary couple who were pioneers in the literature-based community. Their method is to start with history and find real, interesting books to do the teaching. No textbooks found here! They offer a full curriculum based on the grade/age of your children.

Lit Wits

This is another one that I don’t have a ton of personal experience with, but I’m on their mailing list and their studies look amazing. And what’s even better is that they’ve recently started migrating all of their studies over to a new site and made them completely free! They charge for some of their printables, but the base studies are now completely free. You can use the paid printables to supplement, or create your own papers to go along with the studies.

Progeny Press

You might have read my most recent review from Progeny Press; if you did, you’ll know all about them. I really like their study guides, which are great for a wide range of children’s ages. I’m not going to go too much into them here, though. Read any of my reviews for more information.

2021 | 2020 | 2018 | 2017 | 2016 | 2015 | 2014

Design Your Own

One thing I’ve learned over the years is that a literature-based homeschool doesn’t have to be complicated. You need a few non-literature subjects to hang the framework on (math, for instance), but from there it’s really “anything goes.” I tend to choose a book or series to read with my kids and then add things to that. I remember a few years ago when I read Henry and the Paper Route to them and we built an entire unit study around newspapers. We made a lapbook, created our own paper using shreds from newspapers, and even took a field trip to the local newspaper office. It was fantastic! You can build spelling lists from the novel, and make grammar lessons that use phrases from the book as examples. The sky really is the limit.

I hope this post will encourage you to try one or more of these resources, or maybe even try your hand at creating your own literature experience for you children. In either case, I encourage you to explore a literature based schooling experience with your children.

Blessings,

Math Rider (review)

Disclaimer: I received this complimentary product through the Homeschool Review Crew.

Knowing math facts can be difficult for young kids, but it’s absolutely vital in the early/mid elementary grades that they master them. It’s easy to think about “math facts” as just the “times tables,” but addition, subtraction, and division are just as important. Without those foundational facts memorized, all math is harder for kids. Flash cards are a great (non digital) way to reinforce those facts, but what if you had a computer game that was as engaging as it is beneficial? Now you do with MathRider.

Math Rider is a one-time fee downloadable computer game that teaches kids math facts in all four areas: addition, subtraction, multiplication, and division. It’s an easy download, and the game is simple enough that you’ll only need to teach them how to play once and they’ll be able to handle it on their own after that. We have been using the game with Grasshopper to increase his speed with addition facts.

When you click on the icon to open the game, you’ll need to choose which child is working and sign in with their password each time. The password requirements are quite simple; we have chosen something that is easy for Grasshopper to remember on his own, so I don’t even need to help him with that.

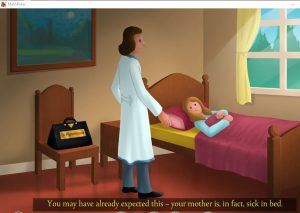
The game itself is centered around quests. There’s a story that includes simple animation and text that is read aloud to your child. Once they’ve heard the story, they move on to the map, where they can then choose “play” and get into the math portion of the game. Depending on what math facts your child is assigned, that’s what the game will offer them to answer.

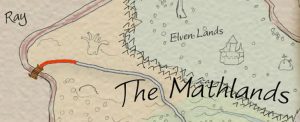
There are 30 facts per round, and your child simply has to read the problem and type the correct answer before his horse gets to the problem. (To be honest, it looks more like the problem is coming toward the horse though; the horse is always on the left and the problem moves toward the middle of the screen.) When they’ve answered all 30 math facts, they’re given a score based on their speed and accuracy. Then the game takes them back to the map, where the path they just “rode” is highlighted in pink. When they get to the end of the path, they’re given a new quest, and that continues until they’ve achieved 100% mastery of the math facts. I’m not entirely sure what happens after that, because Grasshopper hasn’t quite gotten to that 100% mark yet.

MathRider has been really fun for my son to play. He gets so excited to see his path turn pink, and he’s engaged by the story. His recall of those addition facts is getting quicker, resulting in higher scores each day. He always asks to do “horse math” first thing in the morning. Grasshopper really responds well to learning games, so I’m happy to let him play things like this that really cement things in his mind and help him to keep learning. We will absolutely keep having him use this game as long as he’s engaged and his math fact recall continues to improve!

Make sure to read more reviews on the Homeschool Review Crew website this week.

Blessings,

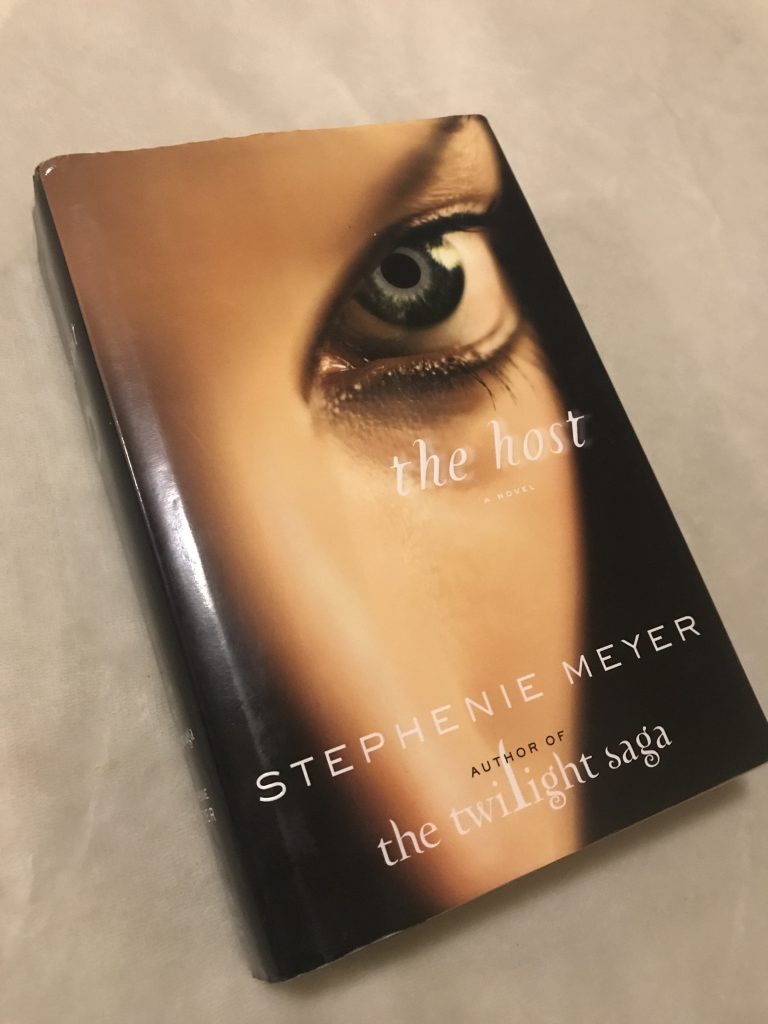
Book Club: The Host

One of my favorite books is The Host by Stephenie Meyer. The first time I read it, many years ago, it took me a long time. The first 70 pages or so just didn’t make any sense at all. The character names were weird (Fords Deep Waters, for example), and I really struggled with it. Add to the strange character names the fact that the main character is actually two characters (I’ll explain that in a minute, when I get to the plot summary), and I just couldn’t follow it at all.

But then I got past that 70th page, and things started to fall into place for me. From that point on, I devoured the book. And now it’s one of my favorites. I recently reread it after having not in a few years, so I’m going to discuss it today for Book Club.

Plot

The world has been taken over by “souls,” creatures from space that can’t live on their own. They travel to various planets, inserting themselves into the bodies of the creatures who already live on those planets – the hosts. Now, they’ve come to Earth. Most of the humans have been taken over by these souls, and very few have “survived.” Their bodies are alive, yes, but their minds are completely gone. Only the memories of the soul remain. But there are a few who fight back. Melanie Stryder is one such fighter.

The soul assigned to Melanie is called Wanderer. She’s tasked with not only becoming Melanie, but with digging into her memories and finding out where the pocket of resistors (Melanie’s family) are hiding. When Wanderer finds them, will she report them to the “proper” authorities? Or will she develop relationships with the humans that have successfully resisted?

Thoughts

As I mentioned before, I love this book. It was Stephenie Meyer’s first foray into adult fiction, and I think it was a resounding success. A lot of people don’t like it (likely because of those first 70 confusing pages), but I think it deserves more love than it gets. I like how the two-characters-in-one-body start off so volatile toward one another but slowly develop a friendship. I enjoyed watching the relationships develop between Wanda (as the humans shorten Wanderer’s name to) and Jared (Melanie’s boyfriend) and Ian (a human in the cave who takes an interest in Wanda). It was fascinating to “see” how the other characters slowly come around to Wanda. Reading about the other made-up planets Stephenie Meyer created for Wanda to have inhabited was so neat – I could see all of the details in my mind’s eye as I read. I also liked how she didn’t spare the characters – some of the humans died, some of the souls were killed, and one of the main characters nearly died. There was a lot of emotion poured into this book. As a reader, you go through everything with the characters – love, pain, joy, betrayal… it was really well written (the exact kind of book that makes me want to write another novel).

Movie

The Host was turned into a movie starring Saoirse Ronan and William Hurt in 2013. It captured a lot of the main plot points of the book, but lacked most of the character depth of the novel. The movie felt like it just sped through the storyline with very little reason to care about the characters. It wasn’t a bad film, but it certainly didn’t compare to the book. At all. If you’re interested in the story but don’t want to commit to reading a 650-page book, it’s a decent substitution. And if you like the film, then you should definitely pick up the book.

Have you ever read The Host? Seen the movie?

Blessings,

Learning About the Dollar (review)

Disclosure: I received this complimentary product through the Homeschool Review Crew.

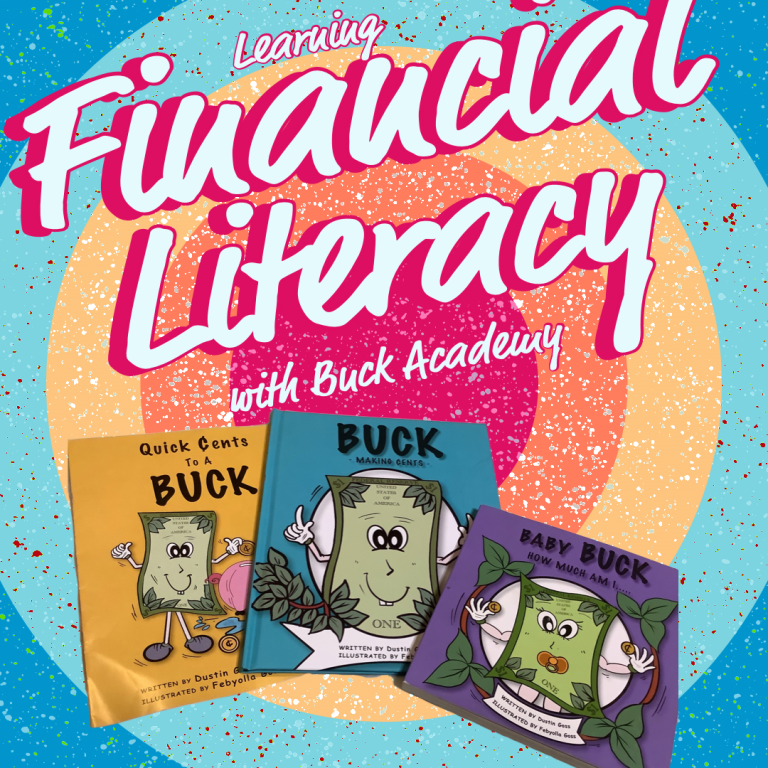
When you think of the word “buck,” what do you think of? My first thought is a male deer, so I was pleasantly surprised when I learned that Buck Academy is actually a company that’s created a series of books to help you teach your children about financial literacy. Because I have a toddler as well as elementary-school-aged children, I received a copy of each of their books. Let’s take a look at them.

BUCK Making Cents is a hardcover picture book written with children ages 5-10 in mind (in my case, Grasshopper and Dragonfly). The book is split up into three sections. After a brief introduction for parents, the first chapter covers basic things like the definition of money and common nicknames for an American dollar (like a “buck”!). The main character in the book is Buck the dollar, and he shows up throughout the book. The rest of the first chapter covers the coins. After a brief introduction of the coins as a whole, including pictures that are foiled for realism, each coin (penny, nickel, dime, and quarter) gets its own page. On these pages, there are more pictures of the coins as well as information about the coin. It also describes the image on the heads side and tails side of each coin, including discussion of past iterations of the tails sides (like the quarters before 1999, when the state-quarters were introduced). The final page of the first chapter is the same as the coin pages, except it focuses on Buck, the one-dollar bill.

Chapter 2 is a lot shorter than Chapter 1. It focuses on the coins again, but this time in how they relate to the dollar. It has pictures of the correct number of each particular coin to equal a dollar.

The final chapter in the picture book is the “memory bank,” which is a clever name for a review/quiz chapter.

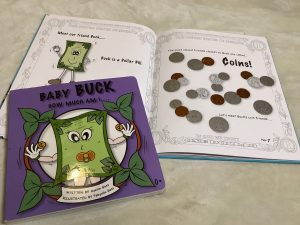
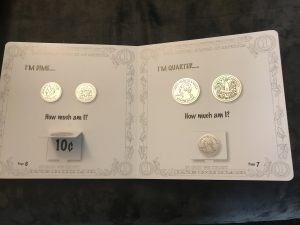
Baby BUCK, How Much Am I… is a book to help you teach very basic financial literacy to your toddlers. It’s a board book, perfect for ages 0-4. The story is a super simplified version of BUCK Making Cents, and it has an interactive element which makes it fun for toddlers. Instead of teaching how many of each coin make up a dollar, Baby BUCK teaches the value of each coin. The pages ask the question “how much am I?” for each coin, and there’s a lift-the-flap with the answer beneath.

My kids love having read-aloud time, and the Buck Academy books were a valuable addition (pardon the pun) to our home library. All three of my younger boys enjoyed the books; we read them many times. Even though the two book technically have different age ranges as their demographic, all of my kids enjoyed both books. Dragonfly loved lifting the flaps in Baby BUCK just as much as Bumblebee did! And Bumblebee sat quietly and listened to BUCK Making Cents with not a trace of boredom. These books are great for teaching the most basic lessons of financial literacy for kids – without a formal math class!

Make sure to head over to the Homeschool Review Crew site for more information and to read additional reviews!

Blessings,